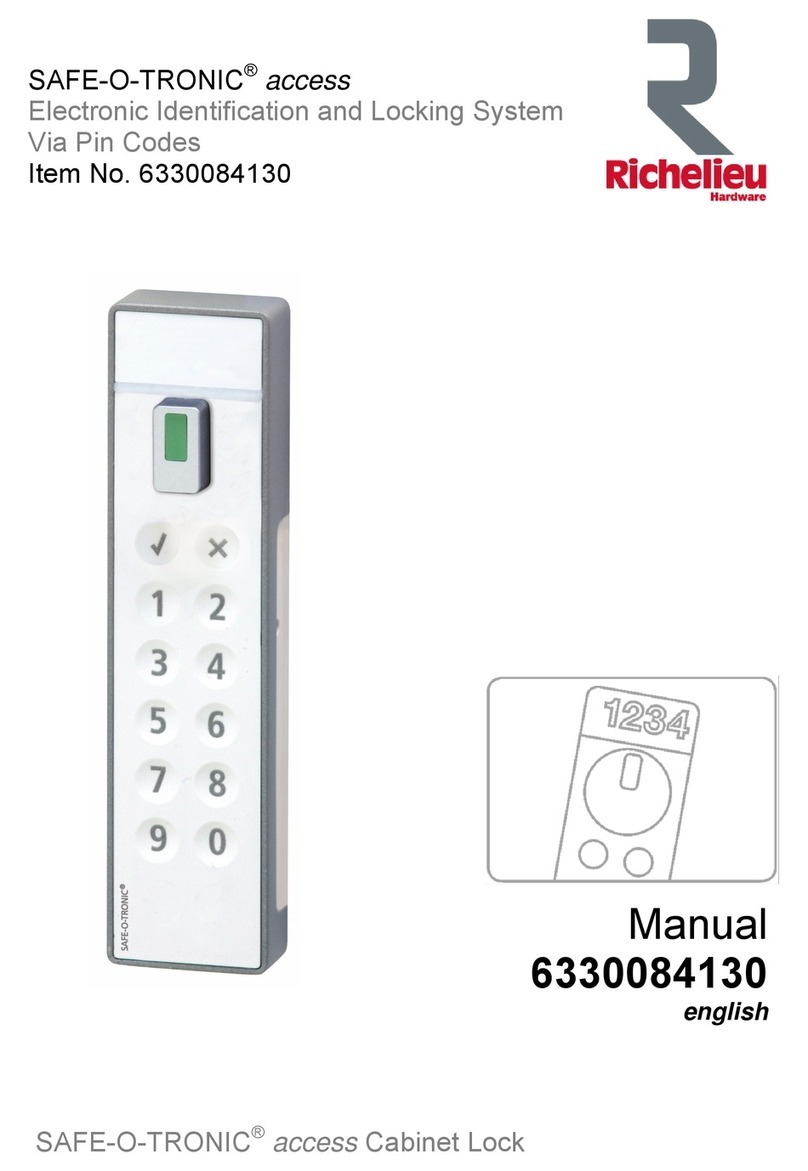
Richelieu SAFE-O-TRONIC access User manual

SAFE-O-TRONIC® access
Electronic Identification and Locking System
Via Pin and RFID
Item No. 6330084230
SAFE-O-TRONIC® access Cabinet Lock
Manual
6330084230
english
1
www.richelieu.com

Manual
Notes on this manual
Document number: 6330084230_042014
This manual replaces all previous versions.
The details in this manual are subject to change without prior notification.
The compilation of the information in this manual is carried out to the best of our knowledge.
Richelieu does not assume any liability for the correctness and completeness of the details
in this manual. In particular, Richelieu cannot be held liable for consequential damages on
account of faulty or incomplete details.
As errors can never be avoided entirely in spite of all endeavours, we would be grateful for
pointers at any time.
Relaying and duplication of this document and the exploitation and communication of its
contents are not permitted unless expressly allowed. Violations shall obligate to provide
compensation for damages. All rights reserved in the event of patent grant or registration of a
utility model or design.
Means of depiction
The following means of depiction are used in this manual:
Notice
Please observe this important information.
Handling instructions
► These mark a work step during user input.
Safety and warning notes
Please read before initial operation.
This manual describes the commissioning and operation of a SAFE-O-TRONIC® 6330084230
The equipment must only be used for the purpose intended by the manufacturer.
Please keep the instruction manual in an easily accessible place.
Unauthorised amendments and the use of spare parts and auxiliary devices that are not sold
or recommended by the manufacturer of the equipment can cause fires, electric shocks and
injuries. Measures of this kind will lead to an exclusion of liability and the manufacturer will
not provide a guarantee.
Repair work must only be carried out by the manufacturer.
The warranty provisions of the manufacturer as amended on the date of purchase shall apply
to the equipment. Liability will not be assumed for unsuitable and automatic compilation of
parameters for a device or unsuitable application of a device.
The operating company shall bear the responsibility that the device is installed and
connected according to recognised technical rules in the country of installation as well as
other valid regulations.
6330084230
2
www.richelieu.com

Manual
List of contents
Notes on this manual .......................................................................................................... 2
Safety and warning notes ................................................................................................... 2
List of contents .................................................................................................................... 3
Control elements ................................................................................................................. 4
Lock with mounting components ...................................................................................... 5
Installation information ....................................................................................................... 6
Preparation of the door ................................................................................................................. 6
Installation .................................................................................................................................... 6
Replacement of the rotary knob (as needed) ................................................................................ 6
Setting the rotational direction for locking ...................................................................................... 7
General information ............................................................................................................ 8
Capacity keypad ........................................................................................................................... 8
Programming ................................................................................................................................ 8
Operation .................................................................................................................................... ..8
Locking and opening using the UserCode ................................................................................... ..8
Function control .................................................................................................................. 9
TestCode .................................................................................................................................... ..9
Operating modes ............................................................................................................... ..9
Free cabinet selection ................................................................................................................. ..9
Fixed cabinet allocation .............................................................................................................. ..9
All Open ...................................................................................................................................... ..9
One Open ................................................................................................................................... ..9
Programming Set ............................................................................................................... 10
General ....................................................................................................................................... 10
6330084230
FreeCode INIT ............................................................................................................................ 11
FixCode INIT All Open ................................................................................................................ 11
FixCode INIT One Open ............................................................................................................. 11
FixCode PROG ........................................................................................................................... 12
BatteryTest ................................................................................................................................. 12
ResetKey .................................................................................................................................... 13
MasterKey I ................................................................................................................................ 13
MasterKey II ............................................................................................................................... 13
Further information ........................................................................................................... 14
LED display ................................................................................................................................ 14
Troubleshooting / operating errors .............................................................................................. 15
Replacing the battery .................................................................................................................. 15
Battery monitoring / battery alarm ............................................................................................... 15
Maintenance and care ................................................................................................................ 15
Technical Data ............................................................................................................................ 16
Drill template ............................................................................................................................... 17
3
www.richelieu.com

Manual
Control elements
OK key: Conclusion of Code entry
Abort key: Code entries or programming operations can be rejected by
pressing the abort key
Keys 1, 2, 3, 4, 5, 6, 7, 8, 9, 0: Number keys for Code entry
LED display red / green
Capacity keypad
√
X
1 2
2 4
56
78
9 0
6330084230
Exchangeable numbers plate
Rotary knob
RFID reader
4
www.richelieu.com

Manual
Lock with mounting components
1 Lock
2 Nut for mounting the lock on the door
3 Grommet for setting the rotational direction of the rotary knob in order to lock
4 Locking lever (a cropped or hook-shaped locking lever can also be used depending on the
properties and condition of the cabinet)
5 Fastening screw for locking lever
6 Bush for fastening the lock to the door for door thicknesses of 10mm to 18mm
7 Bush for fastening the lock to the door for door thicknesses of 1mm to 9mm
8 Screw for fastening the lock to the door
9 Rotary knob
6330084230
5
www.richelieu.com

Manual
Installation information
Preparation of the door
Installation
1. Insert the lock (1) into the two punched holes 19.1mm / 16mm and 7 mm
2. Fasten the lock (1) using the nut (2)
3. Screw on the lock (1) using the screw (8) and the bush (6 or 7) depending on the thickness of the
door
4. Fasten the grommet (3) for setting the rotational direction and the locking lever (4) using the
screw (5)
5. Test the lock function by means of the test code when the door is open
6. Test the function when the door is closed
Replacement of the rotary knob (as needed)
1. Remove the screw (5).
2. Using a TG 10 screwdriver (item no. 358008910) loosen the fastening screw for the rotary knob
by inserting through the threaded hole for the screw (5).
3. Fasten the new rotary knob in reversed order.
6330084230
6
www.richelieu.com

Manual
Setting the rotational direction for locking
The setting of the rotational direction described here is for a lock with a rotary knob that is turned to
the left for locking.
1 Lock marked with l.h. rotational direction for locking
2 Grommet that is attached to the lock on the inside of the door. The opening marked “L” points
downward.
3 Rear side of the lock to which the grommet is attached.
If the lock is installed in a position whereby the rotary knob is not at the top (e.g. horizontal
installation), the grommet must be turned correspondingly.
If the rotary knob is to be turned to the right for locking, the grommet must be attached to the lock
in such a way that the “R” opening points downward.
6330084230
7
www.richelieu.com

Manual
General information
Capacity keypad
The SAFE-O-TRONIC® 6330084230 uses a capacity keypad.
Note: The capacity keypad cannot be operated if you are wearing gloves.
Programming
Programming for putting the SAFE-O-TRONIC® 6330084230 lock into operation can be
ptogrammed by means of the Programming Set (Tokens) item no. 63300200.
Operation
Operation is supported by the red/green LED display and an acoustic acknowledgement by means
of signal transmitters.
The key can be used to abort an input procedure.
The procedure is aborted automatically if there is a pause of more than three seconds between
operating the individual keys.
You have four attempts to enter the correct code. After the fourth incorrect entry the entry process is
disabled for one minute as protection against manipulation. The lock is disabled after 100 incorrect
entries. Blocking can only be cancelled with MasterCode2 or MasterKey II.
Locking and opening using the UserCode
The user enters an (in this example 4-digit) UserCode to lock and open the compartment.
►Enter the UserCode
Note: 9, 0, 6, 0 is only an example code
►Then press the OK key
►Turn the rotary knob
√
9 6 00
X
6330084230
8
www.richelieu.com

Manual
Function control
All locks in the SAFE-O-TRONIC® 6330084230 series are delivered with the same factory
setting. The TestCode for locking and opening is activated in the factory setting.
TestCode
The TestCode can be used to carry out a simple SAFE-O- TRONIC® 6330084230 lock function
check. Locking and opening using the TestCode
►Press the 0 key
►Then press the OK key
►Turn the rotary knob
Note: The TestCode is retained until commissioning (programming the lock).
Operating modes
The UserCode serves locking or opening of the compartment by the user. The lock can be
programmed for four different operating modes for this purpose.
1. Free cabinet selection
2. Fixed cabinet allocation “All Open”
3. Fixed cabinet allocation “One Open”
Free cabinet selection
A lock can be used in “free cabinet selection” operating mode by entering a freely selectable 4-digit
PIN code (UserCode).
Fixed cabinet allocation
The fixed cabinet allocation option allows one to choose between the following three operating
modes: All Open, One Open and Auto List. A maximum of 99 different UserCodes can be
programmed in each SAFE-O-TRONIC® 6330084230 lock. These UserCodes can be fixed at a
length of 4, 5 or 6 digits.
All Open
In “All Open” operating mode every UserCode programmed in the lock can lock and open the lock.
6330084230
√
0
One Open
In “One Open” operating mode every UserCode programmed in the lock can lock the lock. In
contrast to the “All Open” operating mode, only the UserCode last used to lock the lock can open
the lock again.
9
www.richelieu.com

Manual
Programming Set
General
The programming set bears identifying information specific to the object. Following the loss of one
of the RFID data carriers from the set, a sequential programming set can invalidate the old
programming set on the locks.
Three operating modes are available when using the programming Tokens set (63300200): “free
cabinet selection”, “fixed cabinet allocation All Open” and “fixed cabinet allocation One Open”.
“free cabinet selection” a freely selectable 4-digit UserCode can be used by the user for locking
and opening purposes.
“fixed cabinet allocation” one or more (max. 99) fixed 4 to 6-digit UserCodes are programmed in
the lock by the operator.
In the process, in the “All Open” version all the UserCodes entered into a lock can be used for
opening irrespective of the UserCode used for locking.
In the “One Open” version the cabinet can only be opened by using the UserCode with which it
was also last locked.
Changing over from an operating mode that has already been programmed to another operating
mode is only possible after carrying out a reset.
The RFID data carriers (Tokens) are labelled with the respective function, e.g. “ResetKey” and
object identification. In order to programme the locks, the RFID data carriers must be held
against the RFID reader after activating the lock by means of the keypad. With the exception of
BatteryTest, MasterKey I and MasterKey II the RFID data carriers only function if the locks are
unlocked.
6330084230
10
www.richelieu.com

Manual
FreeCode INIT
This RFID data carrier is used to put the lock into “free cabinet selection” operating mode:
►Press the OK and abort keys simultaneously
►Hold the RFID data carrier labelled “FreeCode Init” against the RFID reader on the lock.
FixCode INIT All Open
This RFID data carrier is used to put the lock into “fixed cabinet selection All Open” operating mode:
►Press the OK and abort keys simultaneously
►Hold the RFID data carrier labelled “FixCode Init All Open” against the RFID reader on the lock.
In the next step, the UserCode can be entered by means of the RFID data carrier “FixCode PROG”.
FixCode INIT One Open
This RFID data carrier is used to put the lock into “fixed cabinet selection One Open” operating
mode:
►Press the OK and abort keys simultaneously
►Hold the RFID data carrier labelled “FixCode INIT One Open” against the RFID reader on the
lock.
In the next step, the UserCode can be entered by means of the RFID data carrier “FixCode PROG”.
and X
√
X
and
√
X
and
√
6330084230
11
www.richelieu.com

Manual
Notice: 9, 0, 6, 0 is only an example code
►Then press the OK key
The next UserCode can now be entered. Ready for entry status is indicated by constant flashing of
the green LED.
The key can be used to abort an entry procedure and the UserCode last confirmed is not
saved in the process.
Entry is automatically aborted if ten seconds elapse after the last entry of a UserCode without any
further key being operated. The green LED will not be flashing any more and the red LED will light
up briefly.
UserCodes cannot be deleted individually. All UserCodes can be deleted using the ResetKey.
BatteryTest
The status of the battery is displayed via the LEDs when using this RFID data carrier. At the same
time the old programming set is deleted from the locks with the help of the new BatteryTest-Key
when replacing a programming set (e.g. following the loss of RFID data carriers).
►Press the OK and abort keys simultaneously
►Hold the RFID data carrier labelled “BatteryKey” against the RFID reader on the lock.
The LED is illuminated green if the battery is charged sufficiently and flashes red and green if the
battery charging is too low (see the LED display table / status reports).
√
X
and
√
X
6330084230
FixCode PROG
A maximum of 99 different 4 to 6-digit UserCodes can be programmed in each case in the individual
locks in the selected operating mode “fixed cabinet allocation All Open” or “One Open”:
►Press the OK and abort keys simultaneously
►RFID-Datenträger mit der Aufschrift „FixCode PROG“ an das RFID-Lesefeld des Verschlusses
halten.
The 4 to 6-digit UserCode can now be entered:
►Enter the UserCode 9 6 00
and X
√
12
www.richelieu.com

Manual
►Hold the RFID data carrier labelled “MasterKey I” against the RFID reader on the lock.
Opening is then possible.
If a SAFE-O-TRONIC® 6330084230 has been opened using MasterKey I, it remains locked out for
the entry of a UserCode. The SAFE-O-TRONIC® 6330084230 then has to be cleared again using
MasterKey II.
MasterKey II
MasterKey II can be used by the operator of the facility at any time to open and close the
compartment or enable the lock.
►Press the OK and abort keys simultaneously
►Hold the RFID data carrier labelled “MasterKey II” against the RFID reader on the lock.
If MasterKey I was used, the lock will be enabled again or it will be possible to open or lock the
compartment.
X
and
√
6330084230
MasterKey I
MasterKey I only serves opening the compartment by the operator of the facility / members of staff.
It is intended for employees with restricted locking rights. After being opened, the lock is locked out
for the entry of a new UserCode and has to be cleared with the help of the MasterKey II. If only
MasterKey I is handed over to the members of staff, they are protected against suspicion in cases of
concealed theft, i.e. if a theft has occurred and the cabinet is locked again following the theft,
members of the staff do not come into consideration as offenders.
►Press the OK and abort keys simultaneously and
√X
ResetKey
All entries are deleted using this RFID data carrier and the lock is returned to factory default
settings:
►Press the OK and abort keys simultaneously
►Hold the RFID data carrier labelled “ResetKey” against the RFID reader on the lock.
and X
√
13
www.richelieu.com

Manual
Further information
LED display
All important actions and operating conditions are indicated by the LED
display and are intended to contribute to finding the causes of failures and
operating errors. The following table lists the meaning of the individual
signals.
Status messages
Green
Red
Green
Red
Display
Action
Flashing rapidly
Programming mode
Every 3 seconds
Disabling time (one minute)
is active. Wrong Code
entered four times
1 second
Key entry
1 second
Abort key (“X”) pressed
LEDs flash in turn three
times
Handling error, the rotary
knob was not operated
within the clearance period
Alternating
Waiting for rotary knob to be
operated
1 second
Lock has been locked /
programming successful
2 seconds
Lock has been unlocked
½ second
Code accepted
3 seconds
Internal malfunction / lock
may have to be replaced
Red LEDs light up first,
then the green LEDs,
for ½ a second in each
case
Lock-out triggered by
MasterCode 1 /Key I
cancelled by means of
MasterCode 2 /Key II
LEDs flash fast
together three times
Code entry rejected, as
lock-out by MasterCode 1 /
Key I active
LEDs flash together
three times
Warning: Short-term battery
replacement required
LEDs flash in turn five
times
Battery must be replaced
immediately; lock can no
longer be operated
LEDs flash three times
Reset has been carried out
6330084230
14
www.richelieu.com

Manual
Troubleshooting / operating errors
You are able to see errors and operating errors in the status messages of the LED display and then
correct them accordingly.
Please contact the support department in the event that other undefined conditions arise and the
lock does not function perfectly in spite of replacing the battery and carrying out a reset using the
ResetKey and new programming.
Replacing the battery
1. Remove the screw on the side of the cover
(using a TG 6 screwdriver)
2. Open the battery compartment and remove the
battery pack. Disconnect the two-pole plug-in
connector from the battery pack.
3. Connect the new battery pack to the plug-in
connector and insert the battery into the housing.
4. Close the battery compartment and screw down.
Codes are not deleted when a battery is replaced.
Note: Please dispose of the empty battery pack properly in accordance with the valid
environmental regulations!
Battery monitoring / battery alarm
Automatic battery monitoring on the SAFE-O-TRONIC® 6330084230 ensures that the lock with
inadequate battery voltage can no longer be locked.
There is an advance warning when all the LEDs flash twice. It is then advisable to replace the
battery.
An alarm is triggered after a while if the battery is not replaced. This is indicated when the red and
green LEDs light up in turn three times. The battery must now be replaced. In this condition the
compartment can only be opened but no longer locked.
Maintenance and care
The SAFE-O-TRONIC® 6330084230 is maintenance-free. In no event should the lock be oiled or
greased with lubricants containing mineral oil.
Only use non-stick, residue-free cleaning agents and disinfectants for cleaning purposes. Do not use
any harsh cleaning agents, acids or lyes when caring for the product. Also do not use a pressure
cleaner. It is also not permitted to spray-wash the locks, for example using a hose.
6330084230
15
www.richelieu.com

Manual
Technical Data
Indicators: 2 x LED green
2 x LED red
Acoustic signal: Signal transmitter
Battery: Battery pack: 3 x alkaline cells (AAA)
Battery life cycle: Approx. 3 years at 30 lockings per day
Temperature ranges
Function: 0 to +60˚C
Storage: -15 to +70˚C
Relative humidity: 10 – 90% non-condensing
Protection class according to DIN EN 60529: IP 43
Weight: approx. 300 g
Housing dimensions incl.
rotary knob (H x W x D):
Colour of housing frame:
Colour of the control panel:
Door thickness:
151mm x 38mm x 33mm
Similar to RAL 9006 (white aluminium)
White or Black
1 to 18 mm
6330084230
16
www.richelieu.com

Manual
Drill template
Notice: Depending on the printer there can be dimensional deviations when printing this drill
template. Therefore, please remeasure the drill template before use. Therefore, please
remeasure the drill template before use.
6330084230
17
www.richelieu.com
Other manuals for SAFE-O-TRONIC access
1
Table of contents
Other Richelieu Lock manuals
Popular Lock manuals by other brands

COMPX
COMPX Timberline CB-284 instruction sheet

Gartner
Gartner GAT Smart.Lock 7001 quick start guide

Allegion
Allegion LOCKNETICS CS450 Series installation instructions

Salto
Salto XS4 Mini installation guide

LEHMANN
LEHMANN M400 Smart Secure operating instructions

BKT Elektronik
BKT Elektronik BKT AL200 user manual

Conrad Electronic
Conrad Electronic 75 10 74 operating instructions

Kaba
Kaba LA GARD 1947 Mounting instructions

LEHMANN
LEHMANN M300 LEGIC L043-A01 operating instructions

jost
jost R 403 FR Installation and operating instructions

hager
hager 3200 Series Installation instructions manual

FUXON
FUXON 051-32011 manual