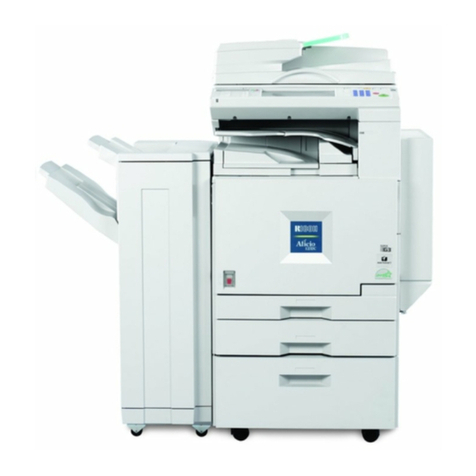
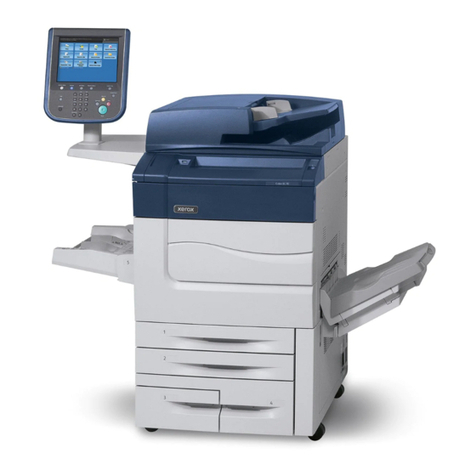
Ricoh FT 4015 User manual

IMPORTANT SAFETY NOTICES
PREVENTION OF PHYSICAL INJURY
1. Before disassembling or assembling parts of the copier and peripherals,
make sure that the copier power cord is unplugged.
2. The wall outlet should be near the copier and easily accessible.
3. Note that the optional tray heater and the optional anti-condensation
heaters are supplied with electrical voltage even if the main switch is
turned off.
4. If any adjustment or operation check has to be made with exterior
covers off or open while the main switch is turned on, keep hands away
from electrified or mechanically driven components.
5. The inside and the metal parts of the fusing unit become extremely hot
while the copier is operating. Be careful to avoid touching those
components with your bare hands.
HEALTH SAFETY CONDITIONS
1. Toner and developer are non-toxic, but if you get either of them in your
eyes by accident, it may cause temporary eye discomfort. Try to remove
with eye drops or flush with water as first aid. If unsuccessful, get
medical attention.
OBSERVANCE OF ELECTRICAL SAFETY STANDARDS
1. The copier and its peripherals must be installed and maintained by a
customer service representative who has completed the training course
on those models.
SAFETY AND ECOLOGICAL NOTES FOR DISPOSAL
1. Do not incinerate toner cartridges or used toner. Toner dust may ignite
suddenly when exposed to open flame.
2. Dispose of used toner, developer, and organic photoconductors in
accordance with local regulations. (These are non-toxic supplies.)
3. Dispose of replaced parts in accordance with local regulations.

SECTION 1
OVERALL
MACHINE INFORMATION

1. SPECIFICATIONS
Configuration: Desk Top
Copy Process: Dry electrostatic transfer system
Originals: Sheet/Book
Original Size: Maximum: A3/11" x 17"
Copy Paper Size: Maximum: A3/11" x 17"
Minimum:
A5/51/2" x 81/2" sideways (Paper tray feed)
A6/51/2" x 81/2" lengthwise (By-pass feed)
Non-standard sizes:
Vertical 45 mm ~ 308 mm, 1.8" ~ 12"
Horizontal 148 mm ~ 432 mm, 5.8" ~ 17"
Copy Paper Weight: Paper tray feed: 64 to 90 g/m2, 17 to 24 lb
By-pass feed: 52 to 157 g/m2, 14 to 42 lb
Reproduction Ratios:
Zoom: From 50% to 200% in 1% steps
Copying Speed: 15 copies/minute (A4/8.5" x 11" sideways)
9 copies/minute (A3/11" x 17")
Warm-up Time: 120 V machines: Less than 30 seconds (at 23°C)
230 V machines: Less than 45 seconds (at 23°C)
First Copy Time: Less than 6.9 seconds (A4/8.5" x 11" sideways)
Copy Number Input: Number keys, 1 to 99
Manual Image Density
Selection: 7 steps
Automatic Reset: 1 minute standard setting; can also be set to 3
minutes or no auto reset
Metric Version Inch Version
Enlargement 200%
141%
122%
200%
155%
129%
Full Size 100% 100%
Reduction
93%
82%
71%
50%
93%
74%
65%
50%
Overall
Information
20 December 1996 SPECIFICATIONS
1-1

Paper Capacity: Paper tray: 500 sheets or less than 56 mm stack
height
By-pass feed entrance:
Toner Replenishment: Bottle exchange (215 g/bottle)
Copy Tray Capacity: 100 sheets
Power Source: 120 V/60 Hz: More than 15 A (for North America)
220 ~ 240 V/50 Hz: More than 8 A (for Europe)
220 V/50 Hz: More than 8 A (for Asia)
220 V/60 Hz: More than 8 A (for Middle East/Asia)
110 V/60 Hz: More than 15 A (for Taiwan)
127 V/60 Hz: More than 15 A (for Middle East)
Power Consumption:
Dimensions:
Copier only Full system*
Maximum 1.4 kW
(120 V machines) 1.5 kW
(120 V machines)
0.9 kW
(230 V machines) 1.0 kW
(230 V machines)
Copy cycle 0.71 kW 0.74 kW
Warm-up 0.95 kW 0.95 kW
Stand-by 0.25 kW 0.25 kW
Energy saver 0.2 kW 0.2 kW
*Full system: Copier with document feeder and 10-bin sorter
Width Depth Height
Copier 579 mm
(22.8") 560 mm
(22.1") 420 mm
(16.6")
Full system* 775 mm
(30.2") 560 mm
(22.1") 508 mm
(19.8")
*Full system: Copier with document feeder and 10-bin sorter
Standard paper 80 sheets
OHP 10 sheets
Others 1 sheet
SPECIFICATIONS 20 December 1996
1-2

Noise Emissions: Sound pressure level (the measurements are
made in accordance with ISO 7779 at the
operator position.)
Sound power level (the measurements are made
in accordance with ISO 7779)
Weight:
Optional Equipment:
(Sales items) Document feeder (A662)
10-bin sorter (A657)
Optional Equipment:
(Service items) Optics anti-condensation heater
Tray heater
•Specifications are subject to change without
notice.
Copier only Full system*
Copying Less than 57 dB Less than 61 dB
*Full system: Copier with document feeder and 10-bin sorter
Copier only Full system*
Stand-by Less than 40 dB Less than 40 dB
Copy cycle Less than 63 dB Less than 67 dB
*Full system: Copier with document feeder and 10-bin sorter
Copier only 42 kg (93.0 lb)
Full system* 55 kg (121 lb)
*Full system: Copier with document feeder and 10-bin sorter
Overall
Information
20 December 1996 SPECIFICATIONS
1-3

2. COPY PROCESS AROUND THE DRUM
2
65
4
7
813
A219V503.wmf
COPY PROCESS AROUND THE DRUM 20 December 1996
1-4

1. DRUM CHARGE
In the dark, the charge corona unit gives a uniform negative charge to the
organic photoconductive (OPC) drum. The charge remains on the surface
of the drum because the OPC drum has a high electrical resistance in the
dark.
2. EXPOSURE
An image of the original is reflected to the drum surface via the optics
assembly. The charge on the drum surface is dissipated in direct
proportion to the intensity of the reflected light, thus producing an
electrical latent image on the drum surface.
3. ERASE
The erase lamp illuminates the area of the charged drum surface that will
not be used for the copy image. The resistance of the drum in the
illuminated areas drops and the charge on those areas dissipates.
4. DEVELOPMENT
Positively charged toner is attached to the negatively charged areas of
the drum, thus developing the latent image. (The positive triboelectric
charge is caused by friction between the carrier and toner particles.)
5. IMAGE TRANSFER
Paper is fed to the drum surface at the proper time so as to align the copy
paper and the developed image on the drum surface. Then, a strong
negative charge is applied to the back side of the copy paper, producing
an electrical force which pulls the toner particles from the drum surface to
the copy paper. At the same time, the copy paper is electrically attracted
to the drum surface.
6. PAPER SEPARATION
A strong positive dc charge is applied to the back side of the copy paper
via a discharge plate, reducing the negative charge on the copy paper
and breaking the electrical attraction between the paper and the drum.
Then, the stiffness of the copy paper causes the paper to separate from
the drum surface.
7. CLEANING
The cleaning blade scrapes the toner off the drum. The collected toner is
recycled.
8. QUENCHING
Light from the quenching lamp electrically neutralizes the drum surface.
Overall
Information
20 December 1996 COPY PROCESS AROUND THE DRUM
1-5
3. MECHANICAL COMPONENT LAYOUT
7
19
10
98654321
16
15
14
13
12
11
22 21 20 17
18
25
26
23
24
A219V500.wmf
1. 2nd Mirror
2. 1st Mirror
3. Exposure Lamp
4. Hot Roller
5. Lens
6. Quenching Lamp
7. Charge Corona Unit
8. 6th Mirror
9. Erase Lamp
10. 4th Mirror
11. 5th Mirror
12. Toner Bottle Holder
13. By-pass Feed Roller
14. By-pass Feed Table
15. Relay Rollers
16. Tray Paper Feed Rollers
17. Registration Rollers
18. Development Roller
19. Transfer/Separation Unit
20. Drum
21. Cleaning Blade
22. Pressure Roller
23. Paper Tray
24. Copy Tray
25. Exit Rollers
26. 3rd Mirror
MECHANICAL COMPONENT LAYOUT 20 December 1996
1-6

4. DRIVE LAYOUT
1. Lens Motor
2. Fusing Unit Drive Gear
3. Main Motor
4. Drum Drive Gear
5. Tray Paper Feed Clutch Gear
6. Relay Roller Clutch Gear
7. By-pass Paper Feed Clutch
8. Registration Clutch Gear
9. Toner Supply Motor
10. 4th/5th Mirror Motor
11. Scanner Drive Motor
1
2
9
8
7
6
543
11
10
A219V501.wmf
Overall
Information
20 December 1996 DRIVE LAYOUT
1-7

5. PAPER PATH
1
2
3
A219V502.wmf
1. By-pass Feed
2. Paper Tray Feed
3. Copy Tray
PAPER PATH 20 December 1996
1-8

6. ELECTRICAL COMPONENT DESCRIPTIONS
Refer to the electrical component layout and the point-to-point diagram on the
waterproof paper in the pocket for symbols and index numbers.
Symbol Name Function Index No.
Motors
M1 Main Motor Drives all the main unit components except
for the optics unit and fans. 8
M2 Scanner Drive Motor Drives the scanners (1st and 2nd). 9
M3 Lens Motor Moves the lens position in accordance with
the selected magnification. 18
M4 4th/5th Mirror Motor Moves the 4th/5th mirror position in
accordance with the selected magnification. 16
M5 Toner Supply Motor Rotates the toner bottle to supply toner to the
development unit. 10
M6 Optics Cooling Fan
Motor Prevents build-up of hot air in the optics
cavity. 17
M7 Exhaust Fan Motor Removes heat from around the fusing unit
and blows the ozone built up around the
charge corona unit towards the ozone filter. 7
Clutches
CL1 Tray Paper Feed
Clutch Transfers main motor drive to the paper feed
roller. 14
CL2 By-pass Paper Feed
Clutch Starts paper feed from the by-pass feed
table. 12
CL3 Relay Roller Clutch Drives the relay rollers for paper tray feed. 13
CL4 Registration Clutch Drives the registration rollers. 11
Switches
SW1 Main Switch Supplies power to the copier. 38
SW2 Interlock Switch Cuts all power when the front cover is
opened. 37
SW3 Tray Paper Size
Switch Determines what size of paper is in the
paper tray. 31
SW4 Right Vertical Guide
Switch Cuts the +24 V dc power line of the relay
roller clutch. 27
Sensors
S1 4th/5th Mirror Home
Position Sensor Informs the CPU when the 4th/5th mirror
assembly is at the home position (full size
position). 33
S2 ADS Sensor Detects the background density of the
original. 24
Overall
Information
20 December 1996 ELECTRICAL COMPONENT DESCRIPTIONS
1-9

Symbol Name Function Index No.
S3 Tray Paper End
Sensor Informs the CPU when the paper tray runs
out of paper. 28
S4 Registration Sensor Detects the leading edge of the copy paper
to determine the stop timing of the relay
roller clutch, and detects misfeeds. 30
S5 By-pass Feed Paper
End Sensor Informs the CPU when there is no paper in
the by-pass tray. 29
S6 Exit Sensor Detects misfeeds. 23
S7 Scanner Home
Position Sensor Informs the CPU when the 1st scanner is at
the home position. 40
S8 Lens Home Position
Sensor Informs the CPU when the lens is at the
home position. 22
S9 Toner Density (TD)
Sensor Detects the ratio of toner to carrier in the
developer. 26
Printed Circuit Boards
PCB1 Main Control Board Controls all copier functions. 1
PCB2 High Voltage Supply
Board - C/G/B/T/S Provides high voltage to the charge corona,
grid, development bias, transfer corona, and
discharge plate. 2
PCB3 AC Drive/DC Power
Supply Board Drives the exposure lamp, fusing lamp, and
main motor. Rectifies 30 Vac and 8 Vac input
and outputs 5 Vdc and 24 Vdc. 3
PCB4 Operation Panel
Board Informs the CPU of the selected modes and
displays the situation on the panel. 6
Lamps
L1 Erase Lamp Discharges the drum outside of the image
area. (Provides leading/trailing edge and
side erases.) 4
L2 Quenching Lamp Neutralizes any charge remaining on the
drum surface after cleaning. 5
L3 Exposure Lamp Applies high intensity light to the original for
exposure. 20
L4 Fusing Lamp Provides heat to the hot roller. 25
Others
CO1 Total Counter Keeps track of the total number of copies
made. 34
H1 Tray Heater (Option) Turns on when the main switch is off to keep
paper in the paper tray dry. 32
H2 Optics
Anti-condensation
Heater (Option)
Turns on when the main switch is off to
prevent moisture from accumulating in the
optics. 39
TF1 Exposure Lamp
Thermofuse Provide back-up overheat protection around
the exposure lamp. 21
ELECTRICAL COMPONENT DESCRIPTIONS 20 December 1996
1-10

Symbol Name Function Index No.
TF2 Fusing Thermofuse Provide back-up overheat protection in the
fusing unit. 36
TH1 Fusing Thermistor Monitors the temperature around the
exposure lamp for overheat protection. 35
TH2 Optics Thermistor Monitors the temperature around the
exposure lamp for overheat protection. 19
TR Transformer Steps down the wall voltage to 30 Vac and 8
Vac. 15
Overall
Information
20 December 1996 ELECTRICAL COMPONENT DESCRIPTIONS
1-11

SECTION 2
DETAILED DESCRIPTIONS

1. DRUM
1.1 OPC DRUM CHARACTERISTICS
The OPC (Organic Photoconductor) drum used in this copier is small in
diameter (30 mm), ensuring good paper separation. An OPC drum has the
following characteristics.
1. The drum is able to accept a high negative electrical charge in the dark.
(The electrical resistance of a photoconductor is high in the absence of
light.)
2. It dissipates the electrical charge when exposed to light.
(Exposure to light greatly increases the conductivity of a photoconductor.)
3. The amount of charge dissipated is in direct proportion to the intensity of
the light. That is, where stronger light is directed to the photoconductor
surface, a smaller voltage remains on the drum.
4. An OPC drum is less sensitive to changes in temperature (when
compared to selenium F type drums).
5. During the drum’s life, drum residual voltage gradually increases and the
photoconductive surface becomes worn. Therefore, some compensation
for these characteristics is required.
Detailed
Descriptions
20 December 1996 DRUM
2-1

1.2 DRIVE MECHANISM
The drive from the main motor [A] is transmitted to the drum [B] through a
series of gears, a timing belt [C], and the drum drive shaft [D].
When the imaging unit is installed in the copier, the drum drive shaft engages
inside the drum’s flange [E] as shown.
[B]
[A]
[C]
[D] [E]
A219D520.wmf
DRUM 20 December 1996
2-2

2. CHARGE
2.1 OVERVIEW
This copier uses a single wire scorotron to charge the drum. The corona wire
[A] generates a corona of negative ions when the high voltage supply unit
applies a negative voltage. The stainless steel grid plate [B] ensures that the
drum coating receives a uniform negative charge as it rotates past the corona
unit.
The exhaust fan [C] causes a flow of air above and through the charge
corona section. This prevents an uneven build-up of negative ions that can
cause uneven image density.
An ozone filter [D], which absorbs ozone (O3) generated by the charge
corona, is located beside the exhaust fan. The ozone filter decreases in
efficiency over time as it absorbs ozone. The ozone filter should be replaced
every PM cycle (45 k copies).
[A] [B]
A219D505.wmf
[C] [D]
A219D521.wmf
Detailed
Descriptions
20 December 1996 CHARGE
2-3

2.2 CHARGE CORONA WIRE CLEANER MECHANISM
Pads [A] move along the charge corona wire as the wire cleaner knob [B] is
manually slid in and out.
The cleaner pad bracket [C] is connected to the wire cleaner knob. When the
knob is pulled out, the pads move into contact with the corona wire as shown,
since the casing [D] is narrower away from the home position.
The pads move away from the wire when the wire cleaner knob is fully
inserted and the pad bracket is pushed back to the home position.
After copier installation, the key operator should be instructed to use this
mechanism when copies have white streaks or uneven image density.
Instruct the operator to firmly push the pad bracket into the home position.
Poor copy quality will result if the cleaning pads remain in contact with the
charge corona wire.
[A]
[B]
[D]
[C]
A219D536.wmf
CHARGE 20 December 1996
2-4

2.3 CHARGE CORONA CIRCUIT
The main board supplies +24 V to the high voltage supply board at CN102-7.
After the
key is pressed, the CPU drops CN102-5 from +24 V to 0 V.
This activates the charge corona circuit which applies a high negative voltage
of approximately –5 k volts to the charge corona wire. The corona wire then
generates a negative corona charge.
The grid plate limits the charge voltage to ensure that the charge does not
fluctuate and that an even charge is applied to the entire drum surface. The
grid plate is connected to ground through a zener diode in the high voltage
supply unit. The grid plate drains any charge in excess of –910 V, which is
discharged to ground through the zener diode.
DC/DC
Converter
CN102-7
Drum
B
Zener
Diode
Protection
Circuit
DC/DC
Converter
DC/DC
Converter
DC/DC
Converter
GND CN102-6
CN102-4
CN102-3
CN102-2
CN102-1
24 V
C Trigger
T Trigger
B-PWM
S Trigger
S
T
GC
5 V
4.7 k
Main Board High Voltage Supply Board
CN102-5
A219D506.wmf
Detailed
Descriptions
20 December 1996 CHARGE
2-5

3. OPTICS
3.1 OVERVIEW
During the copy cycle, an image of the original is reflected onto the drum
surface through the optics assembly as follows:
Light path:
Exposure Lamp [A] →Original →First Mirror [B] →Second Mirror [C] →
Third Mirror [D] →Lens [E] →Blue Filter [F] →Fourth Mirror [G] →Fifth
Mirror [H] →Sixth Mirror [I] →Drum [J]
This copier has eight standard reproduction ratios and a zoom function. The
operator can also change the reproduction ratio in one-percent steps from
50% to 200%. Stepper motors are used to change the positions of the lens
and 4th/5th mirrors to enlarge/reduce the image across the page. Changes in
reproduction ratio down the page are achieved by changing the scanner
speed.
The CPU monitors the temperature around the optics through a thermistor
which is located on the scanner frame. When the temperature reaches 40°C,
the optics cooling fan [K] starts rotating to draw cool air into the optics cavity.
The fan operates until the temperature drops below 38°C.
Additionally, a thermofuse on the 1st scanner provides back-up overheat
protection. It opens when the temperature reaches 128°C and cuts ac power
to the exposure lamp.
A blue filter is located just after the lens to improve the reproduction of red
areas of the original on copies.
[C][C] [A][B] [K] [E] [I] [G]
[H]
[J]
[D]
[F]
A219D507.wmf
OPTICS 20 December 1996
2-6
This manual suits for next models
5
Table of contents
Other Ricoh Copier manuals

Ricoh
Ricoh FT8880 User manual

Ricoh
Ricoh FT4215 User manual

Ricoh
Ricoh B286 User manual

Ricoh
Ricoh DSc535 User instructions

Ricoh
Ricoh aficio 1013 User manual

Ricoh
Ricoh Aficio MP C3000SPF Service manual

Ricoh
Ricoh B003 User manual

Ricoh
Ricoh SWALLOW 2 User manual

Ricoh
Ricoh B003 User manual

Ricoh
Ricoh Priport DD 4450 User manual

Ricoh
Ricoh Pro C7100 User manual

Ricoh
Ricoh 5490 User manual

Ricoh
Ricoh Aficio MP 1350 User manual

Ricoh
Ricoh Priport JP5800 User manual

Ricoh
Ricoh Aficio 401 User manual

Ricoh
Ricoh A183 User manual

Ricoh
Ricoh D069 Quick start guide

Ricoh
Ricoh MPC 1500sp User manual

Ricoh
Ricoh A151 User manual

Ricoh
Ricoh Aficio FT4027 User manual