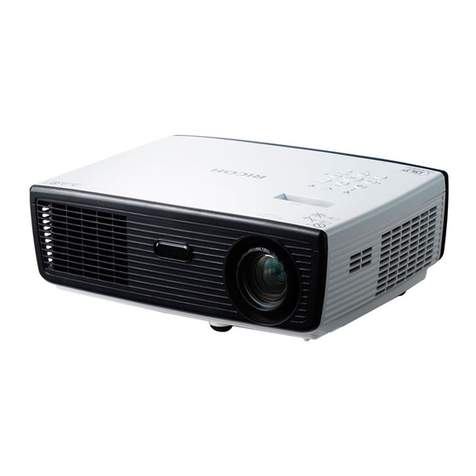
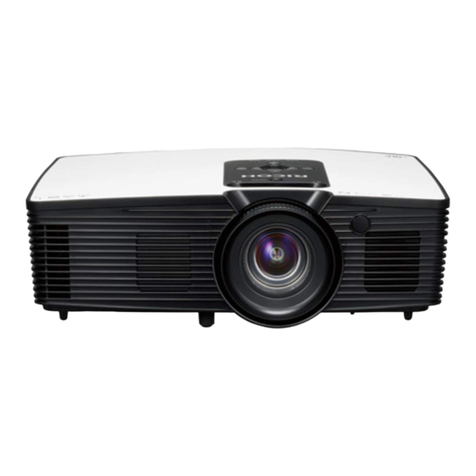
Ricoh Image Pointer GP01 User manual


English
1
English
Table of Contents
Table of Contents ............................1
Usage Notice....................................2
Precautions.........................................2
Safety Labels of This Machine............6
Other Information................................7
Introduction......................................8
Product Features ................................8
Package Overview..............................9
Product Overview .............................10
Connection Ports.................................. 11
Control Panel........................................ 12
360° Installation.................................... 13
Attaching a Wrist Strap......................... 14
Basic Operations...........................15
Connecting the Projector ..................15
Charging the Projector ......................... 15
Connect to Video/PC/iOS/Android ....... 16
Powering On/Off the Projector..........17
Powering On the Projector and
Connecting to the HDMI Source........... 17
Powering On the Projector and
Connecting to the iOS Device (Direct
Connection).......................................... 18
Powering On the Projector and
Connecting to the iOS Device (Connection
via Router)............................................ 19
Powering On the Projector and
Connecting to the Android Device
(Direct Connection) .............................. 20
Powering Off the Projector ................... 21
Warning Indicator ................................. 21
Adjusting the Projector Focus .............. 23
Adjusting Projection Image Size........... 23
User Settings .................................24
On Screen Display (OSD).................24
How to operate..................................... 24
Menu Tree ............................................ 25
Main Menu............................................ 27
Image Menu ......................................... 29
Display.................................................. 31
Setup.................................................... 32
WiFi Setting .......................................... 34
User Logo Setting................................. 37
Troubleshooting ............................43
Appendices ....................................47
List of Compatible Signals ................47
Specications....................................50
Dispose of the Projector ...................51
Cabinet Dimensions..........................54
Trademarks .......................................55
Copyrights.........................................56

2
English
Usage Notice
Precautions
Follow all warnings, precautions and maintenance as
recommended in this user’s guide to maximize the life of your
unit.
Indicates a potentially hazardous situation which, if
instructions are not followed, could result in death or
serious injury.
Indicates a potentially hazardous situation which, if
instructions are not followed, may result in minor or
moderate injury or damage to property.
■ Warning-
■ Caution-
■ Warning- Do not use ammable sprays or solvents in the
vicinity of this machine. Also, avoid placing these
items in the vicinity of this machine. Doing so could
result in re or electric shock.
■ Warning- Do not place vases, plant pots, cups, toiletries,
medicines, small metal objects, or containers
holding water or any other liquids, on or close to
this machine. Fire or electric shock could result from
spillage or if such objects or substances fall inside this
machine.
■ Warning- Keep the machine and attachments out of the reach of
children. If the machine is near children, it may cause
injury.
■ Warning- Plastic bags can be dangerous, please do not leave
near babies and young children. To avoid the threat
of suffocation, please keep away from their nose and
mouth.
■ Warning- Do not use the connection cable if it is deformed,
cracked, or damaged. Doing so could result in
re or electric shock. If the connection cable is
deformed, cracked, or damaged, contact your service
representative to request a replacement cable.
■ Warning- When using an extension cord or power strip, only
connect equipment whose total power consumption
is within the power rating for the extension cord or
power strip. If the power rating is exceeded, it may
cause heat buildup and result in re.

English
3
English
Usage Notice
■ Warning- If the machine emits smoke or odours, or if it behaves
unusually, you must turn off its power immediately.
After turning off the power, be sure to disconnect the
power adapter from the machine. Then contact your
service representative and report the problem. Do
not use the machine. Doing so could result in re or
electric shock.
■ Warning- If metal objects, or water or other uids fall inside this
machine, you must turn off its power immediately.
After turning off the power, be sure to disconnect the
power adapter from the machine. Then contact your
service representative and report the problem. Do
not use the machine. Doing so could result in re or
electric shock.
■ Warning- If the machine topples, or if a cover or other part gets
broken, you must turn off its power immediately.
After turning off the power, be sure to disconnect the
power adapter from the machine. Then contact your
service representative and report the problem. Do
not use the machine. Doing so could result in re or
electric shock.
■ Warning- Never push objects of any kind into this product
through openings as they may touch dangerous
voltage points or short-out parts that could result in a
re or electric shock. Never spill liquid of any kind on
the product.
■ Warning- Do not remove any covers or screws that are not
mentioned in this manual. There are high voltage
components inside the machine that may cause electric
shock. Contact your service representative if any of the
machine’s internal components require maintenance,
adjustment, or repair.
■ Warning- Do not disassemble or modify the machine. Doing so
may cause injury or malfunction.
■ Warning- Do not install the projector on a wall or ceiling.
■ Caution- Keep the machine away from humidity and dust.
Otherwise a re or an electric shock might occur.
■ Caution- Do not place any objects on the machine. Doing
so may cause the machine to topple over, possibly
resulting in injury.
■ Caution- Do not place the machine on an unstable or tilted
surface. If it topples over, an injury might occur.

4
English
Usage Notice
■ Caution- Do not place the machine or use it in an environment
where it might get wet such as from snow, rain, or
being near water. Doing so could result in re or
electric shock.
■ Caution- Do not place the machine in a location where air
ow is poor. Doing so may cause re due to internal
components becoming overheated.
■ Caution- Do not place or store the machine in a location where
direct sunlight or heat generation might occur. The
heat may deform or wear out the exterior parts or
negatively affect internal parts. Doing so could result
in re.
■ Caution- If this machine is not going to be used for several days
or longer at a time, disconnect the machine from the
power adapter.
■ Caution- When performing maintenance on the machine, always
disconnect the machine from the power adapter.
■ Caution- Do not place the machine on other equipment or vice
versa. Doing so may cause heat buildup inside the
machine or cause the other equipment to malfunction.
■ Caution- Do not increase the volume unless you are listening
while increasing the volume. Also, lower the volume
before turning off the power, because a loud sound
may be emitted when the power is turned on and
cause hearing damage.
■ Caution- If the machine’s interior is not cleaned regularly,
dust will accumulate. Fire and breakdown can result
from heavy accumulation of dust inside this machine.
Contact your sales or service representative for details
about and charges for cleaning the machine’s interior.
■ Caution- Unplug this product from the power adapter and
take the product to qualied service personnel if you
encounter any of the following conditions:
a) Liquid has been spilled, or objects have fallen into
the product.
b) The product has been exposed to rain or water.
c) The product does not operate normally when
following the operating instructions. Adjust only those
controls that are covered by the operating instructions.
d) The product has been dropped or damaged in any
way. (If the cabinet should break, please handle with
care to avoid injury.)

English
5
English
Usage Notice
■ Caution- This product incorporates glass components, including
a lens. If these should break, please handle with care
to avoid injury and contact your sales representative
for repair service. Avoid any broken pieces of glass
since they may cause injury. In the unlikely event that
the light source ruptures, thoroughly clean the area
around the projector and discard any edible items
placed in that area since they may be contaminated.
■ Caution- Unauthorized substitutions may result in re, electric
shock, or other hazards. (Only the replacement of the
light source should be made by users.)
Upon completion of any service or repairs to this
product, ask the service technician to perform safety
checks to verify that the product is in proper operating
condition.
■ Caution- Do not use the product in a closed installation location.
Do not place the product in a box or in any other
closed installation location. Otherwise it may overheat,
which could result in a risk of re.
Important:
Contents of this manual are subject to change without prior notice.
In no event will the company be liable for direct, indirect, special,
incidental, or consequential damages as a result of handing or
operating this product.

6
English
Usage Notice
Safety Labels of This Machine
Do not look into the lens while the LED light source is on. The strong
light from the LED light source may cause damage to your eyesight.
If you wish to discard this product, please contact your local
authorities, the shop where you bought this product, your local
dealer or sales/service representatives.
Power Switch Symbols
The meaning of the symbols for the switches on this machine as follows:
: On/Standby (Off)

English
7
English
Usage Notice
Other Information
Copyrights to Images
When projecting images using the projector, be careful
not to infringe the copyright of protected materials.
The following are examples that may infringe the
copyright of protected materials.
• Broadcasting images or movies for commercial purposes
• Modifying images or movies using functions such as freeze,
magnify, or zoom to broadcast images for commercial
purposes or public viewing
• Varying the aspect ratio of images or movies using a
function that changes the screen size to broadcast images for
commercial purposes or public viewing

8
English
Introduction
Product Features
Outstanding features include:
■ FWVGA (854x480)
■ Single chip DLP® technology
■SDTV(480i/576i), EDTV(480p/576p),
HDTV(720p/1080i/1080p) compatible
■LED light source, 20000H life
■ User friendly multilingual on screen display (OSD)
■ High quality full screen image re-scaling
■ Built-in mono 1-Watt speaker.
■WXGA, SXGA+, SXGA, XGA compression
■Supports IEEE 802.11n/ac WiFi protocol

English
9
English
Introduction
Package Overview
This projector comes with all the items shown below. Check
to make sure your unit is complete. Contact your dealer
immediately if anything is missing.
Documentation:
Read This First
Projector USB TypeA-C cable
Due to the
difference in
applications for
each country, same
regions may have
different accessories
and documents.
N
o
t
e
Wrist strap Pouch

10
English
Introduction
Product Overview
1. Lens
2. Focus ring
3. Speaker (internal)
14
5
2
4. Control panel
5. Connection ports
6. Tripod screw hole
3
6

English
11
English
Introduction
Connection Ports
1. Type-C terminal (DC power input)
2. Micro HDMI terminal
3. Strap hole
3
1 2

12
English
Introduction
Control Panel
1 Display/Enter Conrm your section of items
in sub menu operation or start a
presentation.
2 Power Refer to the “Power On/Off the
Projector” section. Please see pages
17~21.
3Input Select the input source.
4 Four
Directional
Select Keys
Use , , , or to select items or
make adjustments to your selection.
5 Keystone Adjust the projector keystone.
6Menu Press the “Menu” key to launch the
Onscreen display (OSD).
7 LED Indicator Displays the status of this projector.
6
5
2
3
1
4
7

English
13
English
Introduction
360° Installation
This projector supports 360° free orientation operation.
The projector must be installed in a location that is sturdy
enough to support the full weight of the projector and
brackets. (The weight of GP01 is approximately 0.20kg).
Ensure that the projector is tightly secured to the brackets.

14
English
Basic Operations
Attaching a Wrist Strap
When projecting by hand, hang the projector around your
wrist with a wrist strap.
To attach the wrist strap, follow steps 1 ~ 2.
Step 1:
Step 2:
A wrist strap is
effective in preventing
projector dropping
and avoiding possible
damage to the product.
N
o
t
e

English
15
English
Basic Operations
Connecting the Projector
1............................................................................................. USB-C to USB-A cable
2........................................................................................................... AC adapter(*)
Charging the Projector
Ensure that the
power adapter is
rmly connected to
the wall outlet.
Ensure that the
USB cable is rmly
connected to the
power adapter and to
the DC IN port on the
projector.
Connect the
power adapter to
the wall outlet that
is the closest to the
projector.
(*) The power
adapter is an optional
item and not supplied.
Please use an adapter
that has an output of
5V/2A or higher.
N
o
t
e
1
2Power adapter
(not supplied)
Fully charge the projector before using it for the rst time.
During projector’s built-in battery charging, the LED indicator is ashing red.
When the battery charging is complete, the LED indicator turns off.
When the battery charging is complete, please unplug the AC adapter from
the wall outlet.

16
English
Basic Operations
Due to the
difference in
applications for each
country, some regions
may have different
accessories.
To ensure the
projector works well
with your computer,
please make sure the
timing of the display
mode is compatible
with your projector.
Please see page 47.
Use the cables
that come with the
projector.
N
o
t
e
Connect to Video/PC/iOS/Android
DVD player, Set-top Box
HDTV receiver
1
1............................................................................................................. HDMI Cable
iOS device
Router
Android
device

English
17
English
Basic Operations
Powering On the Projector and Connecting
to the HDMI Source
1. Ensure that the HDMI cable is rmly connected. If using
an external power supply, ensure that the USB-C cable is
securely connected to the power adapter and power adapter
is connected to the wall outlet.
2. Turn on the projector by pressing and holding the “Power”
key for 1 second or longer.
The power LED around the “Power” key will turn blue and
the RICOH logo will be displayed on the screen for 20 seconds.
After that is displayed a blank screen.
3. Turn on the HDMI source, for example Video Player.
4. Press the “Display/Enter” key to start the projection. By
default, the screen is displayed while pressing the “Display/
Enter” key.
5. If the projector cannot detect the source, it will display the
source icon on the screen. Press the “Input” key to change
the signal source or conrm the source.
6. Turn the focus ring to adjust the focus manually.
Powering On/Off the Projector
CAUTION:
• Do not look into the lens while the projector is on. The strong light from the light
source may cause damage to your eyesight.
• Do not block the light from projection lens by anything when you want to stop
projection. Doing so could cause a re due to heating by strong light. Please use
“Keep Projection” function for this purpose.
If you turn on the
projector for the rst
time, the system will
display a language
selection menu.
Language
English
Select your preferred
language and press the
“Display/Enter” key
on the control panel to
conrm.
To display the Input
Source menu, press the
“Power” key for 0.5
seconds or longer.
Turn on the
projector rst and then
the signal source.
N
o
t
e
Power
1

18
English
Basic Operations
Powering On the Projector and Connecting
to the iOS Device (Direct Connection)
1. Turn on the projector by pressing and holding the “Power”
key for 1 second or longer.
The power LED around the “Power” key will turn blue
and the RICOH logo will be displayed on the screen for 20
seconds. After that is displayed a blank screen.
2. Press the “Input” key for 0.5 seconds or longer to display
the Input Source menu. Press the / keys to change the
input source to iOS. Then press the “Display/Enter” key.
3. Press the “Display/Enter” key again to display the screen.
If the connection to the iOS device has not been established,
the Device Name and Password message will appear on the
top left corner of the screen. (Figure 1)
4. Congure WiFi settings on the iOS device. Open the
“Settings” > “WiFi” menu. Enable “WiFi”. Select the
Device name that is displayed on the screen, and enter the
password to establish the WiFi connection. (Figures 2~4)
5. Swipe up from the bottom of the iOS screen to open the
Control Center. Tap on “Screen Mirroring”. (Figure 5)
6. Tap on the connected ImagePointer to start the screen
mirroring. (Figure 6)
Figure 1 Figure 2 Figure 3
Figure 4 Figure 5 Figure 6
Press the “Input”
key for 0.5 seconds or
longer to display the
Input Source menu.
To learn how to
use your iOS device,
please refer to the
operating instructions
that came with the
device.
N
o
t
e
Table of contents
Other Ricoh Projector manuals

Ricoh
Ricoh PJ WU6480 User manual

Ricoh
Ricoh Y024 Manual

Ricoh
Ricoh PJ X5360N User manual

Ricoh
Ricoh PJ WX5140 User manual

Ricoh
Ricoh PJ WX6170N User manual

Ricoh
Ricoh PJ X3340N User manual

Ricoh
Ricoh PJ WX5361N Operating manual

Ricoh
Ricoh PJ WX5140 User manual

Ricoh
Ricoh PJ X3340 Guide

Ricoh
Ricoh PJ X6180N User manual

Ricoh
Ricoh PJ WUL6670 User manual

Ricoh
Ricoh Y017 Manual

Ricoh
Ricoh PJ WX4240N User manual

Ricoh
Ricoh PJ WX3340N User manual

Ricoh
Ricoh Soleil-PJ1 Series Quick start guide

Ricoh
Ricoh PJ S2340 User manual

Ricoh
Ricoh PJ WX3340 Quick start guide

Ricoh
Ricoh PJ WUL5970 Series User manual

Ricoh
Ricoh PJ X5360N User manual

Ricoh
Ricoh PJ X3241N User manual