Ridea
Group
Ltd.
No.53-63
Gouqian
Lane,
Gouqian
Village,
Lukang
T
ownship,
Changhua
County
,
50567,
T
aiwan
+
886
4
771
5639
[email protected] www.rideabikes.comBottom bracket maintenance
Use mild soap or a specialized bicycle cleaning product to clean your bicycle. When
cleaning the bottom bracket area, do not use high-pressure water to avoid water from
soaking into the bottom bracket shell.
Depending on the weather conditions and riding style, you may need to uninstall your
bottom bracket to perform a deeper cleaning and re-greasing. The frequency of this service
depends on riding conditions. Note that servicing the bearings from a bottom bracket is a
specialized task that should be performed by qualified bicycle mechanics. Please note that
if your bearings are worn, a deep cleaning and re-greasing may still not make your bottom
bracket works without issues. If your bearings are worn, please contact to a Ridea dealer.
They will help you to determine whether they can be replaced by new ones or if a replacing
Warranty
Ridea Group Ltd. warrants this product against defects in materials or workmanship for
a period of two (2) years from the original date of purchase (one [1] year for bearings).
Alternatively, bottom brackets with stainless steel rings (identified by a blue dust cover) are
warranted for a period of four (4) years. This warranty does not cover damage or failure
resulting from misuse, abuse, alteration, neglect, crash or impact, improper installation and
maintenance and normal and reasonable wear. If you think you have a warranty claim,
please contact the bike shop where you bought your product for more details.
of the whole bottom bracket unit is required.
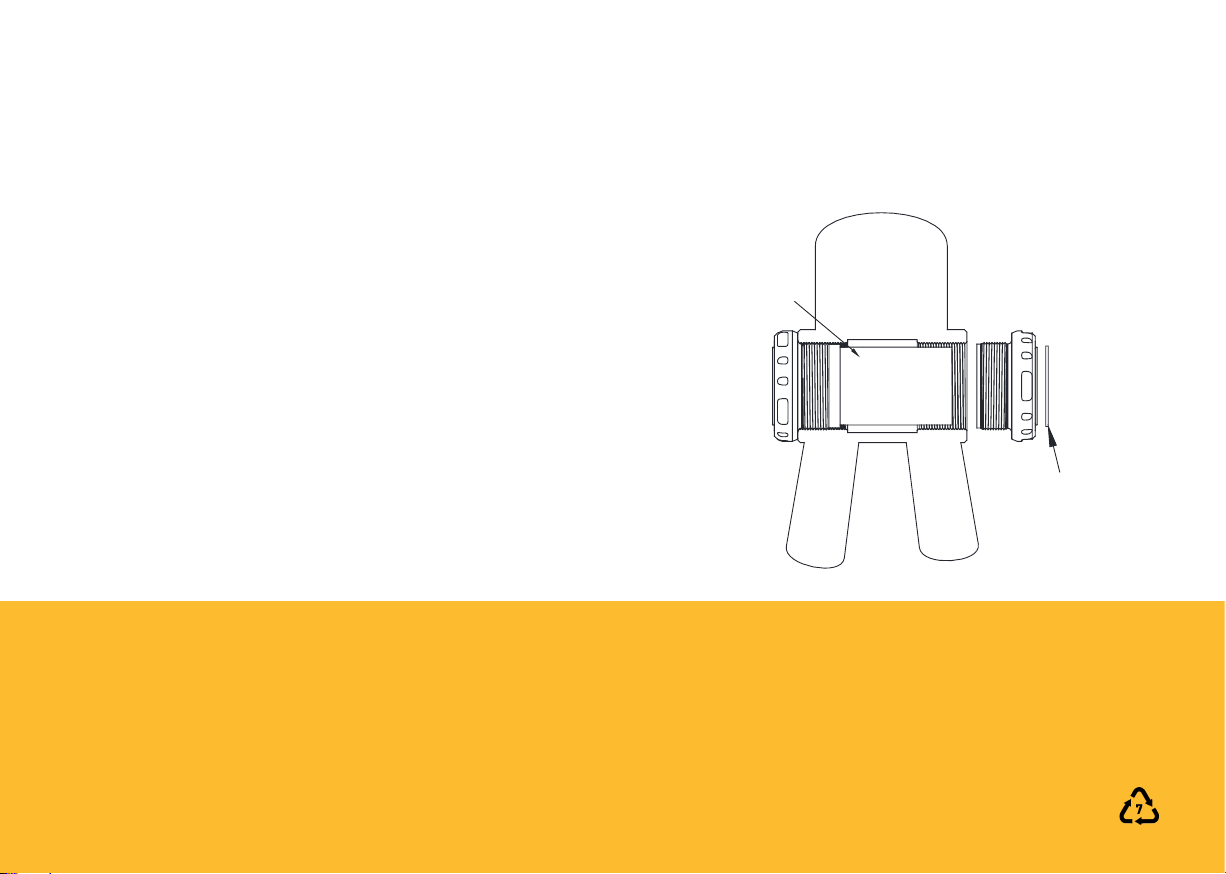
Chainline adjusters
Chainline adjusters can be used to adjust your chainline. Please install them
during the installation of your crankset (between the BB cup and the crank) in
case your crankset and frame combination requires any chainline adjustment.
Installation steps
1. Clean thoroughly the frame BB shell. Pay special attention to the BB shell
threads to make sure they are in good shape and no external particles are
present. To prevent damage to your 6CBB, remove any decorative sticker that
may interfere between the 6CBB and the bike frame.
2. Note BB cups orientation (Drive and Non-Drive Side) and apply carbon-
compatible grease to the threads of both the BB cups and the BB shell.
3. Insert both cups and the center sleeve. Thread the cups to 15 N·m.
The Non-Drive Side cup threads into the BB shell clockwise and the Drive Side
cup threads counter-clockwise.
Frame
Dowm Tube
Center Sleeve
Chainline Adjusters
(as needed)
Drive
Side
Non-Drive Side cup
Clockwise
15 N.m
Drive Side cup
Counter-Clockwise
15 N.m
Important note: To avoid any damage to the product, do not install any
chainline adjuster or any other kind of spacer or external element between the BB
cup and the bicycle frame.


