manuals.online logo
Brands
  1. Home
  2. •
  3. Brands
  4. •
  5. RIDGID
  6. •
  7. Cleaning Equipment
  8. •
  9. RIDGID K-750R 5/8 Instruction Manual

RIDGID K-750R 5/8 Instruction Manual

Other RIDGID Cleaning Equipment manuals

RIDGID K50-100V User manual

RIDGID

RIDGID K50-100V User manual

RIDGID 76430 User manual

RIDGID

RIDGID 76430 User manual

RIDGID K-750 User manual

RIDGID

RIDGID K-750 User manual

RIDGID Auto-Clean K-30 User manual

RIDGID

RIDGID Auto-Clean K-30 User manual

RIDGID 0095691373434 User manual

RIDGID

RIDGID 0095691373434 User manual

RIDGID K-45AF-5 User manual

RIDGID

RIDGID K-45AF-5 User manual

RIDGID K-1500B User manual

RIDGID

RIDGID K-1500B User manual

RIDGID FlexShaft K9-12 User manual

RIDGID

RIDGID FlexShaft K9-12 User manual

RIDGID K-750 User manual

RIDGID

RIDGID K-750 User manual

RIDGID KWIK-SPIN+ User manual

RIDGID

RIDGID KWIK-SPIN+ User manual

RIDGID K-380 User manual

RIDGID

RIDGID K-380 User manual

RIDGID K-45-5 User manual

RIDGID

RIDGID K-45-5 User manual

RIDGID Kollmann KJ-2200 User manual

RIDGID

RIDGID Kollmann KJ-2200 User manual

RIDGID K-45AF-7 User manual

RIDGID

RIDGID K-45AF-7 User manual

RIDGID K-400 User manual

RIDGID

RIDGID K-400 User manual

RIDGID K-45AF-1 User manual

RIDGID

RIDGID K-45AF-1 User manual

RIDGID FlexShaft K9-306 User manual

RIDGID

RIDGID FlexShaft K9-306 User manual

RIDGID K-750 User manual

RIDGID

RIDGID K-750 User manual

RIDGID K-45 User manual

RIDGID

RIDGID K-45 User manual

RIDGID K-5208 User manual

RIDGID

RIDGID K-5208 User manual

RIDGID K-400 User manual

RIDGID

RIDGID K-400 User manual

RIDGID 0095691386786 User manual

RIDGID

RIDGID 0095691386786 User manual

RIDGID 37343 User manual

RIDGID

RIDGID 37343 User manual

RIDGID K-750 User manual

RIDGID

RIDGID K-750 User manual

Popular Cleaning Equipment manuals by other brands

Skov Farm AirClean Technical user guide

Skov

Skov Farm AirClean Technical user guide

Nilfisk-Advance CA 240 operating instructions

Nilfisk-Advance

Nilfisk-Advance CA 240 operating instructions

ORBOT LiO operating manual

ORBOT

ORBOT LiO operating manual

unGer OmniClean Assembly instructions

unGer

unGer OmniClean Assembly instructions

CENTREGO Toucan Eco Bio Carry user manual

CENTREGO

CENTREGO Toucan Eco Bio Carry user manual

BANDELIN SONOREX TECHNIK RM 110 UH Instructions for use

BANDELIN

BANDELIN SONOREX TECHNIK RM 110 UH Instructions for use

Sealey VMA913 instructions

Sealey

Sealey VMA913 instructions

Aztec 520-00 owner's manual

Aztec

Aztec 520-00 owner's manual

BÖWE P25 installation instructions

BÖWE

BÖWE P25 installation instructions

Tunap MF 929 Service information

Tunap

Tunap MF 929 Service information

Aircraft POWERGLIDE manual

Aircraft

Aircraft POWERGLIDE manual

Suevia 130.5011 EASYCLEANER Mounting instructions

Suevia

Suevia 130.5011 EASYCLEANER Mounting instructions

i-MO Öko 2000 user guide

i-MO

i-MO Öko 2000 user guide

unGer Hydro Power Ultra UNP01 operating instructions

unGer

unGer Hydro Power Ultra UNP01 operating instructions

Black & Decker BHPC130 Original instructions

Black & Decker

Black & Decker BHPC130 Original instructions

Uni-ram UG5000E operating manual

Uni-ram

Uni-ram UG5000E operating manual

Axi MTC HC-300 Installation, operating and maintenance manual

Axi

Axi MTC HC-300 Installation, operating and maintenance manual

WASH POWER XB50 user manual

WASH POWER

WASH POWER XB50 user manual

manuals.online logo
manuals.online logoBrands
  • About & Mission
  • Contact us
  • Privacy Policy
  • Terms and Conditions

Copyright 2025 Manuals.Online. All Rights Reserved.

5
K-750R 5/8" Cage Machine
Figure 4 – T-411 2″, T-413 3″& T-414 4″Cutter: Used for
general cleaning to remove tree roots and
materials clinging to pipe walls.
Machine Assembly
WARNING
To prevent serious injury, proper assembly of the
Drain Cleaner is required. The following proce-
dures should be followed:
Instructions For Mounting Handles and
Belt Guard
Handles – Assemble handles to machine frame and
secure with two (2) belt guard screws.
Belt Guard – Check the belt guard to ensure that it is
approximately 1/4
″from the drum. Reposition guard if nec-
essary and tighten bolts
(Figure 6)
.
Gap between belt guard and drum
should not exceed 1/2
″to prevent fingers being caught
between belt and pulley. Do not operate machine with-
out belt guard.
Instructions For Installing Cable
Do not remove bands or staples from cable
shipping carton. Cable is under tension and will whip
causing injury.
Figure 5
Connecting/Disconnecting 5/8" and 3/4" Drum Machine Cable Couplings
Keep couplings clean and lubricated. Plunger pin must move freely and fully extend to secure connection.
New style – Plunger pin
Screwdriver required.
Connecting
1. Slide the couplings together. If needed, depress plunger
pin.
2. Confirm connection is secure. (plunger pin fully extend-
ed).
Disconnecting
1. Insert the screwdriver to depress the plunger pin.
2. Push the couplings apart until the male coupling con-
tacts the screwdriver.
3. Remove the screwdriver and push the couplings apart.
12
Old style – Rotating pin
Screwdriver required.
Connecting
1. Slide the couplings together.
2. Rotate pin so hash mark is away from end of cable
(towards “L” stamped on coupling). Confirm connection
is secure.
Disconnecting
1. Rotate pin so hash mark is towards end of cable (away
from “L” stamped on coupling).
2. Push the couplings apart.
13a 3b2
Hash Mark
CAUTION
WARNING
6
Retrieve end of cable through the center hole of carton and
remove enough cable to connect with drum pigtail. Connect
the male coupling of the cable to the pigtail coupling
(see
Figure 5)
. Confirm connection is secure. Manually feed
cable into drum.
Machine Inspection
WARNING
To prevent serious injury, inspect your Drain
Cleaning Machine. The following inspection pro-
cedures should be performed before each use.
1. Make sure the Drain Cleaning Machine is unplugged
and the directional switch is set to the OFF position
(Figure 6)
.
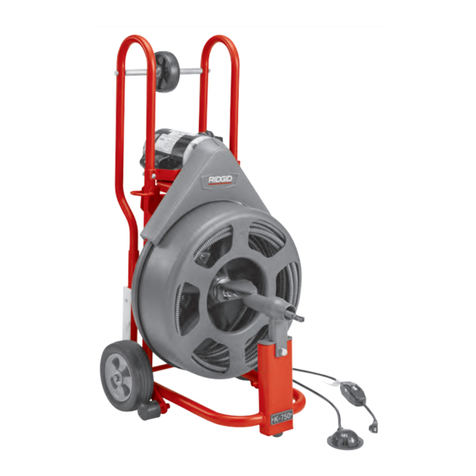
Figure 6 – K-750R Drain Cleaner
2. Make sure the foot switch is present and attached to
the Drain Cleaning Machine
(Figure 6)
. Do not oper-
ate the machine without a foot switch.
3. Inspect the power cord, Ground Fault Circuit Inter-
rupter (GFCI) and plug for damage. If the plug has
been modified, is missing the grounding prong or if the
cord is damaged, do not use the Drain Cleaning
Machine until the cord has been replaced.
4. Inspect the Drain Cleaning Machine for any broken,
missing, misaligned or binding parts as well as any
other conditions which may affect the safe and normal
operation of the machine. If any of these conditions are
present, do not use the Drain Cleaning Machine until
any problem has been repaired.
5. Lubricate the Drain Cleaning Machine, if necessary,
according to the Maintenance Instructions.
6. Use tools and accessories that are designed for your
drain cleaner and meet the needs of your application.
The correct tools and accessories allow you to do the
job successfully and safely. Accessories suitable for
use with other equipment may be hazardous when
used with this drain cleaner.
7. Clean any oil, grease or dirt from all equipment han-
dles and controls. This reduces the risk of injury due
to a tool or control slipping from your grip.
8. Inspect the cutting edges of your tools. If necessary,
have them sharpened or replaced prior to using the
Drain Cleaning Machine. Dull or damaged cutting
tools can lead to binding and cable breakage.
9. Inspect cables and couplings for wear and damage.
Cables should be replaced when they become severe-
ly worn or corroded. A worn cable can be identified
when the outside coils become flat.
Worn or damaged cables can break
causing serious injury.
Machine and Work Area Set-Up
WARNING
To prevent serious injury, proper set-up of the machine
and work area is required. The following procedures
should be followed to set-up the machine:
1. Check work area for:
• Adequate lighting
• Grounded electrical outlet
K-750R 5/8" Cage Machine
Belt Guard
Foot Switch
GFCI and Plug
Handle
Electrical Switch
WARNING