RIDGID SeekTech ST-510 User manual

RIDGE TOOL COMPANY
Tools For The ProfessionalTM
GB p. 1
DE p. 17
FR p. 33
NL p. 49
IT p. 65
ES p. 81
PT p. 97
DA p. 113
NO p. 129
PL p. 145
RU p. 161
SeekTech
ST-510

Ridge Tool Company 1
Tools For The ProfessionalTM
SeekTech®ST-510
•Exposing the utility is the only way to verify its
existence, location and depth. Ridge Tool Co., its
aliates and suppliers, will not be liable for any injury
or any direct, indirect, incidental or consequential
damages sustained or incurred by reason of the use
of the NaviTrack.
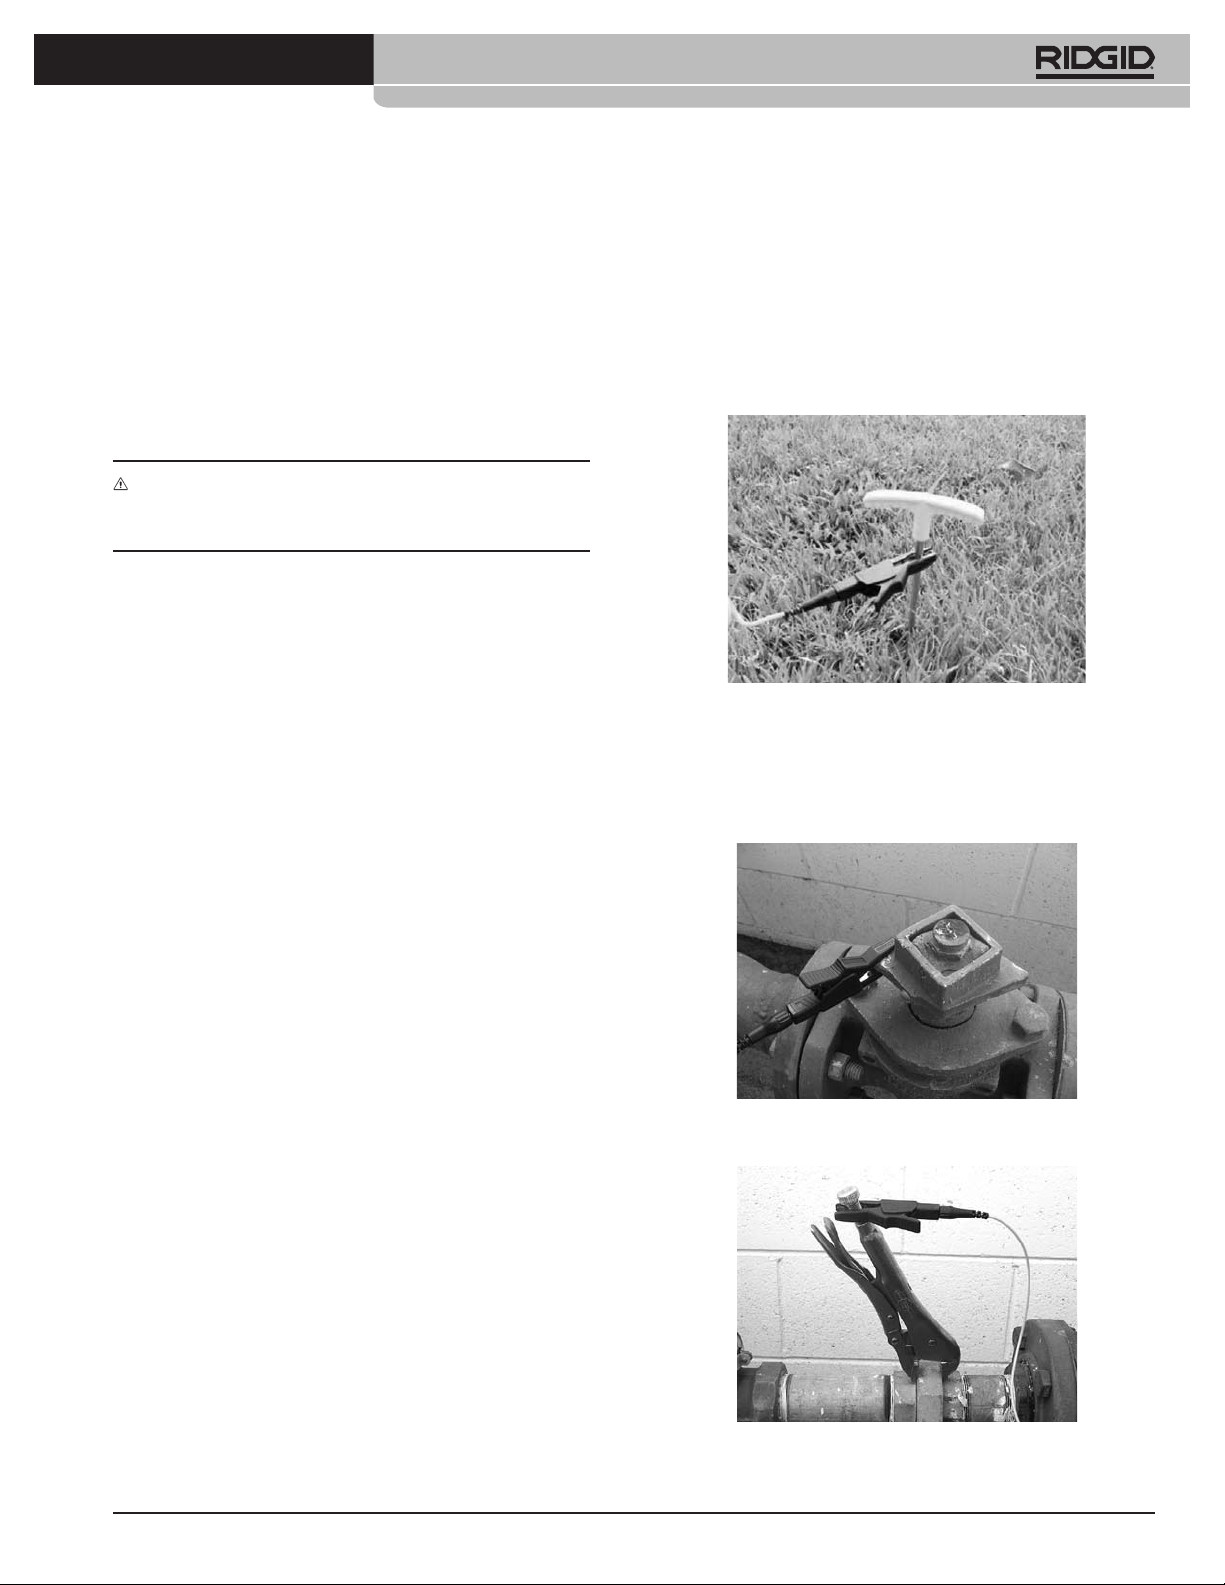
NOTE: Connection To Energized Conductors
The line transmitter is designed to withstand up to
240 VAC 50/60 Hz excitation between the two leads. The user
is cautioned not to deliberately connect to live power lines.
The protection is not intended to be used continuously. If the
transmitter indicates the presence of high voltage, use high
voltage precautions to carefully disconnect the line transmitter
from the high voltage source.
•The line transmitter is normally powered by internal
batteries,andisdesignedtoprotecttheuserfromvoltages
up to 240 VAC that may be accidentally encountered.
Powering the line transmitter by batteries provides the
highest level of isolation and safety, and is therefore the
recommended power source.
•The line transmitter may also be powered by an optional
external power supply. The user must ensure that the
external power source is fully isolated from ground
and from the power mains. The user is cautioned to
use only external power sources recommended by the
manufacturer. If a line transmitter is powered by an
external source that is not isolated from ground and from
the power mains, the line transmitter is not protected
from connection to live power lines! The line transmitter
may be destroyed and may present a safety hazard.
DO NOT USE NON-ISOLATED POWER SUPPLIES WITH
THE LINE TRANSMITTER.
•Wear appropriate heavy soled footwear as you would
when working with any high-voltage equipment.
General Safety Information
WARNING! Read these instructions
and the accompanying safety booklet
carefullybeforeusing this equipment.
If you are uncertain about any aspect of using
this tool, contact your RIDGID distributor for
more information.
Failure to understand and follow all
instructions may result in electric shock,
re, and/or serious personal injury.
SAVE THESE INSTRUCTIONS!
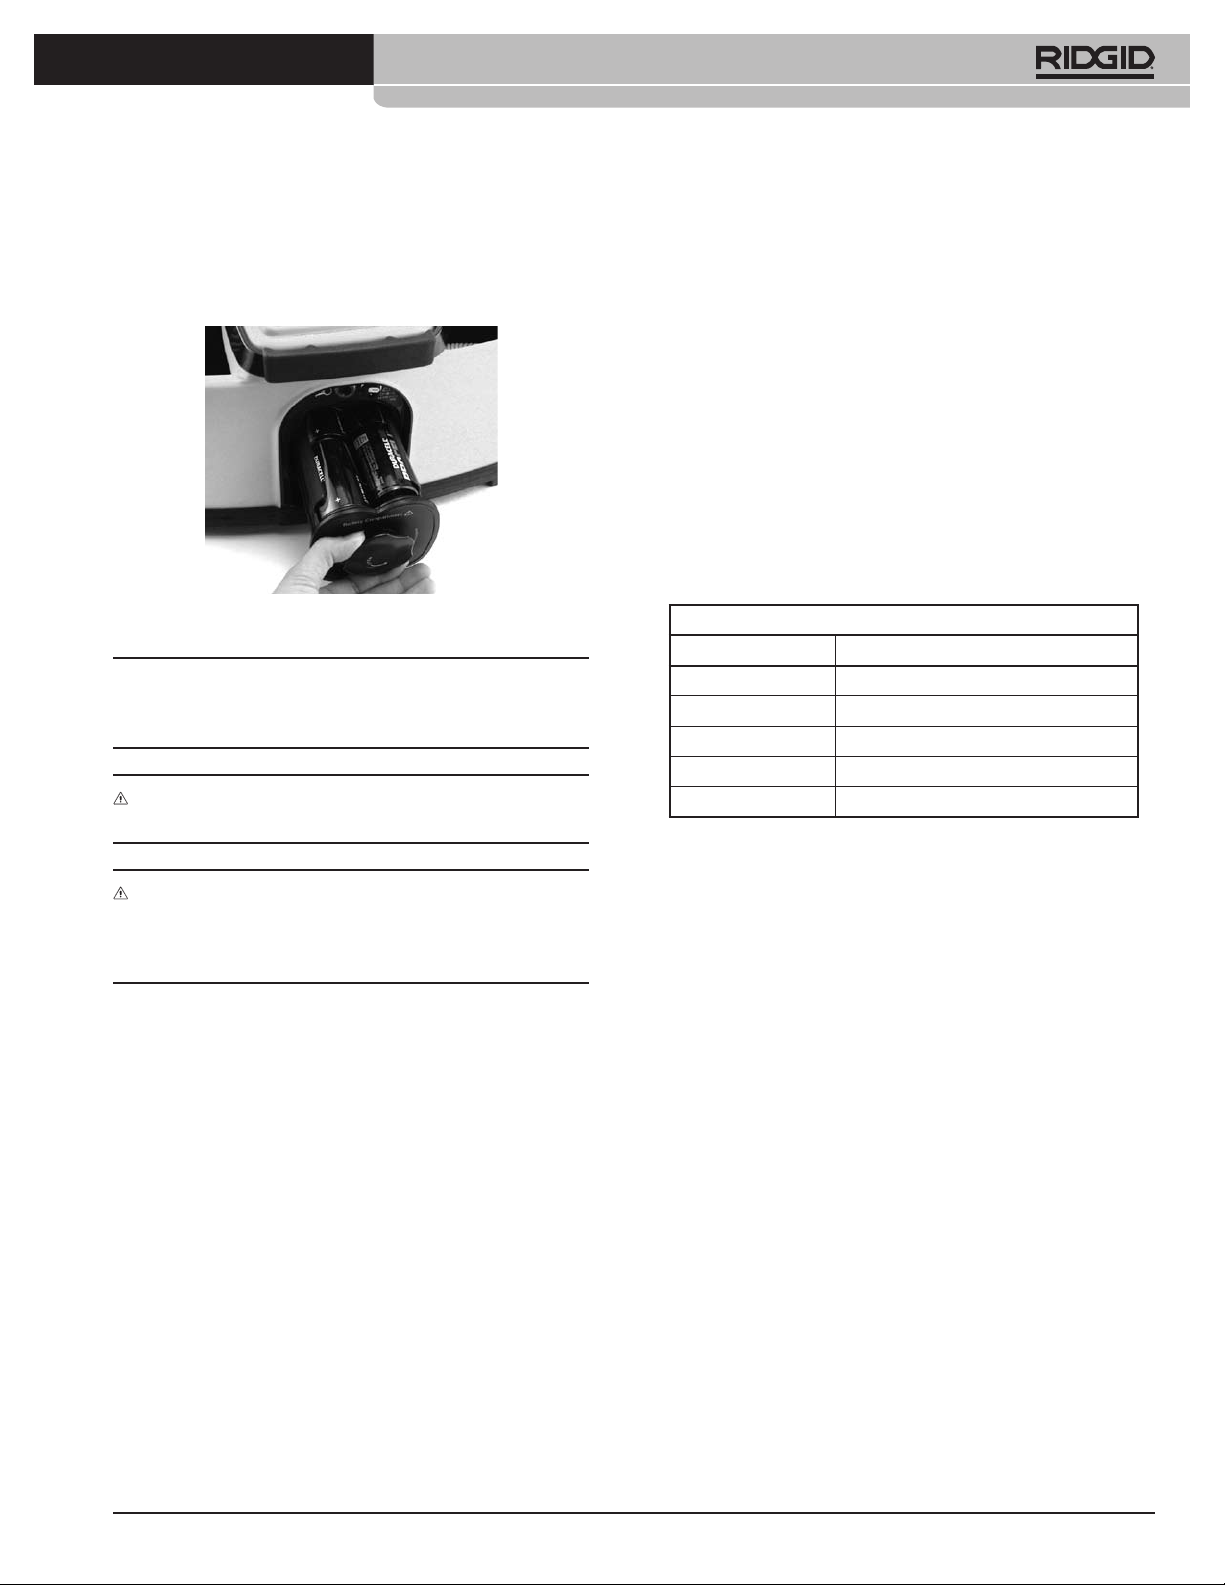
CAUTION: Remove batteries entirely before shipping.
If you have any questions regarding the service or
repair of this machine, contact your Ridgid distributor,
your local Ridgid oce or Ridge Tool Europe at
info[email protected].
DANGER
•The ST-510 transmitter is intended for use with a
SeekTech locator/reciever. SeekTech locators are
diagnostictoolsthat sense electromagneticelds emitted
by objects underground. They are meant to aid the user
in locating these objects by recognizing characteristics
of their eld lines and displaying them on the screen. As
electromagneticeldlinescanbedistortedandinterfered
with it is important to verify the location of underground
objects before digging.
GB
SeekTech ST-510
Operating Instructions

Ridge Tool Company
2
Tools For The ProfessionalTM
SeekTech®ST-510
DANGER
•If the line transmitter is powered by a vehicle 12 VDC
cigarette lighter connection, and the line transmitter
is connected to a power line, the vehicle is now
connected to that power line. The vehicle is now at a
potentially lethal voltage. If the vehicle is grounded,
the line transmitter may be destroyed.
93 Kilohertz Frequency Use
The default 93 kHz frequency has an actual cycle count of
93,696 cycles per second.
Some older transmitters use a dierent value for the nominal
93 kHz frequency, 93,622.9 cycles per second.
If you nd that your transmitter signal at 93 kHz cannot be
detected by your receiver, set the transmitter’s frequency to
93-B kHz, which is set to the older value. Both 93 and 93-B
frequencies can be found under the Manufacturer’s Menu.
DANGER
•ALWAYS HOOK UP LEADS FIRST BEFORE POWERING THE
UNIT ON TO AVOID SHOCK.
•ALWAYS TURN UNIT OFF BEFORE DISCONNECTING
LEADS.
•ELECTRIC SHOCK MAY RESULT FROM FAILURE TO
CONNECT LEADS BEFORE POWERING THE UNIT ON.
•Do not handle the transmitter while you are connected
directly to ground yourself.

Ridge Tool Company 3
Tools For The ProfessionalTM
SeekTech®ST-510
Transmitter Components
Figure 1: ST-510 Components
Top View
Bottom View
Back View
Keypad
Lead Clip
Pocket
Display Screen
Shoulder Strap
Handle
Battery Compartment
Jack for Inductive Clamp
Coil Cord (48 ft. (15 m) extended)
DC Power Jack
Serial Number Label
Security Cable Holes
Grounding Stroke

Ridge Tool Company
4
Tools For The ProfessionalTM
SeekTech®ST-510
Keypad
Figure 2: Keypad
Display Screen
Figure 3: Display Screen
• Battery Level – Shows remaining battery power in 5 steps.
• Manufacturer – Shows the manufacturer’s frequency set being used (default is SeekTech).
• Voltage – Voltage that is applied to the leads. This may say MAX, indicating the voltage is at its highest allowable point
(~80 V peak-to-peak, ~30V RMS (square wave.))
• Current Strength – This is the current owing through the circuit in milliamps (mA).
• Sound – Indicates if sound is ON or OFF.
• Ohms (resistance) – This shows the approximate resistance in the circuit. See page 9.
• Watts (Power) – Total power that the transmitter is putting out. In Battery Saver mode, this is absent.
• Frequency – Frequency being used.
Display Screen
Use Up/Down Arrows for
Output Current Adjustment and
Menu Control Keys
Select
(Hold down, use up/down for
contrast adjustment)
Frequency Selection
Frequencies
Inductive Mode
On/O
Orientation For
Inductive Mode
Main Menu
Sound On/O
Power On/O
High Voltage Indicator
128Hz
1kHz
8kHz
33kHz/
93kHz
Voltage
Battery Level
Manufacturer
Frequency
Watts Audio
Ohms (resistance)
Current Strength

Ridge Tool Company 5
Tools For The ProfessionalTM
SeekTech®ST-510
Getting Started
Installing/Changing Batteries
Figure 4: Inserting Battery Holder
NOTE: When replacing batteries use 8 D cells that are the
same type. Do not mix half-used alkalines with brand new
ones.
CAUTION: Always remove batteries before shipping the
unit.
CAUTION: Do not allow debris or moisture into battery
compartment. Debris or moisture may short the battery
contacts, leading to rapid discharge of the batteries, which
could result in electrolyte leakage or risk of re.
Operation Time
Typical operation time for the SeekTech line transmitter, using
alkaline cells, is about 12.5 hours which varies depending on
factors such as load and current transmitted, and how much
thebacklightison.Select theBatterySaverfeatureifextended
battery life is needed. Other factors that aect the operation
timewillincludechemistryofthebattery.(Manyofthenewhigh
performance batteries, such as the“Duracell ® ULTRA” do last
10%-20% longer than conventional alkaline cells under
high demand applications). Operation at low temperatures
will also reduce battery life. Typical operating times will be
generally on the order of those shown here.
These gures assume a notional load of approximately
150 ohms. Note that Battery Saver mode limits output current
to 100 mA.
Estimated Operating Times
Current Est. Time to Depletion
400 mA 1.8 hours
200 mA 3.6 hours
100 mA 7.25 hours
50 mA 14 hours
25 mA 28 hours
Batteries can recover after being subjected to high loads.
If time is allowed, batteries may recover enough to oer
additional hours of operation.

Ridge Tool Company
6
Tools For The ProfessionalTM
SeekTech®ST-510
Optional External Power Source
Use only a power supply approved to IEC 61010-1 or IEC
60950. Output must be isolated, SELV and Limited-Energy
Circuit per IEC 61010-1 or LPS per IEC 60950, 12-15VDC, 30W
minimum. Output connection is standard barrel plug, 2.1mm
pin, tip positive.
DANGER! If the line transmitter is powered by a
vehicle 12 VDC cigarette lighter connection, and the line
transmitter is connected to a power line, the vehicle is
now connected to that power line.The vehicle is now at a
potentially lethal voltage. If the vehicle is grounded, the
line transmitter may be destroyed.
Powering Up/Down
Power the unit ON/OFF by depressing the Power key on
the keypad.
Sounds of the SeekTech Transmitter
Sounds are associated with specic events.
The unit will beep, then pause to measure how much current
is owing onto the cable or pipe. The unit will beep faster
when more current is detected.
To mute the sound, press the Sound key.
Using the ST-510 Line Transmitter
The ST-510 line transmitter can apply an active tracing signal
to a target conductor in three ways:
Figure 5
Figure 6
Figure 7

Ridge Tool Company 7
Tools For The ProfessionalTM
SeekTech®ST-510
Direct Connect – The receiver’s leads are connected directly
to the target conductor or tracing wire, and a suitable
ground.
Inductive Clamp (optional) – The jaws of the inductive
clamp encircle the target conductor; there is no metal-to-
metal contact.
Inductive (internal coils) – The transmitter is placed over
and in-line with the utility. Its internal coils generate a eld
which induces current in the underground target conductor.
DANGER! Always connect leads before turning
the transmitter on to avoid electrical shock. Ensure
transmitter is well grounded.
Direct Connect Method
1. Attach the ST-510 line transmitter to
the ground and to the target line.
Insert the ground spike into the ground. Connect one of the
cable leads to the grounding spike.
Figure 8: Attaching Lead to Ground Stake
2. Connect the other lead to the target
conductor.
Figure 9: Example of Connecting to a Gas Line
Figure 10: Alternative Connection to a Pipeline

Ridge Tool Company
8
Tools For The ProfessionalTM
SeekTech®ST-510
DANGER! NEVER CONNECT TO LINES ENERGIZED
WITHAPOTENTIALLYDANGEROUSELECTRICALCURRENT.
To increase safety, the ground lead should be attached rst.
If there were an unknown high voltage running through
the target line, this would allow a means of redirecting the
current away from the transmitter and operator.
ALWAYS HOOK UP LEADS FIRST BEFORE POWERING THE
UNIT ON TO AVOID SHOCK.
ALWAYS TURN UNIT OFF BEFORE DISCONNECTING
LEADS.
3. Select a Frequency
The ST-510 line transmitter provides ve frequencies:
Figure 11: Frequency Selection
NOTE: For 93 kHz, press the 33 kHz button a second time.
4. Check the Circuit
More current gives a stronger signal. Less current prolongs
battery life.
To prolong battery life and reduce the chance of the signal
“bleedingover”ontoadjacentlines,usetheminimumamount
of current needed to get a clear reading on the receiver.
Look at the ohms (Ω) (resistance), the voltage (V) and the
current (mA) displayed on the screen. Generally the lower
the ohms (total resistance) the more eciently current can
be added. Lower total resistance indicates an ecient circuit
and requires less voltage to illuminate the line.
Figure 12: Display Panel
NOTE: Ohms, current, power and voltage displayed are
approximate values.
The transmitter will beep faster if the resistance is lower, and
slower if the resistance is higher.
128Hz
1kHz
8kHz
33kHz/93kHz

Ridge Tool Company 9
Tools For The ProfessionalTM
SeekTech®ST-510
5. Adjust Current
Use the up and down arrows to adjust the amount of current
in milliamps (mA).
There are 7 current levels that the user can choose from:
5, 25, 50, 100, 200, or 400 mA.
Figure 13: Current Selected
When a current level is chosen, the transmitter will adjust the
voltage to try and produce the selected current and lock it
in. If the transmitter cannot produce the current selected it will
adjust down to the next level.
The transmitter’s maximum current output depends on the
amount of resistance in the circuit. When the transmitter is
putting out the maximum current possible for internal and
external conditions, MAX will be displayed in place of the
current strength number.
Figure 14: MAX Current
MAX will also appear if the power output of the transmitter is
at its allowable limit. (See FCC limits in the Useful Information
section on page 14.)
When the current drops below 5 mA,“LO”will appear instead
of a number.
Figure 15: LO Current
WARNING: If the transmitter is showing low or no current,
the signal may be too low to be detected by the receiver
locator and inadequate for tracing.
6. Check the Receiver
Set the receiver’s frequency to match that on the transmitter.
Conrm the receiver is picking up the transmitted frequency
by holding it near the transmitter and observing the increase
in receiver signal.
Useful Operating Points
• To help lower the resistance of the circuit, scrape away
dirt, paint and corrosion before connecting to the target
conductor or grounding spike.
• Moist ground is a better conductor than dry soil. Wetting
the ground can improve a circuit in dry soil.
• The transmitter’s leads can act as antennas, broadcasting
a strong signal. If locating close to the transmitter, keep
the leads as short as possible by stowing the excess
length in the transmitter’s side pockets. This will reduce
the amount of interfering signals from the leads.
• It is usually best to start by using the lowest frequency
and the least amount of current needed to eectively
illuminate the line. Lower frequencies travel farther.
Higher frequencies generally make it easier to illuminate
a line, but they do not travel as far and are much more
likely to couple onto other utility lines. This can distort
the signal and reduce accuracy.
DANGER! ALWAYS HOOK UP LEADS FIRST BEFORE
POWERING THE UNIT ON TO AVOID SHOCK. ALWAYS
POWER UNIT OFF BEFORE DISCONNECTING LEADS.

Ridge Tool Company
10
Tools For The ProfessionalTM
SeekTech®ST-510
Inductive Clamp Method
Figure 16: Inductive Clamp (Optional)
1. Plug the inductive clamp into the 1/4” phone jack
above the battery cover. Plug must be mono or, if
stereo, connected between tip and base. The coil
cords are disabled when the clamp is connected.
2. Clamp the jaws of the Inductive Clamp around a
section of the pipe or cable to be traced.
3. Power the transmitter on and proceed as in the
Direct Connect method. Be sure the receiver and the
transmitter are set to the same frequency.
Inductive Mode
The ST-510 can be used without a direct connection to a
pipe or cable. In Inductive Mode, the ST-510 generates a
eld which induces a current into a conductor such as a pipe
running directly beneath it.
1. Be sure that the transmitter is positioned correctly
over the line.
Figure 17: Orientation to the Conductor
(Inductive Mode)
2. Push the inductive mode (upper right) button to
induce a signal onto the line. The Inductive Mode
message will appear on the screen.
Orientation Mark

Ridge Tool Company 11
Tools For The ProfessionalTM
SeekTech®ST-510
Figure 18: Inductive Mode Key
3. Lower frequencies couple poorly inductively. When
using Inductive Mode, use higher frequencies in order
to get a good signal at the receiver.
4. Note that the line into which current is induced must
be grounded in both directions for a signal to be
induced away from the transmitter.
5. The transmitter in inductive mode will generate a eld
through the air around it as well as into the ground
under it. If the receiver is within about 20-30 feet of
the transmitter it will measure this eld instead of on
the target conductor. Place the transmitter at least
20 feet away from the region where tracing occurs in
order to avoid this“air coupling”.
Figure 19: Air Coupling
6. Generally if you trace a line with an induced signal
checking for a valid depth measurement and a strong
stable proximity signal is the best way to conrm that
you are locating the induced signal in a line and not
the signal directly from the transmitter through the
air (air coupling).
NOTE: If you have been using the ST-510 in inductive mode,
be certain to switch inductive mode o if you are going to
use the unit in direct connect mode. Air coupling can create
very confusing signals if you inadvertently have the unit set
to inductive mode but are trying to use it in direct connect
mode.
Inductive Key
Orientation Mark

Ridge Tool Company
12
Tools For The ProfessionalTM
SeekTech®ST-510
Features
Auto Back Light
The SeekTech is equipped with an automatic LCD backlight.
Whenever a key is pressed, the backlight is activated to aid
viewing for 80 seconds.
High Voltage Indicator
When ever the line transmitter encounters voltage higher
than about 42 volts (RMS), it will ash a red LED at the bottom
of the keypad. The LCD will display “High Voltage”. If this
occurs, follow high-voltage safety procedures to disconnect
the transmitter.
Figure 20: High Voltage Indicator
Main Menu
To access the Main Menu:
1. Press the menu key:
Figure 21: Menu Key
2. Use the Up and Down keys to scroll through the menu
choices in either direction.
Figure 22: Main Menu Choices
Figure 23: Up and Down Keys
3. To accept the highlighted choice, press the Select
key.
Menu Key
Up Key
Down Key

Ridge Tool Company 13
Tools For The ProfessionalTM
SeekTech®ST-510
Figure 24: Select Key
Battery Saver Mode
This allows the user to limit the power output of the ST-510
line transmitter to approximately 1 watt in order to prolong
the life of the batteries. Is o by default.
Figure 25: Battery Saver and Auto-O Options
Shut O Adjustment
Check this box to have an automatic shut down of the
transmitter. When checked, using the select key, the ST-510
will automatically shutdown to help conserve batteries.
Shutdown time using this feature varies with current draw.
The approximate values are:
8 hrs 25ma output or less
4 hrs 50-100ma
2 hrs 200-400ma
1hr >400ma
This feature prevents the batteries from running down if the
unit is inadvertently left on. A is o by default. See Figure 25
above.
Other Manufacturers Menu
This menu allows you to use the ST-510 to transmit on
dierent manufacturer’s frequencies.
Adjusting the LCD Screen Contrast
To adjust the LCD Contrast:
1. Press and hold down the select key:
2. Simultaneously press the up arrow key to lighten the
display or press the down arrow key to darken the
display.
Select Key

Ridge Tool Company
14
Tools For The ProfessionalTM
SeekTech®ST-510
Useful Information
Using High and Low Frequencies
High Frequencies:
• Don’t travel as far
• Overcome some barriers
• Bleed-over more.
Low Frequencies:
• Travel further
• Lose signal when hitting barriers, gaskets, poor
insulation
• Do not bleed-over as much.
As a general rule, detecting with lower frequencies is more
reliable for the reasons given above, IF you can get a good
signal.
FCC Limits
47 CFR 15.213 says that from 9 kHz up to (but not including)
45 kHz, peak output power shall not exceed 10 W. From
45 kHz to 490 kHz, it must not exceed 1 W.
Transportation and Storage
Before transporting make sure that the unit is OFF to preserve
battery power.
Make sure that the ST-510 line transmitter is secure and does
not bounce around or get bumped by loose equipment.
The ST-510 line transmitter should be stored in a cool dry
place.
NOTE: If storing the ST-510 line transmitter for an extended
period of time, the batteries should be removed. If storage
is brief then the battery carriage may be pulled out ½ an
inch to preserve battery power. Remove batteries entirely
before shipping.
Maintenance and Cleaning
1. Keep the ST-510 line transmitter clean with a damp
cloth and some mild detergent. Do not immerse in
water.
2. When cleaning, do not use scraping tools or abrasives
as they may permanently scratch the display. NEVER
USE SOLVENTS to clean any part of the system.
Substances like acetone and other harsh chemicals
can cause cracking of the case. Locating Faulty
Components.
For troubleshooting suggestions, please refer to the trouble
shooting guide at the end of the manual.
Service and Repair
The unit should be taken to a RIDGID Independent
Authorized Service Center. All repairs made by Ridge service
facilities are warranted against defects in material and
workmanship.
If you have any questions regarding the service or repair of
this machine, contact your RIDGID distributor, local RIDGID
CAUTION: Always remove batteries entirely before
shipping.

Ridge Tool Company 15
Tools For The ProfessionalTM
SeekTech®ST-510
High Voltage Present
Inductive Mode - Press frequency
button twice to turn on
Power On/O
Caution
Inductive Clamp
External Power
12-15VDC
Icon Legend
Specications
Power Source:
8 Alkaline or rechargeable batteries. (D-Cells)
Weight:
4.75 lbs (2.15 kg) w/o batteries, 7.5 lbs (3.4 kg) w/batteries
Cable length:
48’Extended (14 m); 46”contracted (1.1 m)

Ridge Tool Company
16
Tools For The ProfessionalTM
SeekTech®ST-510
Trouble Shooting Guide
PROBLEM PROBABLE FAULT LOCATION
Display appears
completely dark, or
completely light when
it is turned on.
Try powering the unit OFF and then back ON.
Adjust the LCD screen contrast.
Allow the unit to cool if it has been exposed to excessive heat from sunlight.
Receiver will not pick
up the line transmitter’s
signal.
Check that the correct frequency has been selected on both units.
Check to make sure that the receiver and the line transmitter are in the same mode and on the
same frequency. (See note on page 3 about using 93 kHz frequencies.)
Make sure that the proper functions are activated on the receiver. e.g. activating the line trace
function for line tracing. (See manual for the particular receiver being used.)
Unit will not power ON. Check orientation of batteries.
Check that the batteries are fresh or charged.
Check to see that the battery contacts are OK.
Standard Equipment
• SeekTech ST-510 Transmitter
• Direct connect leads and clips
• Operator’s Manual
• 8 D-cell batteries (Alkaline)
Default settings for the transmitter:
• 50 Hz Mode
• 2 hr shuto
• 30V-RMS Maximum
• SeekTech frequencies loaded
A Direct Connect Lead (48ft./16m) (Cat#22758)
B Battery Holder Cover Assembly (Cat#18428)
C Battery Holder (Cat#18433)
D Ground Spike (Cat#18438)
E Direct Connect Lead Clip (Cat#18443)
F Inductive Clamp (Optional) (Cat#20973)
F

Ridge Tool Company 17
Tools For The ProfessionalTM
SeekTech®ST-510
•Das Freilegen der Versorgungsleitung ist die
einzige Möglichkeit, ihre Existenz, Lage und Tiefe
zu verizieren. Ridge Tool Co., ihr angegliederte
Unternehmen und Lieferanten haften nicht für
Verletzungen oder direkte, indirekte, Neben- oder
Folgeschäden, zu denen es aufgrund der Benutzung
des ST-510 kommt.
HINWEIS: Verbindung mit Energie führenden Leitern
Der Leitungstransmitter ist so ausgelegt, dass er einer
Erregung mit bis zu 240 V Wechselstrom 50/60 Hz zwischen
den beiden Klemmen standhält. Der Benutzer sollte das
Gerät aber nicht absichtlich an Strom führende Leitungen
anschließen. Der Schutz ist nicht für einen Dauereinsatz
ausgelegt. Wenn der Transmitter das Vorhandensein
von Hochspannung anzeigt, treen Sie entsprechende
Vorkehrungen, um den Leitungstransmitter vorsichtig von der
Hochspannungsquelle zu trennen.
•Der Leitungstransmitter wird normalerweise
von internen Batterien gespeist und schützt den
Benutzer vor Spannungen bis 240 V Wechselstrom,
die unbeabsichtigt angelegt werden. Das Betreiben
des Leitungstransmitters mit Batterien bietet ein
Höchstmaß an Isolierung und Sicherheit, Batterien
werden daher als Stromquelle empfohlen.
•Der Leitungstransmitter kann auch über ein optionales
externes Netzteil versorgt werden. Der Benutzer muss
sicherstellen, dass die externe Stromquelle vollständig
vom Erdanschluss und vom Stromnetz isoliert ist. Es
dürfen ausschließlich vom Hersteller empfohlene
externe Stromquellen verwendet werden. Wenn ein
Leitungstransmitter von einer externen Stromquelle
gespeist wird, die nicht gegenüber dem Erdanschluss
und dem Stromnetz isoliert ist, ist der Leitungstransmitter
nicht vor derVerbindung mit Strom führenden Leitungen
geschützt! Der Leitungstransmitter kann zerstört
werden und außerdem ein Sicherheitsrisiko darstellen.
AUF KEINEN FALL NICHT-ISOLIERTE STROMQUELLEN
MIT DEM LEITUNGSTRANSMITTER VERWENDEN.
•Tragen Sie, wie beim Umgang mit jeder Hoch-
spannungsausrüstung, geeignete Schuhe mit dicken
Sohlen.
Allgemeine
Sicherheitsinformationen
WARNUNG! Lesen Sie diese
Anweisungen und die begleitende
Sicherheitsbroschüre sorgfältig,
bevor Sie dieses Gerät benutzen. Bei
Unklarheiten wenden Sie sich bitte an
Ihre RIDGID Vertriebsstelle, die Sie näher
informiert.
Unkenntnis und Nichtbefolgung der
Anweisungen können zu elektrischen
Schlägen, Feuer und/oder schweren
Verletzungen führen.
BEWAHREN SIE DIESE ANWEISUNGEN AUF!
VORSICHT: Vor dem Transport die Batterien vollständig
entfernen.
Sollten Sie Fragen bezüglich Wartung oder Reparatur dieses
Gerätes haben, wenden Sie sich an Ihren RIDGID Händler,
Ihre zuständige RIDGID Niederlassung oder an Ridge Tool
GEFAHR
•Der ST-510 Transmitter ist für den Einsatz mit einem
SeekTech Leitungssuchgerät/Empfänger vorgesehen.
SeekTech Suchgeräte sind Diagnosehilfsmittel,
die elektromagnetische Felder ermitteln, die von
unterirdischen Objekten ausgehen. Sie sollen dem
Benutzer helfen, diese Objekte aufzunden, indem
sie Merkmale der Feldlinien erkennen und auf dem
Bildschirm darstellen. Da elektromagnetische Feldlinien
verzerrt und gestört werden können, ist es wichtig,
die Lage unterirdischer Objekte zu verizieren, bevor
gegraben wird.
DE
SeekTech ST-510
Bedienungsanleitung

Ridge Tool Company
18
Tools For The ProfessionalTM
SeekTech®ST-510
GEFAHR
•Wenn der Leitungstransmitter über einen 12 V Gleich-
strom Zigarettenanzünderanschluss betrieben wird
und der Leitungstransmitter an eine Strom führende
Leitung angeschlossen wird, ist auch das Fahrzeug
mit dieser Strom führenden Leitung verbunden. Dem
Fahrzeug wird nun eine potentiell tödliche Spannung
zugeführt. Wenn das Fahrzeug geerdet ist, kann der
Leitungstransmitter zerstört werden.
Einsatz mit einer Frequenz von 93 Kilohertz
Die vorgegebene 93 kHz Frequenz hat einen tatsächlichen
Wert von 93696 Zyklen pro Sekunde.
Einige ältere Transmitter arbeiten mit einem anderen Wert
für die Nennfrequenz von 93 kHz, nämlich 93622,9 Zyklen
pro Sekunde.
Wenn Sie feststellen, dass Ihr Transmittersignal bei 93 kHz
von Ihrem Empfänger nicht erkannt wird, stellen Sie die
Frequenz am Transmitter auf 93-B kHz, das ist die Einstellung
für den älteren Wert. Beide Frequenzen, 93 und 93-B sind im
Herstellermenü zu nden.
GEFAHR
•VOR DEM EINSCHALTEN DES GERÄTES IMMER ZUERST
DIE ZULEITUNGEN ANSCHLIESSEN, UM ELEKTRISCHE
SCHLÄGE ZU VERMEIDEN.
•VOR DEM ABKLEMMEN DER ZULEITUNGEN DAS GERÄT
GRUNDSÄTZLICH ABSCHALTEN.
•WENN DIE ZULEITUNGEN NICHT VOR DEM EINSCHALTEN
DES GERÄTES ANGESCHLOSSEN WERDEN, KANN ES ZU
ELEKTRISCHEN SCHLÄGEN KOMMEN.
•Berühren Sie den Transmitter nicht, wenn Sie selbst
gerade direkt geerdet sind.

Ridge Tool Company 19
Tools For The ProfessionalTM
SeekTech®ST-510
Komponenten des Transmitters
Abbildung 1: Komponenten des ST-510
Ansicht von oben
Ansicht von unten
Bedienfeld
Zuleitung mit Clip
Fach
Anzeigebildschirm
Schulterriemen
Handgri
Spiralkabel 15 m gedehnt
Typenschild
Önungen
für Sicherheitskabel
Erdungsstab
Rückansicht
Batteriefach
Buchse für Induktionsklammer Gleichstrom-Anschlussbuchse
Other manuals for SeekTech ST-510
2
Table of contents
Languages:
Other RIDGID Transmitter manuals

RIDGID
RIDGID SeekTech ST-305 User manual

RIDGID
RIDGID NAVITRACK User manual

RIDGID
RIDGID NaviTrack Battery Sonde User manual

RIDGID
RIDGID NAVITRACK User manual

RIDGID
RIDGID SeekTech ST-305 User manual

RIDGID
RIDGID SeeSnake Max rM200 User manual

RIDGID
RIDGID SeekTech ST-305R User manual

RIDGID
RIDGID NaviTrack 10 User manual

RIDGID
RIDGID SeekTech ST-305 User manual

RIDGID
RIDGID SeekTech ST-510 User manual