1. Safety
Avant d’utiliser le booster de démarrage, veuillez lire les instructions et les conserver aux ns de consultation ultérieure.
L’utilisation inappropriée du booster de démarrage risque d’exposer l’utilisateur nal à un danger.
Ce produit contient une batterie au lithium-cobalt (LiCoO2) et doit être chargé : AVANT UTILISATION - APRÈS UTILISATION
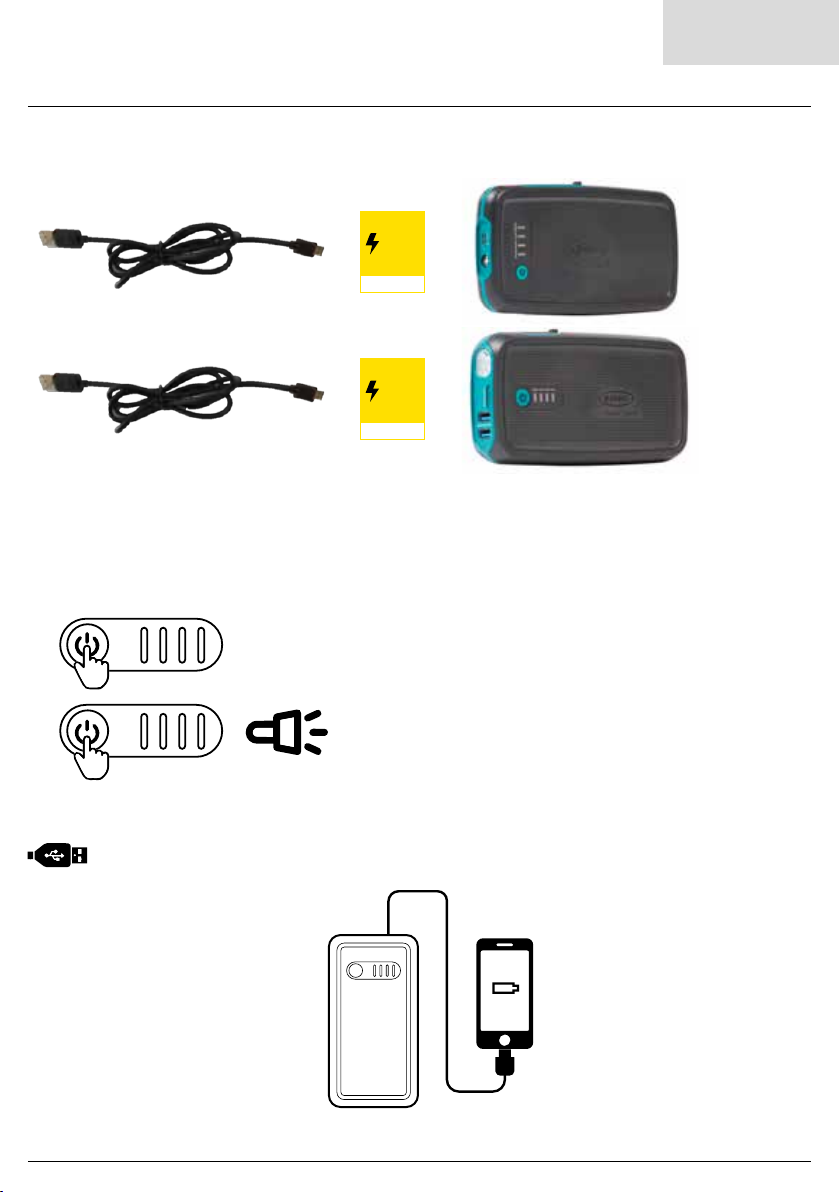
- TOUS LES 6 MOIS. Pour recharger le booster de démarrage, utiliser uniquement le câble de charge USB fourni.
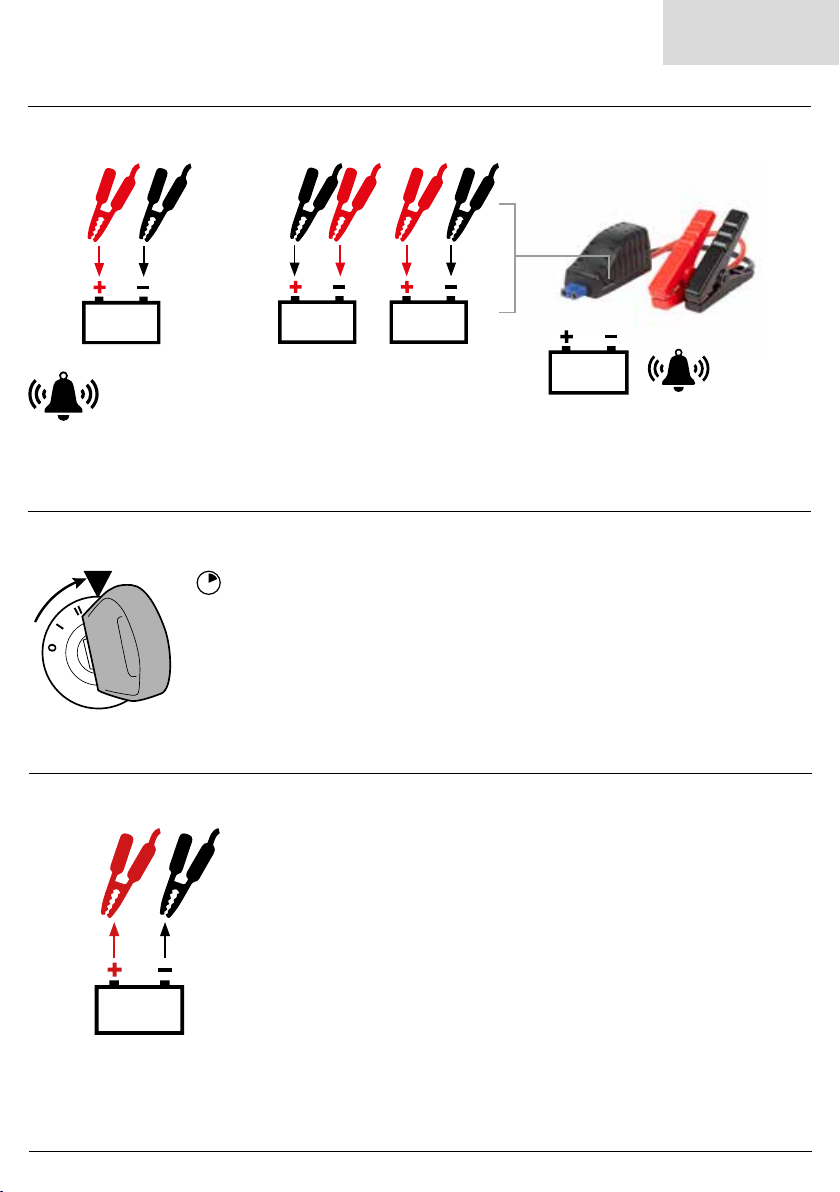
Des gaz explosifs peuvent s’échapper de la batterie pendant le processus de charge. Lors du branchement ou
débranchement des pinces sur/de la batterie, veiller à assurer une ventilation adéquate et à tenir la batterie à l’écart de toutes
ammes et étincelles. Ce booster de démarrage contient une batterie au lithium. Le tenir à l’écart du rayonnement solaire
direct et de toute source de chaleur. Ne pas perforer le boîtier. Ne pas utiliser l’appareil si son boîtier est endommagé
Des gaz explosifs peuvent s’échapper de la batterie pendant le processus de charge. Lors du branchement ou
débranchement des pinces sur/de la batterie, veiller à assurer une ventilation adéquate et à tenir la batterie à l’écart de toutes
ammes et étincelles
RPPL200
RPPL300
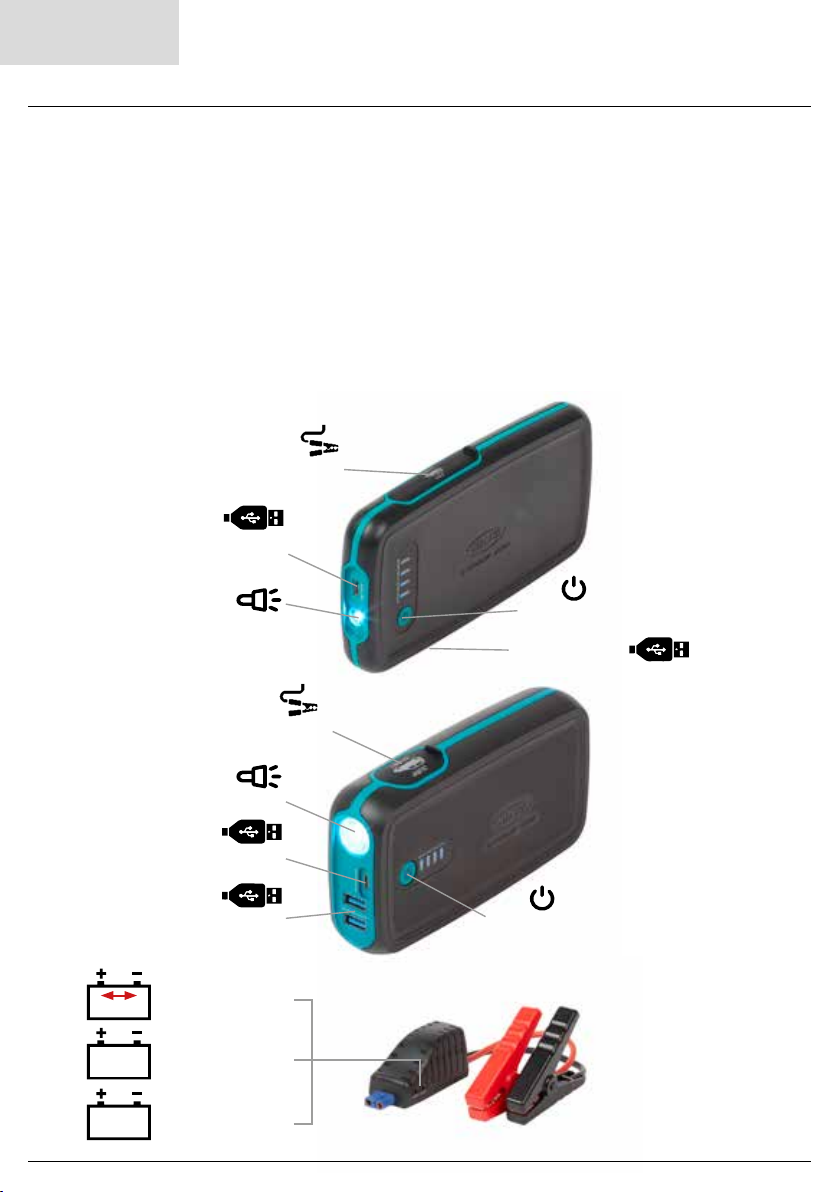
Pinces intelligentes
Port de charge micro
USB
Port de charge micro
USB
USB output socket
Source lumineuse à LED
Source lumineuse à LED
Voyant LED rouge
Voyant LED restant
allumé en vert
Voyant LED clignotant
en vert
Port de câbles volants de
démarrage
Bouton d’alimentation
Bouton d’alimentation
4
<5V
FR
Port de câbles volants de
démarrage
USB output socket