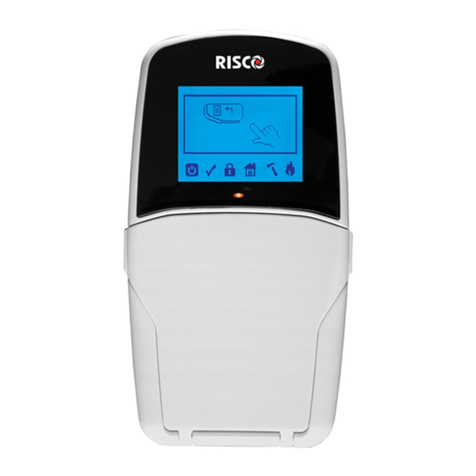
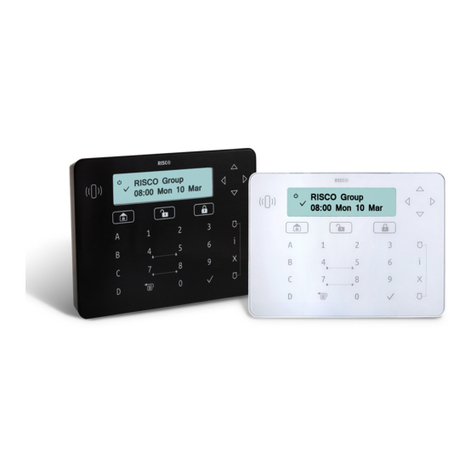
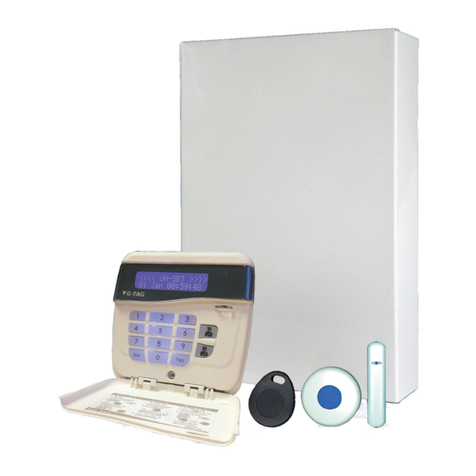
Risco GT 601 Instruction manual

GT 601
Quick User Guide

Page 2
Introduction
The GT 601 Control Panel can control up to 136 zones with 99 individual Users. Control of the system
is via Remote Keypads (RKPs). Control is also possible via Proximity Reader(s). Facility is provided
for Central Station and/or Vo- Comm (message communication) to inform of system status and alarm
events. Vo- Comm messages may be sent to standard land line telephones or mobile telephones.
Please take time to familiarise yourself with the type of equipment fitted to your premises as it will
prove invaluable whilst using this manual.
IMPORTANT USER INFORMATION
If the Control Panel is non EN then all displays will be shown and
“ENTER CODE CHECK” will not be displayed.
All information displays will remain until cleared by the User.
User Code Types
Master Level User Code BS / EN2 (default) - 5678
EN3 (default)- 005678
Programming & Deleting User Codes (By Master code only)
You will be advised by your installation company on the code length required. Under no
circumstances should the actual user code be written down.
If your installation company has given you key switches for the operation of your system, the last five
user codes may have been reserved for use by these key switches.
If your engineer has indicated that some of the user numbers on your system have been
reserved, you should not use them whilst programming user codes. If you do so your system
may be adversely affected.
1)
With the display showing:-
2)
Enter a Master Code, the display will show:-
3)
Press NO five times, the display will show:-
4)
Press YES, the display will show:-
5)
Enter the user number that you wish to program followed by YES,
the display will show:-
If you need to see allocated user numbers, press NO then keep pressing YES to view used or spare
numbers. If spare, press NO.
6)
Either Enter the User Code you require followed by YES
(If you wish to Delete a Code enter six Zeros followed by YES)
01 JAN 19 : 58 : 01
Do you want to . .
SET the System ?
Do you want to . .
Prog. USER CODES ?
Enter User No. - -
+YES or NO: View
Now Enter Code . .
- - - - - - Then YES
ok ?
Code Type
= Maste
r

Page 3
Or
Present your G-Tag to the Reader The display will show:-
7)
Press NO until the Code Type you require is displayed then press YES.
Display will show:- (See full user Instructions for Code Types)
Some examples below:
Set Only Only Allows for the setting of the system.
Main Allows Setting, Part Setting, Area Setting, Zone Remove, System Test, Unsetting.
Master Allows Setting, Part Setting, Area Setting, Zone Remove, System Test, Viewing the Log,
Chime On/Off, Program User Codes, Set Time/Date, Unsetting.
8)
Code Groups are only used in conjunction with controlling outputs. This is dealt with in the
Advanced Code Programming section (See full user Instructions) of this manual, Press YES to
accept None.
9)
The display will show:-
This determines if using this user code to Set or Unset the system will trigger the Vo-Comm.
(For more details on Vo-Comm please refer to the Vo-Comm section). Press NO until the setting you
require is displayed (YES or NO). Then press Yes.
Note: The Vo-Comm will need to be programmed for this option to work (please refer to the Vo-
Comm section in the full user manual).
10)
The display will show, for example:-
11)
If you wish to accept the Username shown press YES and jump to step 15
Or
If you wish to change the Username shown press NO, the display will show:-
12)
You may now enter up to nine characters for the username using the layout shown below for the
allocation of characters.
User31 Name
=User31
User 1 Name
>
Code Group
= None ok ?
VoComm Trigger
= On Ok ?

Page 4
13)
Referring to the character map enter the required character (pressing the 3 key will display 'G',
pressing it again will show 'H' and again will show 'I '), once the correct character is displayed
press YES and the display will move on to the next position.
14)
Continue entering characters (up to 9). If you require a blank space press YES while the '-' is
displayed
15)
As you press YES for the ninth character (or if you have jumped from step 11)
the display will change to:-
16)
If you wish to program other User Codes return to step 4
Or
Press 0 to return to:-
Programming Time & Date
1)
With the display showing:-
2)
Enter a Master Code, the display will show:-
3)
Press NO six times, the display will show:-
4)
Press YES, the display will show:-
5)
Press YES for Auto Adjust for British Summer Time the display will show:-
6)
Press NO to change, display will show:-
7)
Enter the last two digits of the Year then press YES. Display will show:-
8)
Press YES. Display will show:-
9)
Enter the Date in the form dd/mm followed by YES. Display will show:-
10)
Enter the Time using the 24Hr Clock format then YES. Display will show:-
11)
Press 0 to return to Unset.
Do you want to Prog.
USER CODES ?
01 JAN 19 : 58 : 01
01 JAN 19 : 58 : 01
Do you want to . .
SET the System ?
Do you want to Set
DATE / TIME ?
Summer - Adjust is
On ok ?
Year is 20xx
ok ?
Enter Year
20 - - Then YES
Year is 2019
ok ?
Enter Day / Month
- - / - - Then YES
Enter Hrs : Mins
- - : - - Then YES
Do you want to Set
Date / Time ?

Page 5
Setting the System (Using Master or Main)
1)
With the display showing:-
2)
Enter your User code.
The display will show:-
and a continuous exit tone will sound.
(Also See “Pre-Exit Check” in Main User Instructions)
Time will count down
Note: Count down in display depends on the setting mode programmed by the Engineer.
3)
Exit the premises via the authorised exit route.
(The exit tone will change if any detectors are violated during exit).
4)
Once the premises are secure listen, (from outside the protected area) that the exit tone returns to the
continuous tone.
5)
Wait until the exit tone finishes before leaving.
Note: 1 Setting the system with an area code will set only the area(s) associated with that code.
Note: 2 Setting an unset system with a cleaner code will set the full system. Note: 3 To Set the system
with cleaner on-site Press CODE YES YES 0
Unsetting the System
1)
Enter the premises via the authorised entry route (the broken entry tone will sound).
Proceed to the keypad.
2)
At the keypad enter a valid code, the display will show:-
3)
The system is now unset.
Note: If an Area Code has been entered, only the area associated with that code will be unset.
Note: If a Cleaner Code has been entered, only the cleaner area will beunset.
Part Setting the System
(using Master & Main type codes)
1)
With the display showing:-
2)
Enter a Master or Main type code, the display will show for example:-
3)
Press 1, 2 or 3 (for Part 1, 2 or 3), the display will show for example:-
01 JAN 18 : 58 : 01
15
EXIT ! 1
A
ll Zones ON
01 JAN 19 : 58 : 01
01 JAN 19 : 58 : 01
Do you want to . .
Set the System ?
15
EXIT ! 1
Part 1

Page 6
Note: If a Global code (Master or Main) has been used, all areas that are being set will be Part 1 set.
Note: If an Area Main code has been used only Part 1 set for that associated area will occur.
Note: Your installation company will have informed you what zones are being removed (omitted) for the
Part Set you are using. Refer to the System Attributes section for what zones have been programmed as
Part Set zones.
4)
The exit tone may or may not be heard depending on the system settings.
5)
Exit the premises or retire to an unprotected part of the system. At the end of the exit time either the exit
sounder will stop, or a single beep will be emitted (depending on system settings).
Quick Part Setting System
If required there is a quick method to Part Set the system regardless of the level of code being used (except
Control Level). To Part 1 Set the system Enter YES, YES CODE. The system will now start to Part 1 Set.
For Setting and Part Setting the System with Area Code, please refer to the
FULL User Manual
Viewing the Event Log (Master code only)
1)
With the display showing:-
2)
Enter a Master Code, the display will show, for example:-
3)
Press NO three times, the display will show:-
4)
Press YES, the display will show, for example:-
5)
This is the most recent event in the log.
Whilst viewing the Log,
Pressing NO will move back to the previous event. Pressing YES will move forward to the next event.
Pressing 7 will take you to back to the last event of the previous day.
Pressing 9 will take you forward to the first event of the next day.
Whilst viewing a zone descriptor pressing 5 will show the zone number
6)
When you have finished viewing the Log press 0 twice the display will show:-
01 JAN 19 : 58 : 01
Do you want to . .
SET the System ?
Do you want to . .
View the LOG ?
Read Log
01 JAN 19 : 58 : 01
01 JAN 19 : 58 : 01

Page 7
Re-setting the system.
1)
If the system is programmed for Any code reset, enter a User code.
The display will show:-
Note: If NO is NOT pressed then the alarm status will only be displayed for ten seconds.
2)
The display will then show:- Enter your user code again.
3)
The display will show:-
To return to the ‘ALARM’ display, press 0 then NO to view the cause.
4)
Press YES. The exit tone will sound, and the display will show, for example:-
5)
Enter the code again to abort the setting.
6)
The system is now reset
Or
If a higher level of code is required one of the following displays will be shown:-
Use a Master code to reset the system.
Or:-
Call the installation company
Or:-
Call the central station or installation company (as instructed) and quote the number given
Or:-
7)
To reset the system with an Anti-Code, contact the central station or engineer (as instructed by the
installation company) and quote the number given by the display.
8)
The central station or engineer will give a return Anti-Code, (this may contain the YES & NO keys) for
example 5, YES, 2, 4.
9)
Enter this Anti-Code into the keypad.
10)
The system is now reset.
Note: A full and comprehensive User Manual can be downloaded from www.riscogroup.com/uk
Can't Set ! use . .
Master
Can't Set ! use . . Eng.
Code
Can't Set ! use . . Eng.
+Anti Code 1234
Can't Set ! use . . Anti
Code 1234
15
EXIT! 1
All Zones ON
<<<< ALARM >>>>
Press NO to view
! ! Enter Code ! !
! ! ! ! Check ! ! ! !
Do you want to . .
SET the System ?

Page 8
© RISCO Group 12/2019. All rights reserved. 5IN1839 B
Table of contents
Other Risco Control Panel manuals

Risco
Risco LightSYS Instruction manual

Risco
Risco RisControl User manual

Risco
Risco GT 600 Programming manual

Risco
Risco GardTec 350+ User manual

Risco
Risco ProSYS 128 User manual

Risco
Risco gt490x User manual

Risco
Risco GT Plus Instruction manual

Risco
Risco RisControl User manual

Risco
Risco GT 600 User manual

Risco
Risco RisControl User manual
Popular Control Panel manuals by other brands

CWSI
CWSI CP-3000 Operating and installation instruction manual

ENDA
ENDA EOP4-057 Series installation instructions

ABB
ABB CP660-x operating instructions

Skov
Skov DOL 234 Panel Technical user guide

Danfoss
Danfoss VLT LCP 11 installation instructions

jablotron
jablotron JA-80K Oasis installation instructions