Risco RisControl User manual

RisControl
User Manual
Model: RP432KPTZ

2
Contents
INTRODUCTION ......................................................................................................... 5
OPERATING THE RISCONTROL ................................................................................... 6
Entering RisControl ...................................................................................................... 6
RisControl Security Session .......................................................................................... 8
RisControl Main Menu ................................................................................................. 8
RisControl Top Bar ....................................................................................................... 9
Troubles Management ............................................................................................... 11
Communication troubles ........................................................................................... 11
Confirm Troubles (Security Only mode) ..................................................................... 13
Notifications Management ........................................................................................ 14
Software Update Notification ............................................................................... 14
Confirm Alarms .......................................................................................................... 15
SCREEN SAVER ........................................................................................................ 16
Exit/Entry Screen Saver Mode ................................................................................... 16
Screen Saver During Alarm ........................................................................................ 16
FAVORITES SCREEN ................................................................................................. 18
Using the Favorites Screen ......................................................................................... 18
Editing the Favorites Screen ...................................................................................... 19
Adding Shortcut Buttons to the Favorites Screen ................................................. 20
Removing Shortcut Buttons from the Favorites Screen ........................................ 21
Using the Shortcut Buttons from the Favorites Screen ............................................. 22
Incoming Alarm on the Favorites Screen ................................................................... 22
SCENES ................................................................................................................... 24
ROOMS ................................................................................................................... 26
The Rooms Screen ...................................................................................................... 26
Device Buttons Operations ........................................................................................ 28
SECURITY ................................................................................................................ 30
Partitions .................................................................................................................... 30
Arming and Disarming ........................................................................................... 31
Exit/Entry Delay ..................................................................................................... 32
Final Exit Zone ....................................................................................................... 32
One Click Activation of all Partitions ..................................................................... 32
Arming/Disarming Selected or All Partitions......................................................... 33

3
Groups ....................................................................................................................... 34
Detectors ................................................................................................................... 35
Utility Outputs ........................................................................................................... 37
SURVEILLANCE ........................................................................................................38
Cameras Screen ......................................................................................................... 38
PIR CAM ..................................................................................................................... 39
Video Cameras ...................................................................................................... 40
Quick Buttons ............................................................................................................ 41
Using Quick Buttons ............................................................................................. 41
Quick Buttons Tray ............................................................................................... 42
Editing the Quick Buttons Tray ............................................................................. 42
Adding/Removing Quick Buttons from the Tray .................................................. 43
Adding/Removing Multiple Quick Buttons to/from the Quick Buttons Tray ....... 43
VIDEO RECORDER ....................................................................................................45
Video Recorder Live Gallery ...................................................................................... 46
Camera Video Playback ............................................................................................. 47
Time Slider ................................................................................................................. 47
Playback Controls ...................................................................................................... 48
Date Selection ........................................................................................................... 48
Switch back to Live .................................................................................................... 49
HISTORY ..................................................................................................................50
Searching Events ....................................................................................................... 50
Media Events and Video Activities ............................................................................ 51
SETTINGS ................................................................................................................52
General ...................................................................................................................... 53
Wi-Fi Connection .................................................................................................. 53
Screen Brightness ................................................................................................. 53
Session Timeout ................................................................................................... 54
Screen Saver ......................................................................................................... 54
Language .............................................................................................................. 55
System Information .............................................................................................. 55
Users and Permission Settings .................................................................................. 57
Add a User ............................................................................................................ 58
Edit or Delete a User............................................................................................. 59
Editing a User’s Own Details (performed by the User) ......................................... 60
Login to the RISCO Cloud ...................................................................................... 61
4
Date & Time ............................................................................................................... 62
Date & Time Settings ............................................................................................. 62
Maintenance Menu .................................................................................................... 63
Walk Test ............................................................................................................... 64
Siren Test ............................................................................................................... 65
Service Mode ........................................................................................................ 65
Restart Keypad ...................................................................................................... 65
Upload Logs File .................................................................................................... 66
Anti-Code .............................................................................................................. 66
Monitoring Station ................................................................................................ 67
Sounds ........................................................................................................................ 68
Follow Me .................................................................................................................. 69
Adding a Follow Me Recipient .............................................................................. 69
Test or Edit a Follow Me........................................................................................ 70
Service Info ................................................................................................................ 70
RULES ..................................................................................................................... 71
Adding a New Rule ..................................................................................................... 71
Manual Rule .......................................................................................................... 72
Schedule Rule ........................................................................................................ 73
Event Rule ............................................................................................................. 79
Performing Actions ............................................................................................... 82
View Rules Summary ............................................................................................. 86
Set Night Mode ..................................................................................................... 87
Set Vacation .......................................................................................................... 90
EMERGENCY ............................................................................................................ 92
Activating the Emergency .......................................................................................... 92
SPECIFICATIONS ...................................................................................................... 94
UKCA and CE RED Compliance Statement: ................................................................ 95
FCC ID:JE4RP432KPTZ ................................................................................................ 95
FCC Note .................................................................................................................... 95
RF Exposure Statement: ............................................................................................. 95

5
INTRODUCTION
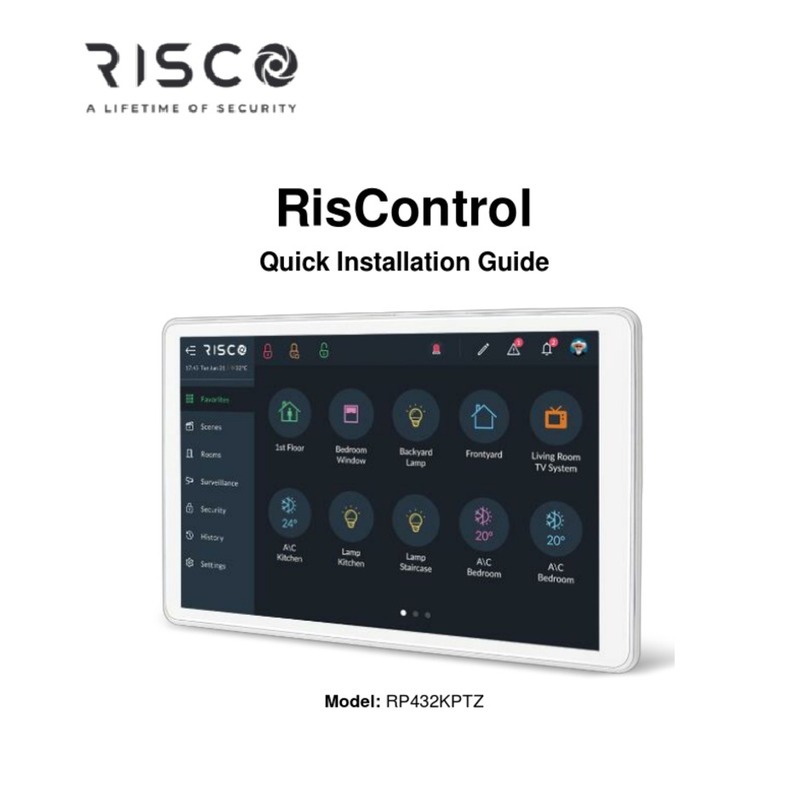
RisControl is a high-resolution Smart Touchscreen Keypad with an intuitive,
easy to navigate user interface. RisControl combines standard keypad functionality
with the ability to operate RISCO’s Smart Home cloud-based solution, and alarm
and video, from one customizable screen.
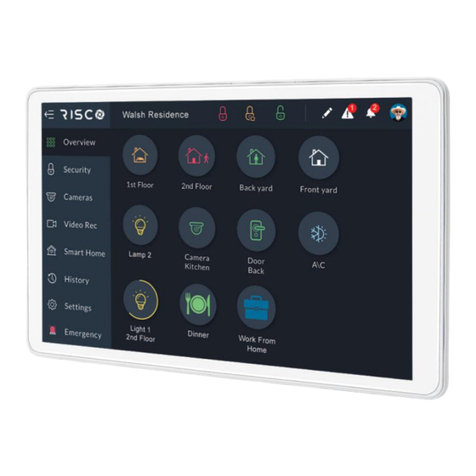
Figure 1: RisControl
The RisControl can be used in 3 operation modes, as follows:
Smart Home + Security –RisControl is connected to a control panel via the RS-
485 bus. For Smart Home operation, RisControl is connected to other RisControl
units and to the RISCO Cloud via Wi-Fi
Smart Home Only–RisControl is connected to other RisControl units (and to the
RISCO Cloud) via Wi-Fi
Security Only- RisControl is connected to a control panel via the RS-485 bus and
to the RISCO Cloud via Wi-Fi

6
OPERATING THE RISCONTROL
Entering RisControl
Upon power up, the RisControl screen saver is displayed (see SCREEN SAVER,
page 16). When the user clicks anywhere on the screen, the RisControl exits the
Screen Saver mode and switches to the “Favorites Screen”.
Notes:
1. If there are no items in the Favorites screen, the Scenes screen will be displayed. If there
are no items in the Scenes screen, the Rooms screen will be displayed.
2. When operating in Security Only mode, you may be asked to enter a PIN CODE.
RisControl will return to the screen saver following a predefined “idle” time (Session
Timeout) during which the screen has not been touched.
Figure 2a: RisControl Smart Home + Security Opening Screen

7
Figure 2b: RisControl Smart Home Only Opening Screen
Figure 2c: RisControl Security Only Opening Screen

8
RisControl Security Session
The “RisControl Security Session” is the duration of time after which the RisControl
will return to the screen saver. It starts after a user enters a valid PIN Code, and it
ends automatically following a predefined “idle” time (Session Timeout) during
which the screen has not been touched. “Session Timeout” is defined in “Settings”
(page 52).
RisControl Main Menu
The RisControl main menu, on the left side of the screen, allows the user to
navigate the various menus as required.
The main menu is always displayed on the screen and the user can decide to use
the expanded mode, where the text description of each menu appears next to the
menu icon, or, in its collapsed mode, where only the icons of the menu items
appear.
Figure 3: Main Menu (expanded mode)
The user can click the button, at the top left corner of the screen to change the
menu mode of display. When the main menu is collapsed, it will appear as shown
below.
Click to collapse
the menu
Main
menu

9
Figure 4: Main Menu (collapsed mode)
RisControl Top Bar
The “RisControl Top Bar” appears at the top of numerous RisControl Screens with
slight variations from screen to screen.
Figure 5: Top Bar of the Opening Screen
The End-User’s Avatar
The End-User’s Avatar appears at the right side of the top bar of all the screens.
You can select your own avatar as described in “Users and Permission Settings”,
“Add a User” section (page 58).
Note: The Avatar is displayed only after a PIN CODE is entered.
Manual termination of the RisControl Session – You can terminate the current
RisControl Session (to prevent the open screen of the RisControl from being used
by an unauthorized user). Click the avatar and then click “Lock Screen”.
Figure 6: Manual Locking of the RisControl Session
Click to expand
the menu
Main
menu

10
- Arm/Partial Arm/Disarm buttons
When clicked, these buttons will Arm, Partial Arm or Disarm all the partitions that
are associated with the user that is currently logged in.
Note: After clicking the Arm/Disarm button, you may be asked to enter a PIN CODE.
- Trouble and Notifications icons
These icons will appear whenever there are one or more troubles or notifications in
the RisControl. Once displayed, they will appear in any of the menu screens.

11
Troubles Management
Click the Trouble icon in the Top Bar of the RISCO Cloud to open a list of all
the Troubles that exist in the system, as show in the example below.
Note: The Trouble icon will appear only when there are Trouble messages.
Figure 7: Troubles List
Communication troubles
The communication Troubles are applicable to the following connections:
RisControl to RISCO Cloud
RisControl to Security Panel
Security Panel to RISCO Cloud
RisControl to Wi-Fi router

12
Figure 8: Communication Troubles Flow
Troubles related to communication failure will be listed first, pinned to the top of
the list.
Click the “See Connection Status” button in the Troubles List; a popup is
displayed, indicating the status of each of the connections.
Figure 9: Communication Troubles Screen

13
Confirm Troubles (Security Only mode)
Note: This section is applicable only to Grade-2 and Grade-3 installations. Users of lower
grade installations can skip to the next section.
Some of the troubles in Grade-2 and Grade-3 installations must be “confirmed” by
the user. When such troubles exist in the system, the “Confirm all troubles” button
will appear at the bottom of the trouble list.
1. Click the “Confirm all troubles” button in the Troubles List.
Note: By clicking the “Confirm all troubles” button, you declare that you have seen
and understood the meaning of all the troubles. A series of screens will be displayed,
concluding with the removal of the troubles (that require confirmation) from the list.
However, only troubles that have been restored can be confirmed. For example, a
Battery Low trouble cannot be confirmed before the battery is replaced with a good one
(and the “Battery Low Restored” flag is set in the system).
The following popup message will be displayed.
Figure 10: Confirm Troubles
2. Click the “OK” button.
All restored troubles will disappear from the Trouble List. The other troubles will
remain in the list.

14
Notifications Management
Click the Notifications icon in the Top Bar of the RisControl to open a list of all
the notifications that are applicable to the RisControl, as shown in the example
below.
Note: The Notifications icon will appear only when there are Notification messages.
Figure 11: Notification List
Software Update Notification
Whenever a Software Update is available, it will be pinned to the top of the
Notifications list. The user can click the “Update Now” button to start the process
or click the “Schedule Update” button for future update.
Note: This procedure is like the one described in “System Information” (page 55).

15
Confirm Alarms
Note: This section is applicable only to Grade-2 and Grade-3 installations. Users of lower
grade installations can skip to the next section.
Some of the alarms in Grade-2 and Grade-3 installations must be “confirmed” by
the user. In this case, the “Confirm all alarms” button will appear at the bottom of
the alarm list.
1. Click the “Confirm all alarms” button.
Note: By clicking the “Confirm all alarms” button, the user declares that they have
seen and understood the meaning of all the alarms.
The following popup message will be displayed.
Figure 12: Confirmed Alarms Screen
2. Click the “OK” button, to approve the confirmation or “Cancel” to cancel it.

16
SCREEN SAVER
The RisControl enters Screen Saver mode at the end of the session timeout in
which the screen has not been touched. In this case, RisControl will display any
one of a variety of screens as selected by the Grand Master (see page 54).
Figure 13: Screen Saver Screen
Exit/Entry Screen Saver Mode
To exit the Screen Saver mode, simply touch the screen. The RisControl will switch
to the “Favorites Screen”.
The RisControl will switch back to the Screen Saver mode at the end of the session
timeout in which the screen has not been touched, or if the avatar/lock screen is
clicked.
Screen Saver During Alarm
Following an alarm that has been triggered in the system, the RisControl will exit
the Screen Saver mode and the following screen will be displayed:

17
Figure 14: Screen Saver during Alarm Screen
Enter your PIN CODE to disarm the alarm.

18
FAVORITES SCREEN
The Favorites Screen allows you to set shortcuts to all frequently used or favorite
activities in one screen, without having to navigate multiple screens to access them.
Using the Favorites Screen
When the user enters the RisControl, the Favorites Screen opens.
Figure 15: Favorites Screen
You can click any of the buttons on the Favorites Screen
You can click Partition buttons to arm/disarm the corresponding partition
You can click Camera buttons to open the camera view screen
You can click the Utility Outputs shortcuts to activate the operation of their
corresponding Utility Outputs.
Notes:
1. Security related activities, such as Cameras and Partitions, require entering a
PIN Code.
2. The Partitions shortcut buttons indicate the status of the partitions using colors and
texts, as described in “Security” (see page 30).

19
Editing the Favorites Screen
A user can edit the Favorites Screen.
Click the pencil icon at the top of the screen to enter edit mode of the Favorites
Screen.
Figure 16: Favorites Screen – Edit Mode

20
Adding Shortcut Buttons to the Favorites Screen
The user can add shortcut buttons to the Favorites Screen.
Note: A Favorites Screen that has at least one shortcut button will be the default screen
that is displayed after exiting the screen saver.
Click “+ Add new button”, the “Add Buttons to Favorites Screen” will be displayed.
Note: The user can return to the empty Favorites Screen, at any time, by clicking
“Favorites” in the main menu.
Figure 17: Favorites Screen – Adding Shortcut Buttons
This screen is divided into the following side tabs:
Partitions
Cameras
Devices
Scenes
Adding Cameras Buttons to the Favorites Screen
1. Click the Cameras side tab to open the list of cameras.
2. Click the bubble icons of the cameras that you wish to add to the Favorites
Screen.
Other manuals for RisControl
3
This manual suits for next models
1
Table of contents
Other Risco Control Panel manuals

Risco
Risco GardTec 350+ User manual

Risco
Risco GardTec 350+ User manual

Risco
Risco gt490x User manual

Risco
Risco GT 601 Instruction manual

Risco
Risco GT 600 User manual

Risco
Risco Gardtec GT480 User manual

Risco
Risco GT 600 Programming manual

Risco
Risco RisControl User manual

Risco
Risco LightSYS Instruction manual

Risco
Risco ProSYS 128 User manual