Pivot Door
Instruction Manual
N2F
IMPORTANT INFORMATION
Be aware toughened glass can shatter if not handled correctly. It should not
be subjected to any sharp impact and it is essential to protect the glass by
resting it on a soft protective surface during installation such as cardboard
or carpeting. It is recommended to wear PPE at all times during installation.
Please make sure the purchaser/end user
completes and returns the guarantee card
which is enclosed with this product. Failure
to validate the Guarantee will mean only the 1
Year Statutory Guarantee will apply.
CONSUMER GUARANTEE
PRE-INSTALLATION CHECKS
1. Check you have the correct product. Please look at the labels on the side of the product packaging.
2. Check all the product components are in the box and the xing kits.
3. Unpack your product and handle it with care.
4. Please check the product for defects or damage, once the installation has commenced we cannot accept responsibility for any defects or damage.
5. Please take time to read these instructions prior to installing your product.
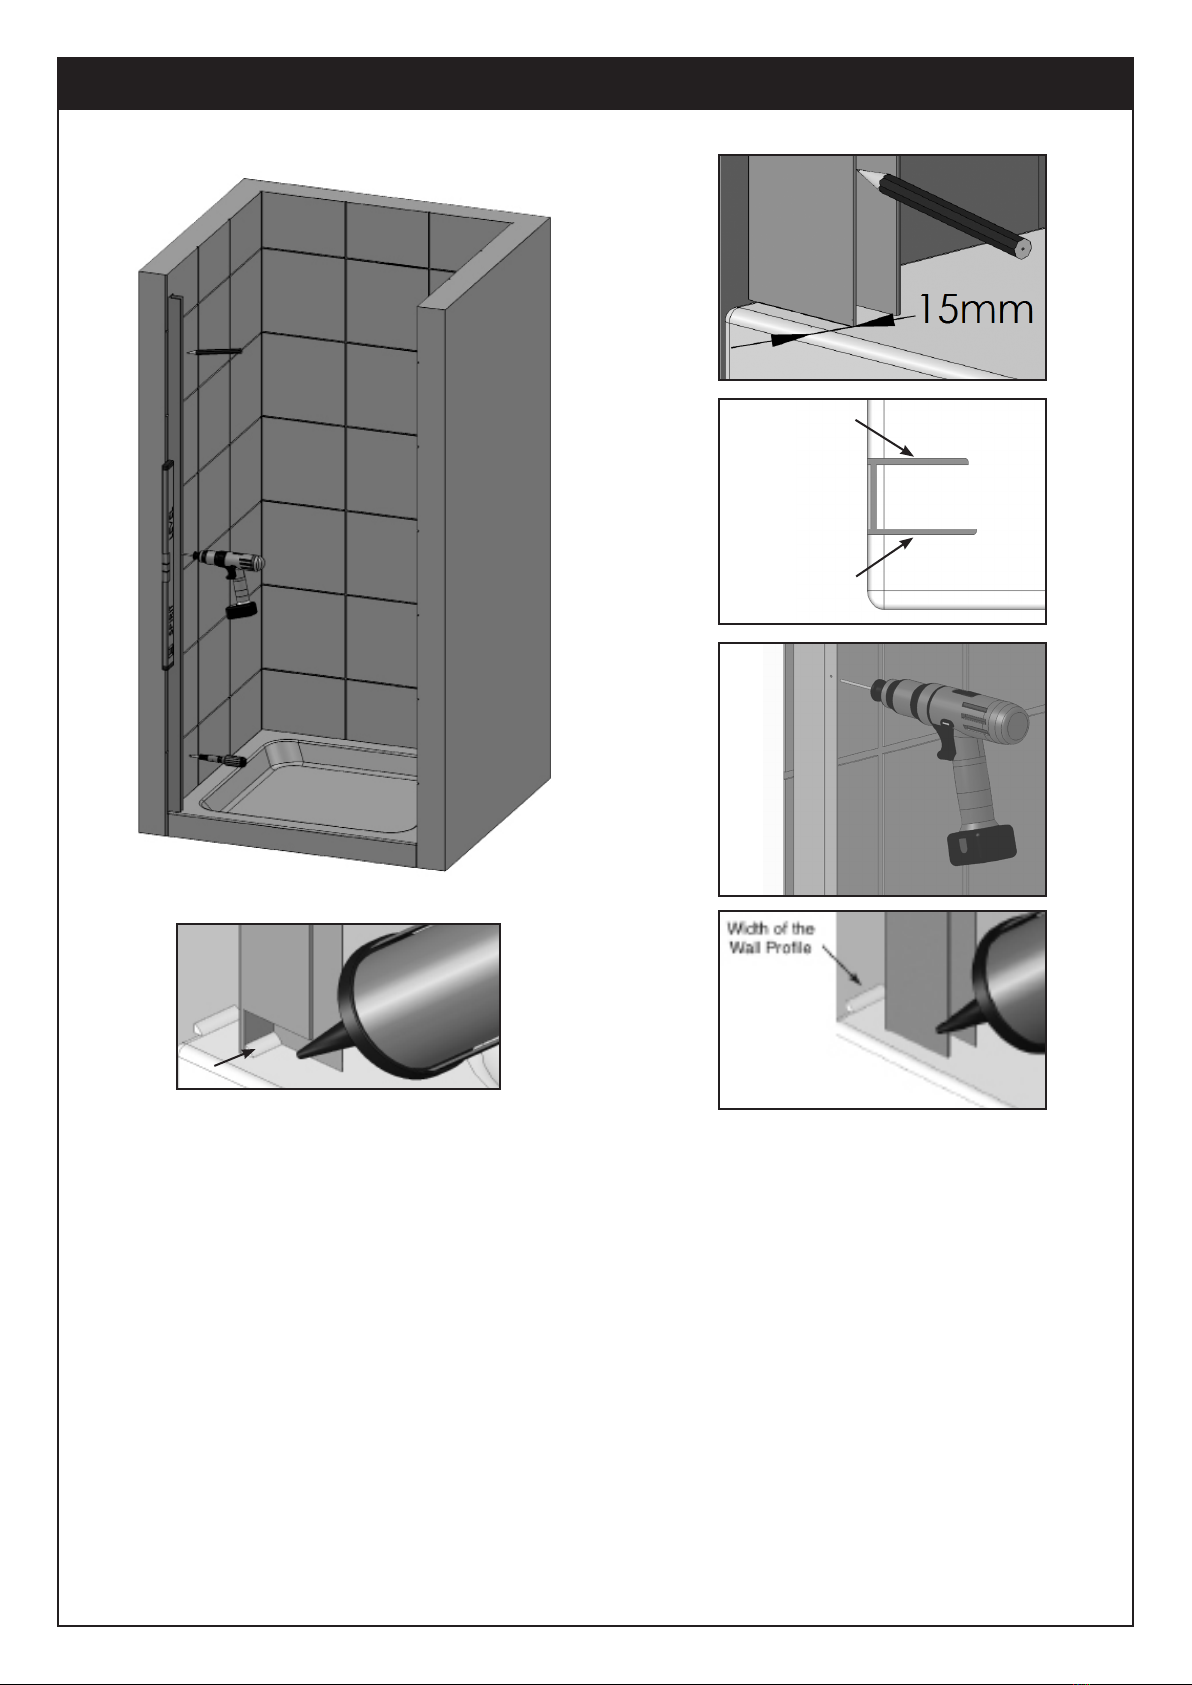
6. Before you commence any drilling check there are no hidden electrical cables and/or water pipes.
7. No attempt should be made to re-work the toughened safety glass.
8. The installation of the product should be performed by two persons.
9. It is strongly recommended that the walls the product is going to be installed on are vertical.
10. It is strongly recommended the product is tted on a tiled surface or similar waterproof surface.
11. It is strongly recommended the walls are tiled and grouted before the product is installed.
12. If the walls and/or the tray are not level you will not achieve maximum adjustment of the product.
13. Pictures used are for illustration purposes only, product designs may alter slightly as a result of continuing product development.
14. We do not stipulate where the European Standard Kite Mark should be positioned on the glass when being factory assembled.
15. Please note that some natural misting may occur when you remove this product from its packaging, due to the addition of the glass protection pre-
coating. If this does occur this can easily be removed with a soft, dry cloth.
Ref: N2F REV2 - SEPT 2019
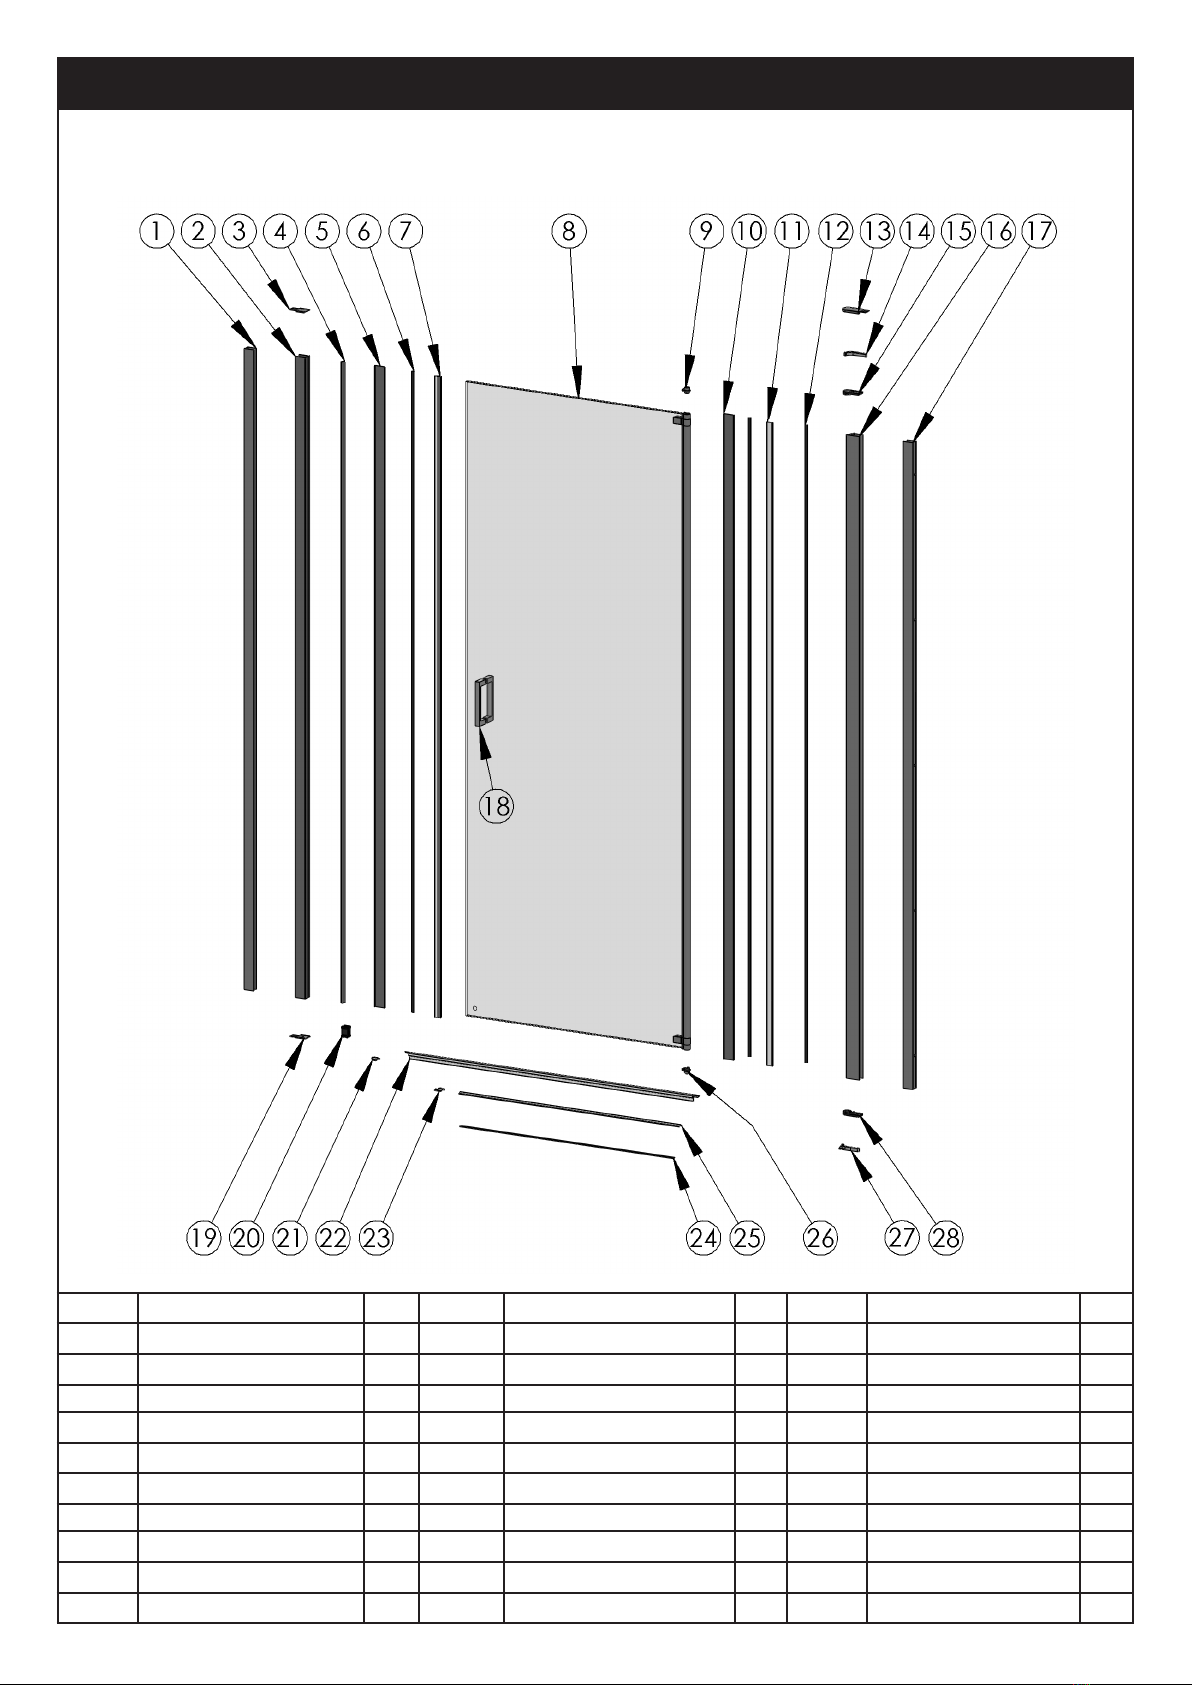
Component Check List: Supplied
Description Quantity
Wall Proles 2
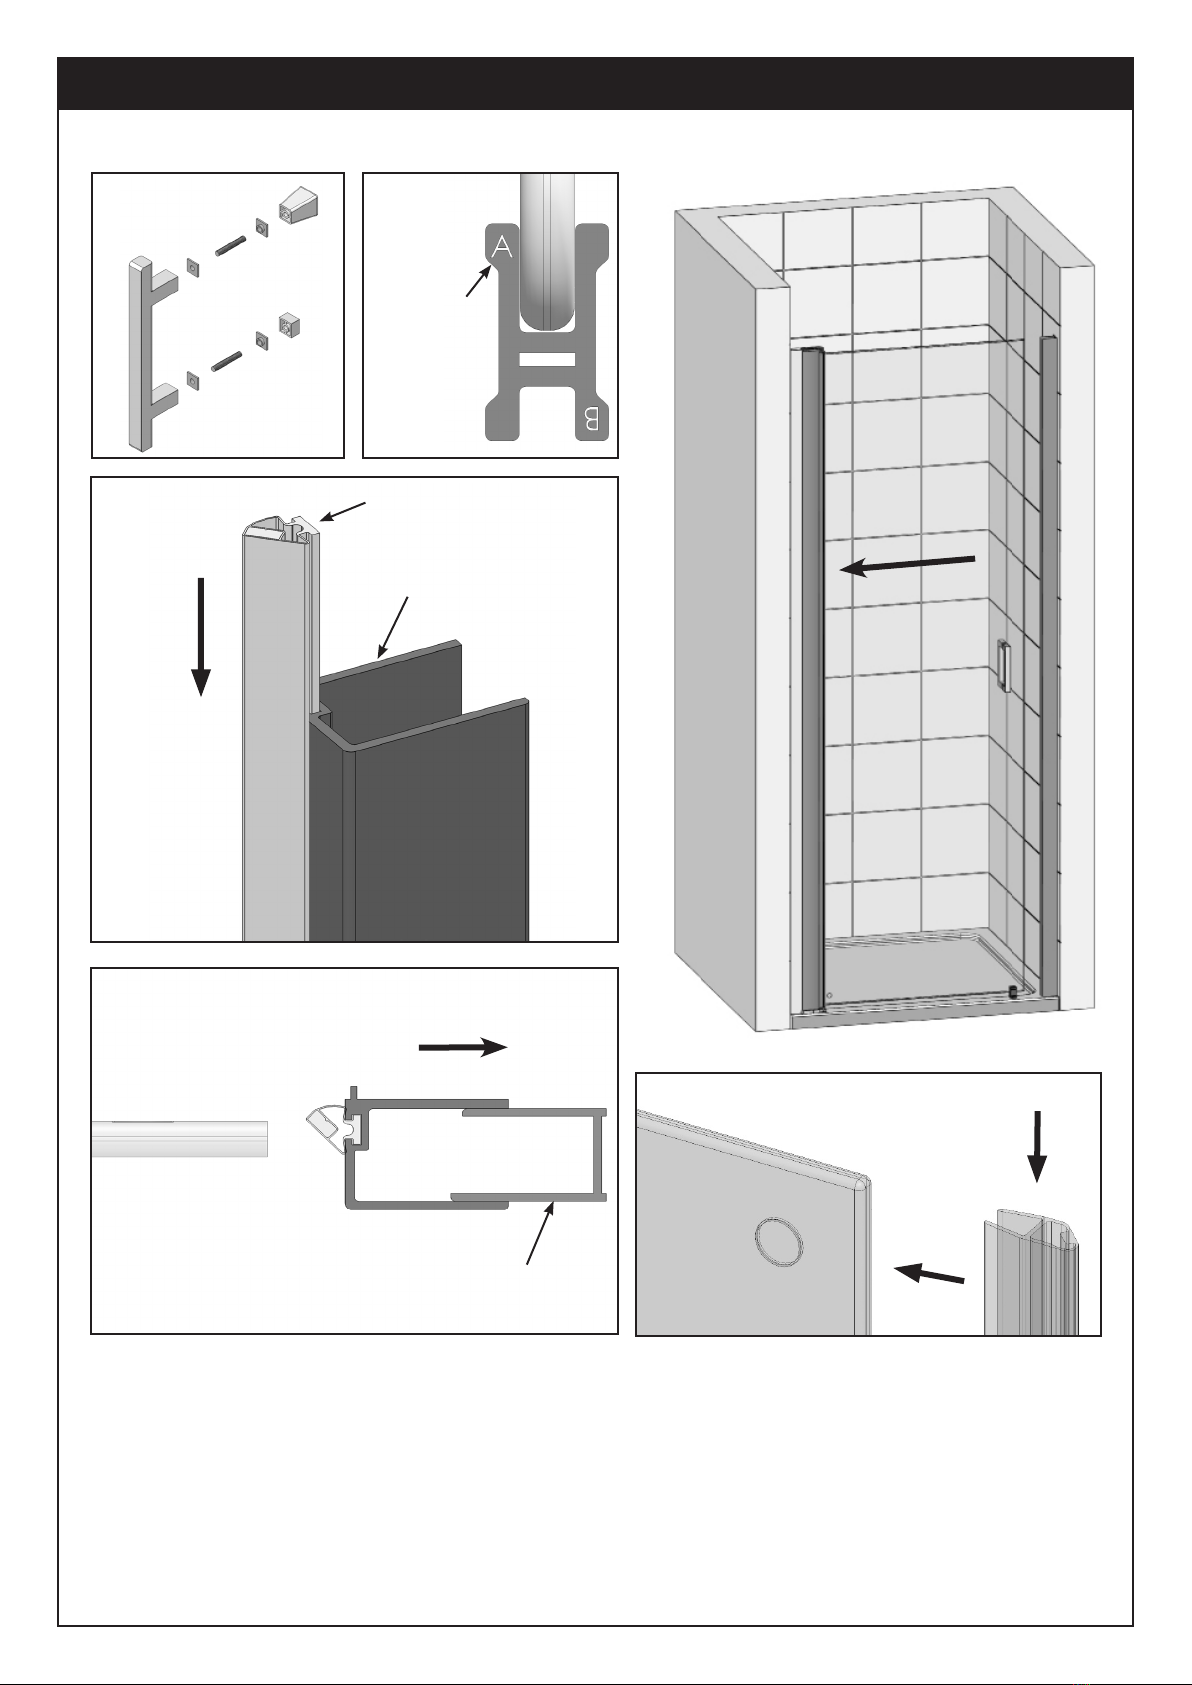
Pivot Door 1
Screw Covers with Adhesive Tape 2
Frame and Door Magnets 1 of each
Vertical Frame (Magnet Side) 1
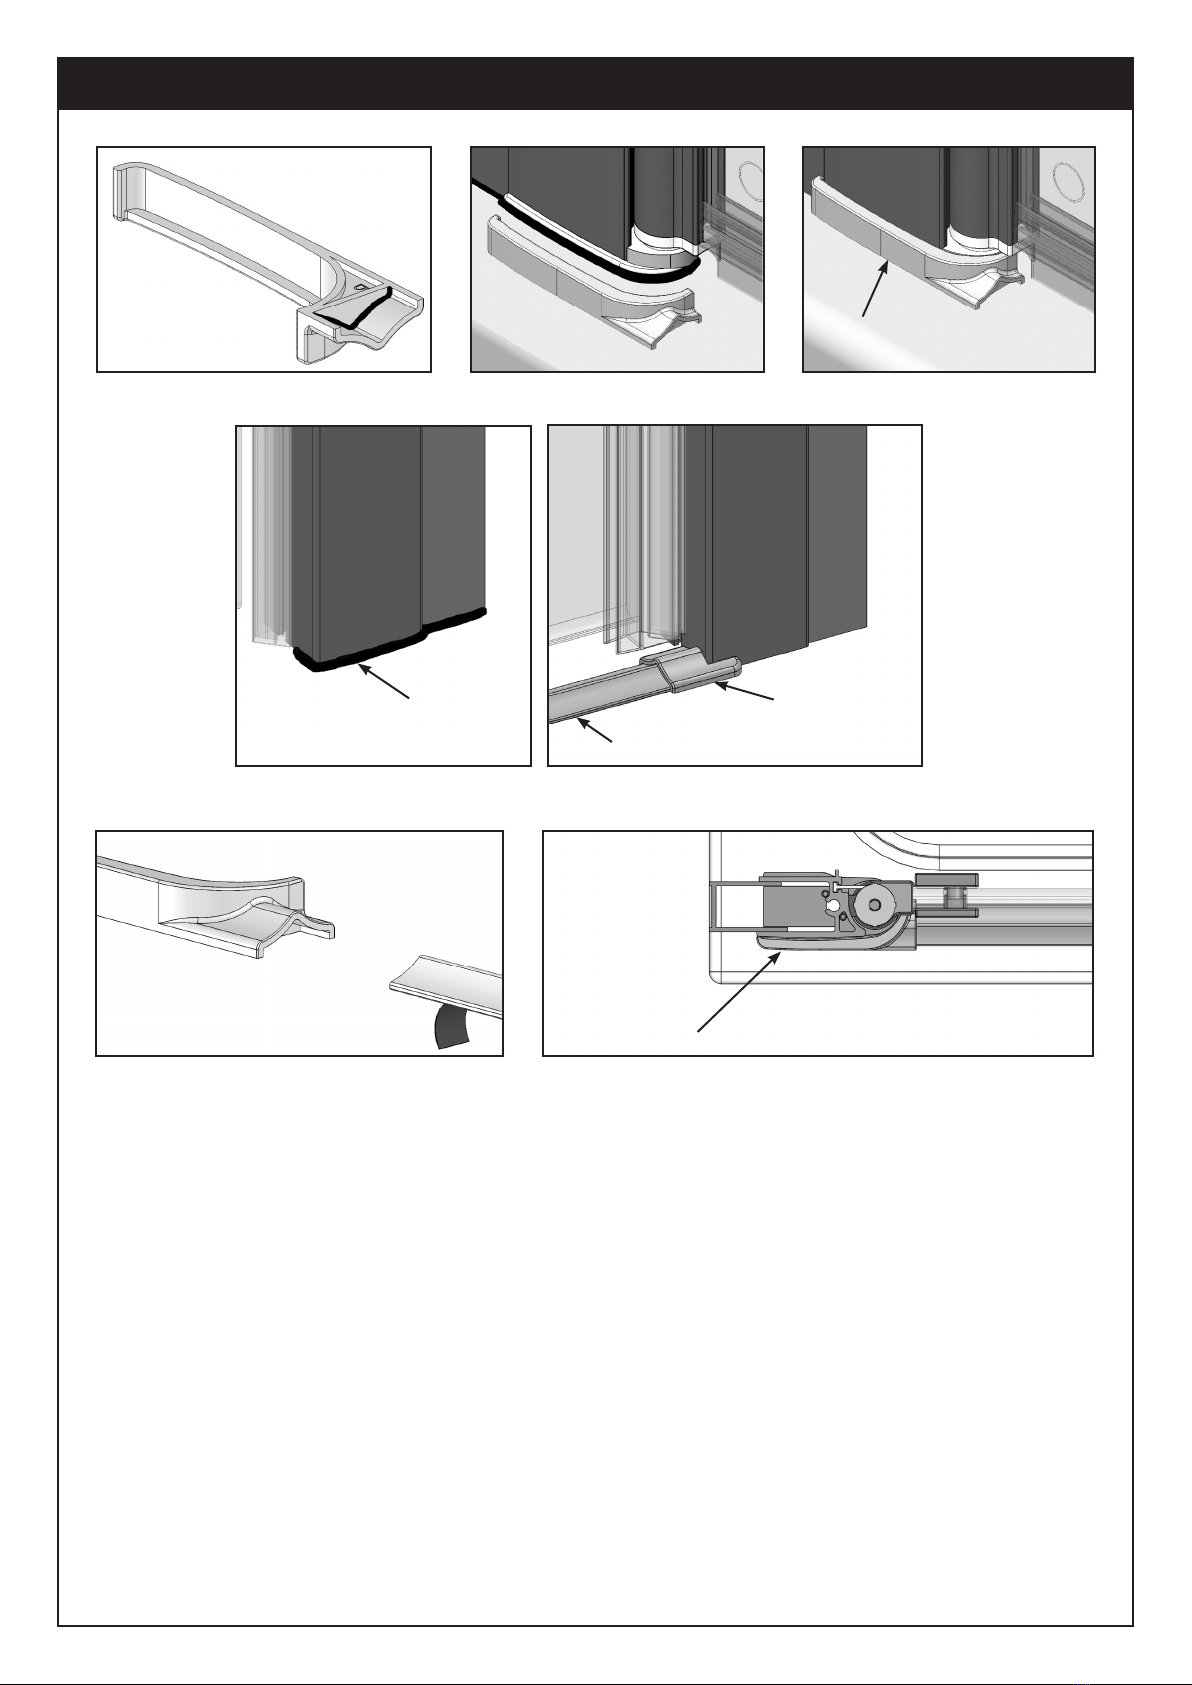
Dam Mouldings (Left and Right Hand) 1 of each
Bottom Rail Joiner (Left and Right Hand) 1 of each
Handle Assembly 1
Bottom Rail and Bottom Seal 1 of each
Fixing Kit Components
Description Quantity
2.5mm Drill Bit 1
Wall Plugs 6
40mm screws 6
9mm Screws 10
Top Caps 3
3mm Allen Key 1
4mm Allen Key 1
Door Setting Block 1
Branding Badge 1
Equipment Check List: Not Supplied
Description
Electric / Battery Drill
6mm Masonry Drill Bit
Sealant Gun
Bathroom Sealant
Screwdriver
Spirit Level
Tape Measure
Pencil
Stanley Knife / Snips