RoadScan Canada DC3 Operator's manual

RoadScan Canada
CAR DVR RSC DC3
USER INSTRUCTION MANUAL

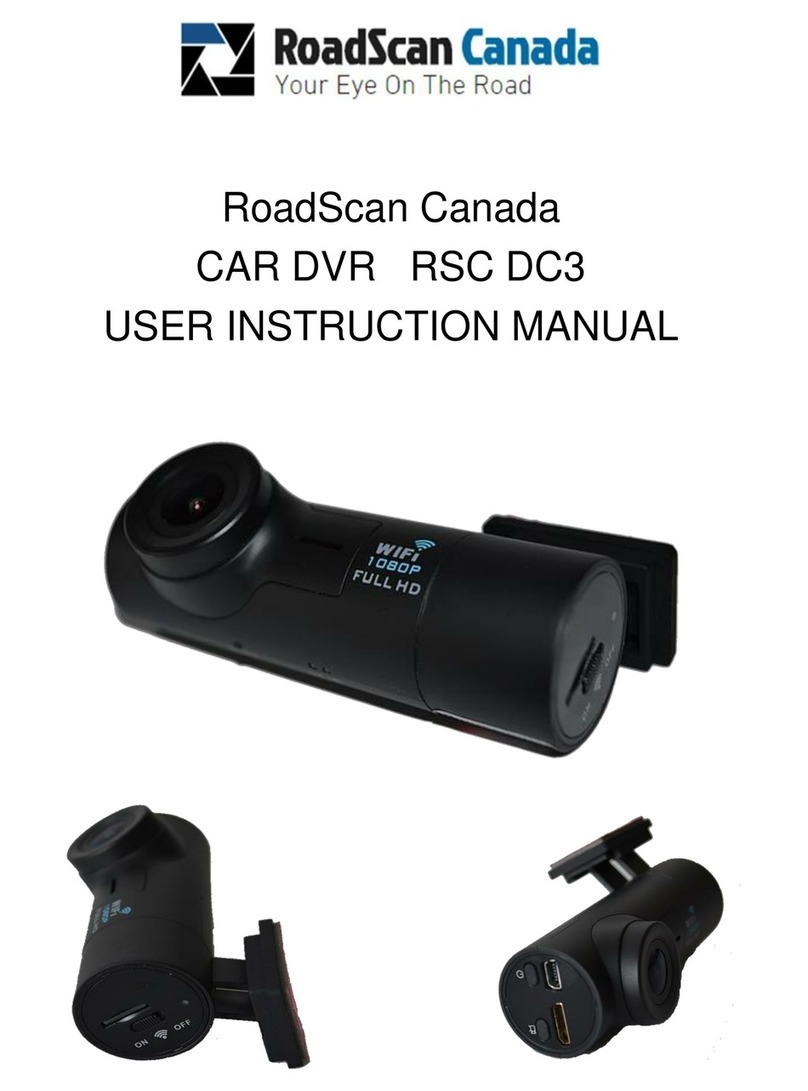
CAMERA LAYOUT
1.Lens 2.WiFi Indicator 3.WiFi On/Off
4.TF Card Slot 5.Power 6.Recording
7.Power/USB 8.HDMI 9.Reset
10.Recording Indicator 11.Charging Indicator
BOX CONTENTS
Hardwire Kit Car Charger USB Cable Fixed plate Suction Cup GPS (Optional)
Page 1

INSTALLATION
1.Insert one HIGH ENDURANCE KINGSTON sd card to the DVR as shown in figure below. ALL
OTHER SD CARDS INSERTED NULLIFIES' THE WARRANTY. PROOF OF PURCHASE AND USE OF
HIGH ENDURANCE KINGSTON sd card IS MANDATORY FOR WARRANTY CLAIM.
Figure 1
NOTE: IT IS IMPORTANT TO FORMAT THE SD CARD ON INITIAL INSTALLATION AND TO DO SO AT
MINIMUM ONCE EVERY 30 DAYS. FAILURE TO DO SO MAY RESULT IN VIDEO NOT BEING
RECORDED.
CHECK SD CARD IS WORKING DAILY. FAILURE TO DO SO MAY RESULT IN VIDEO NOT BEING
RECORDED.
RoadScan Canada Inc DOES NOT TAKE RESPONSIBILITY IF VIDEO IS NOT RECORDED DUE TO SD
CARD ISSUES.
2.Slide the fixed plate to the DVR.
As shown in figure below
Figure 2
Page2

INSTALLATION
3.Attach the fixed plate to the appropriate place on the inside of the windshield with the best placement being
in the middle of the windshield to allow for optimal view and capturing of video . T
he camera is not
designed to be affixed outside of the vehicle at any time for usage.
4.Adjust the visual angle of the DC3. It is recommended to place the camera as much as possible behind the
mirror so that the driver’s view is not blocked.
NOTE: Figure 3 is strictly a representation of the camera
attached to the windshield and not a suggestion of the placement on the windshield. Figure 4
demonstrates an installation behind a mirror, center windshield.
Figure 3 Figure 4
5.Insert the car charger to the USB port. As shown in figure below
NOTE: ENSURE THAT THE HARDWIRE OR 12 VOLT CORD IS INSTALLED CORRECTLY as in Figure 5..
FAILURE TO DO SO MAY RESULT IN NO VIDEO BEING RECORDED. THE WIRE MAY OCCASIONALLY
BECOME LOOSE DURING THE COURSE OF A DAYS DRIVE. IF FOR WHATEVER REASON THE
CAMERA CHIMES OFF, CHECK THE POWER SOURCE FIRST.
RoadScan Canada Inc DOES NOT TAKE RESPONSIBILITY IF THE DVR IS NOT INSTALLED
CORRECTLY OF IF THE POWER CORD COMES OUT.
CHECK WITH YOUR DRIVER ROUTINELY TO DETERMINE IF THE POWER CORD IS BEING UTILIZED.
COMPANIES AND DRIVERS ARE AT RISK OF LIABILITY IF THERE IS NO VIDEO DUE TO LACK OF
ENSURING POWER CORD IS PROPERLY SECURED.
Figure 5
Page 3

OPERATION
1. Power: the camera turns on when the car charger enters the USB port. Hold the power button (on side
with USB port) to turn off/on (if required). If the camera is professionally installed with a hard wire kit
(purchased separately), then the camera will turn on/off automatically when power is supplied or
disconnected. If equipped, vehicles may have automatic power supplied to the 12 volt adaptor at which time
power will automatically be supplied.
2. Recording: After the power turns on, the DVR will automatically start to record. If required, press the
button with the video symbol beside it (on side with USB port) to stop/start recording.
3. WiFi On/Off: Move the switch to the on position to initiate WiFi. A flashing green light will flash beside the
WiFi switch and will turn solid (this may take up to a minute) once ready for connection with phone or tablet..
4. Reset: To reset to the factory default settings, press the reset button (located on bottom of camera) when
abnormal circumstances occur – hitting the reset button will not erase your data.
5. Charging Indicator: Red light at bottom of camera stays on while camera is plugged in.
6. Recording Indicator: When recording, the blue light will flash at the bottom of camera (check to ensure
this light is no, if not, troubleshoot).
7. WiFi Indicator: When WIFI is connecting to a device a green light by the WIFI switch will flash. When the
WIFI has connected a solid green light will be displayed.
8. USB: Used for power or to connect to the computer. If connected to the computer, the USB port will
provide power to the camera to view data (See page 8 for further instructions).
9. HDMI: Using a micro HDMI cord (not supplied), plug the cord into the HDMI port on the camera directly to
a compatible computer monitor, video projector, digital television, or digital audio device to view camera data
without downloading to view the data on the camera.
10. TF card slot: Please insert one TF card before use (the card must be a HIGH ENDURANCE KINGSTON
sd card). It is recommended to format this card prior to use and to reformat this card once a month. If there
is no SD card, an audible sound will alert the user that the card is not installed or not installed correctly.
Page 4

OPERATION FOR SMART CLIENT
1. Download and install APP software onto your cell phone: Search “LinkinEyes” software in Google Play
or App Store, download and install.
Figure 6
2. Connect WiFi: To connect the DC3 WiFi, locate SSID AMBA_BOSS (Amba), wait for the WiFi signal to
indicate that there is a connection, enter password 1234567890, 123456789 or 12345678.
Figure 7 Figure 8
3. Opening App: After connection is established, open Linkin Eyes app, if there is a static spinning
hourglass and failure to open / operate the app, uninstall the app and reinstall the app. **Android phones are
more prone to this than iPhones**.
The camera serial number and a spinning hourglass will be displayed.
Once connected the hourglass will disappear and Real Time Viewing will be
displayed.
Figure 9
Page 5

OPERATION FOR SMART CLIENT
3. View real-time recording: Once opened, live video feed from the DC3 will be displayed and recording.
Figure 9
SETTINGS
1. Video must be stopped prior to viewing data or going to the settings menu. Stop the recording by pressing
the red video camera button (noted in Figure 10)
Figure 10
Page 6

SETTINGS
2. Press the settings button to access the menu (Figure 11).
Figure 11
3. The Setting Menu will display. (Figure 12)
Figure 12
Page 7

SETTINGS
4. FORMAT THE SD CARD - This must be done a minimum of every 30 days. FAILURE TO DO SO WILL
NULLIFY ANY WARRANTY.
IMPORTANT - ALL DATA WILL BE DELETED WHEN FORMATTING, MAKE SURE ALL DATA IS SAVED
PRIOR TO FORMATTING.
5. It is imperative the Time Settings are updated for your time zone. Enter ‘Time Settings’ and the date/time
will be automatically updated. Once complete hit ‘ok’ (Figure 13)
Figure 13
6. Ensure the resolution is set to desired quality (higher resolution reduces record time on sd card),
time/date stamps are ‘on’ for both photo and video and G sensor on medium. All other settings are optional.
Once all settings are complete, tap ‘back’ which will then return to video mode.
Page 8

SETTINGS
Video Resolution: 2560x1080 30P 21:9/2304x1296 30P 16:9/1920x1080 30P 16:9/HDR 1920x1080 30P
16:9/1280x720 60P 16:9/1280x720 30P 16:9/HDR 1280x720 30P 16:9/1920x1080 45P 16:9; Default
2304x1296 30P 16:9
Photo Resolution: 4M(2688x1512 16:9)/9M(4000x2250 16:9)/13M(4800x2700 16:9); Default 4M(2688x1512
16:9)
Video Stamp Date: On/Off/Cancel; Default On
Video Stamp Driver ID: On/Off/Cancel; Default On
Video Quality: S.Fine/Fine/Normal/Cancel; Default S.Fine
Photo Stamp Date : On/Off/Cancel; Default On
Photo Stamp Time: On/Off/Cancel; Default On
Photo Quality: S.Fine/Fine/Normal/Cancel; Default S.Fine
Format Camera Storage Space: Format/Cancel
Time settings
Default Setting: Ok/Cancel
File Sort: Date Ascending/Date Descending/Cancel; Default Date Ascending
Microphone: On/Off/Cancel; Default On
Language: English/Simplified Chinese/Traditional Chinese/Russia (Please note: language is based on your
cell phone language. In another way, if you set your cell phone language to English, it will show English; if set
your cell phone language to Chinese, it will show Chinese)
G-Sensor: Off/Low/Mid/High/Cancel; Default Off
Video Loop Record: 1min/2min/3min/5min/Cancel; Default 2min
Camera Storage Space: Free Space/Total Space
App Version, eg., 1.4.18(420)
Product Name: LinkinEyes
Camera Firmware Version, eg., API 2.0 ambarella v160122
Clear stage folder: Cancel/Ok (clear temporary files). About: show APP copyright
Page 9

PHOTO MODE
To reach photo mode, stop the recording button (figure 10), tap the ’photo button’ (Figure 13) and the camera
switches to photo mode. To take a photo, tap the red photo button.
Figure 13
To return to video mode, tap the grey video button.
FILE PLAYBACK
1. Ensure recording is stopped, then press the file icon in the lower right corner of the screen (Figure 14).
Figure 14
Page 10

FILE PLAYBACK
2. The screen in Figure 15 will be displayed with the list of menus at the top. Tap the menu to view. Videos
that are part of an event or incident will be placed into the ‘event’ folder - these files cannot be deleted on the
camera and can only be deleted on the computer.
Once in the video list, videos will populate (this may take a minute or two depending on the size of file and
the number of files) Figure 16. To view a video, tap the one wished to be viewed. Two options are
presented, view or download. Should download be chosen, the file will be downloaded and saved into your
camera roll or alternatively, files can be deleted in this screen.
The same options are presented for the photograph files, Figure 17.
If no files are present, a message will be displayed showing ‘no files’, Figure 18.
Figure 15 Figure 16
Figure 17 Figure 18
Page 11

TO VIEW YOUR FILES ON YOUR PC
Plug your camera into your PC via the USB cord (provided) into the USB connection. Find the location of the
camera on your PC. The computer should recognize the camera as D, E, F or G drive (or designated drive
for your company), Figure 19.
Open NORMAL folder to view all files on the sd card. From NORMAL, open media001 file to view all media
files on your camera. Videos will show as .MOV, photos as .JPEG and audio as .WAV, Figure 20.
Figure 19
Figure 20
Page 12

RECOMMENDATIONS / TROUBLESHOOTING
● It is recommended to reformat the TF card once a month - FAILURE TO DO SO WILL NULLIFY
YOUR WARRANTY OF ANY KIND.
● If the video captured is long, it is recommended to download and view on the computer as the length
in time to download will be reduced.
●If your data is time stamped for 2015, go back into the settings, click on the time setting, then click
the ‘ok’ button’ the hour glass will spin and stop, once it is done spinning the time WILL BE SET.
● It is recommended to use the fixed plate instead of the suction cup as the suction cup does have
limitations pertaining to extreme heat or cold and may not hold as well as desired.
● To use the suction cup, follow these steps:
1) Attach the suction cup to the DVR (similar to the fixed plate) as shown below:
Figure 22
2) Similar to installing with the fixed plate, it is recommended to place the camera behind the mirror onto
the windshield out of view of the drivers site line. Once attached press the suction cup towards the
windshield and push the switch up on the suction cup towards the windshield, as shown in Figures
23 and 24.
Figure 23 Figure 24
Page 14

CAMERA SPECIFICATIONS
Item
Parameter
Product Size
90*38.4*30mm
Chipset
Ambarella A7
Lens
Fix Focus Lens(150 degrees)
Video Resolution
1296P, 1080P, 720P, HDR 1080P, HDR 720P
File Format
Video mp4, H.264; JPG
USB Port
USB2.0 high Speed
HDMI Output
Support
External Memory card
TF card,up to 32GB
G-sensor
Support
WiFi
Support
Power Source
Two pcs supercapacitors
FEATURES
1. Use the world leading Ambarella H.264 video compression technology, intelligent circulating video
recording without second leakage, and resolution of 1080P 30.
2. Intelligent collision detection and write-protection, which can protect your important data.
3. Built-in WiFi wireless hotspot, external routes are not needed for the service environment
4. Watch real-time video on the recording instrument by smartphone, low latency, high fluency, and
resolution of 1080P.
5. Playback of video file of the recording instrument by smartphone, and resolution of 1080P.
6. Change the setting of the recorder and remote control by smartphone.
7. Support smartphone and tablet PC with IOS/Android platform.
Page 15

NOTICE
This manual is furnished under license and may be used or copied only in accordance with the terms of such
license. Except as permitted by such license, no part of this publication may be reproduced, stored in a
retrieval system, or transmitted, in any form or any means, electronic, mechanical, recording, or otherwise,
including translation to another language or format, without the prior written permission of RoadScan
Canada Inc. The content of this manual is furnished for informational use only and is subject to change
without notice. RoadScan Canada Inc assumes no responsibility or liability for any errors or inaccuracies that
may appear in this book.
DISCLAIMER
Please make sure that you are following the regulations and laws set by your Provinces or State you reside DMV
(Department of Motor Vehicles) prior to mounting your camera for vehicular use. This manual is not designed to
provide any specific legal advice.
• Please check the RSC DC3’s features periodically to ensure that it is operating as required.
• Please use the RSC DC3 as a tool while driving and use driver’s safety while driving.
• Please do not operate the functions of RS2000 while operating a vehicle.
• RoadScan Canada Inc shall not be held responsible for any traffic violations related to the positioning or
improper use of our product.
• Avoid mounting the camera outside of an airbag deployment zone. (please consult your owners manual for
this description).
• Knowing most vehicles run off 12VDC power supply from the battery, please double check our cigarette power
adapters’ output rating before attempting to run power directly from the car battery.
RoadScan Canada Inc. DOES NOT warranty installations. Improper installations will void the warranty.
IMPORTANT
This guide provides important information on the use and operation of your RSC DC3 and the
images/features shown throughout the manual are subject to change without notice due to system and
firmware upgrades. Please read all the information carefully prior to using the product for the best
performance and to prevent any damage/ injuries or misuse of the device(s). Customers are encouraged to
have read through this complete user’s manual before using the RSC DC3. Any unapproved changes or
modifications will void your warranty. Please ensure having a complete understanding of the following
conditions and restrictions.
NOTE: Please check your Provincial Motor Vehicle Act and Regulations pertaining to the use of this camera
while operating your vehicle. It is illegal in most areas to operate a camera while driving.
Page 16

CONDITIONS
Please read the following messages to make sure your working environment is suitable if the camera is
intended for use in the vehicle.
• If your vehicle does not cut off power to your cigarette lighter port, then you may
have to manually turn off or unplug the charger to prevent it from overheating.
• The temperature should be kept between –10˚C and 50˚C (14˚F to 122˚F).
• Avoid putting the product in places where temperature or humidity may change
rapidly.
• Keep it dry, dustless and avoid lens exposure in direct sunlight.
• Keep product away from heat sources such as electric heaters.
• Do not use the camera near harmful chemicals.
• Do not place product near any strong magnetic objects
• It might influence the normal operation of the product if used at the fringe range of
normal temperature. Please turn off the power when not in use.
• Do not disassemble the product.
• Do not shake or strike the product.
• Please obey the local government’s environment protection policy.1
RESTRICTIONS:
When using this product, the safety precautions below must be taken to avoid possible legal liabilities and damages.
Retain and follow all product safety and operating instructions. Observe all warnings in the product operating
instructions. To reduce the risk of bodily injury, electric shock, fire and damage to the equipment, observe the
following precautions.
PLEASE NOTE that under certain circumstances, audio/video recording may be PROHIBITED by law. This device should
be used only in compliance with all applicable Federal, Provincial and local statutes.
• DO NOT disassemble this product. Opening or removing covers may expose you to dangerous voltages or other risks.
Incorrect reassembly can cause electric shock during subsequent use.
• DO NOT use this product unless knowledge of the law, Federal, Provincial and local governments pertaining to use of
the product is fully understood. To infringe on one’s privacy, spying intercepting and related activities are illegal and
punishable by law. Monitoring one’s private activities without consent is illegal and this product is not designed or
manufactured for these purposes.
• DO NOT use this product to carry out any illegal activities such as sneak preview, etc. RoadScan Canada Inc shall not
be responsible for any consequences of illegal conducts made by users.
• DO NOT put the plastic packaging bags in reach of children or babies. Plastic bags can create a suffocation hazard
when placed over the nose and mouth.
• DO NOT plug the AC adapter into the outlet in improper situations.
• Plugging in an AC adapter with wet hands might cause electric shock.
• Plugging in the AC adapter unsteadily might cause fire or electric shock.
• DO NOT cover the AC adapter when it is connected to an outlet, place the adapter near heaters, or put it on the floor
which is equipped with a heater. The above mentioned operation might cause fire or incidents.
Page 17

WARRANTY
RoadScan Canada Inc provides a limited time warranty for this product free from defects in title, materials
and manufacturing workmanship for one year or otherwise specified on the product packaging. This limited
warranty shall commence from the date of purchase. RoadScan Canada Inc products warranty is not
transferable and is limited to the original purchaser. If the product is found to be defective then, as your
sole remedy and as the manufacturer’s only obligation, RoadScan Canada Inc will repair or replace the
product.
This warranty shall not apply to products that have been subjected to abuse, misuse, abnormal electrical or
environmental conditions, normal wear and tear, improper installation, failure to ensure proper usage by
employees, unplugging of the unit resulting in loss of data, or any condition other than what can be
considered normal use. Warranty Disclaimer RoadScan Canada Inc makes no other warranties, express,
implied or otherwise, regarding this product, and specifically disclaims any warranty for merchantability or
fitness for a particular purpose.
All products leaving RoadScan Canada’s facility have been tested and deemed working accordingly and in
good condition. Any mishandling of the product(s) purchased does not provide immediate warranty relief.
RoadScan Canada is the sole determiner if warranty is to be covered.
Photographs and or video will be requested to determine if an item is covered under their respective
warranty.
It is the owners responsibility to read this manual and warranty coverage prior to making a warranty claim.
RoadScan Canada Inc. DOES NOT warranty installations. Improper installations will void the warranty.
RoadScan Canada Inc DOES NOT warranty any DC3 using an unapproved SD card. All other cards, other than the
one noted in this manual will nullify any warranty implied or assumed.
Only HIGH ENDURANCE KINGSTON sd card to the DVR as shown in figure below. ALL OTHER SD
CARDS INSERTED NULLIFIES' THE WARRANTY. PROOF OF PURCHASE AND USE OF HIGH
ENDURANCE KINGSTON sd card IS MANDATORY FOR WARRANTY CLAIM.
LIMITATION OF LIABILITY
The liability of RoadScan Canada Inc, arising from this warranty and sale shall be limited to a refund of the
purchase price. In no event shall RoadScan Canada Inc be liable for costs of procurement of substitute products
or services, or for any lost profits, or for any consequential, incidental, direct or indirect damages, however
caused and on any theory of liability, arising from this warranty and sale. These limitations shall apply
notwithstanding any failure of essential purpose of any limited remedy.
Page 18

Other manuals for DC3
1
Table of contents
Other RoadScan Canada Dashcam manuals
RoadScan Canada
RoadScan Canada DC1 Operator's manual
RoadScan Canada
RoadScan Canada RSC DC3 Operator's manual
RoadScan Canada
RoadScan Canada DC3 Operator's manual
RoadScan Canada
RoadScan Canada DH22 Operator's manual
RoadScan Canada
RoadScan Canada PBC1 Operator's manual

RoadScan Canada
RoadScan Canada PBC1 Operator's manual
RoadScan Canada
RoadScan Canada RS2000 Operator's manual
RoadScan Canada
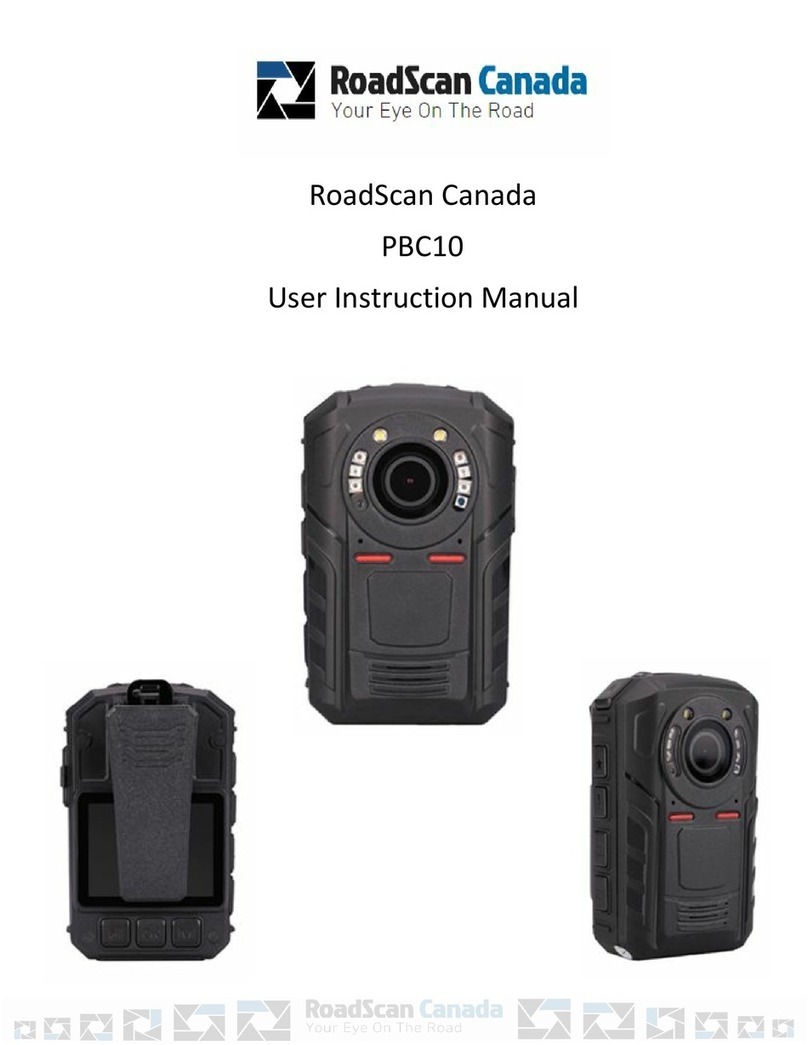
RoadScan Canada PBC10 Operator's manual
