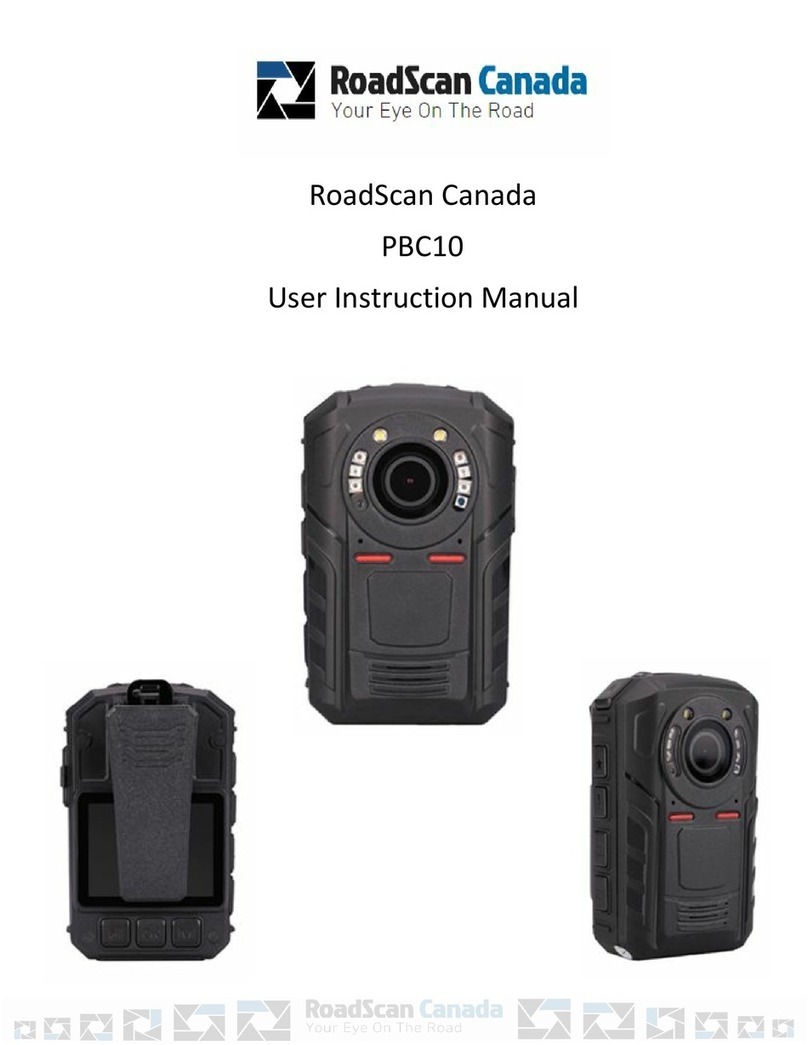
RoadScan Canada PBC1 Operator's manual

/
RadScan Canada
PBC
Ue Incin Manal

/
CAMERA LAO
Pae

/
Pae

/
Pe
Pe O Hold he poe bon on he op igh fo econd a chime and a
WELCOME ceen ill empoail be diplaed The ie of he camea len ill be
diplaed on he main LCD ceen and LED a op of camea ill be olid geen
Pe Off hold he poe bon fo econd A GOODBYE ceen ill empoail
be diplaed and hen he camea ill h d LED ligh ill n off nle camea
i plgged in
Pe O ih Vide Recd When he camea i eed ff hold he ideo ecod
bon fo econd and he camea ill e and begin ecdig fo ome
model
Pe O ih Adi Recd When he camea i eed ff hold he adio bon fo
econd and he camea ill e and begin ecoding adio
Vide
T a a ecdig hile he camea i on and no ecoding pe he ideo ecod
bon on he igh ide of he camea fom he ceen The deice ill ibae and a
oice ill ond indicaing ha he ecoding ha aed The hie ideo camea
mbol a he op lef cone of he ceen ill no be ed and flahing The LED ligh
ill be flahing ed
T a ecdig hile he camea i ecoding pe he ideo ecod bon and
he camea ill ibae and ecoding ill op
T highligh a ecdig hile he camea i ecoding pe he highligh bon
Sa bon on he igh ide of he camea fom he ceen o highligh ecoding
egmen Highligh ill end hen he ideo egmen end ee Spli Time in men
opion Thee ideo ecoding canno be oeien
A gold a mbol ill appea o he lef of he bae life mbol on he op igh
cone of he ceen hile he ecoding i being highlighed
Phgah
Pe he phoo bon o ake a phoogaph Phoogaph can be aken hen he
camea i eihe in o no in ideo ecod mode Thee file ill ho a JPEG file on
o PC
Page

/
Saee Ad B
Recd a aee When the device is ecdg press the audio button to
record a statement The LED ill be flashing ello To stop an audio recording simpl
press the audio button again
Hghgh a ad ecdg hile the camera is recording a statement press the
highlight button to highlight the audio file to be able to access the file faster and more
easil once the audio has been donloaded onto a computer
Oe Ke Re Sch
Hold audio button to toggle beteen P and P If one ke
resolution sitch is activated during recording recording ill temporaril stop and a
ne recording segment ill start Note If an other resolution is chosen prior to using
the oneke resolution sitch see menu options the resolution ill be sitched to
P hen one ke resolution sitch is activated
Bacg f Scee
Press the poer button to back out of an screens You can also use the statement
camera and video record buttons to back out of setting menus and setting sub menus
Seg he Pad
The passord can be changed In the menu option PLEAE ENE O EMEMBE
O NE PAOD A I CANNO BE EIEED IHO ENDING I BACK O
HE MANFACE The ne passord ill be required to vie plaback or via the
computer
Page

/
Plaback
The playback screen can be viewed by pressing the PlaPae bon located to the
left under the LCD view screen when the camera is in standby mode and on main
display screen You will be prompted to enter a password The default password is
times press the OK bon times If you have changed the password use the
Boep and Boedon bon to scroll through other password entry options
and Press OK bon to select password entries
Figure 1
If you make a mistake when entering password hold he Boep bon to move
back one entry and hold Boedon Ke to move forward one entry
Once you have entered the password correctly use the Boep bon to tab left
and Boedon bon to tab right over either video camera or audio file tabs and
press the OK on the selected file tab to view the files
Figure
Page

/
From the selected tab to select which file to view ou can tab over the files using the
Browseup button to scroll left and the Browsedown button to scroll right and press
the OK button to select file Pressing the OK button on a video or audio file will
automatically start playing the file. Use the OK button to pause and pla the file
Use the Browsedown button to fast forward and use the Browseup button to rewind
videos . You can increase the speed of fast forward and rewind b tapping the browse
buttons more than once Video mode has X, X, X, X, X, X, and X speed
both forward and reverse.
Figure 3
One Key Playback
When the camera is in standb mode not recording on the main LCD view screen
press the “one key playback key” otherwise known as the “upbrowse key” to open
the most recentl recorded media file You will first be prompted to enter a password
See plaback for password entr instructions
Page

/
Men Acce
Pre he Men bon oherie knon a he boedon bon locaed o he righ of
he OK bon hile on he main LCD ie creen and camera i in andb mode Yo ill be
promped o ener a paord ee Plaback for paord enr inrcion
Afer paord i enered he folloing creen hold pop p
Figure 4
Thi i he eing men The eing men allo he er o change or rn on fncion
on he camera like camera reolion and br o mee he er preference Camera and
adio recording canno be ed in men mode
Ue he Boedon bon o croll don and Boe bon o croll p hrogh
men iem and OK bon o elec a men iem and ener i b men Finall in he b
men e he Boe bon o croll lef he Boedon bon o croll righ and
he OK bon o elec opion
Pre he Poe bon o back o of b men iho making change o he eing
REMINDER While in he eing men or b men preing he phoo ideo record or
adio record bon ill rern o o he main LCD ie creen
Page

/
Me Oi
Lk a he igh f he me ad he mbe f idicae hich me i ae
●1/32 – Se camea ide eli Options are 2304x12 30P, 120x100p 30p, 1440x100p 30P, 120x20 0P, 120x20 30P, 4x40
0P, 4x40 30P, and 20x40 30P.
●2/32 – Se he file ie This means setting the size of the photo or video. Options are M, M, 10M, 12M, 1M, 20M, 21M, 23M, 2M, 2M,
30M, and 32M
●3/32 – B ff (Burst on allows to snap multiple photos at once upon pressing the photo button). Options are 2, 3, , 10, 1, and 20
photos.
●4/32 - Recd Cam Allows to set the rear screen to show just external mini camera or to both mini cam & main camera when the mini cam is
plugged in
●/32 – Self Time Allows for a timed delay before a photo is taken. Options are and 10 seconds.
●/32 – Qali Ph ali allows to change the quality of the resolution of the photos taken with the camera. Options are S.Fine (Super
Fine), Fine, and Normal.
●/32 – Peecd : A recording can start with up to 30 seconds of footage captured by the camera prior to starting a video recording.
●/32 – P ecd : After stopping a recording the camera will continue to record for the set amount of time. Press the record button a second
time to manually cancel a set delay. Options are off, seconds and, 1 and 10 minutes.
●/32 – CaDV mde : Leave off as this is not a feature on this camera.
●10/32 - L Recd : This device does not have Loop Record. Leave this function off.
●11/32 – Sli Time : Automatically splits video recordings into segments of set times to more easily manage recordings. Each egme ill be a
eaae media file Options are off and 3, , 10, 1, 30, and 4 minutes.
●12/32 – Slide Sh : When viewing a photo file in Playback mode in photo files tab, photos will automatically be scrolled through .
●13/32 – Ifaed : Manual or Automatic: While under dark circumstances, infrared LED will help record clear image or video in HD.
●A : In low light situations (3 Lux), 4 IR LED will be turned on automatically, camera switches to infrared filter lens, video image
turns black and white. When brightness increases again, the IR LED turns off, and image becomes colorful again.
●Maal : When night vision is needed, Press the Flashlight/Infrared button to switch to infrared mode, 4 IR LED will be turned on,
video image will turn black and white. When night vision is no longer needed press the IR button to switch out of night vision.
●14/32 – Mi deec : When turned on, exit the menu to the main display screen and press record. Video recording will start if any
movements are detected and will continue to record if there is motion. If the camera does not detect a motion for 10 seconds, recording will
stop and only record again if there is motion detected. Stop this feature by pressing the record button again or turning this function off.
●1/32 – Recd Waig : the voice/vibrating that advises the user that video recording has been activated. Options are On/Off.
●1/32 – GPS : Having GPS on allows to connect to GPS satellite as to view location of where videos recordings from camera were taken on a
computer. Options are On and Off.
●1/32 – TimeZe Default is set for GMT. This setting allows to change the time zone the camera is set for. PST is -, EST is -4.
●1/32 – Lagage : Allows user to switch the language of the device.
●1/32 – Scee Sae : Allows user to set the amount of time before the device’s screen saver is on. Options are off, 30 second and, 1, 3, and
minutes.
●20/32 – LCD Bighe : Allows user to change the brightness of the device’s screen. Options are low and high.
●21/32 – A e ff : Turning this function on will cause the device to turn off after the selected time when in standby mode. Options are
30 seconds, 1, 3, and minutes.
●22/32 – LED Ligh : If on LED light will change colors depending on what the camera is doing (for example: recording). If off no LED indicators
will show.
●23/32 - Whie LED Enables a white led to be used as a flashlight or as a flashing light (beacon)
●24/32 – Ke e : When this is on the user will hear a key tone when pushing buttons on the device. Options are on and off.
●2/32 – Vlme : Altering this affects the device’s sound levels including key tone and video/audio playback files.
●2/32 - Cdig fma : H.24 - compression factor of files allows for twice the files in less room - essentially doubling the gb’s on the camera
●2/32 – Daeime am : Change the date and time of the device.
●2/32 – ID Seig : Allows to designate the camera to a specific person by entering a unique user ID.
●2/32 – Pad Having this setting on will cause the password requirement before entering menu and playback screens. Options are on
and off
●30/32 – Chage Pad : Allows the user to change password. User must enter old password and then the new password followed by
confirmation of new password using the Scroll and OK buttons. *Note: remember your new password as it is non-recoverable and will be
required to be sent back to manufacturer for resetting. This is a protection measure against unauthorized viewing of your data should the
camera be lost.
●31/32 – Defal Seig : Allows the user to reset the device to the default settings.
●32/32 – Vei : shows the version of the device.
Page

/
Special Features
Infrared: Press the infrared button to manall trn the IR on if the camera is set to
atomatic IR then there is no need to trn the IR on manall hen IR is on to red lights
ill appear on the front of the camera
Flashlight (White LED): Hold the infrared button for seconds for the flashlight to trn on
hold again for seconds to trn off the flashlight
White Beacon: Hold the photo button for seconds to trn on flashing hite beacon Hold
again for seconds to trn it off
Charging
Plg the docking station into the otlet plg and USB cable
A ble light shold appear on the top right side of the camera NOTE It is recommended to
trn the camera off dring charging
Yo can also plg the USB directl into the cameras USB port to charge
It takes approimatel hors for the camera to charge
NOTE If the camera is on hile charging and o nplg the camera from the poer sorce
ia the docking station or USB port the camera ill poer off
Opening Files On Computer
1. Plg the camera into the compter ia the USB cable
On the camera screen o ill be prompted to enter or passord see Plaback for
instrctions for passord entr
Figure 5
Page

/
Afer he paord ha been ccefll enered he camera creen hold ho a
comper ih a bllee image on i
Figure 6
The comper hold recognie he camera a a D E F or G drie
Locae drie on comper and open i
Figure
Once opened here hold be o folder DCIM and GPS Plaer and one file
OPERATIONDIARY hich i a log of he dae and ime of he camera operaion For
eample recording phoo capre and poer
Page

/
Open DCIM then open MEDIA
Figure 8
8. Now choose the file that your wish to view MP JPEG WAV
Figure
Page

/
D F
Select a file or files on compter and press delete ke like an thmb drie Or sae to or
compter
GPS F
1. Back ot of the MEDIA file and open the second folder GPS Plaer
Plaeree shold be in this folder
Choose plaeree
The GPS component ill open and files shold sstematicall sho p ith
satellite images beside each file Files sho p on the bottom right of the
screen If there is no satellite image on the file it means that no GPS as
captred
Figure 0
To ie a file highlight the file and hit the pla btton this ma take a fe
seconds to a minte depending on the sie of the file
Depending on the sie of the file ill depend on the length of time it takes to
donload the GPS data
To delete these files go back to the folder of DE F or G highlight and delete
selected files
To sae files highlight coppaste and store in a ne folder
REMEMBER O EJEC HE BOD CAMERA PROPERL FROM OR COMPER
Page

/
DASH CAM
The i ca be ed a a dah cam i ehicle I ill
cae ide eed ad GPS T e hi feae ece he
dckig ai he dah f ehicle facig he cec
dieci Place he camea i he dckig ai The
camea i ceced ehicle ia ciga lighe Hi he
ide ecd b he eied a aed Ne he
camea i beig chaged hile i he dckig ai
Figure 1
Ree
Shld he i feee icall b hig ma b a he ame ime imila
he heel f deah a cme lcaed i he HDMI i a mall ee b Ue a
bjec a ae cli imila h hi b The camea ill he be ee N file ae
l a file ca l be deleed ff a cme
LED LIGHTS
GREEN LIGHT The camea i
RED BLINKING LIGHT The camea i i ide mde
BLUE LIGHT The Camea i Chagig
M Caea Aace
The mii camea aachme ca be ed f e f edced iibili Siml lg he
USB fm he mii camea i he USB ad e he ecd b he mii camea
a ad ecdig
NOTE Whe lggig hig USB fm he mii camea i he PBC he USB hld eail
lg i meaig hee hld be eceie hig f he cd i he PBC
Ph ca be ake hile i ide mde he ig he mii camea
Page

/
Tbe
●If ge he ad incec hile aeming cnnec ill hae eihe
nlg and lg he camea back in he cme n he e ff and n again
eene ad
●If you press the hoo bon or oe bon while on the password screen that
appears when the camera is plugged into the computer, the camera will change to the
main LCD view screen and you will be able to use all the camera’s functions. NOTE: If
the camera is no ecoding (either audio or video) while plugged into a computer and
you unplug the camera, the camera will n off . However, if you unplug the camera
from a computer while it is recording (either audio or ideo) the camera ill no rn
off .
NOTICE
Thi manal i fnihed nde licence and ma be ed cied nl in accdance ih he em f ch
licene Ece a emied b ch licene n a f hi blicain ma be edced ed in a eieal
em anmied in an fm an mean elecnic mechanical ecding heie inclding
anlain anhe langage fma ih he i ien emiin f RadScan Canada Inc The
cnen f hi manal i fnihed f infmainal e nl i bjec change ih nice RadScan
Canada Inc ame n enibili liabili f an e inaccacie ha ma aea in hi bk
DISCLAIMER
Pleae make e ha ae flling he eglain and la e b Pince DMV Deamen f
M Vehicle i mning camea f ehicla e Thi manal i n deigned ide an
ecific legal adice
Pleae check he RSC PBC feae eidicall ene ha i i eaing a eied
Pleae e he RSC PBC a a l hile diing and e die afe hile diing
RadScan Canada Inc hall n be held enible f an affic ilain elaed he iining
ime e f dc
Aid mning he camea ide f an aibag delmen ne
Kning m ehicle n ff VDC e l fm he bae leae dble check cigaee
e adae aing befe aeming n e diecl fm he ca bae If he l i c
and hen hadied a ehicle he aan i nll and id T chage in he ehicle ONLY e l
ided
IMPORTANT
Thi gide ide iman infmain n he e and eain f RSC PBC and he imagefeae
hn hgh he manal ae bjec change ih nice de em and fimae gade
Pleae ead all he infmain caefll i ing he dc f he be efmance and een an
damage injie mie f he deice Cme ae encaged hae ead hgh hi cmlee
e manal befe ing he RSC PBC An naed change mdificain ill id aan
Pleae ene hae a cmlee ndeanding f he flling cndiin and eicin
NOTE Pleae check Pincial M Vehicle Ac and Reglain eaining he e f hi camea
hile eaing ehicle I i illegal in m aea eae a camea hile diing
Page
CONDITIONS

/
Pleae ead he fllig meage make e kig eime i iable if he camea i
ieded f e i he ehicle
If ehicle de c ff e cigaee lighe he ma
hae maall ff lg he chage ee i fm eheaig
The emeae hld be ke beee C ad C F F
Aid ig he dc i lace hee emeae hmidi ma chage
aidl
Kee i d dle ad aid le ee i diec ligh
Kee dc aa fm hea ce ch a elecic heae
D e he camea ea hamfl chemical
D lace dc ea a g mageic bjec
I migh iflece he mal eai f he dc if ed a he fige age f
mal emeae Pleae ff he e he i e
D diaemble he dc
D hake ike he dc
Pleae be he lcal geme eime eci lic
RESRICIONS
Whe ig hi dc he afe ecai bel m be ake aid ible legal liabiliie ad
damage Reai ad fll all dc afe ad eaig ici Obee all aig i he dc
eaig ici T edce he ik f bdil ij elecic hck fie ad damage he eime
bee he fllig ecai
PLEASE NOTE ha de ceai cicmace adiide ecdig ma be PROHIBITED b la Thi deice
hld be ed l i cmliace ih all alicable Fedeal Picial ad lcal ae
DO NOT diaemble hi dc Oeig emig ce ma ee dage lage
he ik Icec eaembl ca cae elecic hck dig bee e
DO NOT e hi dc le kledge f he la Fedeal Picial ad lcal geme eaiig
e f he dc i fll ded T ifige e iac ig ieceig ad elaed aciiie ae
illegal ad ihable b la Miig e iae aciiie ih ce i illegal ad hi dc i
deiged mafaced f hee e
DO NOT e hi dc ca a illegal aciiie ch a eak eie ec RadSca Caada Ic
hall be eible f a ceece f illegal aciiie cdced b e
DO NOT he laic ackagig bag i each f childe babie Plaic bag ca ceae a ffcai
haad he laced e he e ad mh
DO NOT lg he AC adae i he le i ime iai
Plggig i a AC adae ih e had migh cae elecic hck
Plggig i he AC adae eadil migh cae fie elecic hck
DO NOT ce he AC adae he i i ceced a le lace he adae ea heae i
he fl hich i eied ih a heae The abe meied eai migh cae fie icide
Page

/
AAN
RoadScan Canada Inc warrants that this product will be free from defects in title materials and manufacturing
workmanship for one ear or otherwise specified on the product packaging This limited warrant shall
commence from the date of purchase RoadScan Canada Inc products warrant is not transferable and is
limited to the original purchaser If the product is found to be defective then as our sole remed and as the
manufacturers onl obligation RoadScan Canada Inc will repair or replace the product This warrant shall not
appl to products that have been subjected to abuse misuse abnormal electrical or environmental conditions
normal wear and tear or an condition other than what can be considered normal use Warrant Disclaimer
RoadScan Canada Inc makes no other warranties expressed implied or otherwise regarding this product and
specificall disclaims an warrant for merchantabilit or fitness for a particular purpose
RoadScan Canada is the sole determiner if warrant is covered
LIMIAIN F LIABILI
The liabilit of RoadScan Canada Inc arising from this warrant and sale shall be limited to a refund of the
purchase price In no event shall RoadScan Canada Inc be liable for costs of procurement of substitute products
or services or for an lost profits or for an consequential incidental direct or indirect damages however
caused and on an theor of liabilit arising from this warrant and sale These limitations shall appl
notwithstanding an failure of essential purpose of an limited remed
Other manuals for PBC1
2
Other RoadScan Canada Dashcam manuals
RoadScan Canada
RoadScan Canada DC3 Operator's manual
RoadScan Canada
RoadScan Canada DH22 Operator's manual
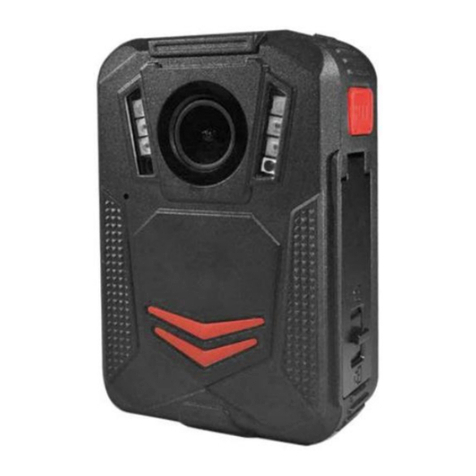
RoadScan Canada
RoadScan Canada RS2000 Operator's manual
RoadScan Canada
RoadScan Canada DC1 Operator's manual
RoadScan Canada
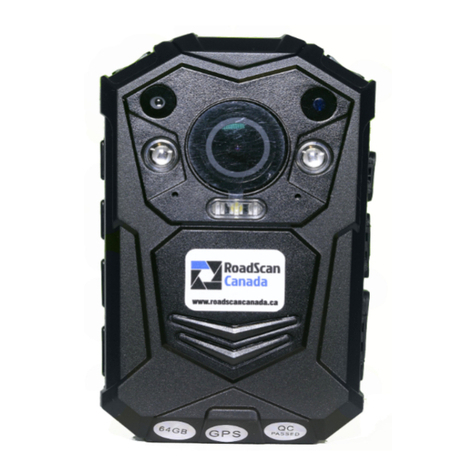
RoadScan Canada PBC1 Operator's manual
RoadScan Canada
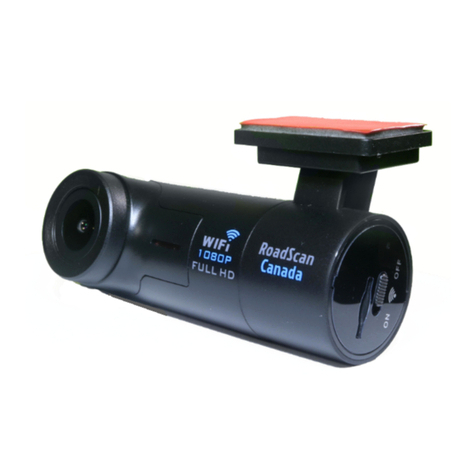
RoadScan Canada RSC DC3 Operator's manual
RoadScan Canada
RoadScan Canada PBC10 Operator's manual

RoadScan Canada
RoadScan Canada DC3 Operator's manual
