RFN560I20AU-01
FINCH 3W LED NON MAINTAINED TWIN SPOT, WHITE
6500K, C/W 1.2M FLEX AND AU PLUG
Page 1
INSTRUCTION MANUAL
Testing
PLEASE READ INSTRUCTION BEFORE COMMENCING INSTALLATION AND RETAIN FOR FUTURE REFERENCES.
! Electrical products can cause death or injury, or damage to property. If in any doubt about the installation or
use of this product, consult a competent electrician
Note:
Product technical information and specification may change over time without prior notification. For the latest
technical information please visit our web site www.ledgrouprobus.com or robusdirect.com
Issue 2 150317
Installation
The Installation must be carried out by a qualified electrician
0°C < Ta < +40°C, 220V – 240V ~ 50/60Hz, Class I, IP20,
Luminaire is non-dimmable
Suitable for mounting on a normally flammable surface.
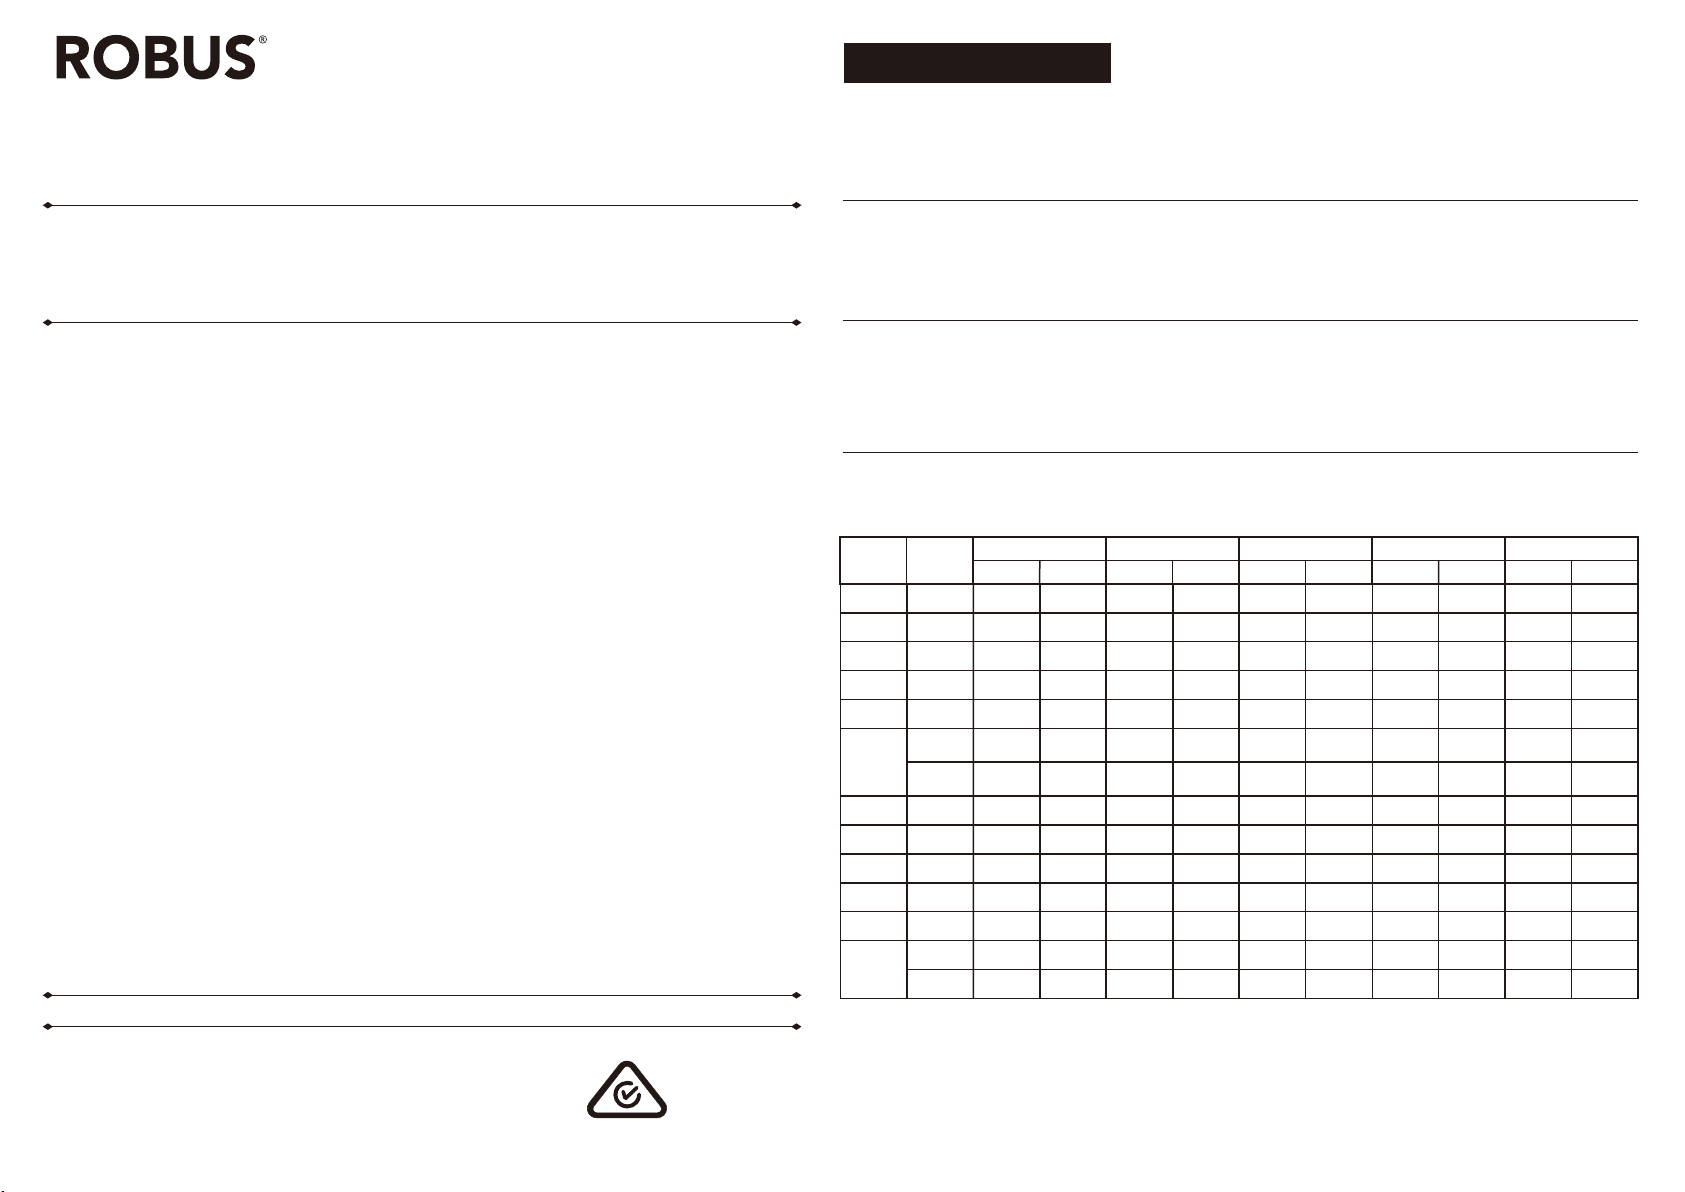
Installation and Maintenance Record:
Installer
Installation Type
Installation test duration & Date
1. Ensure mains supply is switched off before
commencing work.
2. Remove the front cover
3. Mark appropriate fixing points on wall; check that
fixings will not impinge on concealed cables of
pipes
4. Attach fitting to the wall using the three screws
provided. Ensure that it is secure
5. Connect supply: Insert plug into the socket
6. Write installation date on battery, connect battery
to PCB
7. Attach the front cover
Switch on supply:
Two green LEDs should come on. Charge 1 LED:
indicating correct battery charge status. Lamp 2
LED: indicating no issues with emergency LED
lamps. The luminaire is non-maintained. When main
supply is lost, the battery will operate both lamps in
emergency mode. Interrupt supply by pressing the
test switch, the fitting will then operate in emergency
mode for a short period of time.
LED Group Australasia
9/210 Queensport Road North Tel: 07 3890 5444
Murarrie Fax: 07 3890 4777
Australia Website: www.ledgrouprobus.com.au
The emergency lighting must be inspected and
tested regularly in accordance with local codes
of practice: note: for safety reasons tests should
be carried out during daylight hours.
The minimum recommended test schedule is as
follows:
After installation, allow 16 hours to ensure full
battery charge and then interrupt the supply; the
maximum duration time is 90-minutes check that
LEDs are still lighting.
1. Daily check that charge indicator LED is
working
2. Monthly, interrupt mains for a short period and
check LED lights
3. 6-month and 12-month check, full duration
test. Interrupt mains supply, LEDs will light
and should last for a minimum 90-minutes
operation: batteries must be replaced when
they can no longer support 90-minutes
operation.
4. Complete record sheet on installation and
retain in maintenance file.
5. Update file with ongoing test records for
inspection by fire officer or other duly
authorised person
Signed
Month Test
Short
Short
Short
Short
Short
Short
Short
Short
Short
Short
Short
90 min.
90 min.
Short
1
2
3
4
5
6
7
8
9
10
11
12
Date
1st Year
Signed Date Signed Date Signed Date Signed Date
2nd Year 3rd Year 4th Year 5th Year


