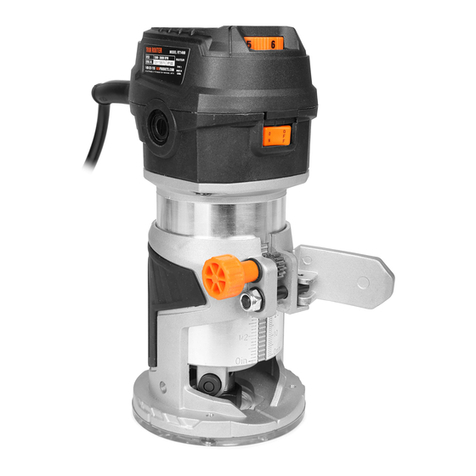
Rockler Ellipse/Circle Jig User manual

Compact Router Ellipse/
Circle Jig Instructions
The Compact Router Ellipse/Circle Jig allows you to use your compact plunge router to easily cut
precise ellipses and circles for picture frames, mirrors, signs and more. For safe and effective operation,
please read these instructions fully before use.

2
>For any tool that is used in conjunction with this
product always read, understand and follow the
instructions and safety warnings for that tool.
>Before using this product, review and verify that all
tools used with it are in proper working order as
definedbythetool’sowner’smanual.
>Allsafetyequipmentmustbeinstalledandworking
properlyasdefinedbythetool’sowner’smanual.
>Do not use this product until you have read the
provided instructions and warnings and are confident
youunderstandthem.
>AlwayswearsafetyglassesincompliancewithANSI
safety standards and hearing protection and follow all
standard shop safety practices including:
•Keep your work area well lit and clean.
• Usedustcollectiontoolsanddustfacemasksto
reduce exposure to dust.
• Useaccessorysafetyequipmentsuchas
feather boards, push sticks, and push blocks
whenever appropriate.
•Do not use power tools in explosive
environments,e.g.inthepresenceofflammable
liquids,fumesordust.
•Keep children and bystanders away while operating
your tools.
• Maintainproperfootingatalltimesanddo
not overreach.
•Do not force the tool.
• Unplugallpowertoolsbeforemakingany
adjustmentsorchangingaccessories.
>Remainalertandusegoodjudgmentwhenusing
this tool. Do not use this tool if you are in any way
impairedbymedications,alcohol,drugsorfatigue.
> Dressappropriatelyandremovealljewelry,secure
loose clothing and tie up long hair before using
this tool.
> Itisthesoleresponsibilityofthepurchaserofthistool
to ensure that any third party reads and agrees to all
thesafetyprecautionsoutlinedinthismanualprior
to using the tool.
>Maintain these instructions and warnings as long as
you own the tool. Keep in a place where they will be
readily available for reference.
>Theuserassumesallriskfortheproperuseof
this tool and for ensuring product suitability for
intended application.
>These warnings and instructions do not represent the
totalofallinformationavailableregardingtoolsafety,
use and technique. Always seek out opportunities to
learnmoreandimproveyourskillsandknowledge.
Thistoolisdesignedforspecificapplicationsasdefinedintheinstructionsandshouldnotbemodifiedand/or
usedforanyotherapplications.BeforeusingtheCompactRouterEllipse/CircleJigread,understandandfollowall
instructionsandsafetyinformationprovided.KEEP THESE INSTRUCTIONS.
GENERAL SAFETY WARNINGS
SPECIFIC SAFETY WARNINGS
> Yourroutermustbeunpluggedwhileattachingthe
Ellipse/CircleJigandwhilemakinganyadjustments.
>Properlysecureyourworkpiecebeforeattempting
tomakeacut.
> Donotattempttomakethefulldepthofcutinone
pass.Makeseveralpassesremovingsmall
incrementsofmaterialeachtime.
>Maintainawarenessoftherouterbitatalltimes
while cutting.

3
Quantity
1 JigArm 1
2 JigBase 1
3 Dovetail Key 2
4 5/16-18x1"Knobs 2
5 5/16"Washers 2
6 5/16-18x1"T-Bolts 2
7 #6WoodScrews 4
8 10mmMachinePanHeadScrews 4
PARTS LIST - COMPACT ROUTER ELLIPSE/CIRCLE JIG
4
5
66
3
32
5
4
8
7
1

4
ROUTER MOUNTING HOLE KEY
Porter Cable 450PK
DeWalt DWP611PK
Bosch Colt PR20EVS Kits
2.696"
2.992"
3.125"
2.696"
2.992"
2.6"
3.125"
2.6"

5
Jig and Workpiece Setup
Recommended maximum material thickness (for through routing)
is 1/2".
1. Attach your compact plunge router to the Jig Arm (1) with the
included 10mm Pan-Head Machine Screws (8) and install
the desired bit.
Note: We recommend using a 1/4" diameter spiral up-cut
bit (82652, sold separately).
2. Set up your workpiece on a solid, stable surface.
3. If making through cuts, elevate your workpiece to prevent
damage to the surface underneath. Secure the workpiece
to a sacrificial board, or use spacers to hold and support the
workpiece, including any sections that will be cut free. Make
sure that all parts of the workpiece will remain stationary
during cuts to avoid potentially dangerous and damaging
shifts, and position any spacers out of the path of the cutter.
Routing an Ellipse
1. Mark a center point on your workpiece. Lay out the
major (long) and minor (short) axes of your ellipse so that
they’re perpendicular and intersect at the center point. The
major axis can be a maximum of 24" long and a minimum
of 11". The minor axis can be a maximum of 19" long and a
minimum of 6". (The maximum difference in length between
the major and minor axes is 5".) Fig. 1.
2. Use the scribe lines machined into the Jig Base to center it on
the intersection of the major and minor axes. Secure the Jig
Base (2) to the workpiece with the included #6 Wood
Screws (7). Fig. 2.
Fig. 1
Major Axis
Minor Axis
Center point
2
Fig. 2

3. Insert a Dovetailed Key (3) into each channel in the Jig
Base (2). Center one (hereafter referred to as “Dovetail
Key A”) along the minor axis.
4. Loosen the two Locking Pivots on the Jig Arm (1) and position
them so they mount on the pins in the Dovetailed Keys (3).
Fig. 3.
Note: The Locking Pivot closest to the router must be
mounted on “Dovetail Key B” (along the major axis).
5. Rotate the Jig Arm (1) so it’s aligned with the major axis, and
adjust it in or out until the bit is positioned as desired to make
the cut. Tighten the Locking Pivot on Dovetail Key A. Fig. 4.
6. Rotate the Jig Arm (1) so it’s aligned with the minor axis, and
adjust it in or out until the bit is positioned as desired to make
the cut. Tighten the Locking Pivot on Dovetail Key B. Fig. 5.
Note: The maximum distance between Locking Pivots A
and B is 21⁄2".
7. With the router off, rotate the Jig Arm (1) through the full
range of cut. You want to ensure that the dovetail keys will
move smoothly, as well as verify the ellipse pattern and proper
placement of any spacers/supports. Then make the cut.
Note: Don’t try to cut to full depth in one pass. Make several
passes, increasing the depth of cut with each pass.
Routing a Circle
1. Mark a center point on your workpiece and lay out the
perpendicular axes.
6
Fig. 3 - Router removed for clarity
Dovetail Key “B”
Locking pivot “A”Locking pivot “B”
Fig. 4 - Router removed for clarity
Locking pivot “A”
Locking pivot “B”
Position router bit
Dovetail Key “A”

7
Fig. 5 - Router removed for clarity
Locking pivot “A”
Locking pivot “B”
Position router bit
Fig. 6
Key fastened
with screws
2. Use the scribe lines machined into the Jig Base (2) to center it
on the intersection of the axes. Secure the Jig Base (2) to the
workpiece with the included #6 Wood Screws (7).
3. Remove one of the Locking Pivots from the Jig Arm (1) and
one of the dovetail keys (3) from the Jig Base (2).
4. Make sure the remaining Dovetail Key (3) is in the channel
that has the two holes near the center. Align the holes in the
Dovetail Key (3) with the holes in the Jig Base (2) and secure
with two of the included #6 Wood Screws (7). Fig. 6.
5. Loosen the Locking Pivot on the Jig Arm (1) and position it so
it mounts on the pin in the Dovetailed Key (3).
6. Adjust the Jig Arm (1) in or out until the bit is positioned as
desired to make the cut. Tighten the Locking Pivot.
7. With the router off, , rotate the Jig Arm (1) through the full
range of cut. You want to ensure that the Jig Arm will
move smoothly, as well as verify the circle pattern and proper
placement of any spacers/supports. Then make the cut.
Note: Don’t try to cut to full depth in one pass. Make several
passes, increasing the depth of cut with each.
Check Rockler.com for updates. If you have further questions, please
contact our Technical Support Department at 1-800-260-9663
or support@rockler.com

Distributed by Rockler Companies, Inc.
©2016 Rockler Woodworking and Hardware
55819
Rev 09/16
Table of contents
Other Rockler Wood Router manuals