manuals.online logo
Brands
  1. Home
  2. •
  3. Brands
  4. •
  5. Rubi
  6. •
  7. Bathroom Fixture
  8. •
  9. Rubi RHA3139 User manual

Rubi RHA3139 User manual

InstallatIon Hana - RHa3139 / RHa3140
Doc. # DR047-3 / 21-12-2015 www.rubi.ca - 1.800.463.2197
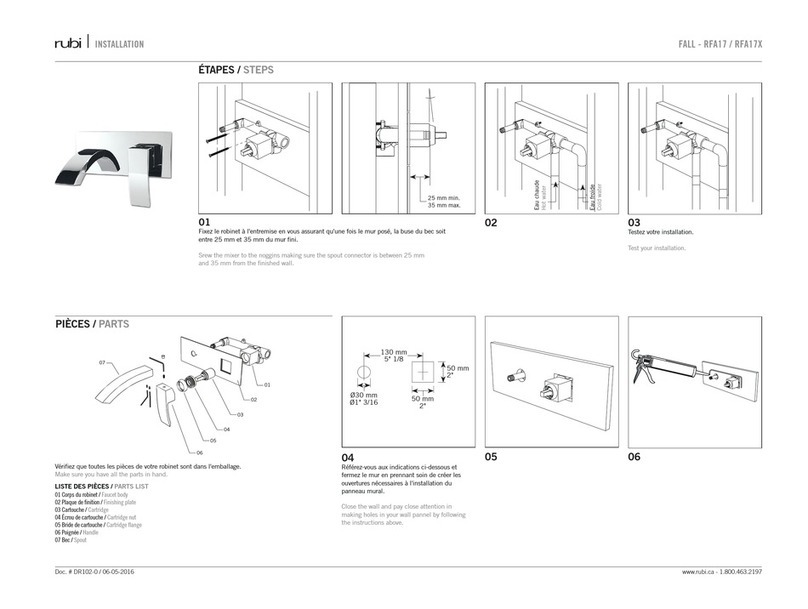
03
Appliquez du téflon sur les mamelons
excentriques et vissez aux sorties d'eau.
À l'aide d'une clé, vissez fermement et ajustez
afin que les sorties soient à 6" centre à centre
et au niveau.
Apply teflon on eccentric nipples, tighten with
a wrench and adjust to make the two outlets
6" appart from center to center and leveled.
02
Vous devez avoir vos sorties d'eau à 6" c.c.
Marquez l'emplacement de ancrage supérieur.
Have your water outlet at 6" c.c. Mark top
anchor's position.
04
Placez le support mural centré sur sur sa
position et marquez les positions de perçage.
Hold in place the wall fixture and make drilling
mark.
05
Percez sur vos marques et insérez les douilles
de plastique.
Drill on your marks and insert the plastic
sleeves.
PIèCES / PARTS
InSTAllATIon DE lA bARRE / ShowER bAR InSTAllATIon
Vérifiez que toutes les pièces de votre colonne de douche
sont dans l'emballage.
Make sure you have all the parts in hand.
lISTE DES PIèCES / PARTS lIST
01 Corps de robinet / Faucet body
02 Tube droit / Straight tube
03 Tube courbé / Curved tube
04/05 Tête pluie ronde 8’’ (RHA3139 seulement) /
Round shower head 8’’ (RHA3139 only)
06 Douchette / Hand shower
07 Tête pluie ronde 8’’/ Round shower head 8’’
08 Crochet coulissant / Adjustable hook
09 Flexible de douchette / Handshower hose
10 Raccord excentrique / Eccentric connection
11 Poignée tête douche / Showerhead handle
12 Poignée douchette / Handshower handle
13 Poignée thermo / Thermo handle
14 Rondelle graphite / Graphite washer
15 Rosace / Finishing flange
03
12 11
02
01
15
10 14
09 13
12
08
11
06
07
08
04
05
06
Vissez le support mural au mur.
Screw the wall fixture in place.
RHA3139 RHA3140
800 - 810 mm
31-1/2"-31-7/8"
152 mm c.c.
6" c.c.
Hauteur recommandée:
de 36" (915 mm)
à 50" (1,270 mm)
du sol.
Recommended height:
from 36" (915 mm) to 50"
(1,270 mm)
from ground.
Mettre au niveau
Leveling
152 mm c.c.
6" c.c.
InstallatIon Hana - RHa3139 / RHa3140
Doc. # DR047-3 / 21-12-2015 www.rubi.ca - 1.800.463.2197
EnTRETIEn / MAInTEnAnCE
Pour nettoyer votre barre de douche, un savon doux, de l’eau chaude et un linge doux suffiront
pour faire disparaître saletés, tâches et traces d’accumulation de savon. Rincez après le nettoyage
et asséchez avec un linge doux et sec pour retrouver le lustre original de votre barre de douche.
La garantie sera nulle et non avenue dans les cas d’utilisation de produits nettoyants inadaptés
(particulièrement ceux contenant des agents abrasifs, cires, alcools, ammoniaques, javelisants,
acides, des solvants ou autres produits chimiques corrosifs), qu’ils soient utilisés par l’acheteur ou
par un tiers pour l’acheteur/propriétaire.
A mild detergent, warm water and a soft cloth will remove normal dirt and soap accumulations on
your shower bar surface. Rinse thoroughly after cleaning and wipe with a soft dry cloth to restore
original luster on its surface. Do not use harsh abrasives cleaners to clean your shower bar.
The warranty will be void in case of use of unsuitable cleaning products (especially those containing
abrasive cleansers, waxes, alcohols, ammoniated, bleach, acids, solvents or other harsh chemicals),
whether they are used by the purchaser or a third party for the buyer/owner.
08
Assemblez le flexible de douchette à la valve
en vous assurant que la rondelle d'étanchéité
est en place. Serrez bien sans toutefois utiliser
une force excessive. Utilisez une clé ajustable
si nécessaire.
Connect flexible hose to water supply making
sure washer in in place. Thighten hose to supply.
Use the adjustable wrench if necessary.
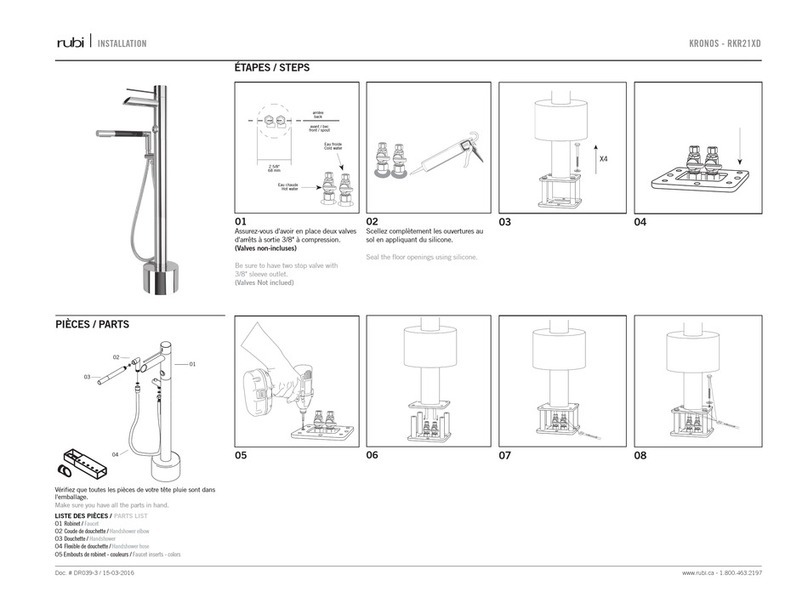
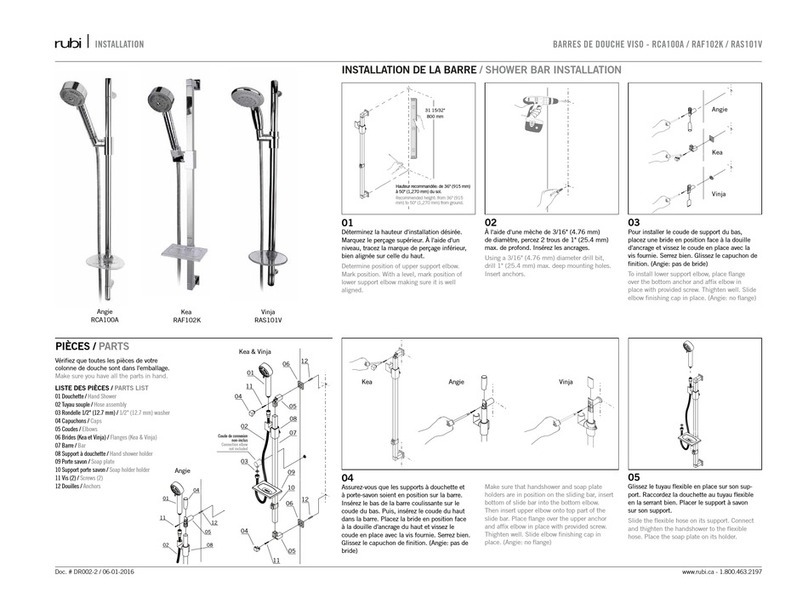
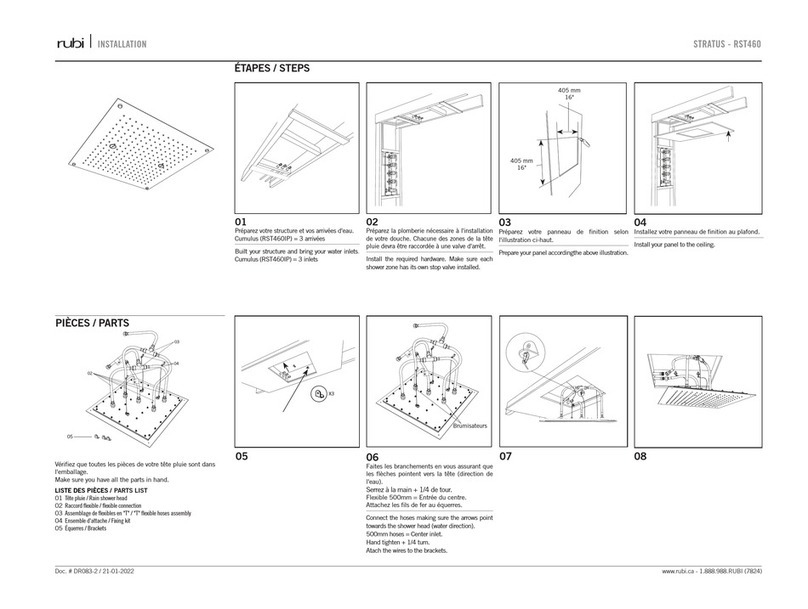
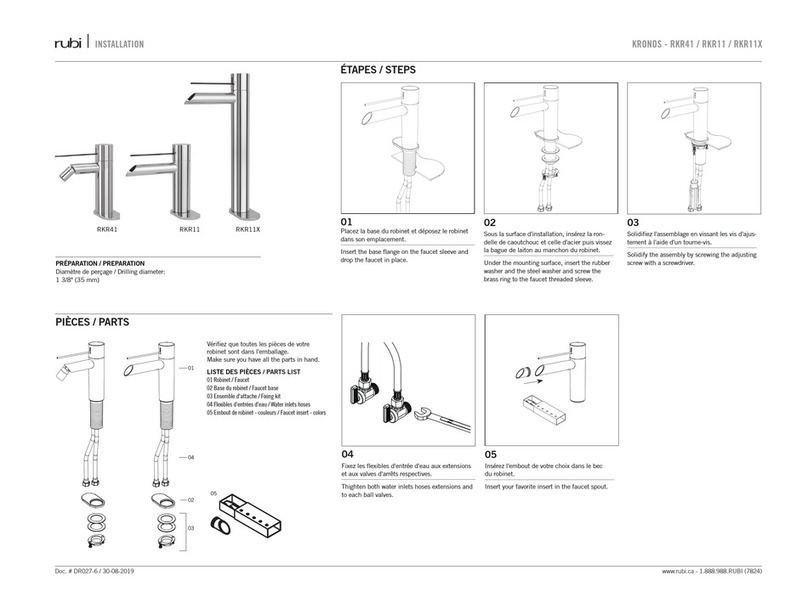
ÉTAPES / STEPS
09
Alignez les ancrages du haut de la barre puis
serrez les entrées d'eau de la valve sur les
raccords excentriques à l'aide d'une clé.
Align the bar's top anchor, align and tighten
the valve water intakes on the eccentric fittings
with a wrench.
10
Solidifiez l'assemblage de l'ancrage du haut
avec une clé allen.
Solidify top anchor with the allen key.
11
Installez la tête de douche et la douchette.
Assemble the shower head and the
handshower.
07
Insérez le crochet de douchette sur la barre de
douche puis la barre de douche sur la valve.
Serrez bien.
Insert the handshower hook on the shower bar
then the shower bar on the valve. Tighten.
This manual suits for next models

1

Other Rubi Bathroom Fixture manuals

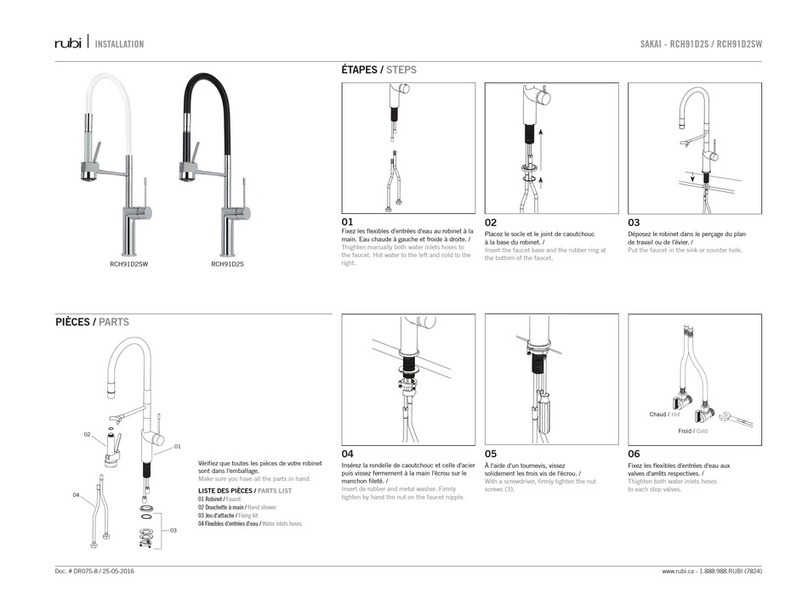
Rubi SAKAI RCH91D2S User manual

Rubi

Rubi SAKAI RCH91D2S User manual

Rubi Cumulus RCU460 User manual

Rubi

Rubi Cumulus RCU460 User manual

Rubi Scolo 30 Instruction Manual

Rubi

Rubi Scolo 30 Instruction Manual

Rubi Quatro RFA17 User manual

Rubi

Rubi Quatro RFA17 User manual

Rubi KRONOS RKR21XD User manual

Rubi

Rubi KRONOS RKR21XD User manual

Rubi SOTTO RKN510BL User manual

Rubi

Rubi SOTTO RKN510BL User manual

Rubi ABYSS RAB22D User manual

Rubi

Rubi ABYSS RAB22D User manual

Rubi VISO RAF21XDK User manual

Rubi

Rubi VISO RAF21XDK User manual

Rubi KUMA User manual

Rubi

Rubi KUMA User manual

Rubi YUMA RAF120 User manual

Rubi

Rubi YUMA RAF120 User manual

Rubi STRATUS RST460 User manual

Rubi

Rubi STRATUS RST460 User manual

Rubi RUBISTATIC XR674RU User manual

Rubi

Rubi RUBISTATIC XR674RU User manual

Rubi KRONOS RKR41 User manual

Rubi

Rubi KRONOS RKR41 User manual

Rubi VERTIGO RVT17 User manual

Rubi

Rubi VERTIGO RVT17 User manual

Rubi FALL RFA17 User manual

Rubi

Rubi FALL RFA17 User manual

Rubi RCA100A User manual

Rubi

Rubi RCA100A User manual

Rubi VERTIGO RVT21XD User manual

Rubi

Rubi VERTIGO RVT21XD User manual

Rubi FALL RFA22D User manual

Rubi

Rubi FALL RFA22D User manual

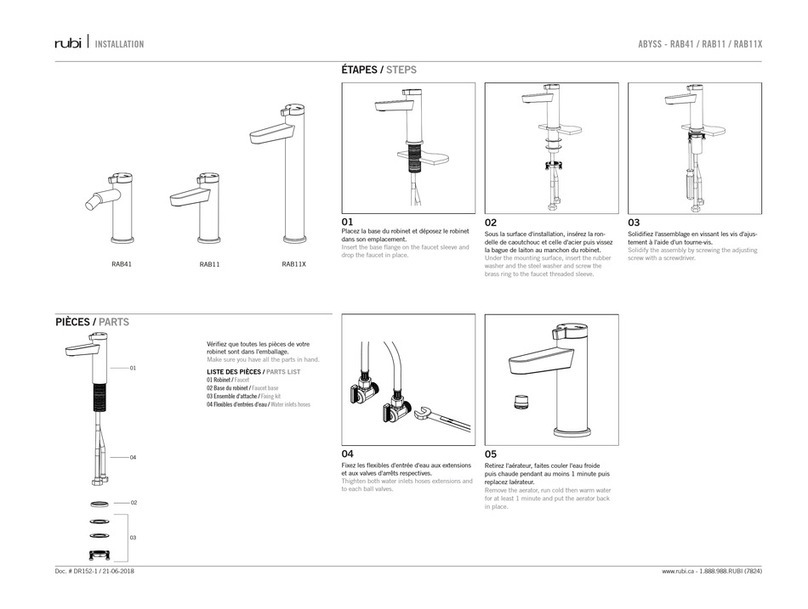
Rubi ABYSS RAB41 User manual

Rubi

Rubi ABYSS RAB41 User manual

Rubi KASKAD RKA11B User manual

Rubi

Rubi KASKAD RKA11B User manual

Popular Bathroom Fixture manuals by other brands

EQUATION SI81-A instruction manual

EQUATION

EQUATION SI81-A instruction manual

MAAX 105539 installation instructions

MAAX

MAAX 105539 installation instructions

noken SQUARE 100259027 manual

noken

noken SQUARE 100259027 manual

Glacier bay 67091W-6A01 Installation and care guide

Glacier bay

Glacier bay 67091W-6A01 Installation and care guide

Tassili Supra VALENTINA 33001267 installation guide

Tassili Supra

Tassili Supra VALENTINA 33001267 installation guide

Artos MS12250W installation guide

Artos

Artos MS12250W installation guide

Foremost COVE instructions

Foremost

Foremost COVE instructions

Moen 3662EPBN manual

Moen

Moen 3662EPBN manual

SOMMER Single Door Quadrant Assembly guide

SOMMER

SOMMER Single Door Quadrant Assembly guide

Kesseböhmer Turn-Motion Mounting instructions

Kesseböhmer

Kesseböhmer Turn-Motion Mounting instructions

STROMBERG LENO Assembly & Operating Instruction

STROMBERG

STROMBERG LENO Assembly & Operating Instruction

Tramontina senseday instruction manual

Tramontina

Tramontina senseday instruction manual

Hans Grohe Rainfinity 130 3jet 26864700 Assembly instructions

Hans Grohe

Hans Grohe Rainfinity 130 3jet 26864700 Assembly instructions

clage EKE Operating and installation instructions

clage

clage EKE Operating and installation instructions

KWC WASHINO-2 SANW200 Installation and operating instructions

KWC

KWC WASHINO-2 SANW200 Installation and operating instructions

Ronbow AMORA VANITY 054030 Installation and care guide

Ronbow

Ronbow AMORA VANITY 054030 Installation and care guide

Gessi OVALE 11959 manual

Gessi

Gessi OVALE 11959 manual

Helvex WC Austral installation guide

Helvex

Helvex WC Austral installation guide

manuals.online logo
manuals.online logoBrands
  • About & Mission
  • Contact us
  • Privacy Policy
  • Terms and Conditions

Copyright 2025 Manuals.Online. All Rights Reserved.