Step 5: Logging Into the AP Web Interface
As specied in Step 4: Preparing Your Computer for AP Setup on
page 1, the computer should be connected to your AP through
the Ethernet port and powered on, ready for setup.
1. On your computer, open a Web browser window.
2. In the browser, enter https://192.168.0.1 to connect to the
AP.
3. Press <Enter> to initiate the connection. When a security
alert dialog box appears, click OK/Yes to proceed.
4. When the Ruckus Wireless Admin login page appears, enter
the following:
•Username: super
•Password: sp-admin
5. Click Login. On your rst login, you will be prompted to
change the default password.
6. When the Change Password dialog box displays, enter the
following:
• New Password: Enter a new password.
•Conrm Password: Re-enter the new password.
7. Click Submit.
8. Log in using the new password.
Step 6: Customizing the Wireless Settings
1. On the AP Web interface menu, click Conguration >
Wireless > 5G or Conguration > Wireless > 2.4G. The
Congure > Wireless > Common options appear.
2. Verify that the following options are active:
•Channel: SmartSelect
•Channel Width: 20 MHz, 40 MHz, or 80 MHz (default).
•Country Code: Select the country in which the AP will be
operating.
NOTE: If you purchased the AP in the United States,
then this value is xed to United States at the factory
and is not user congurable. If you purchased the AP
outside the United States, then verify that the value is
set to your country or region. Selecting the correct
country code ensures that the AP uses only the radio
channels allowed in your country or region.
3. Click Update Settings if you made any changes.
4. Click any of the eight Wireless # (Wireless LAN Number) tabs
at the top of the page.
5. In Wireless Availability, click Enabled.
6. Delete the text in the SSID eld, and then type a name for
your network that will help your users identify the AP in their
wireless network connection application.
7. Click Update Settings to save your changes.
8. If required, repeat Step 4 through Step 7 in this task for any
other Wireless # (Wireless LAN Number) interface that you
want to enable.
9. Click Logout to exit the Web interface.
10. Disconnect the AP from the computer and from the current
power source, and then restore your computer to its original
network conguration.
Step 7: Placing the AP at the Site
1. Move the AP to its permanent location (accessible to both AC
or PoE power and network connection).
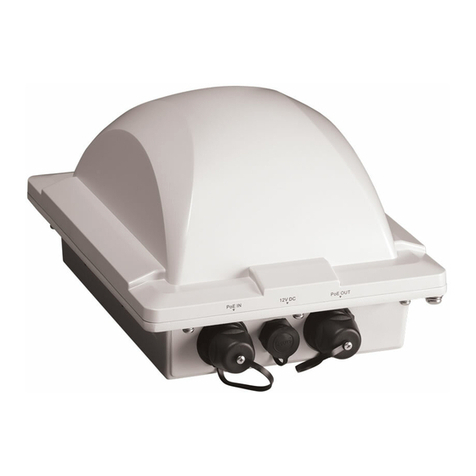
2. Use a Cat 5e (or better) Ethernet cable to connect your
network (or PoE injector or switch) to the POE IN port on the
AP.
-OR--
If you are not using an 802.3af-compliant PoE switch or PoE
injector, then connect the AC power adapter to the AP, and
then to a convenient power source.
3. Verify that the POE IN port LED is lit.
Step 8: Verifying the Installation
1. Using any wireless-enabled computer or mobile device,
search for and select the wireless network you previously
congured.
2. If you can connect, open a browser and link to any public
Web site.
Congratulations! Your wireless network is active and ready
for use. If you need to congure advanced wireless settings,
such as enabling security, refer to the Ruckus Wireless Indoor
AP User Guide.
INSTALLING THE AP
The AP can be mounted on a at surface, on a drop-ceiling T-bar,
or on a pole or at surface. Refer to the following sections:
Mounting on a Flat Surface
The factory-supplied mounting screws and plastic wall anchors
allow you to attach the AP to a wall or ceiling.
1. Use the Mounting Template on the last page of this guide to
mark the locations for two drill holes on the mounting
surface.
2. Use a 4.75mm (3/16”) drill bit to drill holes approximately
25mm (1”) deep into the mounting surface.
3. Insert the factory-supplied anchors (A in the below gure)
and mounting screws (B) into the mounting surface, leaving
approximately 6 mm (1/4”) of the screw heads protruding
from the surface.
FIGURE 3 Mounting the AP on at surface
4. Place the AP onto the mounting screws so that the screw
heads enter the keyholes on the AP enclosure (C), and gently
press down on the AP until the locking tab in the upper AP
keyhole locks the AP onto the top mounting screw.
Mounting on a Drop-Ceiling T-Bar
The factory-supplied T-bar mounting assembly kit allows you to
attach the AP to recessed and ush drop-ceiling T-bars.
1. Position the studs on the bottom of the T-bar bracket (A in
the below gure) to the keyholes on the AP enclosure.
2. Slide the T-bar bracket away from the Ethernet ports on the
bottom of the AP until the AP retainer tab snaps into place,
trapping the T-bar bracket studs in the keyholes.
Copyright © 2019 CommScope, Inc. All rights reserved. Page 2 of 4
Published November 2019, Part Number 800-71895-001 Rev C

