manuals.online logo
Brands
  1. Home
  2. •
  3. Brands
  4. •
  5. TP-Link
  6. •
  7. Wireless Access Point
  8. •
  9. TP-Link Auranet EAP110 User manual

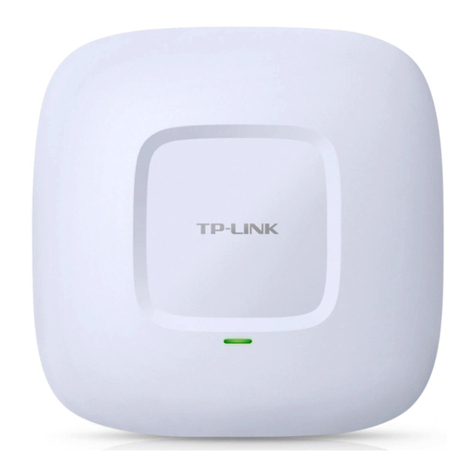
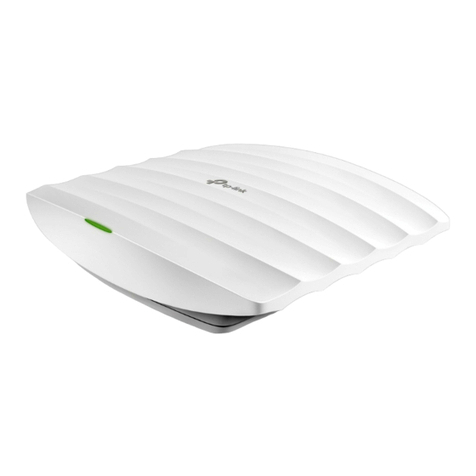
TP-Link Auranet EAP110 User manual

Quick Installation Guide
EAP110
7106505541 REV1.0.0
LED Indication
Hardware Overview
2Hardware Installation
3
Software Configuration
5
The EAP110 can be powered with the provided PoE adapter.
Power Supply
4
1
(Up to 100m)
Switch
3
PoE LAN
PoE Adapter
2
1. Connect the ETHERNET port to the POE port of the PoE adapter using an Ethernet cable. The cable
length can be up to 100 meters.
2. Connect the Ethernet cable from the switch to the LAN port of the PoE adapter.
3. Plug the female connector of the provided power cord into the PoE adapter, and the male connector to a
power outlet.
RESET ETHERNET
Interface Panel
Passive PoE Adapter
RESET
With the device powered on, press and hold the button for about 8 seconds until the LED flashes red, then
release the button. The device will restore to factory default settings.
ETHERNET
The port is to connect to the POE port of the provided PoE adapter for both data transmission and power
supply through Ethernet cabling.
Power LED
The Power LED indicates the status of the electric current: green (0-0.8A), red (0.8A-1A).
PoE Port
This port is used to connect to the
ETHERNET port of EAP110.
LAN Port
This Port is used to connect to your LAN.
1Network Topology Requirement
Clients
Switch
EAP
EAP
EAP
Controller Host
EAP Controller
Router
Internet
A DHCP server (typically a router) is required to assign IP addresses to the EAP and clients in your local network.
A computer running the EAP Controller software, which can be in the same or different subnet with the EAPs.
Option 1: Ceiling Rail Mounting
Option 2: Ceiling Mounting
Option 3: Wall Mounting
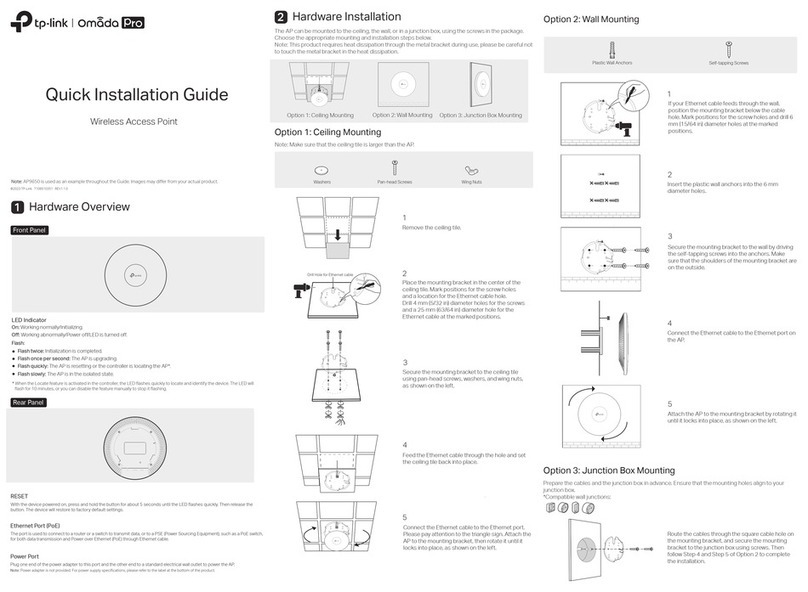
The EAP can be ceiling rail mounted, ceiling-mounted, and wall-mounted.
The instructions for various mounting options are on the back of this Quick Installation Guide.
The device is working properly.
Solid green
System errors. RAM, Flash,
Ethernet, WLAN or firmware
may be malfunctioning.
Flashing red
The device is being reset to its
factory default settings.
Double-flashing red, green, yellow
Firmware update is in progress.
Do not disconnect or power off
the device.
Flashing yellow
PoE
LAN
Power LED
7106505541 REV1.0.0
To quickly set up a wireless network connection with mass EAPs, please follow the steps below.
For More Configurations
Now you can manage your wireless network and view network statistic using the EAP Controller. Please refer
to the EAP Controller User Guide to learn more information on configuring and using the Controller software.
Find the EAP Controller application file on the Resource CD (for Windows user only) or from our website at
www.tp-link.com. Run the file and follow the wizard to install the EAP Controller on the computer.
Step 1: Installing the EAP Controller
Launch the EAP Controller and follow the configuration wizard to create a primary wireless network. After the wizard
is finished, a login screen will appear. Enter the admin name and password you created and click Sign In.
Step 2: Configuring the EAP Controller
Adopt the EAP devices in the Controller management interface to change the status from pending to connected.
Step 3: Adopting the EAP devices
Note: The IP address of the management computer must be reachable for the EAPs in the network.
Option 1: Ceiling Rail Mounting Option 3: Wall Mounting
Option 2: Ceiling Mounting
Website: http://www.tp-link.com Tel: +86 755 26504400 E-mail: support@tp-link.com Copyright © 2015 TP-LINK
M3×20 Self-tapping Screws
(Qty.3)
M3×28 Plastic Wall Anchors
(Qty.3)
5
Connect the Ethernet cable to the ETHERNET port on
the EAP.
5
Feed the Ethernet cable through the hole and set the
ceiling tile back into place. Connect the Ethernet
cable to the ETHERNET port.
5
Connect the Ethernet cable to the ETHERNET port.
2
Make two small pencil marks on the wall. Make sure
the two marks are level and should be 98.6mm apart.
Drill two 6mm holes through the center of your marks.
2
Place the mounting bracket in the center of the ceiling
tile. Mark the three positions of the screw holes and a
10mm hole for the Ethernet cable to feed through.
Drill three 4mm holes and a 10mm hole for the Ethernet
cable.
2
Use an M3×6 pan-head screw to secure the T-rail Clip
onto the ceiling rail.
1
Position the Ceiling T-rail Clip and push the movable
part toward the rail base.
1
Remove the ceiling tile.
1
Attach the EAP to the mounting bracket by aligning
ARROW 1 (on the EAP) with ARROW 2 (on the
mounting bracket), then rotate the EAP clockwise until
it locks into place.
3
Insert the plastic wall anchors into the 6mm holes and
drive the self-tapping screws into the anchors. Do not
drive the screws all the way in and leave enough
clearance to hang the EAP.
3
Secure the mounting bracket to the ceiling tile using
three M3x30 pan-head screws, washers and wing
nuts, as shown on the left.
3
Attach the mounting bracket to the Ceiling T-rail Clip
using four M3x6 pan-head screws.
4
Hang the EAP on the screws. Make sure the EAP is
firmly seated against the wall.
4
Attach the EAP to the mounting bracket by aligning
ARROW 1 (on the EAP) with ARROW 2 (on the
mounting bracket), then rotate the EAP clockwise until
it locks into place.
4
Attach the EAP to the mounting bracket by aligning
ARROW 1 (on the EAP) with ARROW 2 (on the
mounting bracket), then rotate the EAP clockwise until
it locks into place.
Ceiling T-rail Clip M3×6 Pan-head Screws
(Qty.5)
Wing Nuts
(Qty.3)
Washers
(Qty.3)
M3×30 Pan-head Screws
(Qty.3)
Hole for Ethernet cable
X3
98.6mm

Other manuals for Auranet EAP110

13

Other TP-Link Wireless Access Point manuals

TP-Link Omada EAP245 User manual

TP-Link

TP-Link Omada EAP245 User manual

TP-Link CAP2200 User manual

TP-Link

TP-Link CAP2200 User manual

TP-Link Omada EAP225 User manual

TP-Link

TP-Link Omada EAP225 User manual

TP-Link TL-WA901ND User manual

TP-Link

TP-Link TL-WA901ND User manual

TP-Link Omada Pro User manual

TP-Link

TP-Link Omada Pro User manual

TP-Link PHAROS SERIES User manual

TP-Link

TP-Link PHAROS SERIES User manual

TP-Link TL-WA801ND User manual

TP-Link

TP-Link TL-WA801ND User manual

TP-Link TL-WA801ND User manual

TP-Link

TP-Link TL-WA801ND User manual

TP-Link Auranet EAP110 User manual

TP-Link

TP-Link Auranet EAP110 User manual

TP-Link AURANET CAP300-Outdoor User manual

TP-Link

TP-Link AURANET CAP300-Outdoor User manual

TP-Link PHAROS SERIES User manual

TP-Link

TP-Link PHAROS SERIES User manual

TP-Link CAP1200 User manual

TP-Link

TP-Link CAP1200 User manual

TP-Link TL-WA5110G User manual

TP-Link

TP-Link TL-WA5110G User manual

TP-Link TL-WA801ND User manual

TP-Link

TP-Link TL-WA801ND User manual

TP-Link TL-WA7210N User manual

TP-Link

TP-Link TL-WA7210N User manual

TP-Link Auranet EAP225 User manual

TP-Link

TP-Link Auranet EAP225 User manual

TP-Link omada EAP110-Outdoor User manual

TP-Link

TP-Link omada EAP110-Outdoor User manual

TP-Link TL-WA801N User manual

TP-Link

TP-Link TL-WA801N User manual

TP-Link Auranet EAP110 User manual

TP-Link

TP-Link Auranet EAP110 User manual

TP-Link Auranet EAP120 Quick start guide

TP-Link

TP-Link Auranet EAP120 Quick start guide

TP-Link Pharos CPE210 User manual

TP-Link

TP-Link Pharos CPE210 User manual

TP-Link TL-WA701ND User manual

TP-Link

TP-Link TL-WA701ND User manual

TP-Link TL-WA901ND User manual

TP-Link

TP-Link TL-WA901ND User manual

TP-Link TL-WA901ND User manual

TP-Link

TP-Link TL-WA901ND User manual

Popular Wireless Access Point manuals by other brands

Fujitsu Siemens Computers CONNECT2AIR WLAN AP-500RP datasheet

Fujitsu Siemens Computers

Fujitsu Siemens Computers CONNECT2AIR WLAN AP-500RP datasheet

Extreme Networks ExtremeWireless AP3000X quick start guide

Extreme Networks

Extreme Networks ExtremeWireless AP3000X quick start guide

Motorola AP 7161 installation guide

Motorola

Motorola AP 7161 installation guide

NX NX-100AP user manual

NX

NX NX-100AP user manual

Ruijie Reyee Series Faqs

Ruijie

Ruijie Reyee Series Faqs

Luxul XAP-1030 user guide

Luxul

Luxul XAP-1030 user guide

EnGenius ENS200 user guide

EnGenius

EnGenius ENS200 user guide

Airspan AirSpeed 2900 installation guide

Airspan

Airspan AirSpeed 2900 installation guide

Avaya AP-3 user guide

Avaya

Avaya AP-3 user guide

Aerohive HiveAP 100 Series quick start

Aerohive

Aerohive HiveAP 100 Series quick start

Hamlet HNWS111 user guide

Hamlet

Hamlet HNWS111 user guide

Lafalink LF-R500U Quick installation guide

Lafalink

Lafalink LF-R500U Quick installation guide

LevelOne WAP-6110 Quick installation guide

LevelOne

LevelOne WAP-6110 Quick installation guide

Linksys WAP54G - Wireless-G Access Point Quick installation

Linksys

Linksys WAP54G - Wireless-G Access Point Quick installation

Digisol DG-WM2003SIE user manual

Digisol

Digisol DG-WM2003SIE user manual

Aruba AP-318 installation guide

Aruba

Aruba AP-318 installation guide

Ubiquiti NBE-M5-16 quick start guide

Ubiquiti

Ubiquiti NBE-M5-16 quick start guide

Buffalo AirStation WZR-600DHP user manual

Buffalo

Buffalo AirStation WZR-600DHP user manual

manuals.online logo
manuals.online logoBrands
  • About & Mission
  • Contact us
  • Privacy Policy
  • Terms and Conditions

Copyright 2025 Manuals.Online. All Rights Reserved.