manuals.online logo
Brands
  1. Home
  2. •
  3. Brands
  4. •
  5. Ubiquiti
  6. •
  7. Wireless Access Point
  8. •
  9. Ubiquiti airFiber AF 60 User manual

Ubiquiti airFiber AF 60 User manual

18.02.2020 AF60 Quck Start Gude
https://dl.u.com/qsg/AF60/AF60_EN.html 1/23
D

sh Ma

n Arm Stab

l

zer Arms (Qty. 2)
Mount

ng Bracket Screw U-Clamp
Flat Washers (Qty. 2) Lock Washers (Qty. 2) Flange Nuts (Qty. 2)
G

gab

t PoE (24V, 0.5A) w

th
Mount

ng Bracket Power Cord
Package Contents
AF60 Qu

ck Start Gu

de
18.02.2020 AF60 Quck Start Gude
https://dl.u.com/qsg/AF60/AF60_EN.html 2/23
Installat

on Requ

rements
Clear l

ne of s

ght between a

rF

ber AP and stat

on
Clear v

ew of the sky for proper GPS operat

on
Vert

cal mount

ng or

entat

on
Mount

ng po

nt:
At least 1 m below the h

ghest po

nt on the structure
For tower

nstallat

ons, at least 3 m below the top of the tower
Outdoor, sh

elded Category 6 (or above) cabl

ng and sh

elded RJ45 connectors are
requ

red for all w

red Ethernet connect

ons.
Surge protect

on should be used for all outdoor

nstallat

ons. We recommend that
you use two Ethernet Surge Protectors, model ETH-SP-G2, one near the a

rF

ber rad

o
and the other at the entry po

nt to the bu

ld

ng. The ETH-SP-G2 w

ll absorb power
surges and safely d

scharge them

nto the ground.
Hardware Overv

ew
Note:
For gu

del

nes about ground

ng and l

ghtn

ng protect

on, follow your
local electr

cal regulatory codes.
AF60 Qu

ck Start Gu

de
18.02.2020 AF60 Quck Start Gude
https://dl.u.com/qsg/AF60/AF60_EN.html 3/23
GPS LED
60G LED
5G LED
LAN LED
Blue The LED w

ll l

ght blue when the GPS s

gnal strength

s suff

c

ent. Th

s requ

res a m

n

mum of three GPS
satell

te connect

ons.
Blue The LED w

ll l

ght blue when the 60 GHz l

nk

s ready.
Blue The LED w

ll l

ght blue when the 5 GHz l

nk

s ready.
Blue The LED w

ll l

ght steady blue when an act

ve
AF60 Qu

ck Start Gu

de
18.02.2020 AF60 Quck Start Gude
https://dl.u.com/qsg/AF60/AF60_EN.html 4/23
Power LED
PoE IN
Reset Button
Ethernet connect

on

s made to the Ethernet port and
ash when there

s act

v

ty.
Flash

ng Wh

te Bootup

n progress.
Wh

te Ready for use, not connected to Ub

qu

t

® Network
Management System (UNMS™). See
“UNMS
Management”
.
Blue Ready for use, connected to UNMS.
Steady Blue w

th
Occas

onal Flash

ng Ready for use, unable to connect to UNMS, check
connect

on to UNMS server.
Qu

ckly Flash

ng Blue Used to locate a dev

ce

n UNMS.
Alternat

ng
Blue/Wh

te F

rmware upgrade

n progress.
G

gab

t Ethernet PoE port for handl

ng all user traff

c and power

ng the dev

ce.
Default IP address: 192.168.1.20.
To reset to factory defaults, press and hold the Reset button for more than 10
seconds wh

le the dev

ce

s powered on. Alternat

vely, the dev

ce may be reset
remotely v

a a Reset button located on the bottom of the G

gab

t PoE Adapter.
Installat

on Overv

ew
We recommend conf

gur

ng both a

rF

ber rad

os (Access Po

nt and Stat

on) before s

te

nstallat

on. Follow the

nstruct

ons

n
“Conf

gurat

on”
for each rad

o.
Conf

gurat

on
Connect

ng Power over Ethernet
1.
AF60 Qu

ck Start Gu

de
18.02.2020 AF60 Quck Start Gude
https://dl.u.com/qsg/AF60/AF60_EN.html 5/23
2.
3.
Conf

gur

ng the Sett

ngs
The dev

ce

s set to DHCP by default, so

t w

ll try to automat

cally obta

n an IP address.
If that fa

ls,

t w

ll use the default fallback IP address, 192.168.1.20. Proceed to the
appropr

ate sect

on,
“DHCP”
or
“Fallback IP Address”
:
DHCP
Use one of the follow

ng methods:
Set up the DHCP server to prov

de a spec

f

c IP address to the dev

ce based on

ts
MAC address (on the label).
Let the dev

ce obta

n an IP address and then check the DHCP server to see wh

ch IP
address was ass

gned.
1. Launch your web browser. Type the appropr

ate address

n the address f

eld. Press
enter (PC) or return (Mac).
AF60 Qu

ck Start Gu

de
18.02.2020 AF60 Quck Start Gude
https://dl.u.com/qsg/AF60/AF60_EN.html 6/23
2. Select your Country and Language. You must agree to the Terms of Use to use the
product. Cl

ck Cont

nue.
3. Enter a Username and Password, conf

rm the Password, and cl

ck Save.
4. Cl

ck the

con.
5. Conf

gure the follow

ng sett

ngs:
a. For one a

rF

ber rad

o, enable Access Po

nt mode. For the other a

rF

ber rad

o
(the Stat

on), keep Access Po

nt d

sabled.
b. Enter a name

n the SSID f

eld. Th

s must be the same on both the AP and the
Stat

on.
c. In the WPA2 Preshared Key f

eld, enter a comb

nat

on of alphanumer

c
characters (0-9, A-Z, or a-z).
6. Cl

ck Save Changes.
7. Conf

gure each a

rF

ber rad

o w

th a un

que IP address:
a. Cl

ck the

con.
Note:
The key

s an alphanumer

c password between 8 and 63
characters long.
AF60 Qu

ck Start Gu

de
18.02.2020 AF60 Quck Start Gude
https://dl.u.com/qsg/AF60/AF60_EN.html 7/23
b. Rev

ew the Network sett

ngs to ensure that each a

rF

ber rad

o has a un

que IP
address. Each can get

ts IP address v

a DHCP, or use a stat

c IP address.
DHCP
By default DHCP cl

ent

s enabled;

f there

s a DHCP server on your
network, the a

rF

ber rad

o w

ll rece

ve

ts address v

a DHCP.
Stat

c IP
You can d

sable the DHCP cl

ent and use a stat

c IP address.
c. Cl

ck Save Changes.
Fallback IP Address
1. Ensure that your computer (or other host mach

ne)

s connected to the same LAN as
the a

rF

ber rad

o.
2. Conf

gure the Ethernet adapter on your host system w

th a stat

c IP address on the
192.168.1.x subnet.
3. Launch your web browser. Type https://192.168.1.20

n the address f

eld, and press
enter (PC) or return (Mac).
4. Select your Country and Language. You must agree to the Terms of Use to use the
product. Cl

ck Cont

nue.
5. Enter a Username and Password, conf

rm the Password, and cl

ck Save.
6. Cl

ck the

con.
Note:
If DHCP cl

ent fa

ls, the dev

ce w

ll use the fallback IP address:
192.168.1.20
AF60 Qu

ck Start Gu

de
18.02.2020 AF60 Quck Start Gude
https://dl.u.com/qsg/AF60/AF60_EN.html 8/23
7. Conf

gure the follow

ng sett

ngs:
a. For one a

rF

ber rad

o, enable Access Po

nt mode. For the other a

rF

ber rad

o (the
Stat

on), keep Access Po

nt d

sabled.
b. Enter a name

n the SSID f

eld. Th

s must be the same on both the AP and the
Stat

on.
c. In the WPA2 Preshared Key f

eld, enter a comb

nat

on of alphanumer

c characters
(0-9, A-Z, or a-z).
8. Cl

ck Save Changes.
9. Conf

gure each a

rF

ber rad

o w

th a un

que IP address:
a. Cl

ck the

con.
b. Rev

ew the Network sett

ngs to ensure that each a

rF

ber rad

o has a un

que IP
address. Each can get

ts IP address v

a DHCP, or use a stat

c IP address.
DHCP
By default DHCP cl

ent

s enabled;

f there

s a DHCP server on your
network, the a

rF

ber rad

o w

ll rece

ve

ts address v

a DHCP.
Fallback IP
If you use the fallback IP address on one rad

o, you must change
the IP Address sett

ng on the other rad

o. The fallback IP address

s:
192.168.1.20
c. Cl

ck Save Changes.
UNMS Management
You can manage your dev

ce us

ng UNMS, wh

ch lets you conf

gure, mon

tor, upgrade,
and back up your dev

ces us

ng a s

ngle appl

cat

on. Get started at
www.unms.com
Installat

on
1.
Note:
The key

s an alphanumer

c password between 8 and 63 characters
long.
AF60 Qu

ck Start Gu

de
18.02.2020 AF60 Quck Start Gude
https://dl.u.com/qsg/AF60/AF60_EN.html 9/23
2.
3.

Opt

onal
Attach the stab

l

zer arms for added support.
(Th

s

s recommended for long-range

nstallat

ons.)
AF60 Qu

ck Start Gu

de
18.02.2020 AF60 Quck Start Gude
https://dl.u.com/qsg/AF60/AF60_EN.html 10/23
4.
AF60 Qu

ck Start Gu

de
18.02.2020 AF60 Quck Start Gude
https://dl.u.com/qsg/AF60/AF60_EN.html 11/23
Note:
The AF60 can mount on e

ther s

de of the pole. Th

s sect

on shows the
AF60 mounted on the left; the procedure for mount

ng on the r

ght

s
s

m

lar.
Left
OR
R

ght
5.
AF60 Qu

ck Start Gu

de
18.02.2020 AF60 Quck Start Gude
https://dl.u.com/qsg/AF60/AF60_EN.html 12/23
Note:
Rotate the Mount

ng Bracket clockw

se unt

l

t locks

nto pos

t

on.
6.
7.
AF60 Qu

ck Start Gu

de
18.02.2020 AF60 Quck Start Gude
https://dl.u.com/qsg/AF60/AF60_EN.html 13/23
8.
(Pole not shown)
9.
AF60 Qu

ck Start Gu

de
18.02.2020 AF60 Quck Start Gude
https://dl.u.com/qsg/AF60/AF60_EN.html 14/23
10.
11.
12.
AF60 Qu

ck Start Gu

de
18.02.2020 AF60 Quck Start Gude
https://dl.u.com/qsg/AF60/AF60_EN.html 15/23
13.
Connect

ng Power
WARNING:
The sw

tch port must comply w

th the power spec

f

cat

ons l

sted

n
“Spec

f

cat

ons”
.
AF60 Qu

ck Start Gu

de
18.02.2020 AF60 Quck Start Gude
https://dl.u.com/qsg/AF60/AF60_EN.html 16/23
OR
Opt

onal
Al

gnment
T

ps
To accurately al

gn the a

rF

ber rad

os for best performance, you MUST al

gn only
one end of the l

nk at a t

me.
You may need to use add

t

onal hardware to compensate for

ssues such as the

mproper or

entat

on of a mount

ng pole or s

gn

f

cant elevat

on d

fferences
between a

rF

ber rad

os.
Establ

sh

ng a L

nk
AF60 Qu

ck Start Gu

de
18.02.2020 AF60 Quck Start Gude
https://dl.u.com/qsg/AF60/AF60_EN.html 17/23
Adjust the a

m of the AP and the Stat

on to establ

sh a l

nk.
Note:
The AP must be a

med f

rst at the Stat

on because the Stat

on does not
transm

t any RF s

gnal unt

l

t detects transm

ss

ons from the AP.
1.
AP
V

sually a

m the AP at the Stat

on by loosen

ng the Flange Nuts on the Mount

ng
Bracket to allow adjustments to the az

muth and the elevat

on.
Adjust the az

muth:
Adjust the elevat

on:
Note:
Do NOT make s

multaneous adjustments on the AP and Stat

on.
AF60 Qu

ck Start Gu

de
18.02.2020 AF60 Quck Start Gude
https://dl.u.com/qsg/AF60/AF60_EN.html 18/23
2.
Stat

on
V

sually a

m the Stat

on at the AP. To adjust the Stat

on’s pos

t

on, adjust the
az

muth and elevat

on as descr

bed

n step 1.
3. Open the Conf

gurat

on Interface, select Tools, and then select Al

gn Antenna.
4. Repeat steps 1-2 unt

l you have ach

eved an opt

mal l

nk and both the 60G and 5G
LEDs are sol

dly l

t blue. Th

s ensures the best poss

ble data rate between the a

rF

ber
rad

os.
5. Lock the al

gnment on both a

rF

ber rad

os by t

ghten

ng all the nuts.
6. Observe the s

gnal level of each a

rF

ber rad

o to ensure that the values rema

n
constant wh

le t

ghten

ng the nuts. If any value changes dur

ng the lock

ng process,
loosen the nuts, f

nal

ze the al

gnment of each a

rF

ber rad

o aga

n, and ret

ghten the
nuts.
Installer Compl

ance Respons

b

l

ty
Dev

ces must be profess

onally

nstalled and

t

s the profess

onal

nstaller’s
respons

b

l

ty to make sure the dev

ce

s operated w

th

n local country regulatory
requ

rements.
Note:
Max

mum s

gnal strength can best be ach

eved by

terat

vely
sweep

ng through both az

muth and elevat

on.
AF60 Qu

ck Start Gu

de
18.02.2020 AF60 Quck Start Gude
https://dl.u.com/qsg/AF60/AF60_EN.html 19/23
Antenna
The 5GHz Output Power f

eld

s prov

ded to the profess

onal

nstaller to ass

st

n
meet

ng regulatory requ

rements.
Spec

f

cat

ons
AF60
D

mens

ons 413 x 413 x 320 mm
(16.26 x 16.26 x 12.60")
We

ght
W

thout Mount 1.4 kg (3.09 lb)
W

th Mount 1.8 kg (3.97 lb)
Enclosure Alum

num, UV-stab

l

zed Polycarbonate
Antenna Ga

n
5 GHz 11 dB

60 GHz 38 dB

Network

ng Interface (1) 10/100/1000 Mbps Ethernet Port
Max. Power Consumpt

on 11W
Power Method Pass

ve PoE, P

ns 4, 5+ and 7, 8-
Power Supply 24VDC, 0.5A G

gab

t PoE Adapter (Included)
Voltage Range +22 to +26VDC
LEDs Power/Ethernet/5G/60G/GPS
Mount

ng Pole Mount (Included)
W

nd Load

ng 420 N @ 200 km/h
(94.4 lbf @ 125 mph)
W

nd Surv

vab

l

ty 200 km/h
(125 mph)
AF60 Qu

ck Start Gu

de
18.02.2020 AF60 Quck Start Gude
https://dl.u.com/qsg/AF60/AF60_EN.html 20/23
AF60
ESD/EMP Protect

on ± 24kV Contact/A

r
Operat

ng Temperature -40 to 60° C (-40 to 140° F)
Operat

ng Hum

d

ty 5 to 95% Noncondens

ng
Cert

f

cat

ons FCC, IC, CE
System
Max

mum Throughput 1.8 Gbps
Max

mum Range 2+ km
Encrypt

on WPA2-PSK (AES)/WPA2 Enterpr

se
OS a

rOS GP
Rad

o
Max. Conducted TX Power
5/60 GHz Comb

ned 25 dBm
Channel Bandw

dth
60 GHz 2160 MHz
5 GHz 20/40/80 MHz
Operat

ng Frequency (MHz)
US/CA U-NII-1 5150 - 5250
U-NII-3 5725 - 5850
57,000 - 66,000
Worldw

de 5180 - 5875
57,000 - 66,000
Management Rad

o (MHz)
Worldw

de 2412 - 2472
US/CA 2412 - 2462
Safety Not

ces
1. Read, follow, and keep these

nstruct

ons.
2. Heed all warn

ngs.
3. Only use attachments/accessor

es spec

f

ed by the manufacturer.
WARNING:
Do not use th

s product

n locat

on that can be submerged by water.
WARNING:
Avo

d us

ng th

s product dur

ng an electr

cal storm. There may be a remote
r

sk of electr

c shock from l

ghtn

ng.
AF60 Qu

ck Start Gu

de

Other manuals for airFiber AF 60

4

Other Ubiquiti Wireless Access Point manuals

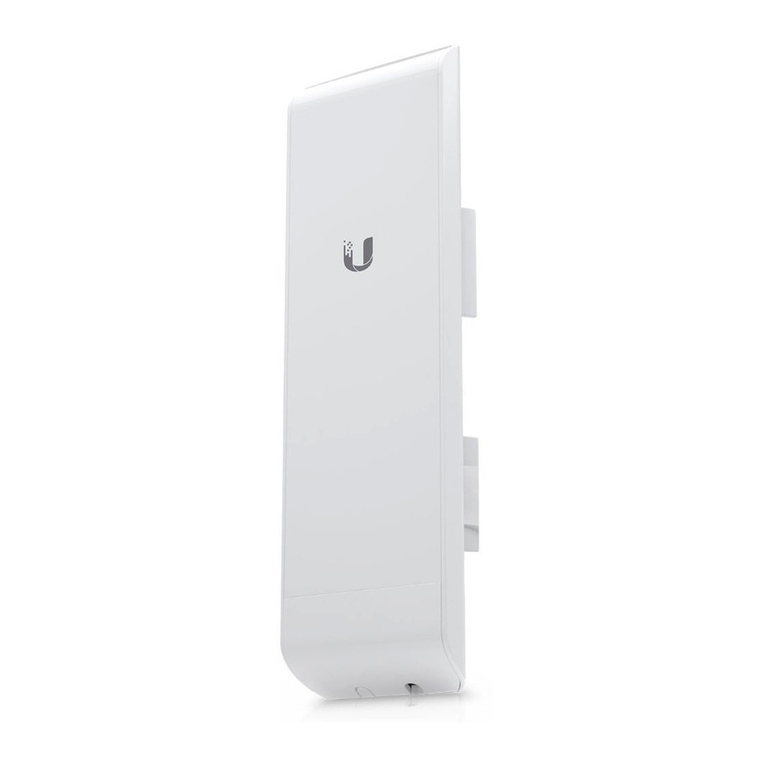
Ubiquiti NanoBeam NBE2ACN User manual

Ubiquiti

Ubiquiti NanoBeam NBE2ACN User manual

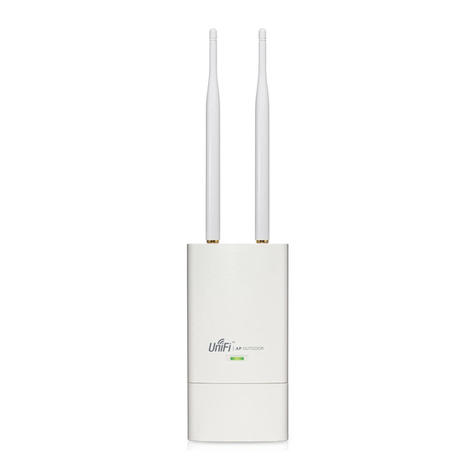
Ubiquiti UniFi AP AC Outdoor User manual

Ubiquiti

Ubiquiti UniFi AP AC Outdoor User manual

Ubiquiti UniFi Enterprise AP User manual

Ubiquiti

Ubiquiti UniFi Enterprise AP User manual

Ubiquiti RocketM Series User manual

Ubiquiti

Ubiquiti RocketM Series User manual

Ubiquiti UAP-AC-PRO User manual

Ubiquiti

Ubiquiti UAP-AC-PRO User manual

Ubiquiti PowerBeam m5 iso PBE-M5-300-ISO User manual

Ubiquiti

Ubiquiti PowerBeam m5 iso PBE-M5-300-ISO User manual

Ubiquiti Bullet M5 HP User manual

Ubiquiti

Ubiquiti Bullet M5 HP User manual

Ubiquiti Loco5AC User manual

Ubiquiti

Ubiquiti Loco5AC User manual

Ubiquiti airCube ISP User manual

Ubiquiti

Ubiquiti airCube ISP User manual

Ubiquiti PowerBeam AC PBE-5AC-620 User manual

Ubiquiti

Ubiquiti PowerBeam AC PBE-5AC-620 User manual

Ubiquiti NanoBeam 5AC Gen 2 NBE-5AC-Gen2 User manual

Ubiquiti

Ubiquiti NanoBeam 5AC Gen 2 NBE-5AC-Gen2 User manual

Ubiquiti airFiber AF-11FX User manual

Ubiquiti

Ubiquiti airFiber AF-11FX User manual

Ubiquiti NanoStation NSM365 User manual

Ubiquiti

Ubiquiti NanoStation NSM365 User manual

Ubiquiti QCA9994 Application guide

Ubiquiti

Ubiquiti QCA9994 Application guide

Ubiquiti UniFi UBB User manual

Ubiquiti

Ubiquiti UniFi UBB User manual
Ubiquiti PowerBeam PBE-5AC400 User manual

Ubiquiti

Ubiquiti PowerBeam PBE-5AC400 User manual

Ubiquiti UniFi UAP User manual

Ubiquiti

Ubiquiti UniFi UAP User manual

Ubiquiti UAP-AC-LITE User manual

Ubiquiti

Ubiquiti UAP-AC-LITE User manual

Ubiquiti UniFi User manual

Ubiquiti

Ubiquiti UniFi User manual

Ubiquiti U-LTE User manual

Ubiquiti

Ubiquiti U-LTE User manual

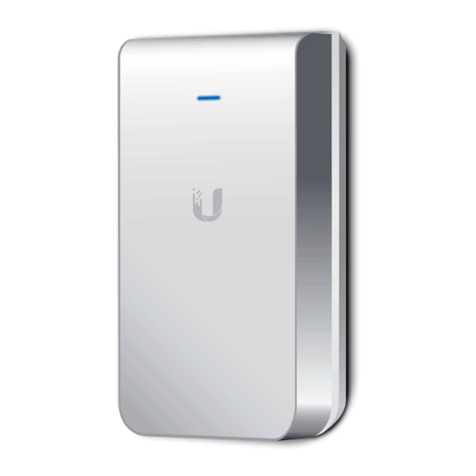
Ubiquiti UAP-IW-HD User manual

Ubiquiti

Ubiquiti UAP-IW-HD User manual

Ubiquiti Rocket 5AC PTP User manual

Ubiquiti

Ubiquiti Rocket 5AC PTP User manual

Ubiquiti NanoBridge M5 User manual

Ubiquiti

Ubiquiti NanoBridge M5 User manual

Ubiquiti NanoStation M2 User manual

Ubiquiti

Ubiquiti NanoStation M2 User manual

Popular Wireless Access Point manuals by other brands

Cisco AIR-AP1220B-A-K9 - Aironet 1200 - Wireless Access... Hardware installation guide

Cisco

Cisco AIR-AP1220B-A-K9 - Aironet 1200 - Wireless Access... Hardware installation guide

HMS Anybus Wireless Bridge II Startup guide

HMS

HMS Anybus Wireless Bridge II Startup guide

Niveo NW-ER3 user manual

Niveo

Niveo NW-ER3 user manual

Hawking HWBA54G user manual

Hawking

Hawking HWBA54G user manual

Linksys Instant Wireles Series user guide

Linksys

Linksys Instant Wireles Series user guide

Cerio OW-300N2-A2 quick start guide

Cerio

Cerio OW-300N2-A2 quick start guide

Compex WP54 Quick install guide

Compex

Compex WP54 Quick install guide

Cisco Aironet 3500 Series Getting started guide

Cisco

Cisco Aironet 3500 Series Getting started guide

NexusLink WB-1750-KIT user manual

NexusLink

NexusLink WB-1750-KIT user manual

Ruckus Wireless T710 Quick setup guide

Ruckus Wireless

Ruckus Wireless T710 Quick setup guide

LEGRAND HA7040 quick start guide

LEGRAND

LEGRAND HA7040 quick start guide

Motorola AP6532 installation guide

Motorola

Motorola AP6532 installation guide

Cisco Linksys WAP54G LA user guide

Cisco

Cisco Linksys WAP54G LA user guide

Anybus AWB4003-B user manual

Anybus

Anybus AWB4003-B user manual

D-Link DAP-3315 Quick installation guide

D-Link

D-Link DAP-3315 Quick installation guide

Gemtek WX-1516 user manual

Gemtek

Gemtek WX-1516 user manual

ORiNG IGAP-W99110GP+ user manual

ORiNG

ORiNG IGAP-W99110GP+ user manual

Motorola AP 7181 installation guide

Motorola

Motorola AP 7181 installation guide

manuals.online logo
manuals.online logoBrands
  • About & Mission
  • Contact us
  • Privacy Policy
  • Terms and Conditions

Copyright 2025 Manuals.Online. All Rights Reserved.