consists of a unique rotary energy recovery wheel that
rotates in and out of fresh air streams within a heavy duty,
permanently installed blower cabinet that provides ready
access to all internal components. The media is polymeric
material that is coated and permanently bonded with a dry
desiccant for total enthalpy recovery. The wheel is belt
driven by PSC motor and drive belt.
When slowly rotating through counter flowing exhaust and
fresh air streams the ERV adsorbs sensible heat and latent
heat from the warmer air stream and transfer this total
energy to the cooler air stream during the second half of its
rotating cycle. Rotating at 60 revolutions per minute, the
wheel provides constant flow of energy from warmer to
cooler air stream. The large energy transfer surface and
laminar flow through the wheel causes this constant flow
of recovered energy to represent up to 85% of the
difference in total energy contained within the two air
streams.
Sensible and latent heat are the two components of total
heat. Sensible heat is energy contained in dry air and latent
heat is the energy contained within the moisture of the air.
The latent heat load from the outdoor fresh air on an air
conditioning system can often be two to three times that of
the sensible heat load and in the winter it is a significant
part of a humidification heat load.
During both the summer and winter, the ERV transfers
moisture entirely in the vapor phase. This eliminates wet
surfaces that retain dust and promote fungal growth as well
as the need for a condensate pan and drain to carry water.
Because it is constantly rotating when in the air stream, the
ERV is always being cleared by air, first in one direction
then the other. Because it is always dry, dust or other
particles impinging on the surface during one half cycle,
are readily removed during the next half cycle.
Low Ambient Kit is appropriate for climates with limited
HVAC system operation when outdoor temperatures are
below 15oF.
The frost threshold is the outdoor temperature at which
frost will begin to form on the ERV wheel. For energy
recovery ventilators, the frost threshold is typically below
15oF. Frost threshold is dependent on indoor temperature
and humidity. The table shows how the frost threshold
temperatures vary depending on indoor conditions.
FROST THRESHOLD TEMPERATURE
INDOOR RH AT
70oF
FROST THRESHOLD
TEMPERATURE
20% 0oF
30% 5oF
40% 10oF
Because Energy Recovery Ventilators have a low frost
threshold, frost control options are not necessary in many
climates. Where outdoor temperatures may drop below
the frost threshold during the ERV operational hours,
exhaust only frost control option is available.
Low Ambient Kit
Low Ambient Kit turns off the supply blower when outdoor
temperatures fall below the frost threshold. Exhaust Only
set points are field adjustable with a factory supplied
thermostat. Supply fan operation is automatically restored
when the exhaust air temperature rises above the
thermostat set point. Provisions for introducing make-up
air into the building when the supply blower is off to avoid
depressurization should be considered.
PAGE 3
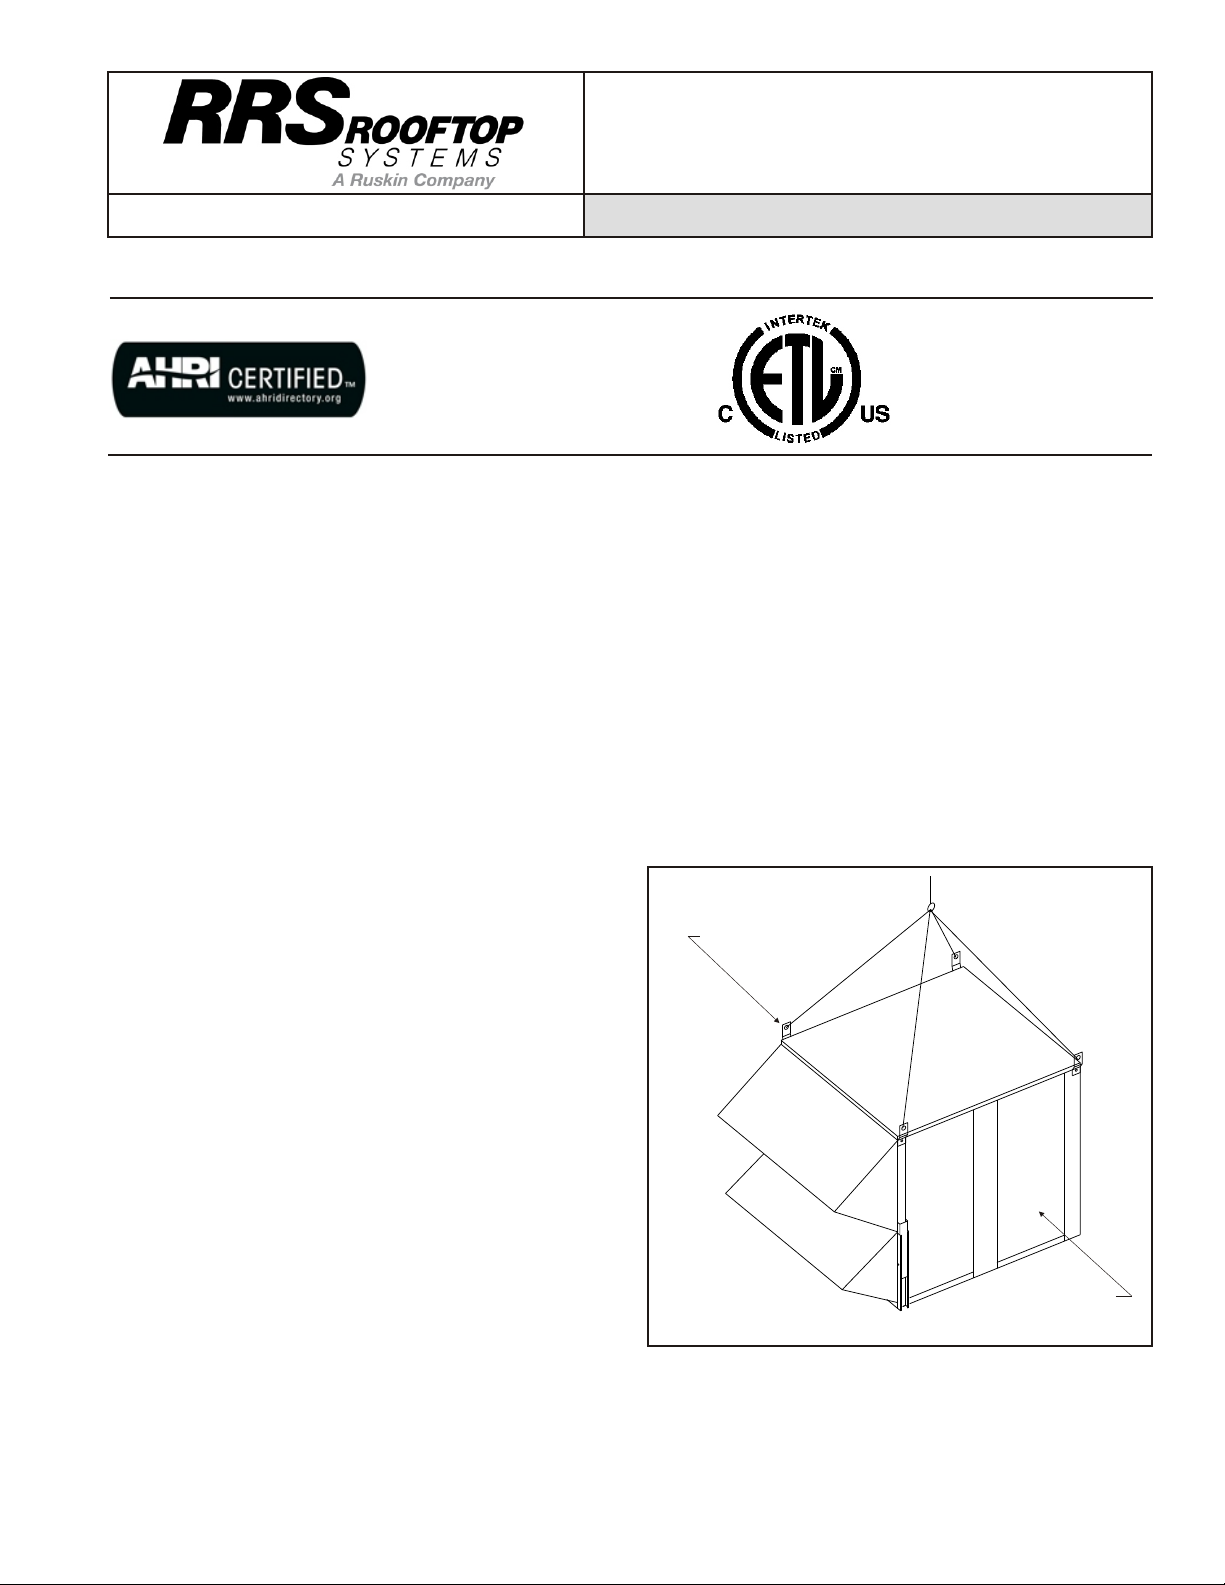
Recovery Mode
On a thermostat call for blower operation in heating,
cooling or continuous blower, the ERW will rotate between
fresh air and exhaust air streams. Both the fresh air and
exhaust air blowers will also be operating to overcome the
air resistance of the ERV. See Figure 3.
RECOVERY MODE
Figure 3
IX - SYSTEM CHECK
1. Disconnect main power.
2. Turn thermostat to "Cont" for blower operation.
3. Restore power to unit. Observe ERV wheel rotation
and both fresh air and exhaust air blowers will
operating.
Note: If Low ambient kit is used the jumper between
TB37-5 & TB37-6 should be removed. Also if
system check out is being conducted at low
ambient temperatures, technician should be
aware that this kit can cause system not to
operate.
4. Verify that the ERV (3) three phase blower motors are
phased sequentially ensuring correct rotation and
operation.
a) Disconnect power.
b) Reverse any two field power leads to the ERV.
c) Reapply power.
A - Return Damper Settings
Manually adjust position of dampers. This is accomplished
by loosing and tightening set screw on positioning rod.
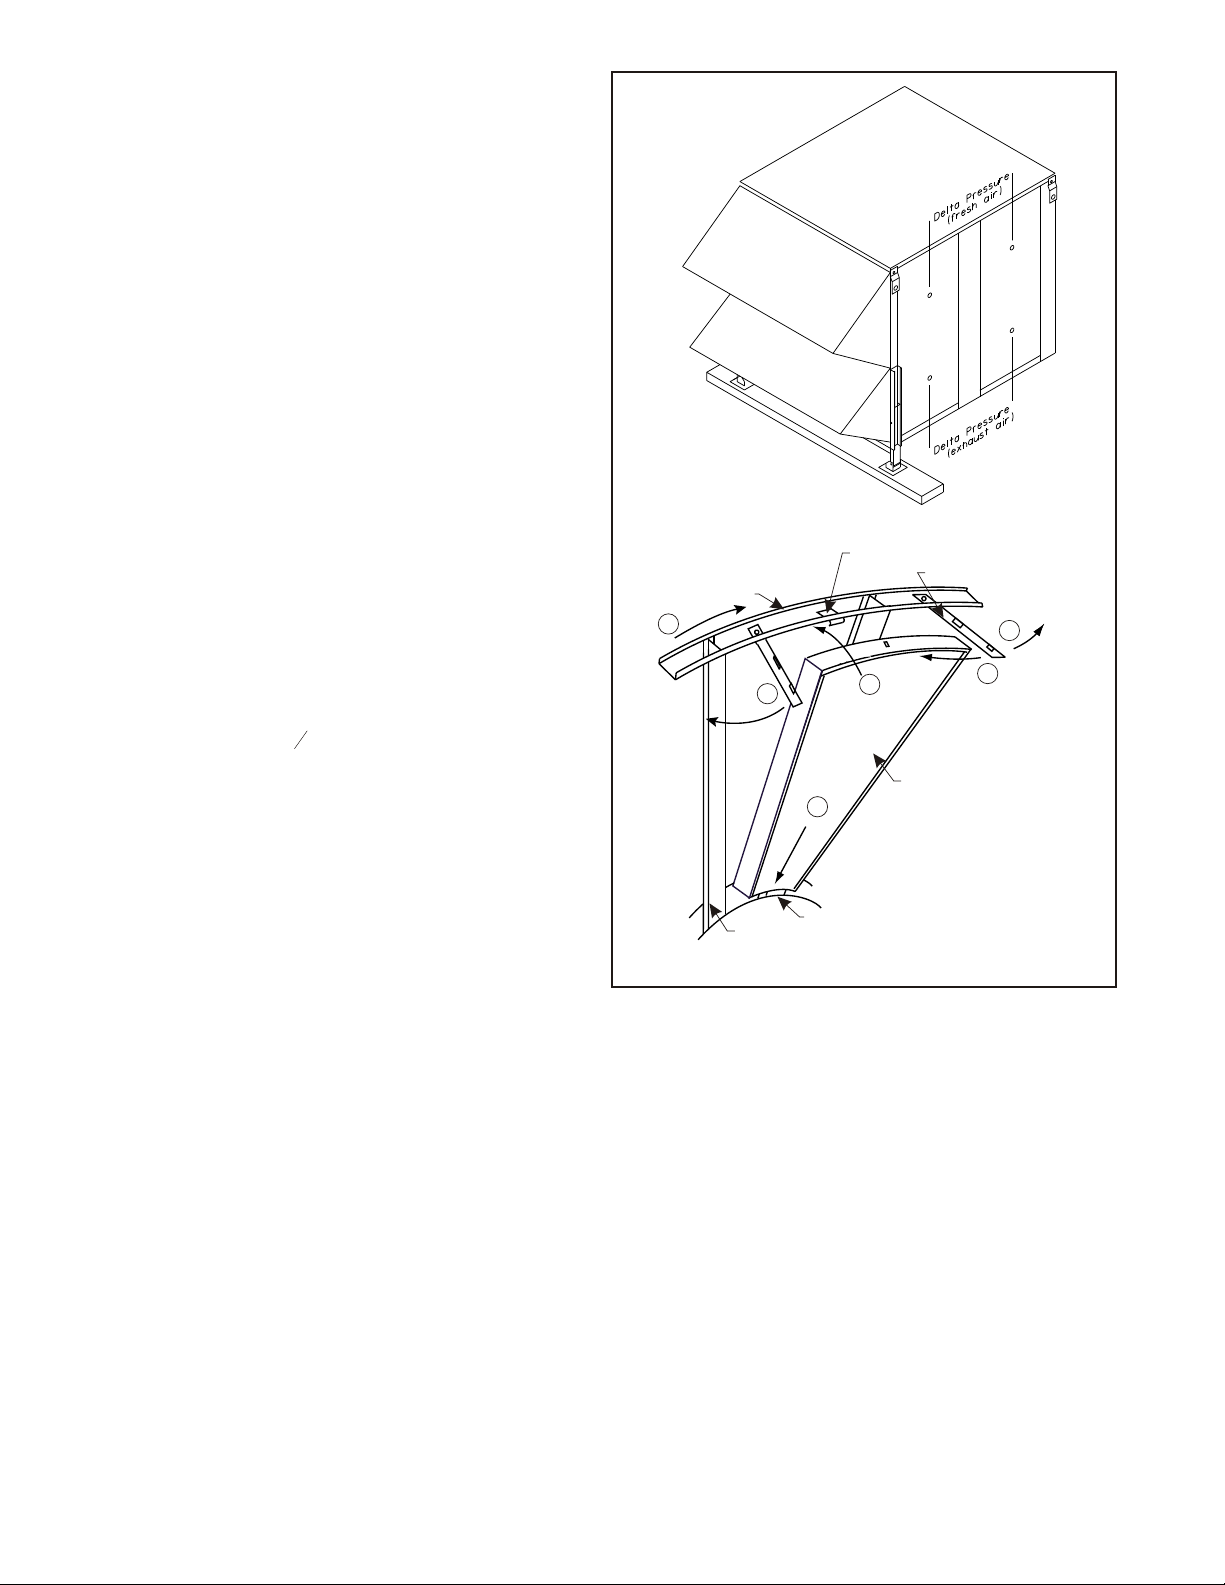
B - Blower Speed Adjustment
Blower speed selection is accomplished by changing the
sheave setting on both fresh air and exhaust air blowers.
Both blowers are factory set at "closed" for maximum
airflow. To determine air flow setting, external static
pressure readings will need to be read across the ERV.
See Figure 4 for location to take pressure readings.
1. Disconnect main power to unit before making
adjustment to economizer and/or ERV unit.
2. Replace ERV control access cover.