manuals.online logo
Brands
  1. Home
  2. •
  3. Brands
  4. •
  5. Saab
  6. •
  7. Automobile Electronic
  8. •
  9. Saab 32 026 005 User manual

Saab 32 026 005 User manual

Other Saab Automobile Electronic manuals

Saab 32 025 687 User manual

Saab

Saab 32 025 687 User manual

Saab 32 025 902 User manual

Saab

Saab 32 025 902 User manual

Saab 32000574 User manual

Saab

Saab 32000574 User manual

Saab 32 025 686 User manual

Saab

Saab 32 025 686 User manual

Saab 32 025 603 User manual

Saab

Saab 32 025 603 User manual

Saab 12 832 509 User manual

Saab

Saab 12 832 509 User manual

Saab 33 000 573 User manual

Saab

Saab 33 000 573 User manual

Saab 12 787 887 User manual

Saab

Saab 12 787 887 User manual

Popular Automobile Electronic manuals by other brands

DRG LC 120 installation instructions

DRG

DRG LC 120 installation instructions

Blue Ox BX8848 installation instructions

Blue Ox

Blue Ox BX8848 installation instructions

Dometic MAGICWATCH MWE890K Installation and operating manual

Dometic

Dometic MAGICWATCH MWE890K Installation and operating manual

Honeywell Thor VM3A user guide

Honeywell

Honeywell Thor VM3A user guide

Waeco MagicWatch MWE250 Installation and operating manual

Waeco

Waeco MagicWatch MWE250 Installation and operating manual

GoldCruise GC90Ci installation manual

GoldCruise

GoldCruise GC90Ci installation manual

Rydeen BKM091 user manual

Rydeen

Rydeen BKM091 user manual

Skoda 5E0 054 630 Fitting instructions

Skoda

Skoda 5E0 054 630 Fitting instructions

VDO SENDER UNIT 2159-0 datasheet

VDO

VDO SENDER UNIT 2159-0 datasheet

iDataLink maestro Rr install guide

iDataLink

iDataLink maestro Rr install guide

Audiovox PRO-PDA15 installation guide

Audiovox

Audiovox PRO-PDA15 installation guide

Movon MDAS-3LFFHD user manual

Movon

Movon MDAS-3LFFHD user manual

Pioneer Comfort adapter CA-D-PI.150 quick start guide

Pioneer

Pioneer Comfort adapter CA-D-PI.150 quick start guide

Dietz 1110 instruction manual

Dietz

Dietz 1110 instruction manual

Perfect Power SMT8-T5 Technical manual

Perfect Power

Perfect Power SMT8-T5 Technical manual

Crux RVCFD-79 manual

Crux

Crux RVCFD-79 manual

Nonda ZUS user manual

Nonda

Nonda ZUS user manual

Adaptiv Mini installation guide

Adaptiv

Adaptiv Mini installation guide

manuals.online logo
manuals.online logoBrands
  • About & Mission
  • Contact us
  • Privacy Policy
  • Terms and Conditions

Copyright 2025 Manuals.Online. All Rights Reserved.

Saab 9-5
900 Installation instructions
SCdefault
MONTERINGSANVISNING ·INSTALLATION INSTRUCTIONS
MONTAGEANLEITUNG ·INSTRUCTIONS DE MONTAGE
SITdefault
Saab 9-5
Parking assistance (SPA)
Accessories Part No. Group Date Instruction Part No. Replaces
32 026 005 9:89-33 Jan 07 32 026 006
E930A513
2 32 026 006
Saab 9-5
1 Electronic unit
2 Screw (x2)
3 Plastic nut (x2)
4 Holder (x4)
5 Distance sensor/sensor (x4)
6 Connector bracket
7 Wiring harness, distance sensor/sensor
8 Adapter harness
9 Connector
10 Cable tie (x20)
11 Cable tie (x2)
12 Cable tie
13 Cable tie, rubber grommet
14 Rubber grommet
15 Fuse holder with 7.5 A fuse
16 Fuse holder with 10 A fuse
E930A514
8 7
1
2396
11
14
16
15
12 10 13
4 5
32 026 006 3
Saab 9-5
Before starting work the visible sections of the
distance sensors and holders must be painted in
the same colour as the bumper shell.
14D - Prepare the luggage compartment:
·Fold forward the rear seat seat cushions and
lower the rear seat backrests.
·Open the boot lid and remove the luggage
compartment floor (A).
·Remove the scuff plate (B).
·Remove the left-hand side trim (C) in the lug-
gage compartment and the insulation pads
(x2) in the rear edge of the body.
·Loosen and move aside the right-hand side
trim (D) in the luggage compartment and
remove the insulation pads (x2) in the rear
edge of the body.
Important
The layer of paint must not be thicker than 90mto
avoid affecting system functionality.
E930A515
A
A A
B B
C D
A
4 32 026 006
Saab 9-5
25D - Prepare the luggage compartment:
·Fold forward the left-hand section of the rear
seat seat cushion and the left-hand section of
the rear seat backrest. Remove the cover
between the left-hand rear door and the back-
rest.
·Lift out the cargo guard.
·Lift away the covers (A) over the storage
compartments and lift out the storage boxes
(B).
·Remove the insulation pads from the rear
edge of the body.
·Remove the luggage compartment floor (C).
·Remove the scuff plate (D), 2 covers, screws
and clips.
The following points apply to the left-hand
side:
·Detach the rear roof cover (E) at the edge to
obtain access to the D-pillar trim (F).
·Remove the D-pillar trim, secured with clips.
·Remove the parcel shelf support (G), 1 cover
and 3 screws.
·Remove the side bolster (H) by first pulling its
top edge so that the lock tongue releases.
Then unhook the lower edge.
·Remove the screws in the top edge of the
side trim (I).
·Fold out the side trim and unplug the connec-
tor to the CD changer if the car was equipped
with one. Lift out the side trim.
E930A516
A,B
D
A,B
C
C
F
E
HG,I
32 026 006 5
Saab 9-5
3 Remove the nuts (A) that hold the bumper. The
lower studs only have nuts if the car is equipped
with towbar.
4Cars with towbar: Remove the nuts for both
reinforcements.
5 Raise the car.
6 Remove the bumper bolts at the wheel hous-
ings.
7Cars with towbar: Unplug the connector for the
towbar wiring harness and remove the four bolts
holding the towbar to the body.
8 Lower the car.
9 With help from an assistant, pull the bumper out
from the clips. Lift the bumper out backwards.
Important
Work carefully during removal so that paint dam-
age is avoided.
Important
The outer bolts (B) are fitted in loose nut plates.
Important
Place the bumper on a soft, clean surface.
E930A517
A
B
6 32 026 006
Saab 9-5
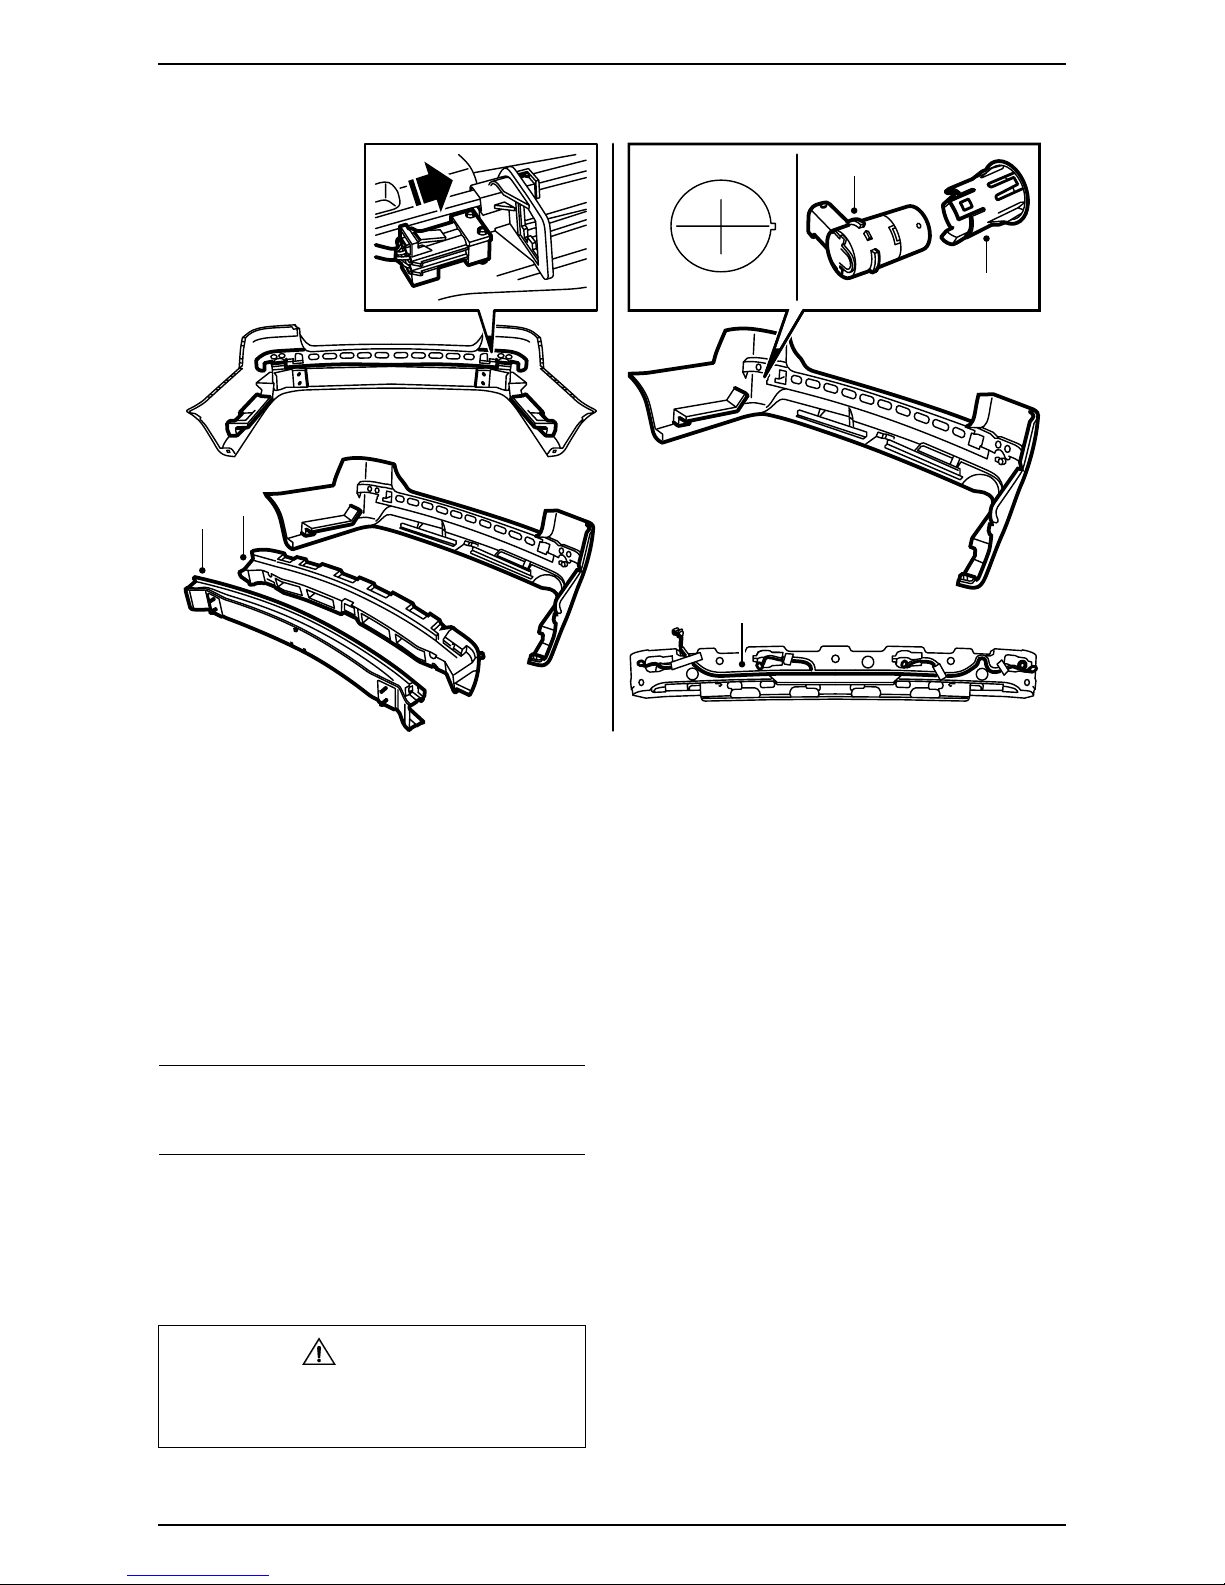
10 5D: Remove the moulding (4 screws) from the
bumper shell.
11 Remove the bumper rail (A) from the protective
shell by detaching the retaining clips.
12 Remove the cellular block (B) from the bumper
shell (wedged into the protective shell's mount-
ing wedges).
13 Drill 4 x 31 mm holes (C) in the pre-punched
markings in the bumper shell.
14 File out the guide groove 1 x 1 mm (C). The
guide groove must be on the side of the hole fac-
ing the left-hand side of the bumper shell.
15 Fit the distance sensors (D) in the holders (E)
and then in the bumper shell.
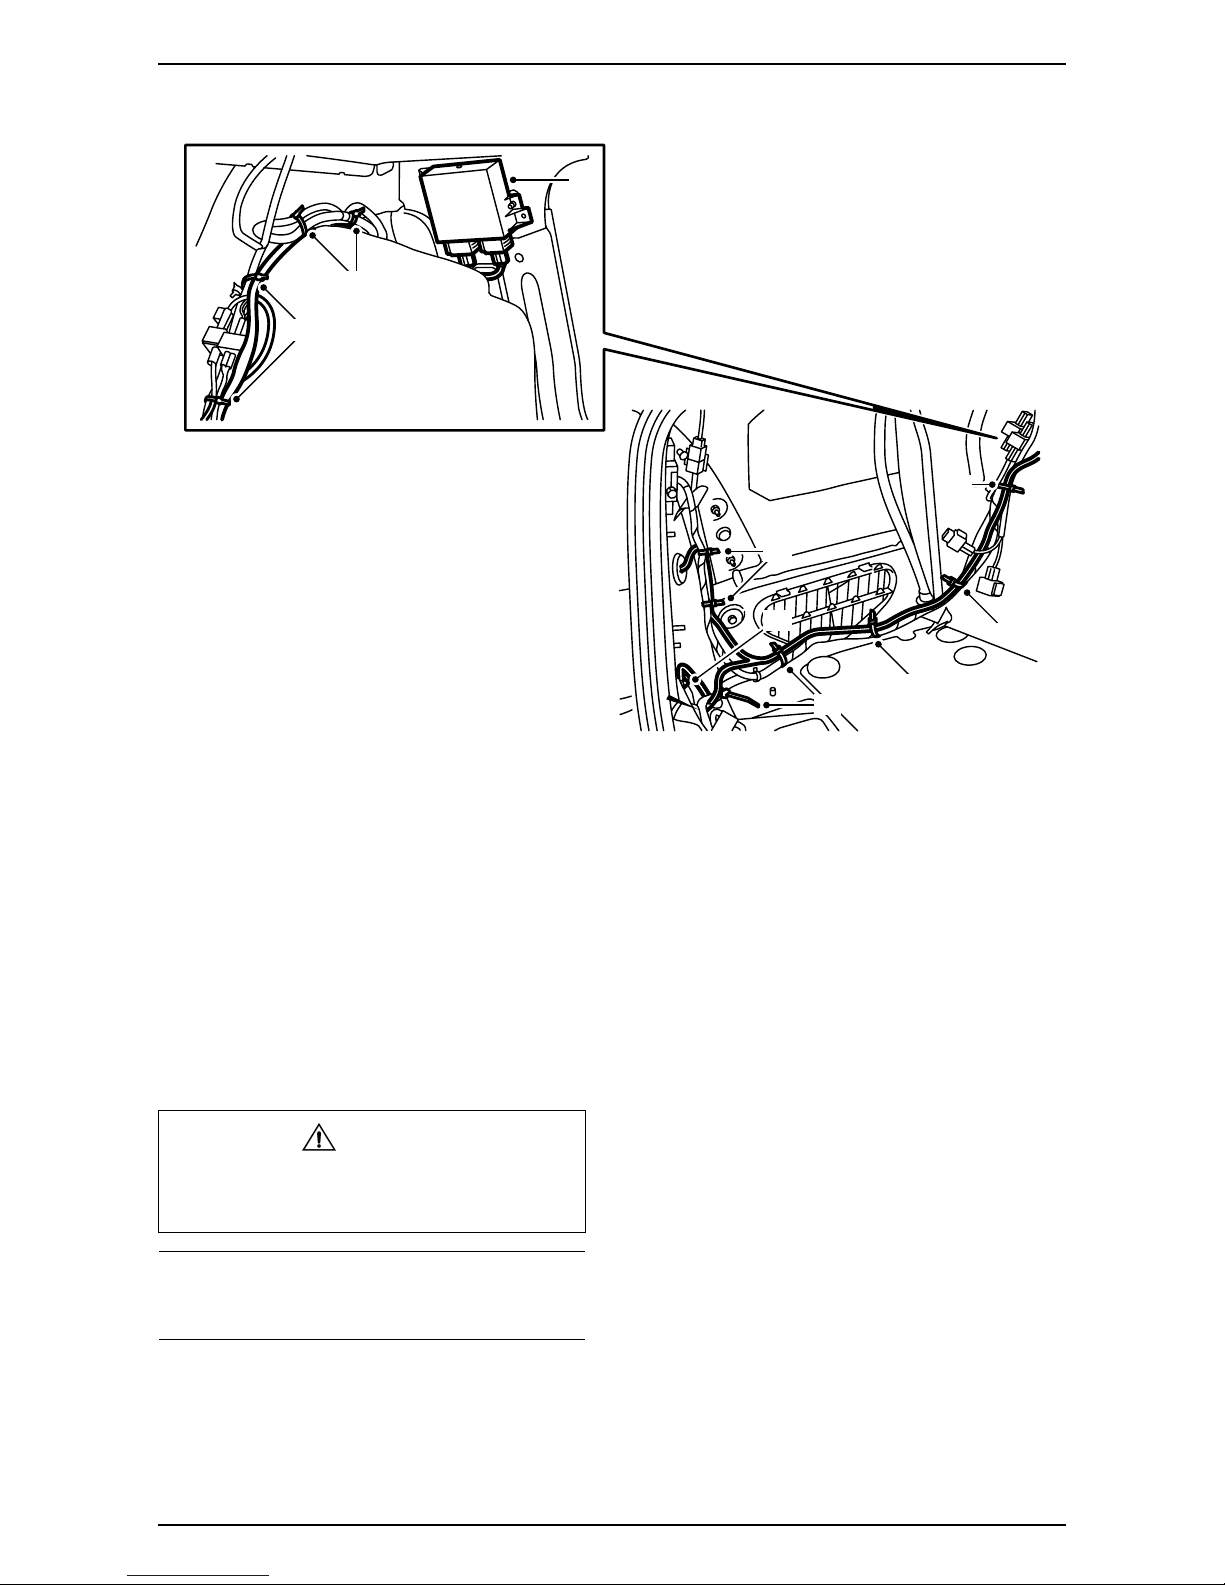
16 Pre-route the wiring harness in the centre foam
section (F). The connector comes out on the
left-hand side. Connect the wiring harness to the
sensors.
17 Fit the connector holder to the left-hand side of
the bumper rail and fit the connector into the
holder (G).
18 Fit the cellular block (B) with wiring harness in
the bumper shell.
19 Guide the bumper rail (A) in toward the bumper
shell's guide pin. Fit the bumper rail with any
reinforcements to the bumper shell.
20 Fit the remaining cellular blocks.
21 5D: Fit the moulding (4 screws) to the bumper
shell.
Important
Do not file too far! The cover would then not be
over the guide.
WARNING
Check that the wiring harness is not trapped.
Incorrect fitting could damage the wiring harness
and cause a short-circuit/fire.
E930A518
C
G
F
D
E
AB
32 026 006 7
Saab 9-5
22 4D - Fit the rubber grommet and plug in the con-
nector:
·Fit the rubber grommet (A) on the parking
assistance system's wiring harness with the
funnel-shaped end directed in towards the
car. The grommet should be located 370 mm
from the end of the taping at the cable termi-
nals.
·Secure the rubber grommet to the wiring har-
ness using a cable tie.
·Remove the rubber plug below the left-hand
tail lamp.
·Guide the wiring harness out through the hole
and fit the kit's rubber grommet.
·Insert the cable terminals in the connector (B)
as follows:
1 Black (BK)
2 Brown (BN)
3 Yellow (YE)
4 Blue (BU)
5 Orange (OG)
6 Grey (GY)
Important
Check that the cable terminals lock firmly and that
the whole of the seal is in contact against the con-
nector.
Be careful so that the seals are not damaged.
E930A519
A
B
8 32 026 006
Saab 9-5
23 5D - Route the wiring harness out and plug in
the connector:
·Remove the left-hand mounting bracket (A)
for the bumper under the left-hand tail lamp.
·Remove the cable tie (D) and tape from the
rubber grommet below the left-hand tail lamp.
·Pull the wiring harness out through the rubber
grommet until the grommet is 370 mm from
the end of the cable terminal taping.
·Insert the cable terminals (C) as follows:
1 Black (BK)
2 Brown (BN)
3 Yellow (YE)
4 Blue (BU)
5 Orange (OG)
6 Grey (GY)
·Affix tape and fit a new cable tie (B) on the
rubber grommet.
·Fit the left-hand mounting bracket (A) for the
bumper shell under the left-hand tail lamp.
The wiring harness must be routed inside the
bracket (D).
Important
Check that the cable terminals lock firmly and that
the whole of the seal is in contact against the con-
nector.
Be careful so that the seals are not damaged.
A
D
B
C
A
E930A520
32 026 006 9
Saab 9-5
24 Fit in the bumper and plug in the connector (A).
25 Fit the bumper (B).
Tightening torque 40 Nm (30 lbf ft)
26 Cars with towbar: Screw in the reinforcements
to the car.
Tightening torque 40 Nm (30 lbf ft)
27 Raise the car.
28 Fit the bumper bolts at the wheel housings.
29 Cars with towbar: Plug in the connector for the
towbar wiring harness.
30 Cars with towing bracket: Fit the bolts (C) and
nut plates holding the towing bracket to the
body.
Tightening torque 40 Nm (30 lbf ft)
Important
Work carefully during fitting so that paint damage
is avoided.
E930A521
B
C
A
10 32 026 006
Saab 9-5
31 4D - Fit the control module and secure the wir-
ing harness:
·Attach the ground cable to the grounding
point (A) in the luggage compartment below
the left-hand tail lamp.
·Route the wiring harness along the left-hand
wheel housing.
·Insert the screws in the control module holes,
connect the wiring harness to the control
module (B), and fit the control module with
connectors facing down onto the plate behind
the rear seat backrest. Tighten the screws.
·Secure the wiring harness the whole way
using cable ties (C).
WARNING
Check that the wiring harness is not trapped.
Incorrect fitting could damage the wiring harness
and cause a short-circuit/fire.
Important
Secure the wiring harness so that there is no risk
of chafing and rattling.
E930A522
C
C
B
C
C
C
C
A
C