manuals.online logo
Brands
  1. Home
  2. •
  3. Brands
  4. •
  5. Safety 1st
  6. •
  7. Thermometer
  8. •
  9. Safety 1st 49545 User manual

Safety 1st 49545 User manual

• Read these instructions carefully to ensure accurate temperature readings. Temperature readings
are affected by many factors including exercise, drinking hot or cold beverages prior to taking a
reading as well as technique.
• High, prolonged fever requires medical attention especially for young children. Please contact
your physician.
• Do not allow children to take their temperatures unattended. This thermometer is not a toy and
should be kept out of a child’s reach when not in use.
• Do not allow children to walk or run during temperature taking. The probe could present a hazard.
• Oral, underarm, and rectal temperatures vary by approximately 1.0°F (0.5°C).
• D o not return this product to the place of purchase. If any parts are missing, email
[email protected], call Consumer Relations at (800) 544-1108, or fax at (800) 207-8182.
You can also visit our website at www.safety1st.com. Have the model number (49545 or 49657)
and date code (manufacture date located on back of thermometer) ready.
WARNING:
BEFORE USING DIGITAL THERMOMETER, PLEASE READ
CAREFULLY.
• This is NOT an ear thermometer. Take temperature
measurements Underarm, Orally or Rectally.
• NEVER allow a child to play with these products. They are
not toys. They are sensitive electronic devices and may be
damaged if not used properly under parental supervision.
• ALWAYS supervise your child when using thermometer.
NEVER allow your child to use it alone or without close
parental supervision.
• Avoid sudden impact and dust.
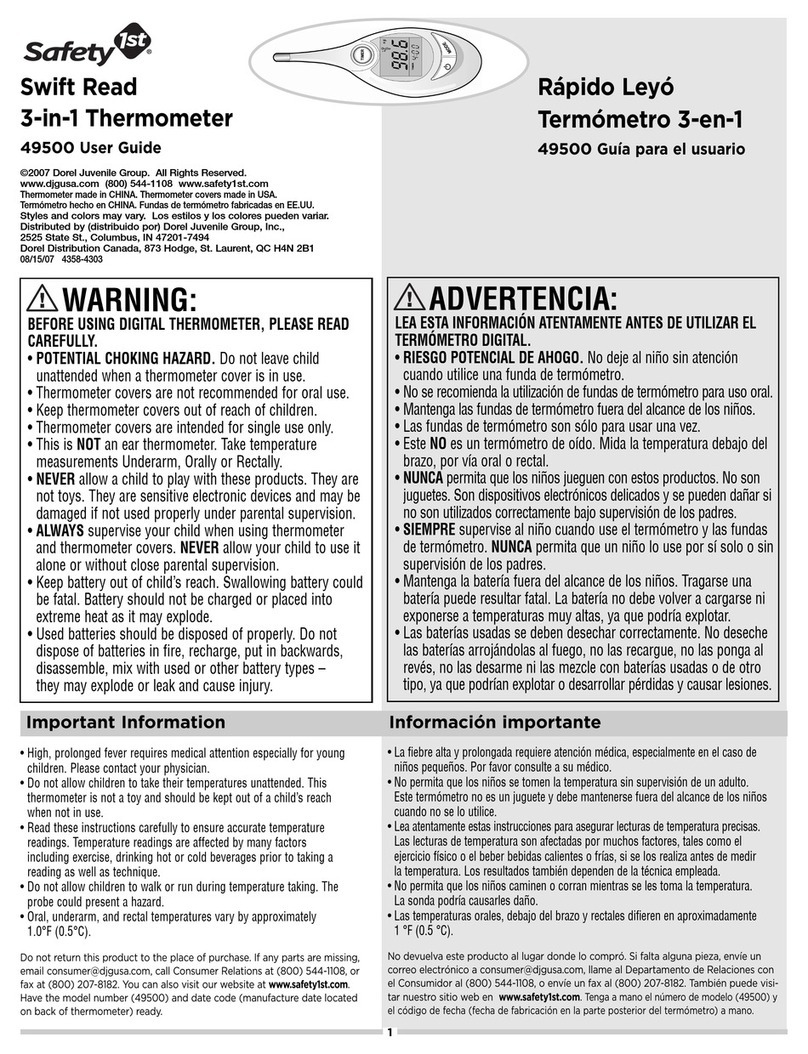
49545 & 49657
User Guide
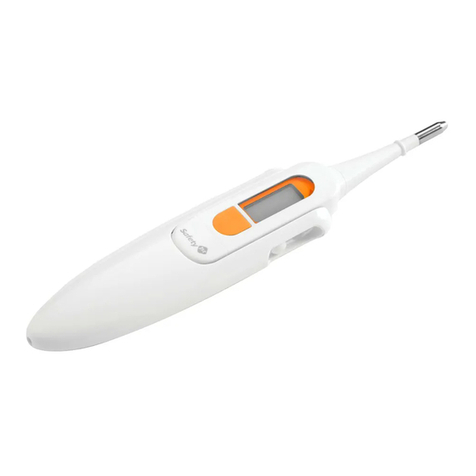
Exchangeable Tip 3-in-1
Thermometer
49545 y 49657
Guía para el usuario
Termómetro de puntas
intercambiables “3-in-1”
©2011 Dorel Juvenile Group. All Rights Reserved. Todos derechos reservados.
www.djgusa.com (800) 544-1108 www.safety1st.com
Styles and colors may vary. Los estilos y los colores pueden variar.
Distributed by (distribuido por) Dorel Juvenile Group, Inc., 2525 State St., Columbus, IN 47201-7494
Dorel Distribution Canada, 873 Hodge, St. Laurent, QC H4N 2B1
11/01/11 4358-4572B
Important Information Información importante
1
• L ea atentamente estas instrucciones para asegurar lecturas de temperatura precisas. Las lecturas de temper-
atura son afectadas por muchos factores, tales como el ejercicio físico o el beber bebidas calientes o frías, si
se los realiza antes de medir la temperatura. Los resultados también dependen de la técnica empleada.
• La fiebre alta y prolongada requiere atención médica, especialmente en el caso de niños pequeños. Por
favor consulte a su médico.
• N o permita que los niños se tomen la temperatura sin supervisión de un adulto. Este termómetro no es un
juguete y debe mantenerse fuera del alcance de los niños cuando no se lo utilice.
• No permita que los niños caminen o corran mientras se les toma la temperatura. La sonda podría causarles
daño.
• Las temperaturas orales, debajo del brazo y rectales difieren en aproximadamente 1 °F (0.5 °C).
•
N
o devuelva este producto al lugar donde lo compró. Si falta alguna pieza, envíe un correo electrónico a con-
[email protected], llame al Departamento de Relaciones con el Consumidor al (800) 544-1108, o envíe un
fax al (800) 207-8182. También puede visitar nuestro sitio web en
www.safety1st.com. Tenga a mano el número
de modelo (49545 o 49657) y el código de fecha (fecha de fabricación en la parte posterior del termómetro) a mano.
ADVERTENCIA:
LEA ESTA INFORMACIÓN ATENTAMENTE ANTES DE UTILIZAR EL
TERMÓMETRO DIGITAL.
• Este NO es un termómetro de oído. Mida la temperatura debajo del
brazo, por vía oral o rectal.
• NUNCA permita que los niños jueguen con estos productos. No son
juguetes. Son dispositivos electrónicos delicados y se pueden dañar si
no son utilizados correctamente bajo supervisión de los padres.
• SIEMPRE supervise al niño cuando use el termómetro. NUNCA per-
mita que un niño lo use por sí solo o sin supervisión de los padres.
• E vite las sacudidas bruscas y el polvo.
4
Dorel Juvenile Group, Inc. warrants to the original purchaser that this product (Exchangeable Tip
3-in-1 Thermometer), is free from material and workmanship defects when used under normal
conditions for a period of one (1) year from the date of purchase. Should the product contain
defects in material or workmanship Dorel Juvenile Group, Inc., will repair or replace the product,
at our option, free of charge. Purchaser will be responsible for all costs associated with packag-
ing and shipping the product to Dorel Juvenile Group Consumer Relations Department at the
address noted on the front of this document and all other freight or insurance costs associated
with the return. Dorel Juvenile Group will bear the cost of shipping the repaired or replaced
product to the purchaser. Product should be returned in its original package accompanied by a
proof of purchase, either a sales receipt or other proof that the product is within the warranty
period. This warranty is void if the owner repairs or modifies the product or the product has
been damaged as a result of misuse. 
This warranty excludes any liability other than that expressly stated previously, including but not
limited to, any incidental or inconsequential damages.
SOME STATES DO NOT ALLOW THE EXCLUSION OR LIMITATION OF INCIDENTAL OR
CONSEQUENTIAL DAMAGES, SO THE ABOVE LIMITATION OR EXCLUSION MAY NOT APPLY
TO YOU.
THIS WARRANTY GIVES YOU SPECIFIC LEGAL RIGHTS, AND YOU MAY ALSO HAVE OTHER
RIGHTS THAT MAY VARY FROM STATE TO STATE.
One (1) Year Limited Warranty Garantía limitada durante un (1) año
Troubleshooting Solución de problemas
When a malfunction or incorrect temperature measurement occurs,
an error message will appear. The thermometer will beep four times,
then automatically turn off.
Meaning Action
• Measured temperature is
below 89.6°F (32°C).
• Measured temperature is
above 109.4°F (42.9°C).
• Thermometer has been
stored in a cold or hot
environment.
• Temperature did not register.
• Thermometer has poor
contact or is poorly placed in
body position.
• Probe tip not connected cor-
rectly.
FEVER ALERT:
• Patient has an elevated
temperature.
• Fever LightTM bar lights up
red for 8 seconds.
• Alert values are:
Rectal: 100.4°F+ (38°C+),
Oral: 99.6°F+ (37.5°C),
Underarm: 99.6°F+ (37.5°C).
• Turn unit off. Wait one min-
ute, then turn on again.
• Turn off, wait one minute,
then turn on. Re-take
temperature.
• Turn off, and bring it to
room temperature. Turn on
and re-take temperature.
• Turn unit off and wait one
minute. Turn on, and re-take
temperature using proper
technique.
• Remove probe tip and re-
attach it correctly.
• Contact your physician.
Display/Pantalla Meaning Action Significado Acción
La firma Dorel Juvenile Group, Inc. asegura al comprador original que este producto (
Termómetro
de puntas intercambiables “3-in-1”
), está garantizado contra materiales defectuosos o mano de
obra deficiente durante un (1) año a partir de la fecha de compra, si se utiliza en condiciones normales.
Si el producto presentara materiales defectuosos o mano de obra deficiente, Dorel Juvenile Group,
Inc. reparará o sustituirá el producto, a nuestra discreción, de manera gratuita. El comprador cubrirá
todos los costes relacionados con el envase y envío del producto al Departamento de Relaciones con
el Consumidor de Dorel Juvenile Group, a la dirección que aparece al inicio de este documento, y
los demás costes de transportación o aseguramiento relacionados con el envío. Dorel Juvenile Group
cubrirá los costes de devolución al comprador del producto reparado o sustituido. El producto debe
enviarse en su envase original junto con una prueba documental de la compra, ya sea el recibo de venta
u otro medio demostrativo de que el producto aún esté dentro del período de garantía. Esta garantía
quedará anulada si el propietario hubiera reparado o modificado el producto, o si éste se hubiera daña-
do como consecuencia del uso incorrecto.
Esta garantía excluye cualesquiera otras responsabilidades ajenas a la expresada más arriba, entre
otras los daños incidentales o consecuentes.
EN ALGUNOS ESTADOS NO SE PERMITEN LAS EXCLUSIONES O LIMITACIONES REFERENTES A
LOS DAÑOS INCIDENTALES O CONSECUENTES, DE MODO QUE LA LIMITACIÓN O EXCLUSIÓN
ANTES EXPUESTA QUIZÁS NO SE APLIQUE EN SU CASO PARTICULAR.
ESTA GARANTÍA LE OTORGA DERECHOS LEGALES ESPECÍFICOS Y ES POSIBLE QUE USTED
TAMBIÉN CUENTE CON OTROS DERECHOS QUE PUDIERAN VARIAR EN DISTINTOS ESTADOS.
Technical Specifications Especificaciones técnicas
Measurement Range: 95°F to 107.6°F (35°C to 42°C).
Measurement Accuracy: Technical: +/- 0.2°F (0.1°C)
Operation Environment: 50°F to 104°F (10°C to 40°C),
Humidity: 15-95% (non condensing) (complies with ASTM E 1112-86)
Storage Environment: -4°F to 122°F (-20° C to 50° C),
Humidity: 15-95% (non condensing)
Test Protocol:
1
Install the oral or rectal probe to the handle holder
2
Put the oral or rectal probe into water bath.
3
Wait for 3 seconds, and then turn on the thermometer by pressing the O/I
button (the thermometer has been in standard mode for measurement).
When thermometer determined the peak value of temperature, the backlight
turns on with two beeps. Temperature measurement completed and then
records the value of temp.
4
For the underarm probe, it shall be inserted to water bath for 60 seconds
prior and then turns on the thermometer for measurement. When the ther-
mometer determined the peak value of temp., the backlight turns on with
two beeps. Measurement completed and records the value of temperature.
En caso de haber algún error de funcionamiento o en la medición de
la temperatura, aparecerá un mensaje de error. El termómetro emitirá
cuatro pitidos y luego se apagará automáticamente.
• La temperatura medida es infe-
rior a 89.6 °F (32 °C).
• La temperatura medida es
superior a 109.4°F (42.9 °C).
• El termómetro estaba guardado
en un entorno frío o caluroso.
• No se registró temperatura.
• El termómetro tiene poco
contacto con el cuerpo o está
colocado incorrectamente en la
ubicación del cuerpo.
• La punta de la sonda no está
colocada correctamente.
ALERTA DE FIEBRE:
• El paciente tiene temperatura
elevada.
• La barra roja Fever Light™ se
enciende durante 8 segundos.
Los valores de alerta son:
Rectal: 100.4°F+ (38°C+);
Oral: 99.6°F+ (37.5°C);
Debajo del brazo: 99.6°F+ (37.5°C).
• APAGUE la unidad. Espere un minuto
y vuelva a ENCENDER el termómetro.
•
APAGUE el termómetro, espere un
minuto y vuelva a ENCENDERLO.
Vuelva a medir la temperatura.
• APAGUE el termómetro y colóquelo a
temperatura ambiente. ENCIÉNDALO
y vuelva a medir la temperatura.
• APAGUE el termómetro y espere un
minuto. ENCIENDA el termómetro y
vuelva a medir la temperatura
utilizando la técnica correcta.
• Retire la punta de la sonda y colóque-
la correctamente.
• Consulte con un médico sobre un
tratamiento a seguir.
Límites de medición: 95 °F a 107.6 °F (35 °C a 42 °C).
Precisión de la medición: Técnicas: ± 0.2 °F (0.1 °C).
Entorno de operación: 50 °F a 104 °F (10 °C a 40° C),
Humedad: 15 a 95% (sin condensación; cumple los requisitos de ASTM E 1112-86).
Entorno de almacenamiento: -4 °F a 122 °F (-20° C a 50° C),
Humedad: 15 a 95% (sin condensación).
Protocolo de prueba:
1
Instale la sonda oral o rectal en el soporte.
2
Ponga la sonda oral o rectal a baño María.
3
Espere 3 segundos y encienda el termómetro presionando el botón de encendido
(el termómetro estará en el modo de medición estándar). Cuando el termómetro
determine el valor máximo de temperatura, la luz de fondo se encenderá y se oirán
dos “bips”. Una vez que finalice la medición de temperatura, grabará el valor medido.
4
En el caso de la sonda axilar, deberá ponerla a baño María durante 60 segundos y
luego encender el termómetro para realizar la medición. Cuando el termómetro deter-
mine el valor máximo de temperatura, la luz de fondo se encenderá y se oirán dos
“bips”. Una vez que finalice la medición de temperatura, grabará el valor medido.
1
To attach a tip, select oral, rectal, or underarm
tip. Align icon to the front (above the
Safety 1st logo) and plug tip into base unit
(Figure 1). Tip fits in one direction only. The
mode is automatically sensed and will display
accordingly (Figure 1).
2
To remove tip, press buttons on both sides and
pull tip off (Figure 2).
To Use Tips Consejos para el uso
2
Símbolo
Icon
Pantalla LCD
con iluminación
Botón de
encendido/apa-
gado con apagado
automático
Barra Fever Light™
LCD Display
with Illumination
On/Scan Button
with Auto Shut-Off
Fever LightTM Bar
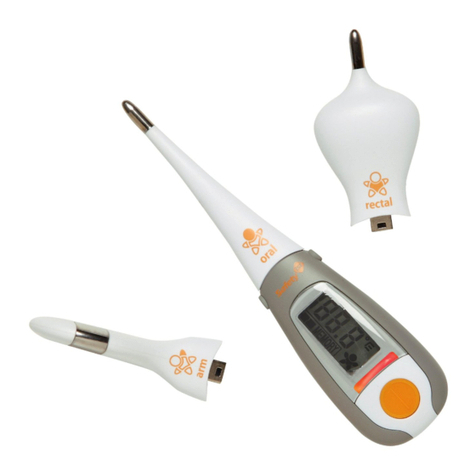
3 puntas de metal con sensor automático
3 Auto-Sensing Probe Tips
Know Your Unit Conozca su unidad
Rectal
Rectal
Brazo
Underarm
Oral
Oral
1
Unidad de base
Base Unit
1
Para colocar una punta, elija la punta oral, rectal
o axilar. Alinee el símbolo hacia el frente (sobre el
logotipo de Safety 1st) y enchufe la punta en la unidad
de base (Figura 1). La punta encaja en una sola
dirección. El modo es automáticamente detectado y
aparecerá en la pantalla.
2
Para retirar la punta, presione los botones a ambos
lados y retírela (Figura 2).
Made in CHINA. Hecho en CHINA.
2 3
Temperature Measurements Range Límites de mediciones de temperatura
Operating Thermometer Cómo utilizar el termómetro
Operating Thermometer (continued)
Cómo utilizar las fundas de termómetro (continuación)
Many people believe that normal body temperature is 98.6°F (37.0°C).
However, medical research has shown that temperature varies from
person to person. Factors affecting body temperature include age,
gender, physical activity, environmental temperature, clothing, medica-
tions, and time of day. Oral, rectal, and underarm temperatures vary by
approximately 1.0°F/0.5°C.
Getting the Thermometer Ready:
1
Turn On: Press and release the On/Scan
button . One beep occurs and all segments
are displayed with back light for two seconds
(Figure 1). The previous measurement is displayed
for three seconds (Figure 2).Back light shuts off
and “- - -” flashes until step 2 is complete.
2
Select Mode: Select oral, rectal, or underarm tip
and plug into base unit (Figure 3).The mode is
automatically sensed and will display accordingly
(Figure 3). NOTE: Tip fits in one direction only.
3
When you hear beeps, the thermometer is ready
to measure temperature.
Choosing a Method:
ORAL METHOD—For children 4 years and older.
1
Place the probe tip under the tongue in locations indicated
by (Figure 1). Instruct children not to bite down on the
probe.
UNDERARM METHOD
1
Wipe underarm with a dry towel. Probe must touch skin.
2
Place probe tip at center of underarm (Figure 2) and bring
arm down against the body.
RECTAL METHOD—
Commonly used for babies, young
children or when it is difficult to take an oral or underarm
temperature.
1
Lubricate probe tip with a water-soluble lubricant or petroleum jelly.
2For easier insertion, position baby so his back and legs form a
90-degree (L-shaped) angle. Try placing child on stomach on your
lap with his legs down. Gently insert the probe tip no more than 1/2
inch (1.3 cm) into the rectum. Do not force the tip into the rectum if
resistance is encountered.
Method Average Normal Temperature Range Fever*
Oral 97.0°F to 99.6°F (36.1°C to 37.6°C) Over 99.6°F (37.6°C)
Rectal 97.3°F to 100.4°F (36.3°C to 38°C) Over 100.4°F (38°C)
Underarm 95.4°F to 98.6°F (35.2°C to 37°C) Over 98.6°F (37°C)
*Fever definitions according to the American Medical Association
To switch the display between °F and °C and vice-versa: While
the thermometer is off, press and hold the On/Scan button
for about 5 seconds until you see the °F or °C. Release button
and press it quickly again. Unit has been reset. Wait for display to
appear.
Changing from Fahrenheit to Celsius
Cambio de grados Fahrenheit a grados Celsius
Taking the Temperature:
1
Once you have positioned the thermometer, hold it steady while
the temperature is obtained. One beep will be heard to indicate that
measurement is complete. Back light will light up for 3 seconds.
Temperature will be displayed for about one minute without back
light.
FEVER ALERT NOTE:
If patient has an elevated temperature, the
red Fever LightTM bar will light up and multiple beeps in ten seconds
will sound.
2Press the
On/Scan
button to turn the thermometer off. If left on,
automatic shut off will occur in approximately one minute.
NOTE: Wait at least one minute before taking another measurement.
Clean the thermometer (see “Care and Maintenance”
section
).
Todos los
segmentos
All segments
Temp. anterior
Previous Temp.
Oral
Oral
Debajo del
brazo
Underarm
Rectal
Rectal
1
2
3
*Fever definitions according to the American Medical Association
When the “Low Battery” symbol appears (Figure 1), the
battery is exhausted and needs replacing.
1
Use a coin to loosen battery cover. Remove cover
(Figure 2).
2
Turn unit upside down and shake battery out.
3
Insert a new 3-volt battery (battery number
CR1225-3V), correctly positioned with the positive
“+” side facing up (Figure 2).
4
Place the battery cover on the thermometer and
secure the cover.
To Replace Battery Para reemplazar la batería
•Clean the base unit and tip with an alcohol swab before and after
each measurement.
•Use a soft, dry cloth to clean thermometer body. Never use abra-
sive cleaning agents, thinners or benzene for cleaning. Do not
scratch the surface of the probe lens or the display. Do not expose
the
thermometer to extreme temperatures, humidity, direct sunlight or
shock. Store at room temperature.
Care and Maintenance Cuidado y mantenimiento
1
2
Batería baja
Low Battery
Moneda
Coin
Positivo
Positive
Muchas personas creen que la temperatura normal del cuerpo es de 98.6 °F
(37.0 °C). Sin embargo, las investigaciones médicas han demostrado que la
temperatura varía de una persona a otra. Los factores que afectan la
temperatura del cuerpo incluyen edad, sexo, actividad física, temperatura
ambiente, ropa, medicamentos y la hora del día. Las temperaturas orales,
debajo del brazo y rectales difieren en aproximadamente 1 °F (0.5 °C).
Método Límite de temperatura normal media Fiebre*
Oral 97 °F a 99.6 °F (36.1 °C a 37.6 °C) Más de 99.6 °F (37.6 °C)
Rectal 97.3 °F a 100.4 °F (36.3 °C a 38 °C) Más de 100.4 °F (38 °C)
Debajo del brazo 95.4 °F a 98.6 °F (35.2 °C a 37 °C) Más de 98.6 °F (37 °C)
Para cambiar la pantalla de °F a °C y viceversa: Mientras el
termómetro se encuentre apagado, mantenga presionado el botón
de encendido/medición durante unos 5 segundos, hasta que el
símbolo °F o °C aparezca en la pantalla. Suelte el botón y rápidamente
presiónelo nuevamente. La unidad ha sido reprogramada. Espere hasta
que se active la pantalla.
*Definiciones de fiebre de la Asociación Médica Americana
Selección del método:
MÉTODO ORAL —Para niños de 4 años de edad en adelante.
1
Coloque la punta de la sonda debajo de la lengua como indica
(Figura 1). Indique al niño que no muerda la sonda. Indique al
niño que no muerda la sonda.
MÉTODO DEBAJO DEL BRAZO
1Limpie la axila con una toalla seca. La sonda debe tocar la piel.
2
Coloque la punta de la sonda en el centro de la axila y presione el
brazo contra el cuerpo.
MÉTODO RECTAL — Este método es comúnmente utilizado
para medir la temperatura de bebés y de niños pequeños, o cuan-
do resulta difícil medir la temperatura oral o debajo del brazo.
1
Lubrique la punta de la sonda con un lubricante hidrosoluble o con
vaselina.
2
Para facilitar la inserción, coloque al bebé de manera que la espalda y l
as piernas del niño formen un ángulo de 90° (en forma de L). Intente
colocar al niño boca abajo sobre su regazo. Inserte suavemente la punta
de la sonda no más de 1/2 pulgada (1.3 cm) en el recto. En caso de
encontrar resistencia a la inserción del termómetro, no fuerce la punta
dentro del recto.
Cómo medir la temperatura:
1Una vez colocado el termómetro, sosténgalo firmemente mientras mide
la temperatura. Cuando la medición finalice, se oirá un “bip” prolon-
gado. La luz de fondo se encenderá durante 3 segundos. La medición
de la temperatura aparecerá en pantalla durante 1 minuto, sin luz de
fondo. NOTA DE ALERTA SOBRE LA FIEBRE: Si el paciente tiene una
temperatura elevada, la lectura destellará y se oirán cinco “bips” cortos
durante 10 segundos.
2
Oprima el botón de Encendido/Apagado (on/scan) para apagar el ter-
mómetro. Si el termómetro queda encendido, se apagará automática-
mente en aproximadamente un minuto.
NOTA: Espere al menos un minuto antes de medir otra vez la tempera-
tura. Limpie el termómetro (vea la sección “Cuidado y mantenimiento”).
Si el símbolo de “Batería baja” aparece (Figura 1), la batería
está agotada y debe reemplazarse.
1
Utilice una moneda para aflojar la tapa de la batería. Retire
la tapa (Figura 2).
2
Invierta la unidad y sacúdala para retirar la batería. (Figura
2).
3
Inserte una nueva batería de 3 voltios (número CR1225-3V)
y colóquela adecuadamente con el lado positivo (“+”) hacia
arriba (Figura 2).
4
Ponga la tapa en el termómetro y asegúrela.
•Limpie la sonda y la punta con un hisopillo embebido en alcohol antes y
después de cada medición.
•Use un paño suave y seco para limpiar el cuerpo del termómetro. No
utilice nunca productos de limpieza abrasivos, solventes o bencina. No
raye la superficie de la lente de la sonda o la pantalla. No exponga el
termómetro a temperaturas extremas, humedad, luz directa del sol ni
golpes. Guarde el termómetro a temperatura ambiente.
The Fever LightTM occurs during temperature measurement
when the temperature is high. (See fever chart included on
package or under “Temperature Measurement Range”). If
your child has an elevated temperature, red Fever LightTM bar
will light up and multiple beeps will sound. High or prolonged
fever requires medical attention, especially for young chil-
dren. Contact your physician.
El indicador Fever Light™ se muestra durante una medición
cuando la temperatura es alta. (Vea la tabla de fiebre incluida
en el paquete o en “Límites de medición de temperaturas”). Si
su hijo tiene una temperatura elevada, la barra roja del indicador
Fever Light™ se encenderá y se oirán varios “bips”. La fiebre
alta y prolongada requiere atención médica, especialmente en el
caso de niños pequeños. Consulte a su médico.
Fever LightTM “Fever LightTM”
=
=
=
Memory Function Función de memoria
The thermometer memory function stores the last measurement. The
last measurement will appear after turning the thermometer on and
after it runs its built-in test. This feature allows you to compare your
most recent measurement to the next measurement.
PRECAUCIÓN: Sólo utilice baterías de litio de “CR1225”
de 3 V. El uso de otros tipos de baterías puede presentar
riesgo de incendio o rotura.
CAUTION: Replace only with 3V “CR1225”
lithium battery. Use of other types of batter-
ies may present a risk of fire or rupture.
AVISO:
• Mantenga la batería fuera del alcance de los niños. Tragarse una batería puede
resultar fatal. La batería no debe volver a cargarse ni exponerse a temperaturas
muy altas, ya que podría explotar.
• Las baterías usadas se deben desechar correctamente. No deseche las baterías
arrojándolas al fuego, no las recargue, no las ponga al revés, no las desarme ni las
mezcle con baterías usadas o de otro tipo, ya que podrían explotar o desarrollar
pérdidas y causar lesiones.
WARNING:
• Keep battery out of child’s reach. Swallowing battery could be fatal. Battery
should not be charged or placed into extreme heat as it may explode.
• Used batteries should be disposed of properly. Do not dispose of batteries in
fire, recharge, put in backwards, disassemble, mix with used or other battery
types – they may explode or leak and cause injury.
La función de memoria del termómetro almacena la última medición.
La última medición aparecerá después de encender el termómetro,
luego de finalizar la prueba incorporada. Esta función le permite
comparar su medición más reciente con la siguiente.
Cómo preparar el termómetro:
1
Para activar: Oprima y suelte el botón de
encendido/medición . Se oirá un “bip” y se
mostrarán todos los segmentos en la pantalla
con luz de fondo durante 2 segundos (Figura
1). La medición anterior aparecerá en pantalla
durante 3 segundos (Figura 2). La luz de fondo
se apagará y la pantalla mostrará “- - -” intermi-
tentemente hasta que el paso 2 se haya comple-
tado.
2
Selección de modo: Elija la punta oral, rectal o
axilar y enchúfela en la unidad de base (Figura
3). El modo es detectado automáticamente y se
indica en la pantalla (Figura 3). NOTA: La punta
encaja en una sola dirección.
3
Luego de escuchar “bips”, el termómetro estará
listo para medir otra temperatura.

This manual suits for next models

1

Other Safety 1st Thermometer manuals

Safety 1st TH084 User manual

Safety 1st

Safety 1st TH084 User manual

Safety 1st 49501B User manual

Safety 1st

Safety 1st 49501B User manual

Safety 1st TADVANCED SOLUTIONS H060 User manual

Safety 1st

Safety 1st TADVANCED SOLUTIONS H060 User manual

Safety 1st 49512A User manual

Safety 1st

Safety 1st 49512A User manual

Safety 1st 49512A User manual

Safety 1st

Safety 1st 49512A User manual

Safety 1st TH051 User manual

Safety 1st

Safety 1st TH051 User manual

Safety 1st 49514B User manual

Safety 1st

Safety 1st 49514B User manual

Safety 1st TH059 User manual

Safety 1st

Safety 1st TH059 User manual

Safety 1st TH094 User manual

Safety 1st

Safety 1st TH094 User manual

Safety 1st Fever Light 49659 User manual

Safety 1st

Safety 1st Fever Light 49659 User manual

Safety 1st TH095 User manual

Safety 1st

Safety 1st TH095 User manual

Safety 1st 49545 User manual

Safety 1st

Safety 1st 49545 User manual

Safety 1st 12346B User manual

Safety 1st

Safety 1st 12346B User manual

Safety 1st TH043 User manual

Safety 1st

Safety 1st TH043 User manual

Safety 1st Hospital's Choise 49531 User manual

Safety 1st

Safety 1st Hospital's Choise 49531 User manual

Safety 1st TH068 User manual

Safety 1st

Safety 1st TH068 User manual

Safety 1st TH097 User manual

Safety 1st

Safety 1st TH097 User manual

Safety 1st Hospital's Choice 49533 User manual

Safety 1st

Safety 1st Hospital's Choice 49533 User manual

Safety 1st 49659 User manual

Safety 1st

Safety 1st 49659 User manual

Safety 1st TH104 User manual

Safety 1st

Safety 1st TH104 User manual

Safety 1st Swift Read 49500 User manual

Safety 1st

Safety 1st Swift Read 49500 User manual

Safety 1st Comfort Check Pacifier Thermometer User manual

Safety 1st

Safety 1st Comfort Check Pacifier Thermometer User manual

Safety 1st TH013 User manual

Safety 1st

Safety 1st TH013 User manual

Safety 1st 49514B User manual

Safety 1st

Safety 1st 49514B User manual

Popular Thermometer manuals by other brands

Craftmade Accolade TH012 Assembling instructions

Craftmade

Craftmade Accolade TH012 Assembling instructions

Levenhuk Wezzer Cook MT10 user manual

Levenhuk

Levenhuk Wezzer Cook MT10 user manual

MOB MO8603 user manual

MOB

MOB MO8603 user manual

Cole Parmer Traceable 4470 instructions

Cole Parmer

Cole Parmer Traceable 4470 instructions

Hanna Instruments HI 147-00 instruction manual

Hanna Instruments

Hanna Instruments HI 147-00 instruction manual

Braun ThermoScan IRT 4020 owner's manual

Braun

Braun ThermoScan IRT 4020 owner's manual

Veridian Healthcare 08-301 Series operating instructions

Veridian Healthcare

Veridian Healthcare 08-301 Series operating instructions

Reer ExpressTemp Pro instruction manual

Reer

Reer ExpressTemp Pro instruction manual

Timex TX-5100 Specification sheet

Timex

Timex TX-5100 Specification sheet

ECOWITT WN32 manual

ECOWITT

ECOWITT WN32 manual

PANCONTROL PAN IR-T42 MED manual

PANCONTROL

PANCONTROL PAN IR-T42 MED manual

Weber iGrill 3 user guide

Weber

Weber iGrill 3 user guide

Optex THERMO-HUNTER BUILT-IN instruction manual

Optex

Optex THERMO-HUNTER BUILT-IN instruction manual

Vicks SpeedRead V912G user guide

Vicks

Vicks SpeedRead V912G user guide

Omega Engineering HH-21A user guide

Omega Engineering

Omega Engineering HH-21A user guide

miniland baby THERMO ADVANCED manual

miniland baby

miniland baby THERMO ADVANCED manual

Ambient Weather WS-HT350 user manual

Ambient Weather

Ambient Weather WS-HT350 user manual

Braun BNT300CA instructions

Braun

Braun BNT300CA instructions

manuals.online logo
manuals.online logoBrands
  • About & Mission
  • Contact us
  • Privacy Policy
  • Terms and Conditions

Copyright 2025 Manuals.Online. All Rights Reserved.