SAGEMCOM D770 User manual

USER GUIDE
D
77
0
-
D
77
0A
EN
EN

1
Dear customer,
You have just acquired a new generation Sagemcom telephone.
This device has been manufactured with the utmost care.
If you should have difficulties in operating it, we recommend that you consult this manual or contact
the Sagemcom Support Team on 0845 0900 316*.
You can also find information on the following site: www.sagemcomdigital.co.uk
To operate the device safely and easily, please read carefully the paragraph “Recommendations
and safety instructions”, page 3.
The CE label confirms that the product complies with the 1999/5/EC regulations of the
European Union Parliament regarding wireless systems and telecommunications.
The declaration of compliance may be looked up on the www.sagemcom.com website
section «Support», or can be obtained from the following address :
Sagemcom Broadband SAS
250, route de l'Empereur 92848
Rueil-Malmaison Cedex - France
Copyright © Sagemcom Broadband SAS
All rights reserved
Sagemcom is a registered trademark
*: 3.95 pence per minute from all fixed lines, tariff cost effective from 01/09/2009

2
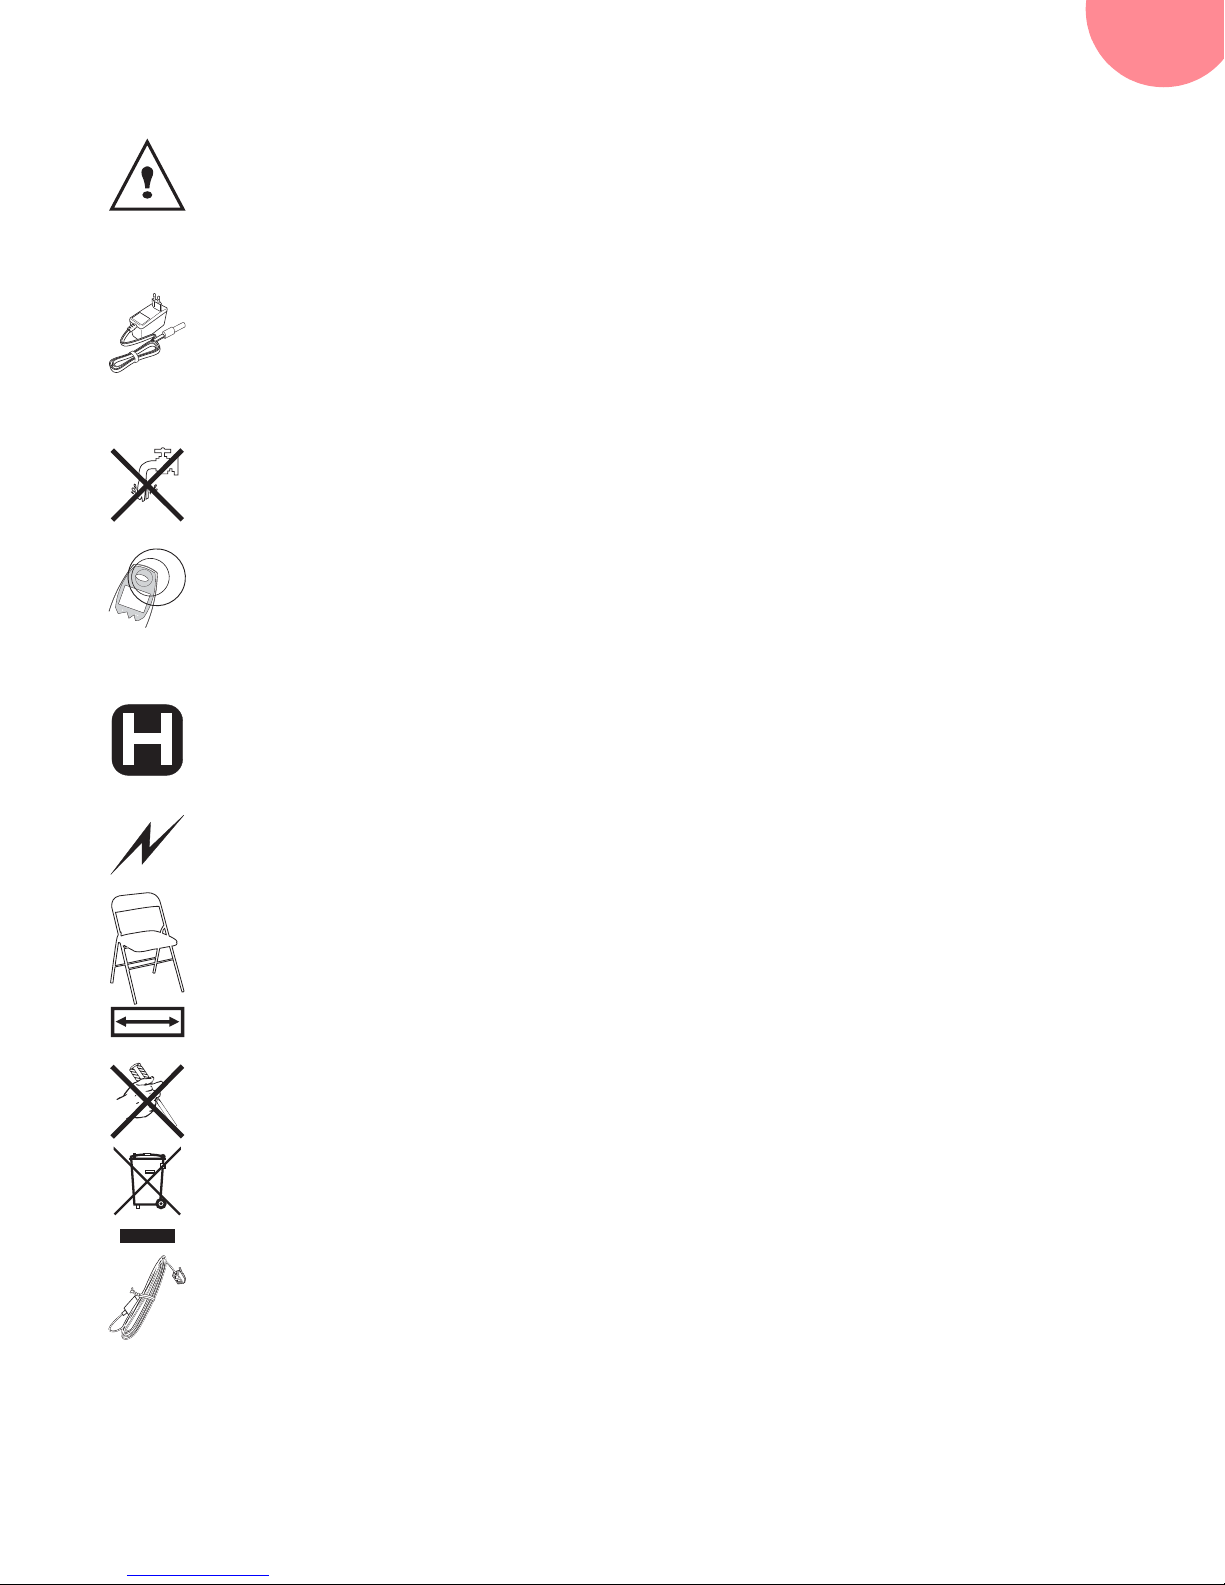
Recommendations and safety instructions........................................... 3
Discover... ........................................................................................... 4
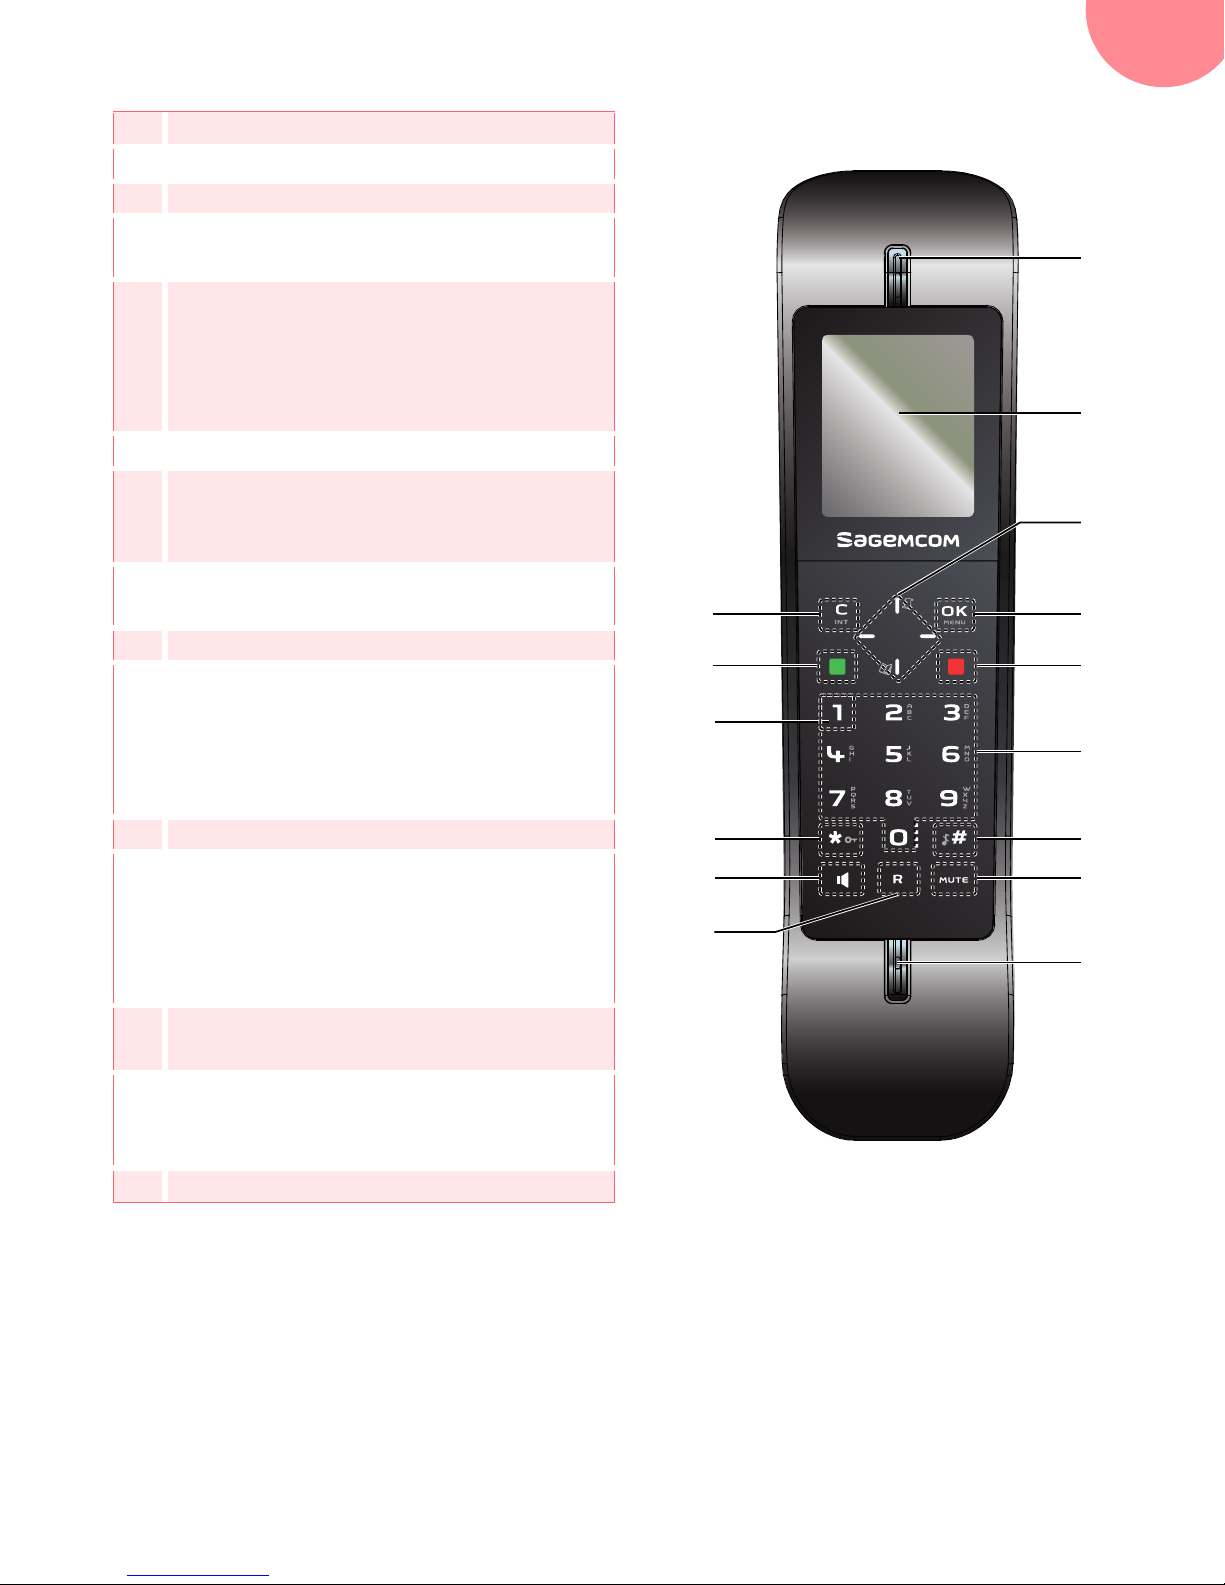
Your phone ................................................................................................................................................ 4
Set-up... .............................................................................................. 6
Connect the base .................................................................................................................................... 6
Handset set-up ........................................................................................................................................ 6
Charging the handset ............................................................................................................................ 7
The handset screen ................................................................................................................................ 7
Switching the handset on / off ............................................................................................................. 8
Battery replacement ............................................................................................................................... 8
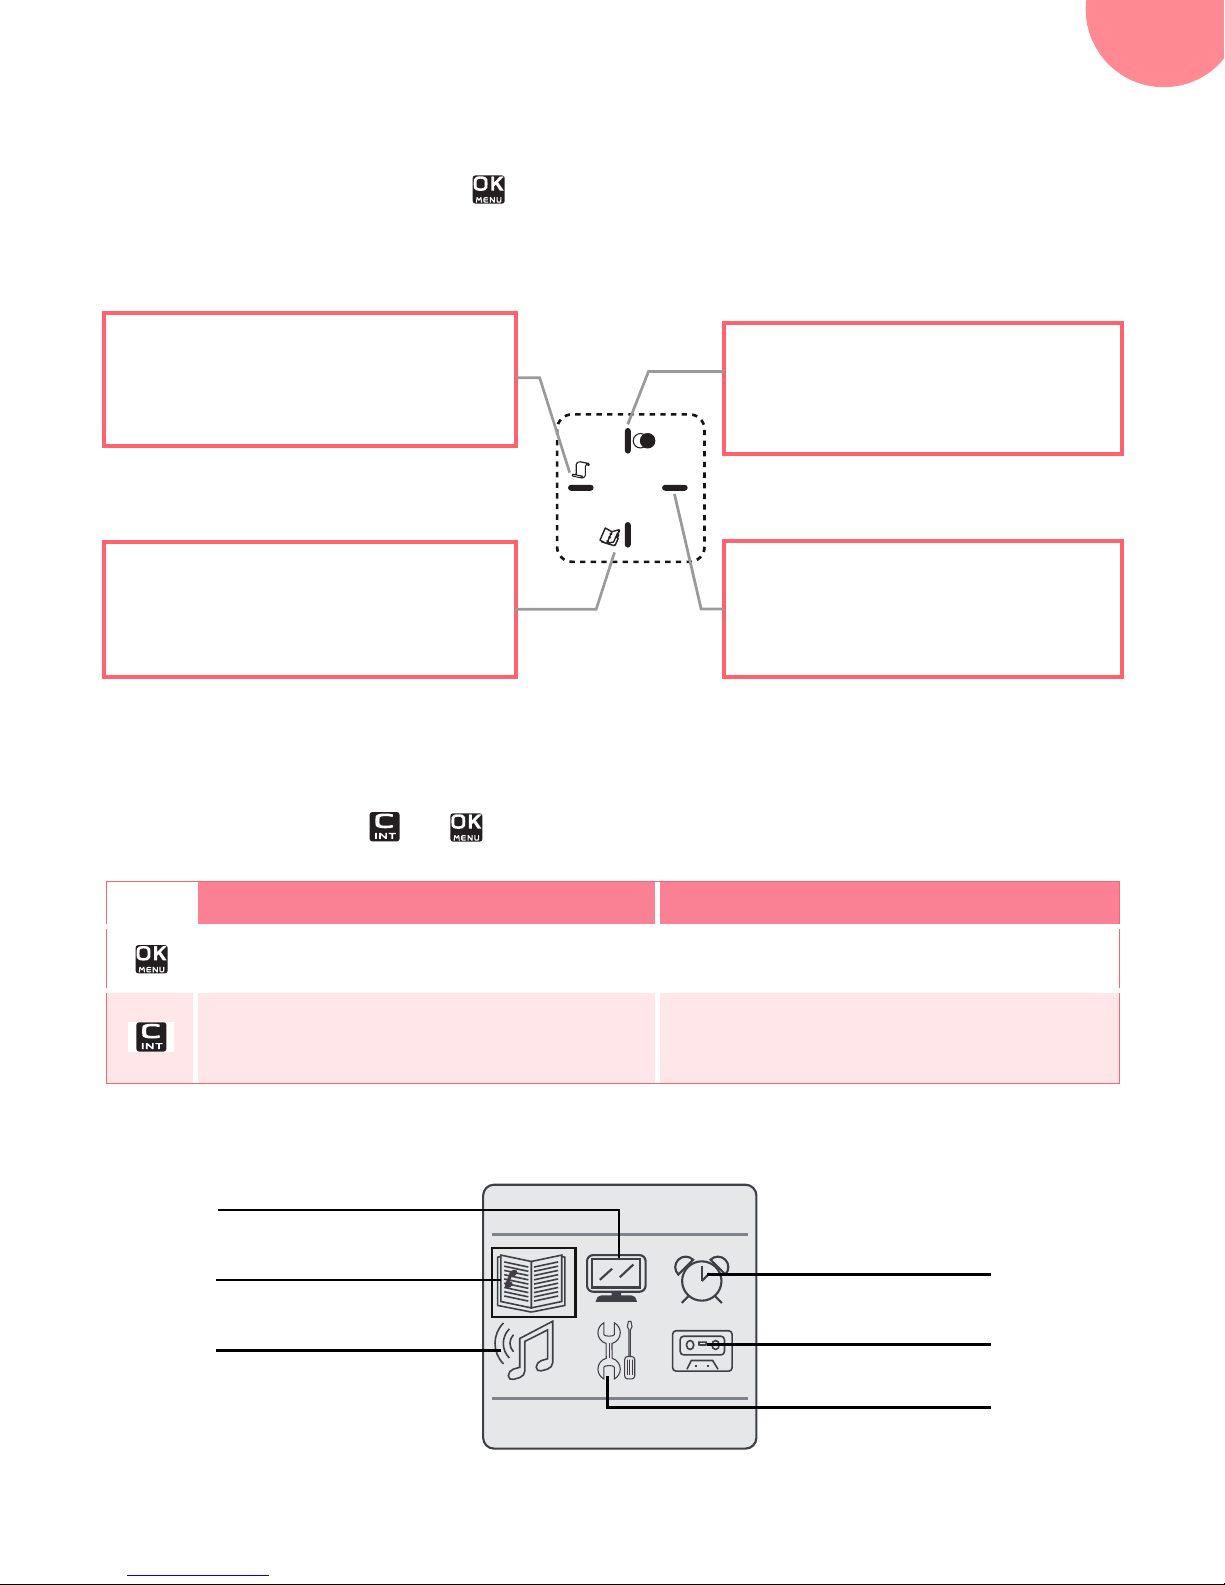
Browsing through the menus ............................................................................................................... 9
Menu tree structure ........................................................................... 12
Making and receiving calls................................................................. 14
Managing a call .....................................................................................................................................14
Options during a call ............................................................................................................................14
Managing several calls ........................................................................................................................15
Using additional handsets ..................................................................................................................16
Locating your handset .........................................................................................................................18
Listening to your messages ...............................................................................................................18
Locking / Unlocking the keypad .......................................................................................................18
Using the phonebook ...........................................................................................................................18
Listening and Recording...(model D770A) .......................................... 21
Enabling/disabling the answering machine ...................................................................................21
Answering machine message ...........................................................................................................21
Record a memo .....................................................................................................................................22
Listening to your messages ...............................................................................................................22
Delete all your messages ....................................................................................................................23
Setting up.......................................................................................... 24
The phone ...............................................................................................................................................24
The handset ............................................................................................................................................25
The base ..................................................................................................................................................27
The line .....................................................................................................................................................28
Answering machine settings ..............................................................................................................28
The alarm .......................................................................................... 30
Tracing your calls... ........................................................................... 31
Call logs ...................................................................................................................................................31
Environmental information................................................................. 33
Guarantee ......................................................................................... 34
Terms and Conditions for United Kingdom & Ireland only ........................................................34

Recommendations and safety instructions
3
Recommendations and safety instructions
For safety reasons, never put the handset in the base station without the battery inserted
or without the lid on the battery compartment as this could cause an electric shock.
To avoid damaging your handset/base, only use certified rechargeable battery NiMH
2.4 V 600 mAh, never use non-rechargeable battery. Insert the battery in the handset
battery compartment.
Only use the power unit supplied and connect it to the electricity mains in accordance with
the installation instructions in this user manual and the details on the sticker regarding
voltage, electrical current and frequency. As a precaution if there is a risk of danger, the
power plug can be pulled out to disconnect the 230 volt power supply. Therefore the
sockets should be near the device and easily accessible.
Do not install your DECT telephone in a damp environment, such as a bathroom,
washroom, kitchen etc, and not within 1.50 metres of a source of water or outside. This
device is designed for use in temperatures of between 5 °C and 40 °C.
Your DECT telephone has a range of approx. 50 metres indoors and up to 300 metres
outdoors. The range can be affected by the proximity of metal objects, such as a television
and electrical devices.
Zones without reception may appear owing to elements in the building. This can cause
brief interruptions in the conversation, caused by faulty transmission.
Certain medical equipment and highly-sensitive machines or security systems may be
affected by the transmission power of the telephone. In these cases we recommend
adhering to the safety information.
In regions greatly affected by electrical storms we recommend that you protect your
telephone circuit with a special fixture for excess voltage.
Your D770A has anti-skid pads that should leave no traces on your furniture and ensure
stability.
However, given the wide variety of finishes used by furniture manufacturers, traces may
appear on surfaces in contact with the parts of your D770A. Sagemcom Broadband SAS
decline all responsibility in any such cases of damage.
Do not attempt to remove screws or open the appliance. It does not contain any
user-replaceable parts
Worn out batteries must be disposed of in line with the recycling regulations in this user
manual.
This product is intended to be connected to the public analogue telephone network of any
British and Irish network operator. Should you experience any problems, contact your
nearest specialst dealer or the Sagemcom Support Team on 0845 0900 316.

4
Discover...
Discover...
The pack
Your phone
The base
1Handset location.
2Handset(s) Search / Pairing key.
•Long press: pairing of handsets.
•Short press: paging of handsets.
3Indicator light *.
Indicator light operation*:
* Only for D770A
Fixed
handset on line.
- or -
answering machine activated
Blinking
New message(s) on your answering machine.
- or -
Accessing the answering machine menu from
the handset/remote querying.
- or -
Recording an outgoing message.
Check that you have the following items in your pack:
a D770 or D770A base according to model,
a rechargeable battery (type NiMH 2.4 V 600 mAh),
a telephone connection cord,
a mains power supply with connection cord,
a quick start guide.
If you have purchased a Duo or Trio pack, you will also find for each extra handset:
a charger,
a mains power supply with connection cord,
a rechargeable battery (type NiMH 2.4 V 600 mAh).
1
1
2
2
3
3

Discover...
5
The handset
1Loudspeaker
2Graphic screen
3Browser
4Menu access / validation key: confirm /
acces to the menu and/or options
5"Hang up" key
•Short press: back to the main menu.
•Short press: end a call (during a call)
•Long press: switch off / switch on
the handset
6Alphanumeric keypad
7"Hash" key:
•Long press : (de)activate the silent
mode
8Mute button : cuts off the microphone
(during a call)
9Microphone
10 Cancel / Intercom key:
•back to the previous menu
•Correct the entry / Cancel
•Call an additional handset (from the
standby screen)
11 "pick up" key
12 key 1:
•Long press: access to voicemail
service (to set voicemail number,
refer to section "Changing your
voice mail number ", page 25)
13 "Star" key"
Long press : (un)lock the keypad
14 Hands-free key
•enable / disable hands-free mode
(during a call)
15 R key (flashing, to manage several calls)
11
13
12
14
15
10 4
8
1
2
3
5
6
7
9

6
Set-up...
Set-up...
Connect the base
1Take the telephone connection cord,
click it into its socket and connect the
other end of the cord to the telephone
socket.
2Take the power adapter. Connect the
end of the cord to the base and the
power adapter to the wall socket.
Handset set-up
1Take the battery provided in the packaging.
2Insert the connector into its housing complying with the positions of the wires.
3Slide the battery pack into its housing.
4Fit the hatch to the handset.
Before making connections, please see the safety instructions at the start of the
booklet.
1
3
4
2
2.4V
600mAh
Ni-MH
2.4V
600mAh
Ni-MH
2.4V
600mAh
Ni-MH
2.4V
600mAh
Ni-MH
Black wire
Red wire

Set-up...
7
Charging the handset
1Gently lower the handset onto the base charging blade. Contacts within the body of the blade
ensure electrical contact with the handset.
2Slide the handset downwards.
3Perform a complete battery charging cycle.
The battery charging icon moves to inform you that charging is in progress. The icon display
stops moving when the battery is charged.
The handset screen
In standby mode or during use, your phone screen informs
you of your phone’s current state through icons, and in
particular:
1Status icons: Indicates your phone’s current state.
2Information field:
•Standby screen :in the normal state, displays the name
of the handset and the current time
•In the menus: displays the selected menu name,
function or setting.
3Action area: displays the actions associated with the
multi-function keys and in the ongoing menu
(refer to section "The multifunction keys ", page 9).
1
2
To ensure optimum charging, leave the handset on the charger for at least 15 hours
when using the phone for the first time. During charging, the battery may heat up. This
is quite normal and perfectly safe.
Interc Menu
Handset 1
15:29 15/12
1
2
3

8
Set-up...
THE ICONS DISPLAYED
Switching the handset on / off
To switch on the handset, give a long press on the key .
To switch off the handset, give a long press on the key .
The message Switch off Handset? is displayed.
Press the key to confirm.
Battery replacement
1Turn off the handset. Turn it over to access the battery compartment hatch.
2Remove the battery compartment hatch.
3Remove the old battery, Insert the connector into its housing complying with the positions of
the wires.
4Refit the battery compartment hatch.
DECT signal Keypad locked
New missed call(s) Silent mode activated
Answering machine activated Battery charge condition
New message(s) on your
answering machine Speakerphone enabled
New message(s) on your
answering voicemail Phone in conversation mode
Alarm on
Worn out batteries should be discarded in accordance with the recycling instructions
given in chapter “Environmental information”, page 33.
To prevent damage to your handset, only use approved rechargeable batteries NiMH 2.4 V
600 mAh. Never use non-rechargeable batteries.

Set-up...
9
Browsing through the menus
Browser
To access the phone menu, press .
When choosing menus, press the top or the bottom the left the right of the browser.
In the option list, press the top or the bottom of the browser.
The multifunction keys
Your telephone has two or "multifunction" keys which you can use in several ways:
Main menu
From the standby screen In a menu
To access the telephone menu. To enter a menu, to validate an action in a
menu.
To make an Intercom call (call to another
handset).
To return to the previous menu. To delete
characters. With each press, the character
preceding the cursor is deleted.
From the standby screen:
Access to the outgoing call list
In a menu:
Navigate up ()
From the standby screen:
No action
In a menu:
Navigate right ()
From the standby screen:
Access to the caller list
In a menu:
Navigate left ()
From the standby screen:
Access phonebook
In a menu:
Navigate bottom ()
Back
Phonebook
OK
Display
Phonebook
Audio
Alarm X
Answer Machine
Settings

10
Set-up...
Illustration
To browse-through menus, use the browser and two multifunction buttons:
1Press the key . The main menu is displayed on the screen.
2Press the top or bottom or the left or the right of the browser to scroll through the
menus and access the desired menu.
3Confirm your choice by pressing the key .
4Press the top or bottom to scroll through the menus and access the desired function.
5Confirm your choice by pressing the key .
6Cancel your choice / Exit the displayed menu :
•either by pressing the key .
•or by pressing the red key ; the home screen is displayed.
Detailed browser example: adjust the date and time
ADJUST THE DATE AND TIME
To access the date and time setting menu:
1Press the key . The main menu is displayed on the screen.
2Select Settings menu by pressing the top or bottom or the left or the right of the
browser. Confirm your choice by pressing the key .
3Scroll through the menus to the Date & Time menu by pressing the top or bottom of the
browser. Confirm your choice by pressing the key .
4Scroll through the menus to the Set Time/Date menu by pressing the top or bottom of the
browser. Confirm your choice by pressing the key .
5Enter the time: using the numeric keypad (hours then minutes). Confirm your entry by pressing
the key .
6Enter the date using the numeric keypad (day, month and year) in the form DD/MM/YYYY.
7Confirm your entry by pressing the key .
You have just set your phone’s current date and time. You can also set the date and time display
format (see “Setting the date and the time format”, page 25).
Refer to the “Menu tree structure”, page 12 section to find out about your phone’s functions.
It is recommended to set the date and time accurately to allow you to keep track of
the timings of your calls and messages.
If you have the Display number option, the date and time will, depending on your
operator, be set automatically when you receive a call.

Set-up...
11
Procedures in your booklet
The procedures in your booklet are presented in the form of sheets.
To facilitate their implementation, each of them includes the following as appropriate:
•the keys associated to directly access the function described, and/or
•the path for accessing the function described in the menu.
EXAMPLE : TO (DE)ACTIVATE THE SILENT MODE
(Long press) means you can use the key(s) offered to access the
function.
Go to the menu Audio > Ring Tone
Setup > Volume > Off
means you can access this function by displaying the
menu, then going down the menus displayed to the
function Volume and selecting the state Off.

12
Menu tree structure
Menu tree structure
Phonebook New Entry
Option Calling Number
Edit Entry
View Entry
Copy Entry * * You must have at least two handsets
paired on the same base.
Refer to section “Associating a new
handset”, page 26.
Copy All *
Delete Entry
Delete All
Capacity
Edit Call Group
Speed Dial
Audio Ring Tone Setup External Calls
Internal Calls
Volume
Silent
Signal Tones
Display Handset Name
Screensaver
Contrast
Settings Date & Time Time Format
Date Format
Set Time/Date
Display
Handset Select Base
Language
Auto Answer
Register HS
De-register
Reset Handset
Base Flash Time
Dial Mode
Call Sharing
Change PIN
Reset Base
Mailbox

Menu tree structure
13
Alarm Alarm X * Alarm On/Off * : X 1 to 5
Time
Melody
Answer Machine ** Play Messages ** : model D770A
Delete Old Msgs
Answer On/Off
Greeting Msg.
Record memo
Settings ** Answer Mode
TAM Language
Answer Delay
Recording Time
Remote Access

14
Making and receiving calls...
Managing a call
Making a call
FROM THE HANDSET - METHOD 1
1Dial your contact’s number.
If you make a mistake, press the key to delete the last character entered.
2Press the key .
FROM THE HANDSET - METHOD 2
1Press the key .
2Dial your contact's number. A beep sounds.
At the end of the call, press the handset key and replace the handset on its base.
Receiving a call
1Press the key to take the call.
2At the end of the call, press the handset key and replace the handset on its base.
A beep sounds.
Options during a call
You can use the following options during a call:
Enable/Disable loudspeaker (speakerphone mode)
During a call press .
The icon appears on the handset screen.
Adjusting the volume
•To increase the volume, press in the browser.
•To decrease the volume, press in the browser .
HANDSET LOUDSPEAKER
FROM THE HANDSET
Your handset includes an Auto Answer. function. For further details, refer to the
“Answering automatically”, page 26.
When the battery charge icon is at minimum, the hands-free function is not available
until the next charging cycle.

Making and receiving calls...
15
The secret mode allows you to temporarily mute the line so that you are not heard by the caller.
During a call press mute.
The icon appears on the handset screen.
Managing several calls
Your phone allows you to take and manage several calls when you are already on the line
(depending on your line provider). These calls can be managed with the key .
During a call, a beep indicates the arrival of a second call.
To take this call, press the key then the key .
Your first call is put on hold and you can talk with the second caller.
During a call, press the key then dial your contact’s number.
Press the key then the key to switch from one call to the other.
The call in progress is then put on hold and you can take back the previous call.
Press the key then the key to end the current call. You will return to the other call.
Press the key followed by the key .
You can then talk with your two contacts at the same time.
To end the 3-way conference, press the key .
Enabling/Disabling the secret mode
Receiving a second call
Making a second call
Switching from one call to the other
Ending one of the calls in progress
Talking with two contacts at the same time (3-way conference)

16
Making and receiving calls...
Using additional handsets
You can associate additional handsets with your phone: You can then make and receive outside
calls or calls between these handsets.
Press the key .
If you only have two paired handsets on the same base:
The handset called rings automatically. Simply take the call.
If you have more than two paired handsets on the same base:
1Press the key . Select the handset with the or key.
2Press the key . The selected handset rings.
3Take the call from the called handset.
4End the call by pressing .
If the share call mode is activated, you can join in a conversation from another handset registered
with the same base (refer to paragraphe “Authorising/prohibiting listening in”, page 25).
From another handset (registered on the same base), press the green key .
You will then join in the conversation
During a call press key.
If you only have two paired handsets on the same base:
The call is transferred directly to the second handset.
1Simply take the call on the second handset.
2Hang up the call on the first handset with the key.
Calling another handset (intercom)
Join in a conversation already taking place
Transferring a call to another handset
You first have to pair the handsets with the base.
For further details, refer to the “Associating a new handset”, page 26 .
You must have at least two handsets paired on the same base.

Making and receiving calls...
17
If you have more than two paired handsets on the same base:
1Select the handset to which you want to transfer the call using the or key.
2Press the key . The handset called rings.
3Pick up the other handset and then transfer the call by pressing .
During a call press key.
If you only have two paired handsets on the same base: The call is transferred directly to the
second handset.
1Simply take the call on the second handset. Your contact is put on hold.
2Use key to switch betwin calls.
The handsets display the message On Hold.
If you have more than two paired handsets on the same base:
1Select the handset to which you want to transfer the call using the or key.
2Press the key . The handset called rings.
3Simply take the call on the second handset. Your contact is put on hold.
4Use key to switch betwin calls. The handsets display the message On Hold.
During a call, you can have a second person in your home take part by activating the call on the
second handset. To do this, you must have paired both handsets to the base.
1During the call, press the key.
2If necessary select the desired handset with the or key.
The selected handset will ring. Your contact is put on hold.
3Simply take the call on the second handset.
4On the first handset, press the key.
You can then all talk to each other. The handsets display the message Conference.
Switch between the outside call and the intercom call
3-way conference
To cancel the transfer before hanging up the second handset, press the key.
You must have at least two handsets paired on the same base.
The activation of 3-way conference is possible only when you are in conversation with
the internal handset call.

18
Making and receiving calls...
Locating your handset
If you have misplaced your handset, press the key on the base. The handset rings.
Listening to your messages
If you have a voice mail service with your line provider, press and hold key or dial the number
given by your line provider directly.
Follow the instructions given by your line provider to listen to and manage your messages.
The icon appears on the handset screen when you have at least one new message.
Locking / Unlocking the keypad
You can lock the keypad when you are not making a call.
Give a long press on the key to lock and unlock the keypad.
The message Keypad Locked and the icon appears on the handset screen when the keypad
is locked.
Using the phonebook
1Go to the menu Phonebook.
The directory opens.
If there are no entries, the message List Empty is displayed.
2Press the key .
3Select New Entry with the or key and press .
4Specify the required information by confirming at each step with :
•Name: enter your contact’s name,
•Number: enter their number,
•Group: if necessary, select the group in which to include the contact with the or key.
Call the contact from their entry
1Go to the menu Phonebook.
2Select the contact to call with the or key.
3Press the key .
4Select the option Calling Number and press .
You can also press the key to call the contact selected in the directory directly.
Search for an entry
1Go to the menu Phonebook.
2Enter the first letter of the name.
Create an entry
To modify the number please refer to “Changing your voice mail number”, page 25.

Making and receiving calls...
19
Changing an entry
1Go to the menu Phonebook.
2Select the entry to be modified with the or key.
3Press the key .
4Select the option Edit Entry and press .
5Use the key to delete characters one by one.
6Change the name and/or number type and confirm with .
Deleting an entry
1Go to the menu Phonebook.
2Select the entry to be deleted with the or key.
3Press the key .
4Select the option Delete Entry and press .
5Confirm the deletion by pressing the key.
Checking available directory space
1Go to the menu Phonebook.
2Press the key .
3Select the option Capacity and press .
4The number of existing entries is displayed with the total possible number (2/100).
Associating a speed dial number with an entry
Speed dial allows you to associate a numeric key with an entry in your directory.
Once you have made the association, you can dial your contact's number automatically by long
press on the associated key.
1Go to the menu Phonebook.
2Press the key .
3Select the option Speed Dial and press .
4Select with or the numeric key of your choice and press .
5Select the desired contact with or and press .
Transferring entries from one handset to another
Each handset has its own phonebook.
To transfer one or more entries from a phonebook to another handset:
1Go to the menu Phonebook.
2Press the key .
The action Delete Entry deletes the selected entry.
The action Delete All deletes all the entries in the directory.
You must have at least two handsets paired on the same base.
Other manuals for D770
1
This manual suits for next models
1
Table of contents
Other SAGEMCOM Telephone manuals

SAGEMCOM
SAGEMCOM CC220R User manual

SAGEMCOM
SAGEMCOM C112 ECO User manual

SAGEMCOM
SAGEMCOM D750 User manual

SAGEMCOM
SAGEMCOM C91 User manual

SAGEMCOM
SAGEMCOM C100 User manual

SAGEMCOM
SAGEMCOM SIXTY User manual

SAGEMCOM
SAGEMCOM C95 User manual

SAGEMCOM
SAGEMCOM D17T User manual

SAGEMCOM
SAGEMCOM D780A User manual

SAGEMCOM
SAGEMCOM D790 User manual