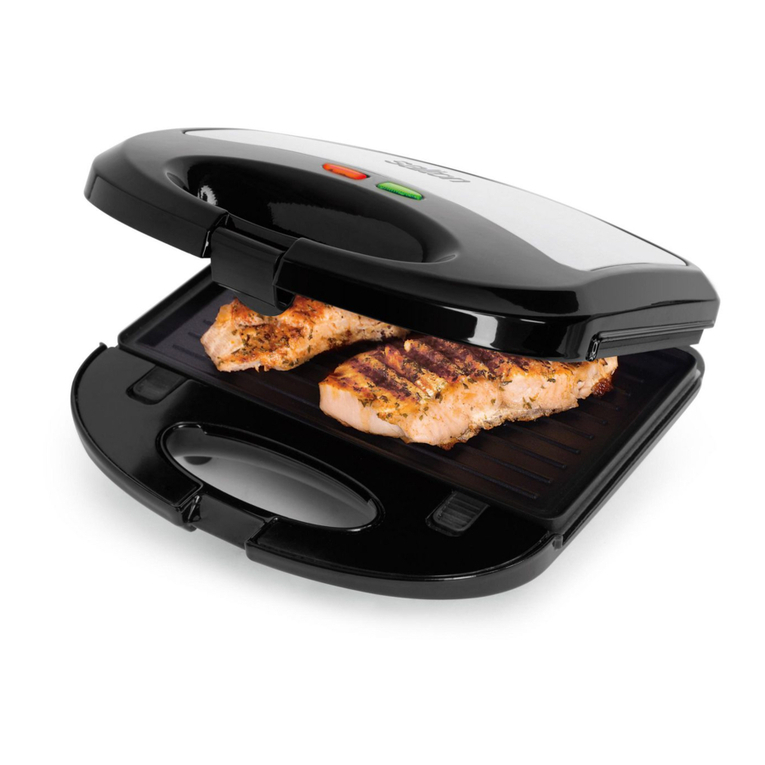
Salton SA8BLK User manual

ONE-YEAR
LIMITED
WARRANTY
This
Sallon/MAXIM
product
warranty
extends
to
the
original
consumer
purchaser
of
the
product,
Warranty
Duration:
This
product
Is
warranted
to
the
original
consumer
purchaser
for
a
period
of
one
{1)
year
from
the
original
purchase
date.
Warranty
Coverage:
This
product
is
warranted
against
defective
materials
or
workmanship.
This
warranty
is
void
if
the
product
has
been
damaged
by
accident,
in
shipment,
unreasonable
use,
misuse,
neglect,
Improper
service,
commercial
use,
repairs
by
unauthorized
personnel
or
other
causes
not
arising
out
of
defects
in
materials
or
workmanship,
This
warranty
is
effective
only
if
the
product
is
purchased
and
operated
in
the
USA,
and
does
not
extend
to
any
units
which
have
been
used
in
violation
of
written
instructions
furnished
by
Saiton/MAXIM
Housewares,
Inc..
or
to
units
which
have
been
altered
or
modified
or
to
damage
to
products
or
parts
thereof
which
have
had
the
serial
number
removed,
altered,
defaced
or
rendered
illegible.
Warranty
Disclaimers:
This
warranty
is
in
lieu
of
all
warranties
expressed
or
implied
and
no
representative
or
person
is
authorized
to
assume
for
Salton/MAXlM
Housewares,
Inc.
any
other
liability
in
connection
with
the
sale
of
our
products.
There
shall
be
no
claims
for
defects
or
failure
of
performance
or
product
failure
under
any
theory
of
tort,
contract
or
commercial
law
including,
but
not
limited
to,
negligence,
gross
negligence,
strict
liability,
breach
of
warranty
and
breach
of
contract.
Warranty
Performance:
During
the
above
one-year
warranty
period,
a
product
with
a
defect
will
be
either
repaired
or
replaced
with
a
reconditioned
comparable
model
(at
Salton/MAXIM's
option)
when
the
product
is
returned
to
the
Salton/MAXIM
facility.
The
repaired
or
replacement
product
will
be
in
warranty
for
the
balance
of
the
one-year
warranty
period
and
an
additional
one-month
period.
No
charge
will
be
made
for
such
repair
or
replacement.
Service
and
Repair
Should
the
appliance
malfunction,
you
should
first
call
toll-free
1-800-233-9054
between
the
hours
of
8:00
am
and
5:00
pm
Central
Standard
Time
ahd
ask
for
CUSTOMER
SERVICE
stating
that
you
are
a
consumer
with
a
problem.
In-Warranty
Service
(USA)
for
an
appliance
covered
under
the
warranty
period,
no
charge
is
made
for
service
or
postage.
Call
for
pre-paid
return
mailing
label.
(U.S.
Customers
Only)
In-Warranty
Service
(Canada)
for
an
appliance
covered
under
the
warranty
period,
no
charge
is
made
for
service
or
postage.
Please
return
the
product
insured,
packaged
with
sufficient
protection,
and
postage
and
insurance
prepaid
to
the
address
listed
below.
Customs
duly/brokerage
fee,
if
any,
must
be
paid
by
the
consumer.
Out-of-Warranty
Service:
A
flat
rate
charge
by
model
is
made
for
out-of-warranty
service.
Include
$6,00
(U.S.)
for
return
shipping
and
handling.
Sallon/MAXIM
cannot
assume
responsibility
for
loss
or
damage
during
incoming
shipment.
For
your
protection,
carefully
package
the
product
for
shipment
and
insure
it
with
the
carrier
Be
sure
to
enclose
the
following
items
with
your
appliance:
any
accessories
related
to
yojr
problem;
your
full
return
address
and
daytime
phone
number;
a
note
describing
the
problem
you
exf^rienced;
a
copy
of
your
sales
receipt
or
other
proof
of
purchase
to
determine
warranty
status,
C,0,D,
shipments
cannot
be
accepted.
Return
the
appliance
to:
•
ATTN:
Repair
Department,
Salton/Maxim
Housewares,
Inc.
550
Business
Center
Drive,
Mt,
Prospect,
Illinois
60056
For
more
information
on
Salton/MAXIM
products:
visit
our
website:
http://www.salton-maxim.com
or
salton@saltonusa,com
Printed
in
China
©
1998
Salton/MAXIM
Housewares,
Inc.
P/N
60288
REVISED
9/22/98
OWNER'S
MANUAL
Model
No.
SA8BLK
Sandwich
Maker
:i|f'
b
A
;
lb

Important
Safeguards
When
using
electrical
appliances,
especially
when
children
are
present,
basic
safety
precautions
should
always
be
followed,
including
the
following:
READ
ALL
INSTRUCTIONS
BEFORE
USING.
1.
Do
not
touch
hot
surfaces.
Use
handles
or
knobs.
2.
To
protect
against
electrical
hazards,
do
not
immerse
cord,
plug,
or
the
appliance
in
water
or
other
liquid.
3.
Close
supervision
is
necessary
when
any
appliance
is
used
by
or
near
children.
4.
Unplug
from
the
outlet
when
not
in
use
and
before
cleaning.
Allow
to
cool
before
putting
on
or
taking
off
parts
and
before
cleaning.
5.
Do
not
operate
any
appliance
with
a
damaged
cord
or
plug
or
after
the
appliance
malfunctions
or
has
been
dropped
or
damaged
in
any
manner.
Return
appliance
to
Salton/MAXIM
Housewares,
Inc.
for
examination,
repair
or
electrical
or
mechanical
adjustment.
6.
The
use
of
attachments
not
recommended
by
the
manufacturer
may
cause
hazards.
7.
Keep
the
cord
away
from
heated
surfaces.
Do
not
let
the
cord
hang
over
the
edge
of
table
or
counter,
as
it
could
be
pulled
off.
8.
Do
not
use
outdoors.
9.
Do
not
place
on
or
near
a
hot
gas
or
electric
burner
or
in
a
heated
oven.
10.
Use
extreme
caution
when
moving
an
appliance
containing
hot
oil
or
other
hot
liquids.
11.
To
use,
plug
cord
into
electrical
outlet.
To
disconnect,
grasp
plug
and
remove
from
outlet.
Do
not
pull
on
the
cord.
12.
Do
not
use
the
appliance
for
other
than
its
intended
use.
THIS
APPLIANCE
IS
FOR
HOUSEHOLD
USE
ONLY
Save
These
Instructions
User
Maintenance
Instructions
This
appliance
requires
little
maintenance.
It
contains
no
user
serviceable
parts.
Do
not
try
to
repair
it
yourself.
Refer
it
to
qualified
personnel
if
servicing
is
needed.
70
CLEAN:
NEVER
IMMERSE
APPLIANCE
IN
WATER.
UNPLUG
AND
ALLOW
TO
COOL
BEFORE
CLEANING.
Do
not
use
steel
wool,
scouring
pads
or
abrasive
cleaners,
as
this
will
damage
the
finish.
Inside
cleaning:
Wipe
Heating
Plates
with
absorbent
paper
toweling
or
a
soft
cloth.
Although
the
Heating
Plates
are
coated
with
a
non-stick
coating,
some
filling
may
still
adhere
to
the
Sandwich
Maker.
To
remove,
simply
pour
a
little
cooking
oil
onto
the
baked-on
food;
allow
to
stand
for
5
to
10
minutes.
This
should
soften
the
food
and
make
it
easy
to
remove
with
absorbent
paper
toweling
or
a
soft
cloth.
If
the
preceding
measure
fails
to
remove
the
food
residue,
we
suggest
wiping
the
Heating
Plates
with
a
slightly
dampened
cloth
and
a
little
non-abrasive
detergent.
Outside
cleaning:
Wipe
dry
with
a
soft,
dry
cloth.
The
Sandwich
Maker
can
be
placed
in
a
vertical
position
(handles
pointed
up)
for
neat
and
compact
storage.
TO
STORE:
Unplug
unit
and
allow
to
cool.
Store
in
its
box
or
in
a
clean,
dry
place.
Never
store
it
while
it
is
hot
or
still
plugged
in.
Never
wrap
cord
tightly
around
the
appliance.
Do
not
put
any
stress
on
cord
where
it
enters
unit,
as
this
could
cause
cord
to
fray
and
break.
if
any
parts
are
missing
or
defective,
DO
NOT
return
this
product.
Please
call
our
Customer
Service
Department
for
assistance.
800"233'9054
Monday
-
Friday
Sam
-
5pm
C5T
Thank
You

Omelet
Deluxe
2
eggs
(beaten)
1-1/4
cup
cooked
and
diced
meat
or
vegetables
(drained)
1/4
cup
grated
cheese
(cheddar,
Monterey
jack,
Swiss
or
feta)
Place
1/2
of
the
cheese
in
the
center
of
each
grid
on
the
lower
cooking
plate.
Pour
the
beaten
egg
gently
over
cheese
and add
cooked
meat
(ham,
bacon,
sausage)
and/or
vegetables.
Close
and
latch
cover.
Allow
to
cook
for
2
minutes
or
until
a
desired
consistency.
Scrambled
E^s
Grilles
4
eggs
4
tbsp.
milk
(1
tbsp.
per
egg)
Spices
and
herbs
to
taste
Dash
of
tabasco
sauce
(if
desired)
1/2
tsp.
butter
or
margarine
(for
grids)
Combine
eggs,
milk
and
spices
in
a
bowl
and
beat.
Brush
heated
sandwich
maker
grids
with
butter
or
margarine
and
add
egg
mixture
to
grids,
leaving
approximately
1/4
inch
for
eggs
to
expand.
Close
cover
but
do
not
latch.
Cook
1-3
minutes
or
until
desired
results
are
achieved.
Makes
4
servings.
Sweet
Treats
Caramelized
Pineapple
2
tablespoons
butter
2
slices
pineapple,
drained
2
tablespoons
brown
sugar
4
slices
raisin
bread
Cream
butter
and
brown
sugar.
Spread
mixture
onto
the
inside
of
two
slices
of
raisin
bread.
Cut
pineapple
slices
into
half
lengthwise.
Place
two
pineapple
slices
onto
each
slice
of
bread:
top
with
remaining
slices
of
bread.
Polarized
Plug
This
appliance
has
a
polarized
plug
(one
blade
is
wider
than
the
other):
To
reduce
the
risk
of
electric
shock,
this
plug
is
intended
to
fit
into
a
polarized
outlet
only
one
way.
If
the
plug
does
not
fit
fully
in
the
outlet,
reverse
the
plug.
If
it
still
does
not
fit,
contact
a
qualified
electrician.
Do
not
attempt
to
modify
the
plug
in
any
way.
Short
Cord
Instructions
A
short
power-supply
cord
is
provided
to
reduce
the
risk
resulting
from
becoming
entangled
in
or
tripping
over
a
longer
cord.
Longer
detachable
power-supply
cords
or
extension
cords
are
available
and
may
be
used
if
care
is
exercised
in
their
use.
If
a
longer
detachable
power-supply
cord
or
extension
cord
is
used,
(1)
the
marked
electrical
rating
of
the
extension
cord
should
be
at
least
as
great
as
the
electrical
rating
of
the
appliance,
and
(2)
the
longer
cord
should
be
arranged
so
that
it
will
not
drape
over
the
counter
top
or
table
top
where
it
can
be
pulled
on
by
children
or
tripped
over
unintentionally.

Getting
To
Know
Your
Salton®
Sandwich
Maker
1.
Latch
2.
Handles
3.
Non-stick
Heating
Plates
FIGURE
1
OPERATE
ONLY
IN
THE
CLOSED
POSITION
1-
.2.
1.
Green
Power
Indicator
Light
2.
Amber
Cook
Light
FIGURE
2
Mixed
Cheese
Sandzvich
1
slice
each
swiss,
cheddar
and
provolone
cheeses.
Top
with
thin
slices
of
tomato.
Add
a
little
mustard
and
sprinkle
with
black
pepper.
Best
with
wheat
or
rye
bread.
Roast
Be^
Sandwich
4-5
slices
of
roast
beef
Spread
inside
of
bread
with
butter
or
margarine.
Heat
roast
beef
in
skillet
on
low-med
heat,
then
place
on
bread.
Add
Cheddar
or
swiss
cheese,
if
desired.
Best
with
deli-style
rye
or
pumpernickel
breads.
Pizza
Fillings
Butter
one
side
of
a
slice
of
bread.
Spread
the
unbuttered
side
with
1
teaspoon
tomato
paste
or
packaged
pizza
sauce.
If
desired,
sprinkle
with
a
little
oregano,
basil,
marjoram
or
thyme.
Add
any
of
the
suggested
fillings
or
improvise
with
your
own
ideas.
Note:
Soften
onions,
green
pepper
and
mushrooms
in
a
iittie
butter
or
margarine
be
fore
using
in
a
fiiiing.
Mushroom
1-2
cocktail
onions,
finely
chopped
1
slice
American
cheese
4
canned
whole
mushrooms,
sliced
1
green
olive,
sliced
Neapolitan
1
tablespoon
chopped
anchovies
1
black
olive,
sliced
1
-2
slices
mozzarella
cheese
1
teaspoon
parmesan
cheese
2-3
canned
mushrooms,
sliced
2
rings
of
green
pepper,
softened
in
butter
Salami
2
slices
salami
1
slice
Cheddar
cheese
2-3
rings
onion,
softened
in
butter
1
green
olive,
sliced
8

Recipes
FOR
LOW-FAT,
LOW-CHOLESTEROL
SANDWICHES:
•
All
recipes
will
work
with
thin-sliced
diet
breads.
•
Don
t
add
butter,
mayonnaise
or
dressings
to
sandwiches.
•
Use
low-fat,
low-cholesterol
spreads
instead
of
butter.
•
Use
low-fat
cheese.
FOR
HIGHER-FIBER
SANDWICHES:
•
Instead
of
white
breads,
use
whole-wheat
or
oat
bran
breads.
•
Blend
1/4-cup
crushed
bran
flakes
into
1
or
2
Tablespoons
of
butter
or
margarine,
then
spread
on
inside
of
bread.
Your
Sandwich
Maker
offers
unlimited
possibilities
for
culinary
creativity.
Experiment
by
adding
your
own
creative
touches
to
the
following
recipes,
transform
leftovers
into
toasted
sandwiches,
or
use
your
imagination
to
design
your
own
sandwich
creations.
INGREDiENTS
INTENDED
FOR
SANDWICHES
USING
270
4
SLICES
OF
BREAD.
Turkey
Sandwich
2
asparagus
spears
2
slices
tomato
2
slices
smoked
turkey
Creamy
Ricotta
Sandwich
1/3
cup
low-fat
ricotta
cheese
1
tablespoon
raisins
1/2
stalk
celery,
sliced
Cinnamon
or
pepper
to
taste
Chicken
Sandwich
2
mushrooms,
sliced
1/2
green
pepper,
sliced
2
oz.
cooked
chicken
breast,
sliced
and
skin
removed
Scrambled
Egg
Sandwich
1
scrambled
egg,
seasoned
with
salt
&
pepper
and
cooked
Add
mayonnaise,
lettuce
and
tomato.
Top
with
bacon
and/or
cheese,
if
desired.
(
\\
Instructions
for
Use
Before
Using
1.
Carefully
unpack
Sandwich
Maker.
2.
Wipe
all
surfaces
with
a
slightly
damp,
soft
cloth.
Never
immerse
in
water.
3.
To
burn
off
residues
on
the
Heating
Elements,
it
will
be
necessary
to
operate
the
unit
for
a
few
minutes
before
initial
use.
Before
heating
your
Sandwich
Maker,
the
Cooking
Plates
may
be
sprayed
or
brushed
with
a
small
amount
of
non
stick
spray.
This
helps
to
protect.
Set
the
Sandwich
Maker
on
a
dry,
clean
and
flat
countertop
surface,
where
it
can
be
easily
plugged
into
an
electrical
outlet.
Open
the
Sandwich
Maker,
as
shown
in
Figure
1.
You
will
notice
smoke
and
a
slight
odor
while
residues
burns
off.
Allow
the
Sandwich
Maker
to
operate
until
smoke
and
odor
dissipate,
then
unplug
Sandwich
Maker
and
allow
to
cool.
Be
careful,
the
Cooking
Plates
will
be
hot!
NOTE:
Sotne
odor
may
still
be
detected
during
initial
use;
this
is
normal
and
should
disappear
after
one
or
two
uses.
IMPORTANT:
Before
using,
operate
the
appiiance
without
bread
in
order
to
burn
off
residues
on
the
Heating
Elements.
To
avoid
burns,
caution
should
be
taken
when
handling
the
Sandwich
Maker.
The
sides
of
the
Heating
Plates
are
exposed
and
may
be
hot.
4.
5.
6.
7.

1.
2.
3.
4.
5.
6.
7.
8.
9.
10.
11.
12.
13.
14.
How
To
Use
Your
Salton®
Sandwich
Maker
Check
to
ensure
that
the
Heating
Plates
are
clean
and
free
from
dust.
If
necessary,
wipe
with
a
damp
cloth.
When
using
the
Sandwich
Maker
for
the
first
time,
brush
the
Heating
Plates
with
oil,
butter
or
margarine.
Close
the
Lid.
Plug
appliance
into
a
standard
electrical
outlet.
Both
the
Green
Power
Indicator
and
Amber
Cook
Light
will
come
on;
unit
will
immediately
begin
heating.
Allow
the
appliance
to
pre-heat
for
approximately
5
minutes
while
preparing
the
sandwiches.
The
Amber
Cook
Light
will
turn
off
when
unit
has
reached
heating
temperature.
Open
Sandwich
Maker;
place
a
slice
of
bread
on
the
bottom
plate
with
the
buttered
side
down.
(For
golden-
toasted
sandwiches,
butter
the
outside
of
the
bread.)
Place
filling
onto
the
bread.
Place
the
second
slice
of
bread
atop
the
filling
with
the
buttered
side
up.
Carefully
close
the
top
of
the
Sandwich
Maker.
Do
not
force
shut.
Steam
will
be
released
between
the
Plates.
Caution
should
be
taken
to
prevent
hands
from
coming
in
contact
with
the
steam.
Secure
the
two
halves
of
the
Sandwich
Maker
with
the
Latch.
Toasting
time
should
take
approximately
3-5
minutes.
Exact
toasting
time
will
be
a
matter
of
taste
and
will
depend
on
type
of
bread'and
filling
used.
The
Amber
Cook
Light
turns
on
and
off
as
the
unit
cycles
to
maintain
ideal
heating
temperature;
this
prevents
overheating.
Avoid
opening
your
Sandwich
Maker
before
toasting
is
completed,
as
this
may
cause
the
sandwich
to
taste
poorly.
When
the
sandwiches
•
are
cooked
to
taste,
remove
the
sandwich
using
a
plastic
or
wooden
spatula.
Do
not
use
metal
tongs
or
knives,
as
this
may
damage
the
Non-stick
Coating.
Keep
the
Lids
closed
to
preserve
the
heat
until
ready
for
the
next
sandwich.
After
use,
immediately
unplug
from
the
electrical
outlet.
If
sandwiches
are
not
to
be
consumed
immediately,
place
the
sandwiches
on
a
paper
napkin
to
absorb
condensation.
To
keep
hot,
place
on
a
rack
in
an
ovenproof
dish
and
warm
in
the
oven
at
about
200°-250T.
Sandwiches
will
keep
for
about
20
minutes
and
then
begin
to
dry
out.
Helpful
Hints
Read
a
recipe
once
before
starting
to
make
sandwich.
Have
all
ingredients
at
hand
before
preparing
sandwich.
Wipe
the
Cooking
Plates
clean
after
each
use
to
avoid
food
contamination.
If
you
never
use
butter
or
margarine,
clean
the
Cooking
Plates
occasionally
with
a
little
vegetable
oil
to
prevent
sticking
and
make
cleaning
easier.
Rub
off
any
excess
oil
with
a
soft,
absorbent
paper
towel
.
Always
preheat
the
Sandwich
Maker
before
each
use.
All
types
of
breads
may
be
used.
However,
select
bread
that
will
fit
the
size
of
the
sandwich
maker.
For
best
results,
we
recommend
to
butter
the
outside
of
the
bread.
Avoid
using
processed
cheeses,
as
they
tend
to
"run"
under
high
temperatures.
A
teaspoon
of
sugar
sprinkled
on
the
buttered
side
makes
toasted
sandwiches
more
crisp
and
adds
flavor
when
using
sweet
fillings.
When
using
soft
or
liquid
fillings,
use
thicker-sliced
breads.
Bread
can
be
slightly
toasted
before
filling
is
added.
Be
aware
that
most
fresh
fruits
give
off
juice
when
heated.
Instead
of
fresh
fruits,
canned
fruits
can
be
used;
drain
fruit
and
pat
dry
with
a
clean
paper
towel
.
Remember
that
whole
grain
and
sweet
breads
will
toast
quicker
than
white
breads.

Recipes
FOR
LOW-FAT,
LOW-CHOLESTEROL
SANDWICHES:
•
All
recipes
will
work
with
thin-sliced
diet
breads.
•
Don
t
add
butter,
mayonnaise
or
dressings
to
sandwiches.
•
Use
low-fat,
low-cholesterol
spreads
instead
of
butter.
•
Use
low-fat
cheese.
FOR
HIGHER-FIBER
SANDWICHES:
•
Instead
of
white
breads,
use
whole-wheat
or
oat
bran
breads.
•
Blend
1/4-cup
crushed
bran
flakes
into
1
or
2
Tablespoons
of
butter
or
margarine,
then
spread
on
inside
of
bread.
Your
Sandwich
Maker
offers
unlimited
possibilities
for
culinary
creativity.
Experiment
by
adding
your
own
creative
touches
to
the
following
recipes,
transform
leftovers
into
toasted
sandwiches,
or
use
your
imagination
to
design
your
own
sandwich
creations.
INGREDiENTS
INTENDED
FOR
SANDWICHES
USING
270
4
SLICES
OF
BREAD.
Turkey
Sandwich
2
asparagus
spears
2
slices
tomato
2
slices
smoked
turkey
Creamy
Ricotta
Sandwich
1/3
cup
low-fat
ricotta
cheese
1
tablespoon
raisins
1/2
stalk
celery,
sliced
Cinnamon
or
pepper
to
taste
Chicken
Sandwich
2
mushrooms,
sliced
1/2
green
pepper,
sliced
2
oz.
cooked
chicken
breast,
sliced
and
skin
removed
Scrambled
Egg
Sandwich
1
scrambled
egg,
seasoned
with
salt
&
pepper
and
cooked
Add
mayonnaise,
lettuce
and
tomato.
Top
with
bacon
and/or
cheese,
if
desired.
(
\\
Instructions
for
Use
Before
Using
1.
Carefully
unpack
Sandwich
Maker.
2.
Wipe
all
surfaces
with
a
slightly
damp,
soft
cloth.
Never
immerse
in
water.
3.
To
burn
off
residues
on
the
Heating
Elements,
it
will
be
necessary
to
operate
the
unit
for
a
few
minutes
before
initial
use.
Before
heating
your
Sandwich
Maker,
the
Cooking
Plates
may
be
sprayed
or
brushed
with
a
small
amount
of
non
stick
spray.
This
helps
to
protect.
Set
the
Sandwich
Maker
on
a
dry,
clean
and
flat
countertop
surface,
where
it
can
be
easily
plugged
into
an
electrical
outlet.
Open
the
Sandwich
Maker,
as
shown
in
Figure
1.
You
will
notice
smoke
and
a
slight
odor
while
residues
burns
off.
Allow
the
Sandwich
Maker
to
operate
until
smoke
and
odor
dissipate,
then
unplug
Sandwich
Maker
and
allow
to
cool.
Be
careful,
the
Cooking
Plates
will
be
hot!
NOTE:
Sotne
odor
may
still
be
detected
during
initial
use;
this
is
normal
and
should
disappear
after
one
or
two
uses.
IMPORTANT:
Before
using,
operate
the
appiiance
without
bread
in
order
to
burn
off
residues
on
the
Heating
Elements.
To
avoid
burns,
caution
should
be
taken
when
handling
the
Sandwich
Maker.
The
sides
of
the
Heating
Plates
are
exposed
and
may
be
hot.
4.
5.
6.
7.

Getting
To
Know
Your
Salton®
Sandwich
Maker
1.
Latch
2.
Handles
3.
Non-stick
Heating
Plates
FIGURE
1
OPERATE
ONLY
IN
THE
CLOSED
POSITION
1-
.2.
1.
Green
Power
Indicator
Light
2.
Amber
Cook
Light
FIGURE
2
Mixed
Cheese
Sandzvich
1
slice
each
swiss,
cheddar
and
provolone
cheeses.
Top
with
thin
slices
of
tomato.
Add
a
little
mustard
and
sprinkle
with
black
pepper.
Best
with
wheat
or
rye
bread.
Roast
Be^
Sandwich
4-5
slices
of
roast
beef
Spread
inside
of
bread
with
butter
or
margarine.
Heat
roast
beef
in
skillet
on
low-med
heat,
then
place
on
bread.
Add
Cheddar
or
swiss
cheese,
if
desired.
Best
with
deli-style
rye
or
pumpernickel
breads.
Pizza
Fillings
Butter
one
side
of
a
slice
of
bread.
Spread
the
unbuttered
side
with
1
teaspoon
tomato
paste
or
packaged
pizza
sauce.
If
desired,
sprinkle
with
a
little
oregano,
basil,
marjoram
or
thyme.
Add
any
of
the
suggested
fillings
or
improvise
with
your
own
ideas.
Note:
Soften
onions,
green
pepper
and
mushrooms
in
a
iittie
butter
or
margarine
be
fore
using
in
a
fiiiing.
Mushroom
1-2
cocktail
onions,
finely
chopped
1
slice
American
cheese
4
canned
whole
mushrooms,
sliced
1
green
olive,
sliced
Neapolitan
1
tablespoon
chopped
anchovies
1
black
olive,
sliced
1
-2
slices
mozzarella
cheese
1
teaspoon
parmesan
cheese
2-3
canned
mushrooms,
sliced
2
rings
of
green
pepper,
softened
in
butter
Salami
2
slices
salami
1
slice
Cheddar
cheese
2-3
rings
onion,
softened
in
butter
1
green
olive,
sliced
8

Omelet
Deluxe
2
eggs
(beaten)
1-1/4
cup
cooked
and
diced
meat
or
vegetables
(drained)
1/4
cup
grated
cheese
(cheddar,
Monterey
jack,
Swiss
or
feta)
Place
1/2
of
the
cheese
in
the
center
of
each
grid
on
the
lower
cooking
plate.
Pour
the
beaten
egg
gently
over
cheese
and add
cooked
meat
(ham,
bacon,
sausage)
and/or
vegetables.
Close
and
latch
cover.
Allow
to
cook
for
2
minutes
or
until
a
desired
consistency.
Scrambled
E^s
Grilles
4
eggs
4
tbsp.
milk
(1
tbsp.
per
egg)
Spices
and
herbs
to
taste
Dash
of
tabasco
sauce
(if
desired)
1/2
tsp.
butter
or
margarine
(for
grids)
Combine
eggs,
milk
and
spices
in
a
bowl
and
beat.
Brush
heated
sandwich
maker
grids
with
butter
or
margarine
and
add
egg
mixture
to
grids,
leaving
approximately
1/4
inch
for
eggs
to
expand.
Close
cover
but
do
not
latch.
Cook
1-3
minutes
or
until
desired
results
are
achieved.
Makes
4
servings.
Sweet
Treats
Caramelized
Pineapple
2
tablespoons
butter
2
slices
pineapple,
drained
2
tablespoons
brown
sugar
4
slices
raisin
bread
Cream
butter
and
brown
sugar.
Spread
mixture
onto
the
inside
of
two
slices
of
raisin
bread.
Cut
pineapple
slices
into
half
lengthwise.
Place
two
pineapple
slices
onto
each
slice
of
bread:
top
with
remaining
slices
of
bread.
Polarized
Plug
This
appliance
has
a
polarized
plug
(one
blade
is
wider
than
the
other):
To
reduce
the
risk
of
electric
shock,
this
plug
is
intended
to
fit
into
a
polarized
outlet
only
one
way.
If
the
plug
does
not
fit
fully
in
the
outlet,
reverse
the
plug.
If
it
still
does
not
fit,
contact
a
qualified
electrician.
Do
not
attempt
to
modify
the
plug
in
any
way.
Short
Cord
Instructions
A
short
power-supply
cord
is
provided
to
reduce
the
risk
resulting
from
becoming
entangled
in
or
tripping
over
a
longer
cord.
Longer
detachable
power-supply
cords
or
extension
cords
are
available
and
may
be
used
if
care
is
exercised
in
their
use.
If
a
longer
detachable
power-supply
cord
or
extension
cord
is
used,
(1)
the
marked
electrical
rating
of
the
extension
cord
should
be
at
least
as
great
as
the
electrical
rating
of
the
appliance,
and
(2)
the
longer
cord
should
be
arranged
so
that
it
will
not
drape
over
the
counter
top
or
table
top
where
it
can
be
pulled
on
by
children
or
tripped
over
unintentionally.

Important
Safeguards
When
using
electrical
appliances,
especially
when
children
are
present,
basic
safety
precautions
should
always
be
followed,
including
the
following:
READ
ALL
INSTRUCTIONS
BEFORE
USING.
1.
Do
not
touch
hot
surfaces.
Use
handles
or
knobs.
2.
To
protect
against
electrical
hazards,
do
not
immerse
cord,
plug,
or
the
appliance
in
water
or
other
liquid.
3.
Close
supervision
is
necessary
when
any
appliance
is
used
by
or
near
children.
4.
Unplug
from
the
outlet
when
not
in
use
and
before
cleaning.
Allow
to
cool
before
putting
on
or
taking
off
parts
and
before
cleaning.
5.
Do
not
operate
any
appliance
with
a
damaged
cord
or
plug
or
after
the
appliance
malfunctions
or
has
been
dropped
or
damaged
in
any
manner.
Return
appliance
to
Salton/MAXIM
Housewares,
Inc.
for
examination,
repair
or
electrical
or
mechanical
adjustment.
6.
The
use
of
attachments
not
recommended
by
the
manufacturer
may
cause
hazards.
7.
Keep
the
cord
away
from
heated
surfaces.
Do
not
let
the
cord
hang
over
the
edge
of
table
or
counter,
as
it
could
be
pulled
off.
8.
Do
not
use
outdoors.
9.
Do
not
place
on
or
near
a
hot
gas
or
electric
burner
or
in
a
heated
oven.
10.
Use
extreme
caution
when
moving
an
appliance
containing
hot
oil
or
other
hot
liquids.
11.
To
use,
plug
cord
into
electrical
outlet.
To
disconnect,
grasp
plug
and
remove
from
outlet.
Do
not
pull
on
the
cord.
12.
Do
not
use
the
appliance
for
other
than
its
intended
use.
THIS
APPLIANCE
IS
FOR
HOUSEHOLD
USE
ONLY
Save
These
Instructions
User
Maintenance
Instructions
This
appliance
requires
little
maintenance.
It
contains
no
user
serviceable
parts.
Do
not
try
to
repair
it
yourself.
Refer
it
to
qualified
personnel
if
servicing
is
needed.
70
CLEAN:
NEVER
IMMERSE
APPLIANCE
IN
WATER.
UNPLUG
AND
ALLOW
TO
COOL
BEFORE
CLEANING.
Do
not
use
steel
wool,
scouring
pads
or
abrasive
cleaners,
as
this
will
damage
the
finish.
Inside
cleaning:
Wipe
Heating
Plates
with
absorbent
paper
toweling
or
a
soft
cloth.
Although
the
Heating
Plates
are
coated
with
a
non-stick
coating,
some
filling
may
still
adhere
to
the
Sandwich
Maker.
To
remove,
simply
pour
a
little
cooking
oil
onto
the
baked-on
food;
allow
to
stand
for
5
to
10
minutes.
This
should
soften
the
food
and
make
it
easy
to
remove
with
absorbent
paper
toweling
or
a
soft
cloth.
If
the
preceding
measure
fails
to
remove
the
food
residue,
we
suggest
wiping
the
Heating
Plates
with
a
slightly
dampened
cloth
and
a
little
non-abrasive
detergent.
Outside
cleaning:
Wipe
dry
with
a
soft,
dry
cloth.
The
Sandwich
Maker
can
be
placed
in
a
vertical
position
(handles
pointed
up)
for
neat
and
compact
storage.
TO
STORE:
Unplug
unit
and
allow
to
cool.
Store
in
its
box
or
in
a
clean,
dry
place.
Never
store
it
while
it
is
hot
or
still
plugged
in.
Never
wrap
cord
tightly
around
the
appliance.
Do
not
put
any
stress
on
cord
where
it
enters
unit,
as
this
could
cause
cord
to
fray
and
break.
if
any
parts
are
missing
or
defective,
DO
NOT
return
this
product.
Please
call
our
Customer
Service
Department
for
assistance.
800"233'9054
Monday
-
Friday
Sam
-
5pm
C5T
Thank
You

ONE-YEAR
LIMITED
WARRANTY
This
Sallon/MAXIM
product
warranty
extends
to
the
original
consumer
purchaser
of
the
product,
Warranty
Duration:
This
product
Is
warranted
to
the
original
consumer
purchaser
for
a
period
of
one
{1)
year
from
the
original
purchase
date.
Warranty
Coverage:
This
product
is
warranted
against
defective
materials
or
workmanship.
This
warranty
is
void
if
the
product
has
been
damaged
by
accident,
in
shipment,
unreasonable
use,
misuse,
neglect,
Improper
service,
commercial
use,
repairs
by
unauthorized
personnel
or
other
causes
not
arising
out
of
defects
in
materials
or
workmanship,
This
warranty
is
effective
only
if
the
product
is
purchased
and
operated
in
the
USA,
and
does
not
extend
to
any
units
which
have
been
used
in
violation
of
written
instructions
furnished
by
Saiton/MAXIM
Housewares,
Inc..
or
to
units
which
have
been
altered
or
modified
or
to
damage
to
products
or
parts
thereof
which
have
had
the
serial
number
removed,
altered,
defaced
or
rendered
illegible.
Warranty
Disclaimers:
This
warranty
is
in
lieu
of
all
warranties
expressed
or
implied
and
no
representative
or
person
is
authorized
to
assume
for
Salton/MAXlM
Housewares,
Inc.
any
other
liability
in
connection
with
the
sale
of
our
products.
There
shall
be
no
claims
for
defects
or
failure
of
performance
or
product
failure
under
any
theory
of
tort,
contract
or
commercial
law
including,
but
not
limited
to,
negligence,
gross
negligence,
strict
liability,
breach
of
warranty
and
breach
of
contract.
Warranty
Performance:
During
the
above
one-year
warranty
period,
a
product
with
a
defect
will
be
either
repaired
or
replaced
with
a
reconditioned
comparable
model
(at
Salton/MAXIM's
option)
when
the
product
is
returned
to
the
Salton/MAXIM
facility.
The
repaired
or
replacement
product
will
be
in
warranty
for
the
balance
of
the
one-year
warranty
period
and
an
additional
one-month
period.
No
charge
will
be
made
for
such
repair
or
replacement.
Service
and
Repair
Should
the
appliance
malfunction,
you
should
first
call
toll-free
1-800-233-9054
between
the
hours
of
8:00
am
and
5:00
pm
Central
Standard
Time
ahd
ask
for
CUSTOMER
SERVICE
stating
that
you
are
a
consumer
with
a
problem.
In-Warranty
Service
(USA)
for
an
appliance
covered
under
the
warranty
period,
no
charge
is
made
for
service
or
postage.
Call
for
pre-paid
return
mailing
label.
(U.S.
Customers
Only)
In-Warranty
Service
(Canada)
for
an
appliance
covered
under
the
warranty
period,
no
charge
is
made
for
service
or
postage.
Please
return
the
product
insured,
packaged
with
sufficient
protection,
and
postage
and
insurance
prepaid
to
the
address
listed
below.
Customs
duly/brokerage
fee,
if
any,
must
be
paid
by
the
consumer.
Out-of-Warranty
Service:
A
flat
rate
charge
by
model
is
made
for
out-of-warranty
service.
Include
$6,00
(U.S.)
for
return
shipping
and
handling.
Sallon/MAXIM
cannot
assume
responsibility
for
loss
or
damage
during
incoming
shipment.
For
your
protection,
carefully
package
the
product
for
shipment
and
insure
it
with
the
carrier
Be
sure
to
enclose
the
following
items
with
your
appliance:
any
accessories
related
to
yojr
problem;
your
full
return
address
and
daytime
phone
number;
a
note
describing
the
problem
you
exf^rienced;
a
copy
of
your
sales
receipt
or
other
proof
of
purchase
to
determine
warranty
status,
C,0,D,
shipments
cannot
be
accepted.
Return
the
appliance
to:
•
ATTN:
Repair
Department,
Salton/Maxim
Housewares,
Inc.
550
Business
Center
Drive,
Mt,
Prospect,
Illinois
60056
For
more
information
on
Salton/MAXIM
products:
visit
our
website:
http://www.salton-maxim.com
or
salton@saltonusa,com
Printed
in
China
©
1998
Salton/MAXIM
Housewares,
Inc.
P/N
60288
REVISED
9/22/98
OWNER'S
MANUAL
Model
No.
SA8BLK
Sandwich
Maker
:i|f'
b
A
;
lb
Other Salton Kitchen Appliance manuals
Salton
Salton DH1000 User manual

Salton
Salton CP1247 User manual

Salton
Salton HB1737 User manual

Salton
Salton MP2013 User manual

Salton
Salton GFSX400 Product information sheet

Salton
Salton DH-1043 User manual

Salton
Salton FR1416A User manual

Salton
Salton CST1162 User manual

Salton
Salton CP1716 User manual

Salton
Salton SFP85 Installation guide
Salton
Salton Cinema Popper CP1750 User manual

Salton
Salton SCPR1 Installation guide

Salton
Salton CP-1204 Cinema Popper User manual

Salton
Salton SP1499 User manual

Salton
Salton SP2042 User manual

Salton
Salton Juiceman II User manual

Salton
Salton SM-1012 User manual

Salton
Salton PM-2 User manual
Salton
Salton CP1283 User manual

Salton
Salton SL-16 User manual