manuals.online logo
Brands
  1. Home
  2. •
  3. Brands
  4. •
  5. Salus
  6. •
  7. Gateway
  8. •
  9. Salus SG888ZB Operation manual

Salus SG888ZB Operation manual

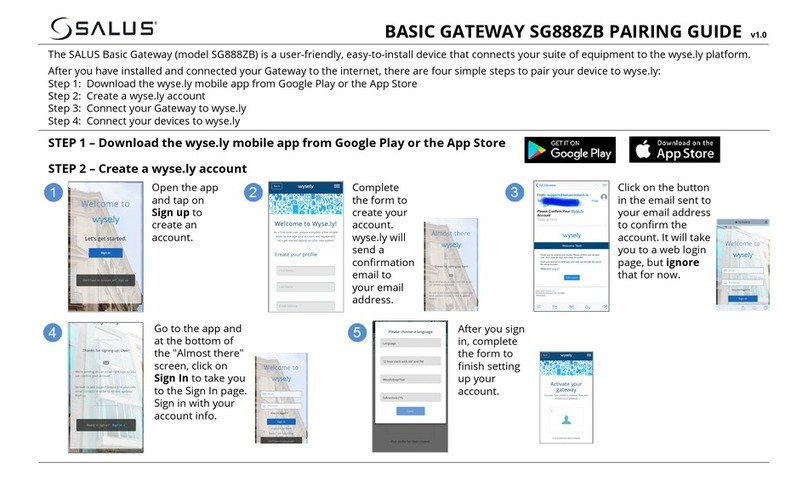
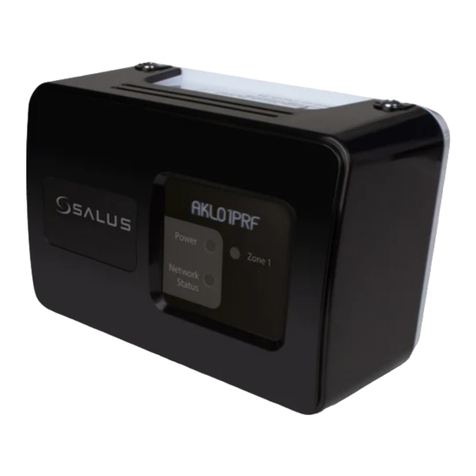
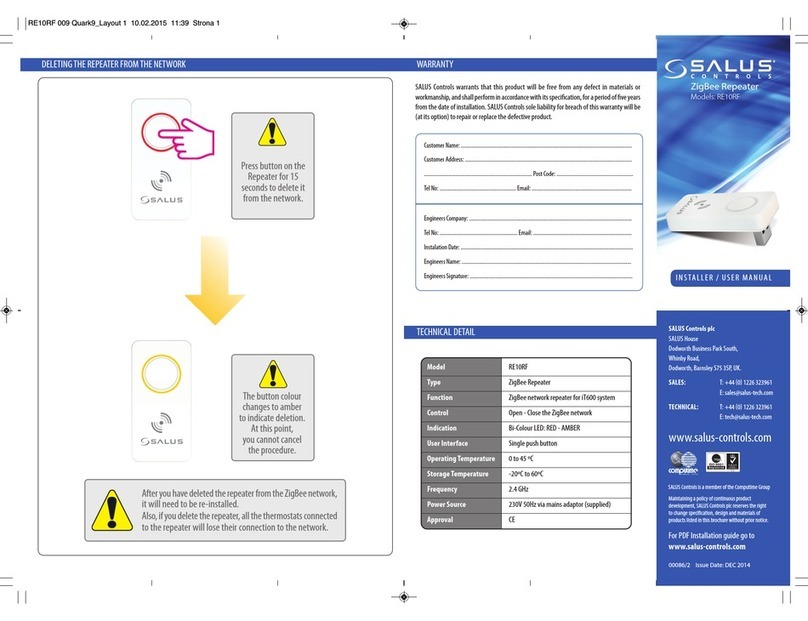
!Installation!/!User!Guide:!Basic!Gateway!(SG888ZB!!!!)!
!
IN#THE#BOX#
#
SAFETY#INSTRUCTIONS#
!
!
!
!
!
Read these instructions before installing and using the Basic Gateway and keep
this guide in a safe place for future reference.
• Verify compatibility with your connected home system before installation.
• Follow all instructions provided by your connected home manufacturer
regarding the addition of devices to your connected home system. An
authorized, qualified installer may be required.
Salus accepts no responsibility for damage caused by not following these
instructions.
Basic!Gateway!w/!
Port!Cover!
Ethernet!Cable!!
USB!Power!
Adapter!
USB!Power!
Cable!
Installation!/!!
User!Guide!
!
NOTE:#Additional!equipment!may!be!required!due!to!building!construction!or!materials,!or!other!
radio!interference!that!may!reduce!the!radio!range.
CONTROLS,#PORTS,#AND#INDICATORS#
!
!
Item
Description
Multi
Button
Multi-function user input button:
Pair, Rejoin, and Factory defaults
Light Ring
Tri-color ring of light to indicate status
AC Plug
NEMA 1 (Type A) plug - Compatible with US
and Canadian standard 120 VAC, 15 A
electrical outlets
USB Port
USB Type - A receptacle configured as a
dedicated charging port
Ethernet
Port
RJ-45 wired connection to the home Internet
router/gateway
Power Port
USB micro-A port for power input
Port Cover
Protective cover for power and Ethernet ports
INSTALLING#THE#GATEWAY#
* The port cover under the gateway can be removed for
easier access to the power and Ethernet ports.
Recommended cabling sequence: first connect the
Ethernet cable to the gateway port, then attach the USB
power cable to the gateway power port. Refer to the
wyse.ly Pairing Guide for more information on how to
connect the gateway to wyse.ly.
USING#THE#DEVICE#
PAIRING DEVICES TO THE GATEWAY
• To pair devices to the gateway, first ensure the gateway
is connected to the Internet (LED ring will be blue).
• Press the Multi Button until the LED ring flashes red (~3
seconds) and release to start the pairing process.
• Follow the instructions on wyse.ly or the wyse.ly app
to complete the device pairing process. Repeat the
process for each device.
• Press Multi Button again for more than 3 seconds to
exit pairing state. The LED ring will turn solid blue when
the pairing process is complete.
RESET TO FACTORY DEFAULTS
• To reset the device to factory default settings, press the
Multi Button until the LED ring is a solid red (~10
seconds). The LED ring will flash red, then go solid red.
• Release the Multi Button when the LED ring is solid red.
The device LED ring will turn solid green when it has
been returned to factory default settings.
LED#INDICATIONS#
Connected = connected to wyse.ly
Linked = connected to local router
Paired = connected to local ZigBee devices
Solid Blue
On, Linked and Connected
Solid Green
Powering Up or
On, Linked, NOT Connected
Solid Red
On, NOT Linked, NOT Connected
Flashing Green
Attempting to Connect or
In IDENTIFY Mode
Flashing Red
Ready for Device Pairing
TROUBLESHOOTING#
WILL NOT PAIR WITH DEVICES INITIALLY
• Radio interference is present at the desired location:
1) Relocate the gateway; 2) Select a different location for
the device; or 3) Add a ZigBee repeater to the system
DEVICE LOSS OF CONNECTION AFTER PAIRING
• Radio environment may have changed: (1) Force rejoin
from device to possibly find a better radio path; or (2)
Apply radio interference solutions above
AC
Plug
Ethernet
Port
USB
Port
Power
Port
Multi Button
Light
Ring
Port Cover
*
Customer’s Internet
Gateway / Router
WH
BK
Version!4!
SPECIFICATIONS
Operating
Conditions
32 – 104°F / 0 – 40°C
10 – 90% humidity (non-
condensing)
Storage
-14 – 140 °F / -10 – 60°C
Protocols
Supported
ZigBee HA 1.2 profile
WiFi 802.11n
RF Freq.
2.4 GHz
Input voltage
120VAC ±10%, 60 Hz
Size
Ø 3.5” x 2.2” /
Ø 89 x 56 mm
FCC#STATEMENTS#
WARNING: Changes or modifications to this unit not expressly
approved by the party responsible for compliance could void
the user’s authority to operate the equipment.
This device complies with Part 15 of the FCC Rules. Operation
is subject to the following two conditions: (1) this device may
not cause harmful interference, and (2) this device must accept
any interference received, including interference that may
cause undesired operation.
NOTE: This equipment has been tested and found to comply
with the limits for a Class B digital device, pursuant to Part 15
of the FCC Rules. These limits are designed to provide
reasonable protection against harmful interference in a
residential installation. This equipment generates, uses and
can radiate radio frequency energy, and if not installed and
used in accordance with the instructions, may cause harmful
interference to radio communications. However, there is no
guarantee that interference will not occur in a particular
installation. If this equipment does cause harmful interference
to radio or television reception, which can be determined by
turning the equipment off and on, the user is encouraged to
try to correct the interference by one or more of the following
measures:
• Reorient or relocate the receiving antenna.
• Increase the separation between the equipment and
receiver.
• Connect the equipment into an outlet on a circuit different
from that to which the receiver is connected.
• Consult the dealer or an experienced radio/TV technician
for help.
FCC#AND#INDUSTRY#CANADA#
RF Radiation Exposure statement: This equipment
complies with FCC and Industry Canada RF radiation exposure
limits set forth for an uncontrolled environment. This
equipment should be installed and operated with a minimum
distance of 20 centimeters between the antenna and all
persons.
INDUSTRY#CANADA#
This device complies with Industry Canada licence-exempt RSS
standard(s). Operation is subject to the following two
conditions: (1) this device may not cause interference, and (2)
this device must accept any interference, including
interference that may cause undesired operation of the device.
Le présent appareil est conforme aux CNR d'Industrie Canada
applicables aux appareils radio exempts de licence.
L'exploitation est autorisée aux deux conditions suivantes : (1)
l'appareil ne doit pas produire de brouillage, et (2) l'utilisateur
de l'appareil doit accepter tout brouillage radioélectrique subi,
même si le brouillage est susceptible d'en compromettre le
fonctionnement.
SALUS#WARRANTY#
SALUS North America, Inc. (“Salus”) warrants that for a period of five (5)
years (“Warranty Period”) from the date of purchase by the consumer
(“Customer”), this device, excluding batteries (“Product”), shall be free of
defects in materials and workmanship under normal use and service in
accordance with all supplied instructions. During the warranty period,
Salus shall, at its option, repair or replace any defective Products, at no
charge for the device. Any replacement and/or repaired devices are
warranted for the remainder of the original Warranty Period or ninety
(90) days, whichever is longer.
This warranty does not cover removal or reinstallation costs. This
warranty does not apply to any Product (i) which has been modified,
repaired, or altered, except by Salus or an authorized Salus
representative, (ii) which has not been maintained in accordance with
any handling or operating instructions supplied by Salus, or (iii) which
has been subjected to unusual physical or electrical stress, misuses,
abuse, negligence or accidents.
This warranty is the only express warranty Salus makes for the Product.
Any implied warranties, including warranties of merchantability or
fitness for a particular purpose, are limited to the Warranty Period or
the shortest period allowed by law.
SALUS SHALL NOT BE LIABLE FOR ANY LOSS OR DAMAGE OF ANY KIND,
INCLUDING ANY SPECIAL, INCIDENTAL OR CONSEQUENTIAL DAMAGES
RESULTING, DIRECTLY OR INDIRECTLY, FROM ANY BREACH OF ANY
WARRANTY, EXPRESS OR IMPLIED, OR ANY OTHER FAILURE OF THIS
PRODUCT. Some states and provinces do not allow the exclusion or
limitation of incidental or consequential damages, or limitation on the
duration of implied warranties of merchantability or fitness, so these
exclusions or limitations may not apply to you.
No oral or written information or advice given by Salus or a Salus-
authorized representative shall modify or extend this warranty. If any
term is held to be illegal or unenforceable, the legality or enforceability
of the remaining terms shall not be affected or impaired.
Customer’s sole and exclusive remedy under this limited warranty is
product repair or replacement as provided herein. If a Product under
warranty is defective, the Customer may:
• contact the party (“Seller”) from which the Customer purchased the
Product to obtain an equivalent replacement product after the
Seller has determined that the Product is defective and the
Customer is eligible for a replacement, or
• contact Salus Service at [email protected], to determine
whether the device qualifies for a replacement. If a replacement is
warranted and is shipped prior to the return of the device under
warranty, a credit card is required and a hold may be placed on the
Customer’s credit card for the value of the replacement until the
returned device is verified as eligible for replacement, in which
case, the Customer’s credit card will not be charged.
This warranty gives you specific legal rights, and you may also have
other rights that vary from jurisdiction to jurisdiction. If you have any
questions regarding this warranty, please write Salus at:
SALUS North America, Inc.
850 Main St.
Redwood City, CA 94063

Other manuals for SG888ZB

4

This manual suits for next models

2

Other Salus Gateway manuals

Salus SG888ZB Operation manual

Salus

Salus SG888ZB Operation manual

Salus RE10RF User manual

Salus

Salus RE10RF User manual

Salus UGE600 User manual

Salus

Salus UGE600 User manual

Salus iTG310 User manual

Salus

Salus iTG310 User manual

Salus SAU2AG1 User manual

Salus

Salus SAU2AG1 User manual

Salus SG888ZB User manual

Salus

Salus SG888ZB User manual

Salus G30 User guide

Salus

Salus G30 User guide

Popular Gateway manuals by other brands

IC nexus VPC100 Series Quick start guides

IC nexus

IC nexus VPC100 Series Quick start guides

Accton Technology CheetahAccess AC-IG1004 user guide

Accton Technology

Accton Technology CheetahAccess AC-IG1004 user guide

Synway SBO500 SBO Series user manual

Synway

Synway SBO500 SBO Series user manual

ADTRAN 7310-8 quick start

ADTRAN

ADTRAN 7310-8 quick start

Ruckus Wireless SmartCell Gateway 200 reference guide

Ruckus Wireless

Ruckus Wireless SmartCell Gateway 200 reference guide

Juniper SRX240 Series Getting started guide

Juniper

Juniper SRX240 Series Getting started guide

Opticon SBG-1000 quick start guide

Opticon

Opticon SBG-1000 quick start guide

Juniper SSG 500M Series Hardware installation and configuration guide

Juniper

Juniper SSG 500M Series Hardware installation and configuration guide

Emerson Smart Wireless Gateway Reference manual

Emerson

Emerson Smart Wireless Gateway Reference manual

Huawei HG552e user guide

Huawei

Huawei HG552e user guide

Maxfor Technology MFG-G300 user manual

Maxfor Technology

Maxfor Technology MFG-G300 user manual

Nexland WaveBase Pro Series user manual

Nexland

Nexland WaveBase Pro Series user manual

Philips CPWBS054/05 quick start guide

Philips

Philips CPWBS054/05 quick start guide

LG V-NET PLNWKB000 Installation & user manual

LG

LG V-NET PLNWKB000 Installation & user manual

Accton Technology Edge-Core OD200 user guide

Accton Technology

Accton Technology Edge-Core OD200 user guide

AudioCodes MediaPack MP-124 Fast Track Guide

AudioCodes

AudioCodes MediaPack MP-124 Fast Track Guide

PalmMicro PA168V Setup guide

PalmMicro

PalmMicro PA168V Setup guide

Eaton XN-312-GW-CAN manual

Eaton

Eaton XN-312-GW-CAN manual

manuals.online logo
manuals.online logoBrands
  • About & Mission
  • Contact us
  • Privacy Policy
  • Terms and Conditions

Copyright 2025 Manuals.Online. All Rights Reserved.