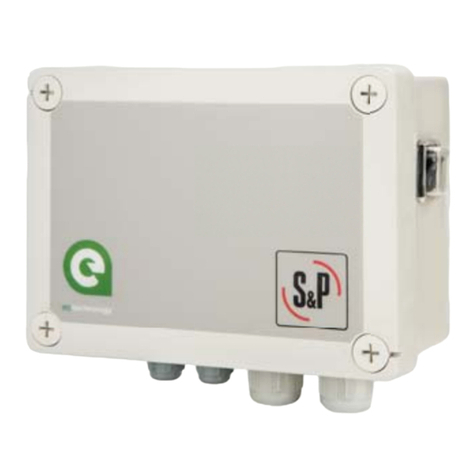
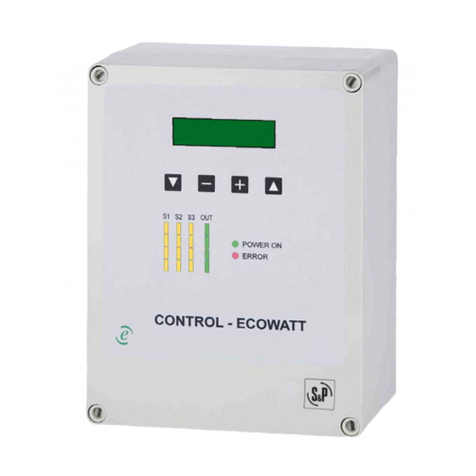
S&P MULTI-REG CONTROL 2841 Series User manual

Page 1 of 24
MULTI-REG CONTROL IP54

Page 2 of 24

Page 3 of 24
ENGLISH
INDEX
1. RECOMMENDATIONS ............................................................................................................................. 5
2. TRANSPORT AND HANDLING .............................................................................................................. 5
3. GENERAL .................................................................................................................................................... 5
3.1.
Speed Control Inputs ............................................................................................................................... 5
3.2.
Installer-defined Fixed Speed Control ....................................................................................................... 5
3.3.
Remote Switching .................................................................................................................................... 6
3.4.
Fan-Fail Detection by Fault Sensing .......................................................................................................... 6
3.5.
Outputs ................................................................................................................................................... 6
3.6.
Analog Switch Outputs ............................................................................................................................. 6
4. SAFETY RULES .......................................................................................................................................... 6
4.1.
WARNING ............................................................................................................................................... 6
4.2.
CAUTION ................................................................................................................................................ 6
4.3.
SPECIFICATION ....................................................................................................................................... 7
4.4.
INSTALLATION ........................................................................................................................................ 7
5. FAN WIRING ............................................................................................................................................. 8
6. CONTROL WIRING .................................................................................................................................. 9
6.1.
REMOTE ENABLE VIA EXTERNAL VOLT-FREE CONTACT ............................................................................ 9
6.2.
REMOTE ENABLE VIA EXTERNAL SWITCHED 230V SUPPLY ..................................................................... 10
6.3.
CONTINUOUS RUNNING WITH TWO OPTIONAL SPEEDS VIA EXTERNAL VOLT-FREE CONTACTS .............. 11
6.4.
CONTINUOUS RUNNING WITH TWO OPTIONAL SPEEDS VIA EXTERNAL SWITCHED 230V SUPPLY .......... 12
6.5.
REMOTE ENABLE AND SPEED CONTROL VIA EXTERNAL REB-ECOWATT .................................................. 13
6.6.
REMOTE ENABLE AND SPEED CONTROL VIA EXTERNAL REB-CVF ........................................................... 14
6.7.
CONTINUOUS RUNNING WITH TWO OPTIONAL SPEEDS VIA EXTERNAL SWITCHED 230V SUPPLY .......... 15
6.8.
REMOTE ENABLE VIA 7-DAY TIMER (1000001114) ................................................................................. 16
6.9.
RUN AND FAULT RELAY ......................................................................................................................... 17
6.10.
FAULT INPUTS ...................................................................................................................................... 18
6.11.
DAMPER ................................................................................................................................................ 19
6.12.
OVER-RUN TIMER ................................................................................................................................. 20
6.13.
FAN SPEED OFFSET ............................................................................................................................... 21
7. MAINTENANCE ................................................................................................................................. 22
8. RECYCLING........................................................................................................................................ 22
9. EC DECLARATION OF CONFORMITY........................................................................................... 22
10. DESIGNATION OF EQUIPMENT ............................................................................................... 22
11. GUARANTEE .................................................................................................................................. 23

Page 4 of 24

Page 5 of 24
1. RECOMMENDATIONS
Thank you for placing your confidence in S&P by buying this product. It has been manufactured
following current technical safety regulations and in compliance with EC standards.
Please read this instruction booklet carefully before installing or starting up the product. It contains
important information on personal and user safety measures to be followed while installing, using and
carrying out maintenance work on the equipment. Once the product has been installed, please hand
this booklet to the end user.
Check that the apparatus is in perfect condition while unpacking. Any fault or damage caused in origin
is covered by the S&P guarantee. Please make sure that the apparatus coincides with the product you
have ordered and that the details on the characteristics plate fulfil your requirements.
2. TRANSPORT AND HANDLING
The packaging used for this apparatus has been designed to support normal transporting
conditions. The apparatus must always be transported in its original packaging as not doing so
could deform or damage the product.
The product should be stored in a dry place in its original packaging, protected from dust and dirt
until it is installed in its final location. Do not accept delivery if the apparatus is not in its original
packaging or shows clear signs of having been manipulated in any way.
Do not place heavy weights on the packed product and avoid knocking or dropping it.
When handling heavy products, adequate lifting equipment should be used to avoid harming people
or damaging the product itself.
Never lift a product by pulling it by the wires or terminal/control enclosure. Likewise, no pressure
should be applied on the impeller, shutter or spigots while handling the product.
3. GENERAL
The MULTI-REG Control for ECOWATT EC Fans to provide Demand Ventilation Speed Control for
dedicated control of the S&P ECOWATT EC ranges and full BMS compatibility.
For up to two ECOWATT (EC) Fans – the MULTI-REG’s 0-10V output signals are routed directly
to the fan.
3.1.
Speed Control Inputs
Variable Speed Control
Manual variable speed control via an optional secondary S&P REB ECOWATT or REB-CVF
controller, or
Automated variable speed control via a 0-10V signal from an external source.
3.2.
Installer-defined Fixed Speed Control
An upon-installation defined duty either continuous or on-demand (triggered by an external switch),
or
One, two or three speeds defined during installation to provide a minimum/middle/maximum speed
ventilation system, the middle and maximum speeds being selected by an external switch/sensor
(either Volt-free and/or 230V).
Note that there is a 3-Volt minimum output to the fan to ensure start-up momentum.

Page 6 of 24
3.3.
Remote Switching
The switching between the (up to) three speeds can be activated by either:
(Up to) Three Volt-free contacts, or
(Up to) Three 230V supply inputs
On/Off – Volt-Free Contact and/or 230V
External Fire Fan Shut-Off Switch – An external “Fire” switch (Volt-Free) can be connected, If the
switch opens signifying that the fire alarm has been activated, then the MULTI-REG Controller will
automatically stop the fan.
3.4.
Fan-Fail Detection by Fault Sensing
Automatic monitoring of the impeller rotation via the Tacho pulse (frequency generator) signal.
Low current sensing to indicate a connection open circuit problem.
Sixty seconds time-delay of fault detection on start-up to allow input levels to normalise.
Facility to connect an Airflow Switch or Differential Pressure Switch (DPS), for use on fans where
other options are not practical. There is approximately a 60 seconds delay in the operation of the
airflow switch monitoring system, to allow full airflow to develop.
3.5.
Outputs
Digital Display
Running, Stopped and/or fault condition.
Fan speed percentage and 0-10V output condition.
Countdown to fault status monitoring condition (allows fan to gain speed).
Diagnostic – Reasons for fan stop/fail.
3.6.
Analog Switch Outputs
Output to BMS of fan run and fault indicated by an individual set of contacts capable of controlling
a maximum load of up to 230 Volts at 8 Amps.
Provision to operate a system damper actuator (can be supplied as an accessory). When the fan
is running, the damper opens, when the fan is stopped (either intentionally or in a fault condition)
the actuator spring return facility closes the damper.
4. SAFETY RULES
4.1.
WARNING
Mains voltage is present. It is the responsibility of the user to ensure compliance with the Health
and Safety at Work Act, 1974.
Isolate mains supply before connecting.
4.2.
CAUTION
This unit must be earthed.
All electrical connections should be made by a qualified electrician.
All wiring must be in accordance with current wiring regulations. The control should be provided
with a separate double pole isolator switch.

Page 7 of 24
4.3.
SPECIFICATION
The MULTI-REG control is designed for continuous operation with the maximum rated current
load listed in table 1 at 40° C. ambient on single phase 230 Volts ~ 50Hz supply.
The normal equipment temperature range is -20°C to +40°C.
The unit meets the EMC requirements of EN 61800-3:1997 and EN61000-3:2006.
The MULTI-REG control is housed in an enclosure that is suitable for the current rating and is
IP56 rated.
10 Amp fuse, 20mm ceramic 10 Amp “F” TYPE
Note: - Fuses on the control board are for protection of the control wiring and
components in case of short circuit. They do not offer motor overload protection.
4.4.
INSTALLATION
Check that the number, size and the speed of the fans can be safely controlled by this controller.
Install in a dry sheltered position. Leave an air space of not less than 150mm around the
controller to allow cooling air to flow freely. Leave an additional gap in front of the control
enclosure lid to allow for access during installation/wiring/maintenance. Do not install in close
proximity to other heat sources. The maximum ambient temperature for the controller must not
exceed 40°C.
Remove the front cover of the controller by removing the cover fixing screws. This provides
access to the terminals and mounting holes that are under the lid.
The connections must be as shown in the applicable wiring diagram.
Should the current rating of the fuse in the controller exceed that of the wiring of the fan(s)
circuit(s), each fan should be protected independently. If individual protection for each fan is
being employed, then this should be situated in each common line only.
The controller is intended to control S&P ECOWATT EC fans only.
All cable entries provided should be used. Any left unused should be blanked and left in a safe
condition.
Pre-starting up checks – before starting up the fan, ensure that:-
The apparatus is well secured and that the electrical connections have been carried out correctly.
No loose material or fitting remains can be sucked up by the ventilator. If the ventilator has been
mounted in a duct, make sure it is clear of loose material.
The earth fittings are adequately connected.
The electrical safety devices are correctly connected, adequately adjusted and ready for use.
The control enclosure and electrical cable glands are correctly sealed and water-tight.
When starting up the product, ensure that:-
The impeller turns in the correct direction.
There are no abnormal vibrations.
If any of the electrical safety devices blow, the apparatus must be quickly disconnected from the
mains supply.
The whole installation should be carefully checked before trying to start-up the fan again.

Page 8 of 24
5. FAN WIRING
This basic wiring must be followed for every installation!!!
L – Live
N – Neutral
E – Earth
Fault monitoring (Tacho)
To monitor the status of fan change TACHO jumpers from ‘OFF’ to ‘ON’.
If you are using ‘FAN 1 O/P’ change TACHO 1 to ‘ON’
If you are using ‘FAN 2 O/P’ change TACHO 2 to ‘ON’
NOTE! If the fan does not have a tacho output then the jumper should remain in the "OFF" Position.

Page 9 of 24
6. CONTROL WIRING
6.1.
REMOTE ENABLE VIA EXTERNAL VOLT-FREE CONTACT
Fan speed set-point (Min Speed)
The speed is defined by the ‘Min speed’ Potentiometer, by rotating the potentiometer dial it will
change the set speed of the fan.

Page 10 of 24
6.2.
REMOTE ENABLE VIA EXTERNAL SWITCHED 230V SUPPLY
Fan speed set-point (Min Speed)
The speed is defined by the ‘Min speed’ Potentiometer, by rotating the potentiometer dial it will
change the set speed of the fan.

Page 11 of 24
6.3.
CONTINUOUS RUNNING WITH TWO OPTIONAL SPEEDS VIA EXTERNAL VOLT-FREE CONTACTS
Trickle speed set-point (Min Speed)
The speed is defined by the ‘Min speed’ Potentiometer, by rotating the potentiometer dial it will
change the set speed of the fan.
Optional second speed (Mid Speed)
The speed is defined by the ‘Mid speed’ Potentiometer, by rotating the potentiometer dial it will
change the set speed of the fan.
Optional third speed (High Speed)
The speed is defined by the ‘High speed’ Potentiometer, by rotating the potentiometer dial it will
change the set speed of the fan.

Page 12 of 24
6.4.
CONTINUOUS RUNNING WITH TWO OPTIONAL SPEEDS VIA EXTERNAL SWITCHED 230V SUPPLY
Trickle speed set-point (Min Speed)
The speed is defined by the ‘Min speed’ Potentiometer, by rotating the potentiometer dial it will
change the set speed of the fan.
Optional second speed (Mid Speed)
The speed is defined by the ‘Mid speed’ Potentiometer, by rotating the potentiometer dial it will
change the set speed of the fan.
Optional third speed (High Speed)
The speed is defined by the ‘High speed’ Potentiometer, by rotating the potentiometer dial it will
change the set speed of the fan.

Page 13 of 24
6.5.
REMOTE ENABLE AND SPEED CONTROL VIA EXTERNAL REB-ECOWATT
PRIOR TO ENERGISING THE MULTI-REG, THE INSTALLER MUST SET ALL THREE OF THE
SPEED POTENTIOMETERS TO THEIR MINIMUM (FULLY ANTI-CLOCKWISE) POSITION.
Fan speed
The speed is defined by rotating the dial on the REB-ECOWATT.

Page 14 of 24
6.6.
REMOTE ENABLE AND SPEED CONTROL VIA EXTERNAL REB-CVF
PRIOR TO ENERGISING THE MULTI-REG, THE INSTALLER MUST SET ALL THREE OF THE
SPEED POTENTIOMETERS TO THEIR MINIMUM (FULLY ANTI-CLOCKWISE) POSITION.
Fan speed
The speed is defined by rotating the dial on the REB-CVF.

Page 15 of 24
6.7.
CONTINUOUS RUNNING WITH TWO OPTIONAL SPEEDS VIA EXTERNAL SWITCHED 230V SUPPLY
PRIOR TO ENERGISING THE MULTI-REG, THE INSTALLER MUST SET ALL THREE OF THE
SPEED POTENTIOMETERS TO THEIR MINIMUM (FULLY ANTI-CLOCKWISE) POSITION.
Fan speed (0-10V)
The speed is defined by the highest voltage of the two 0 - 10V signals from the external devices; the
minimum output is 3V.

Page 16 of 24
6.8.
REMOTE ENABLE VIA 7-DAY TIMER (1000001114)
Fan speed set-point (Min speed)
The speed is defined by the ‘Min speed’ Potentiometer, by rotating the potentiometer dial it will
change the set speed of the fan.

Page 17 of 24
6.9.
RUN AND FAULT RELAY
Run relay (Maximum current load 8A)
Fan Running – Continuity between COM and NO
Fan Stopped – Continuity between COM and NC
Fault relay (Maximum current load 8A)
Fan Running/Stopped – Continuity between COM and NC
Fault with Fan – Continuity between COM and NO

Page 18 of 24
6.10.
FAULT INPUTS
External fault switch (SW1)
When the fan is in normal running conditions the switch should be in the closed position. If additional
switches are required then they can be connected in series. During start-up there is a 60 seconds
delay to allow the airflow to increase. When the fault switch opens signifying loss of airflow, the
controller will automatically stop the fan and display “EXTERNAL SW1 FAULT”.
Following an “EXTERNAL SW1 FAULT”, a manual re-start will be required.
External fire shut-off switch (SW2)
When the fan is in normal running conditions the switch should be in the closed position. When the
fault switch opens signifying the fire alarm has been activated, the controller will automatically stop
the fan and display “FIRE ALARM ACTIVATED”.
Following a “FIRE ALARM ACTIVATED” notification, a manual re-start will be required

Page 19 of 24
6.11.
DAMPER
Damper actuator
When the fan is running, the damper opens. When the fan is stopped (intentionally or in a fault
condition) the damper’s spring return facility closes the damper.

Page 20 of 24
6.12.
OVER-RUN TIMER
Operation:
The over-run timer works when you alter the ‘Timer’ potentiometer, this will allow you to add an
over-run of 0 to 15 minutes; the over-run function will operate for both remote enable and boost
functions.
If a 10 minute over-run is set then the remote enable will over-run for 10 minutes and the boost will
over-run for 10 minutes.
Table of contents
Other S&P Controllers manuals
Popular Controllers manuals by other brands

AVE
AVE Domus 100 SISTEMA44 441048M quick start guide

Mitsubishi
Mitsubishi MELSEC Q Series Structured programming manual

Sunricher
Sunricher SR-ZV9080A-B manual

Lynxspring
Lynxspring JENEsys Edge 534 installation guide

Rockwell Automation
Rockwell Automation Allen-Bradley CompactLogix 5370 user manual

SUPMEA
SUPMEA SUP-PH8.0 user manual