S&P TRW Series User manual

TRW

2
1. Transporte y almacenamiento....................................................................................................... 3
2. Usos................................................................................................................................................ 3
3. Medidas de seguridad ................................................................................................................... 3
4. Descripción .................................................................................................................................... 4
5. Instalación, montaje y funcionamiento ........................................................................................ 5
6. Mantenimiento............................................................................................................................... 8
7. Lista de recambios ........................................................................................................................ 8
8. Gestión de residuos ....................................................................................................................... 8
ESPAÑOL

3
Características técnicas:
•●Cuerpodelaválvulaencobrerojoniquelado: DN20-3/4“
•●Termostatoadaptadoconválvulasconconexiónroscada: M30x1.5
•●Temperaturamáximadefuncionamiento: 120ºC
•●Caudalmáximodeagua: 300l/h
•●Rangodeselección: 7-28ºC
•●Presiónmáximadefuncionamiento: 10bar
•●Presiónmáximadecierre: 1bar
•●Longitudsensorcapilar: 5m
1. Transporte y almacenamiento
A la recepción del equipo, se desembalará la unidad comprobando la integridad de ésta, cualquier
desperfecto puede ser indicativo de un daño en el equipo. Se repasará y comprobará que no falte
ningún elemento:
1. Modelo
2. Diseño
3. Características técnicas
El producto debe mantenerse fuera del alcance de las inclemencias meteorológicas y espacios
donde pueda recibir golpes tanto durante su transporte como almacenaje.
Almacenaje a una temperatura entre -10°C y +40°C.
3. Medidas de seguridad
–Sólo personal cualificado debe trabajar sobre este dispositivo.
–Las acciones que sean necesarias realizar sobre el controlador, sólo deben llevarse a cabo por
personal capacitado basado en su formación previa, instrucciones recibidas y experiencia. A la
vez, deberá ser conocedor de las normas relevantes, previsiones y regulación en lo referido a
prevención de accidentes y condiciones de funcionamiento.
–El instalador debe asegurarse que el dispositivo sólo se utiliza en condiciones adecuadas.
–El encargado del montaje, puesta en marcha, funcionamiento y mantenimiento del dispositivo
debe haber leído y comprendido el manual de instrucciones.
–Evitar el contacto con partes giratorias.
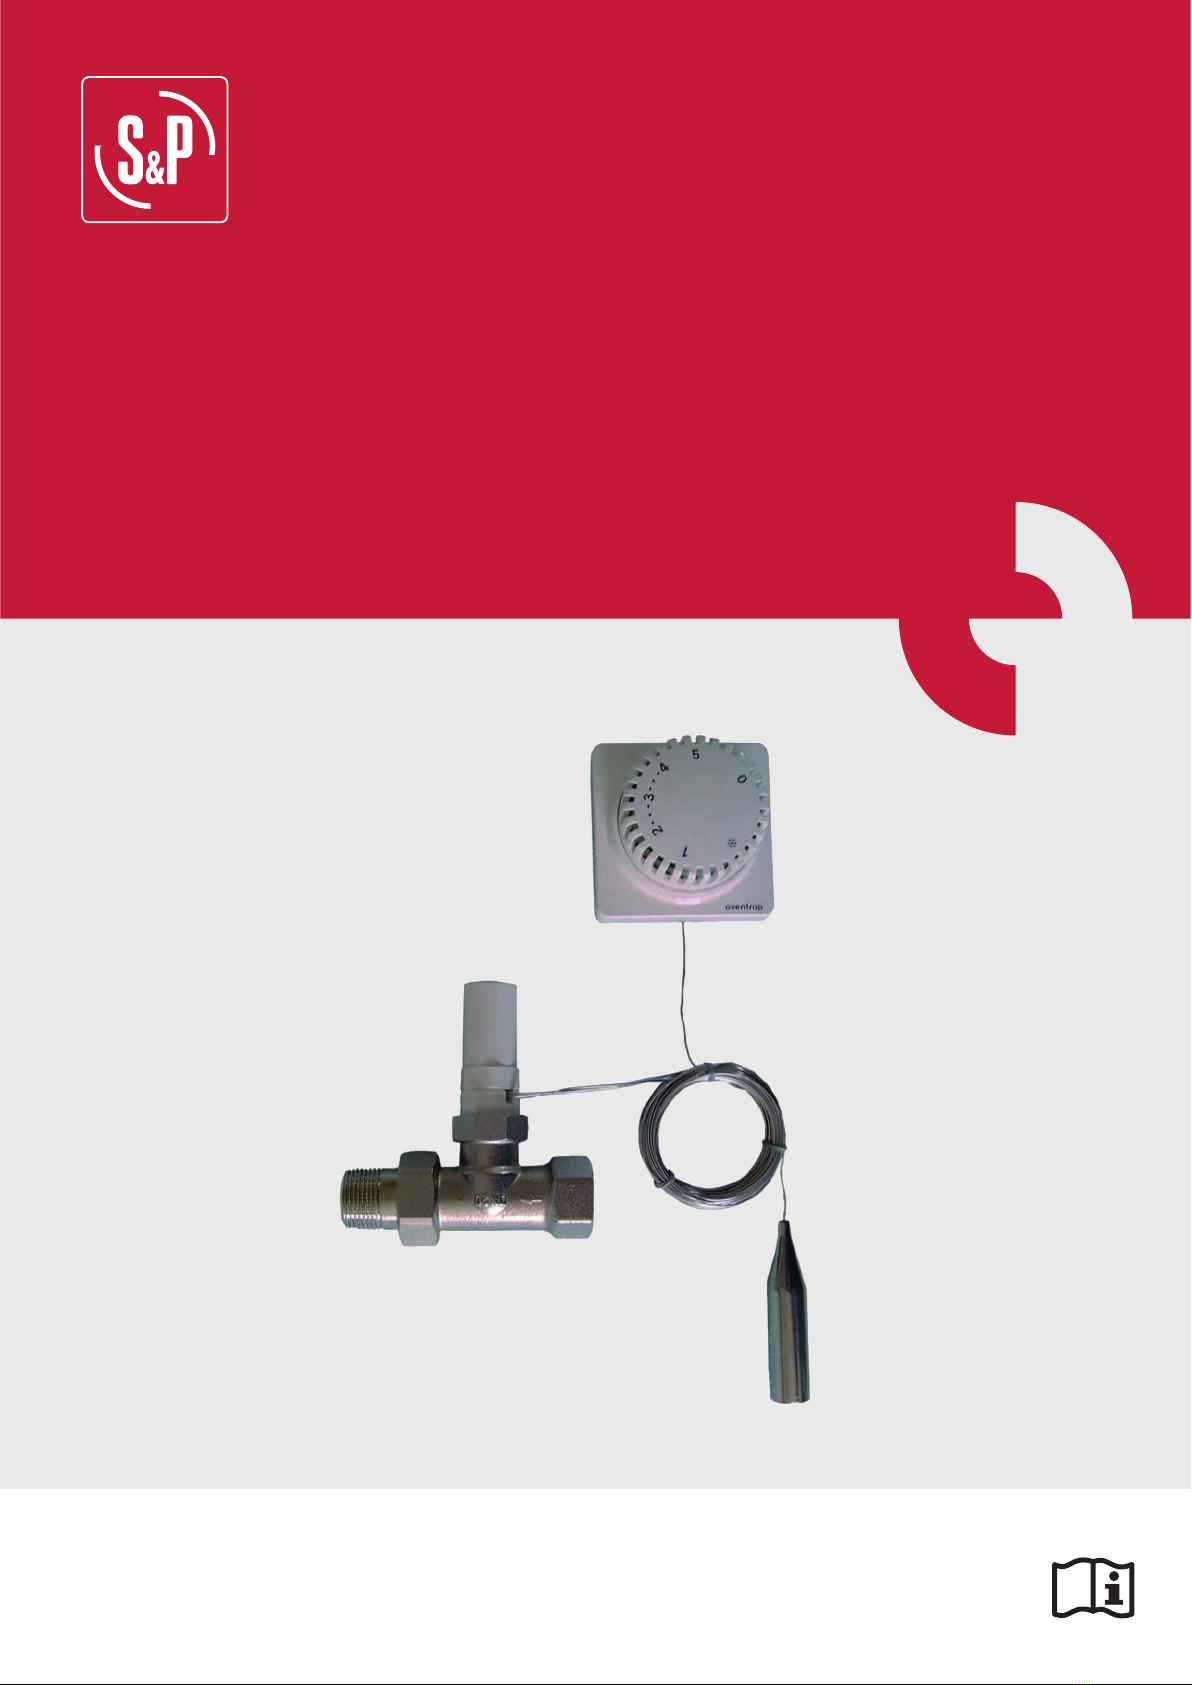
2. Usos
El control TRW está compuesto por unja válvula termostática juntamente con un selector remoto y
un sensor capilar. Su función es mantener constante la temperatura del aire que circula a través de
una batería de agua mediante el control del flujo de agua que circula.

4
4. Descripción
El termostato de pared con sensor remoto TRW incorpora un control proporcional. Se produce un
control de la temperatura mediante la modificación del volumen de agua caliente circulante por la
batería.
Cada variación del ajuste de la válvula corresponde a una temperatura resultante de aire diferente.
En caso de combinar el controlador TRW con la batería de agua MBW, ésta viene equipada con un
pre ajuste de la válvula (posición 6 de fábrica).
Para un comportamiento óptimo, el pre ajuste puede modificarse entre 1 y 6 utilizando una llave
SW13 sobre la batería de agua.
El ajuste deseado de la válvula debe alinearse con la marca existente, ya que posiciones
intermedias no son válidas.
Imagen 1
Sólo valido en caso de combinación
con batería de agua MBW

5
5. Instalación y montaje
Estirar y extraer la cubierta frontal. Ubicar e instalar el termostato de tal forma que se obtengan
valores de temperatura correctos. Además, asegurarse que éste no quede tapado o escondido
por cortinas o muebles y, no expuesto a corrientes de aire, luz directa u otras fuentes emisoras de
calor.
Al colocar el sensor capilar, evitar doblar o aplanar el cable. La longitud excedente puede enros-
carse en la base del control remoto a instalar en pared (Imagen 2). Volver a colocar la cubierta fron-
tal y enroscar la válvula con el actuador. Realice esta unión sin realizar una fuerza excesiva para no
dañar el componente.
Observar que la cubierta frontal sólo encaja en una posición, es decir, haciendo coincidir el saliente
de la cubierta con la muesca existente en la base (Imagen 3).
Limitación de la temperatura:
Con el objeto de evitar que alguien no autorizado pueda desajustar la consigna de temperatura,
éste ajuste puede limitarse o bloquearse para la temperatura deseada.
Pasos a seguir para limitar la temperatura máxima:
Extraer la carátula frontal (Imagen 4). Ajustar el selector numerado sobre la consigna deseada.
Seguidamente utilizar una de los dos topes ligeramente curvados depositados sobre la base e
insertarlo en la parte derecha del reborde plástico existente en la parte central superior de la rueda
exterior. De esta forma, la rueda queda bloqueada en el sentido antihorario a las agujas del reloj
(Imagen 5). Finalmente, volver a colocar la carátula frontal.
Los pasos a seguir para limitar la temperatura mínima son los mismos con la salvedad de colocar
el tope curvado en la parte izquierda. De la misma forma se puede limitar la zona de regulación
colocando los dos topes en el rango de selección deseado.
Imagen 2
Imagen 4
Imagen 3
Imagen 5

6
Bloqueo de la temperatura:
Seguir los mismos pasos descritos en el apartado
“Limitación de la temperatura”
. En este caso,
los dos topes se deben colocar de tal forma que la rueda selectora quede bloqueada tanto al girar
hacia izquierdas como derechas.
Ajuste de la temperatura:
El control remoto viene fijado de fábrica a una temperatura de 20°C = número 3. En el caso de que
este estado quede desajustado, puede volverse a ajustar de la siguiente forma:
–Extraer la cubierta frontal
–Tirar hacia afuera de la rueda de ajuste numerada
–Girar en sentido horario la rueda que queda sujeta a la base hasta que cueste girarla más
–Volver a girar, en este caso, en sentido antihorario hasta que la marca de color rojo coincida con
el resorte plástico central correspondiente al centro superior de la rueda.
–Volver a colocar la rueda de ajuste de tal forma que el número 3 coincida con la zona central y
marcada en rojo
–Volver a montar la cubierta frontal (Imagen 6).
Ajuste del termostato
En esta posición el termostato abre
la válvula automáticamente cuando la
temperatura leída por la sonda baja de 6°C.
1 = aprox. 12°C
2 = aprox. 16°C
3 = aprox. 20°C
4 = aprox. 24°C
5 = aprox. 28°C
Los puntos existentes
entre los números 2 y 4
corresponden a un grado
de incremento.
=
0 = Cierre de la válvula
Imagen 6

7
Ejemplo de aplicación: Esquema de un sistema de control de temperatura de aire mediante TRW
En el caso de combinar con una batería de agua MBW, el sensor remoto debe instalarse a 1,5m después de
la batería MBW mediante un registro a tener en cuenta en el conducto.
Aire exterior
Compuerta
CAR Ventilador
In-line
Caja
filtrante
MFL
Batería de
agua caliente
MBW
Sensor de
tubo capilar
Aire
impulsión
Protector antihielo
con tubo capilar
Unidad
de control de
temperatura
TRW
Válvula
de 2 vías
Termostato con
ajuste remoto
El sensor remoto puede utilizarse alternativamente para control de
temperatura ambiente instalándolo en un lugar apropiado en la habitación.

8
6. Mantenimiento
A parte de la limpieza regular no se requieren tareas de mantenimiento específicas.
7. Recambios
–Termostato con sensor capilar remoto.
–Válvula con cuerpo fabricado en cobre.
8. Gestión de residuos
Este producto no puede tirarse a la basura debido a que contiene materiales que pueden ser
reutilizados y sustancias que deben gestionarse.
!
Cuando este producto llegue al final de su vida, deberá ser eliminado
de acuerdo con las normas vigentes nacionales existentes

9
1. Transport, storage........................................................................................................................ 10
2. Intended use ................................................................................................................................ 10
3. Work safety .................................................................................................................................. 10
4. Description................................................................................................................................... 11
5. Installation and assembly ........................................................................................................... 12
6. Servicing ...................................................................................................................................... 15
7. Replacement parts....................................................................................................................... 15
8. Waste management..................................................................................................................... 15
ENGLISH

10
Technical data:
•Valvebodymadeofredbrass,nickel-plated: DN20-3/4“
•Thermostatadaptedwithvalveswiththreadedconnection M30x1.5
•Maximumoperatingtemperature: 120Cº
•Maximumowvolume 300l/h
•Targetvaluerange: 7-28ºC
•Maximumoperatingpressure 10bar
•Maximumclosingpressure 1bar
•Lengthofcapillarysensor: 5m
1. Transport, storage
Please inspect the device upon receipt for proper condition and functioning.
The following information must be checked on receipt and compared with the order:
1. Model
2. Design
3. Technical data
Please store the device in original packaging in a dry place protected from the elements.
Store at a temperature between -10ºC and + 40 ºC.
For transportation of the device, the local security provisions apply in all cases.
Please transport the device in its original packaging.
3. Work security
–The operator must ensure that only qualified staff work on the device.
–The necessary activities may only be conducted by staff who are suitable based on their training,
experience and instruction, as well as their knowledge of the relevant norms, provisions, and
regulations for accident prevention and operating conditions.
–The operator must ensure that the device is only employed in proper condition.
–Everyone charged with the assembly, startup, operation and maintenance of the device must
have read and understood the instructions for operation.
–Keep the device free of, e.g., screws, chips or tools.
–Avoid contact with rotating parts.
2. Intended use
The TRW control unit consists of a thermostat valve with remote adjustment and a capillary sensor.
It serves for acclimatization of mass flows for a constant air supply temperature control.
The TRW control unit is suitable for hot water coil.

11
4. Description
The TRW wall thermostat with remote sensor has a proportional controller. It controls temperature
by modifying the flow volume of hot water.
A certain valve adjustment corresponds to each sensor temperature.
In case of combination with MBW, this is equipped with an pre-settable valve insert; on delivery,
position 6 is set.
For optimum control behavior, the pre-set can be adjusted between 1 and 6 using a SW13 fork
wrench on the respective hot water coil.
The desired adjustment value must point to a mark, in-between settings are not permitted.
Illustration 1
Just in case of combination
with a MBW hot water coil

12
5. Installation and assembly
Pull off and remove the frame cover. Locate and fit the thermostat so that it senses the true room
temperature. Ensure that the remote sensor are not screened or hidden behind curtains or furniture
and are not exposed to draughts, direct sun light or other heat emitting appliances.
When pinning the capillary take care not to kink or flatten the tube. The surplus length of capillary
can be coiled on the frame of the thermostat (Illustration 2). Then replace the frame cover and turn
the graduated scale cap from the valve and fit the actuator. Use no excessive force or spanner.
Observe that the frame cover can be replaced in one way only, namely with the frame peg located
in the slot of the cover (Illustration 3).
Temperature limitation:
To prevent unauthorized tampering, the preset of the thermostat can be either limited or locked for
the desired temperature.
Procedure to be used for limiting the maximum room temperature:
Remove the frame cover (Illustration 4). Set the graduated scale cap to the required number.
Then remove one of the limiting pegs provided and insert it in slot behinf the graduated scale cap,
immediately to the right from the “stop rib” (Illustration 5). Finally replace the frame cover.
The procedure for limiting the minimum room temperature is similar to the one described above,
however the limiting peg must be inserted immediately to the left of the “stop rib”.
Illustration 2
Illustration 4
Illustration 3
Illustration 5

13
Temperature blocking:
In order to lock the set temperature, insert pegs on both sides of the “stop rib”.
Temperature setting:
The factory setting of the thermostat is arranged so that the number 3 on the graduated scale gap
corresponds to a room temperature of 20°C.
Should this setting be inadvertently disturbed, the following procedure should be undertaken in
order to restore it:
–First remove the frame cover and pull-off the graduated scale cap.
–Turn the centre adjustment screw clockwise until stop, and then turn it anticlockwise until the
factory red paint marks falls in line with the “stop rib”.
–Then replace the graduated scale cap so that the number 3 also falls in line with the “stop rib”.
–Thus the original setting is restored.
–Finally replace the gram cover (Illustration 6).
Thermostat setting
Frost protection. With this setting,
TRW open automatically when the room
temperature falls below 7ºC
1 = approx. 12°C
2 = approx. 16°C
3 = approx. 20°C
4 = approx. 24°C
5 = approx. 28°C
Intermediate positions
between numbers 2 and
4 correspond to a 1ºC
change in the room
temperature
=
0 = valve shut off
Illustration 6

14
Example of aplication: System diagram of air temperature control with TRW:
In case of combination with MBW hot water coil, the remote sensor must be mounted about 1.5 m after the MBW
warm water heat register in a straight section of duct.
3
•
•
•
4
5
•
•
•
2
1
0
M
-15
-10
-5
0
5
10
15
°C
14
2
Duct fan /
ventilation box
Air filter box
Frost prevention
thermostat
As an alternative, for room temperature control, the remote
sensor can also be mounted at a suitable place in the room.
Back pressure lid CAR
or Closure lid AKM Remote sensor
Adjustable
thermostat
Temperature
control unit
TRW
Exterior air Supply
air
+
Warm water -
heat register MBW
Gate valve with
remote adjustment

15
6. Servicing
Apart from regular cleaning no specific servicing tasks are required.
7. Replacement parts
–Thermostat with capillary remote sensor.
–Valve body made of brass.
8. Waste management
This product may not be disposed of with the trash, since the device contains reusable
components and substances which cannot be placed in the trash.
!
When its useful life is over, this product must be disposed
of in accordance with applicable provisions.

1. Transport, Lagerung..................................................................................................................... 17
2. Bestimmungsgemäße Verwendung ............................................................................................ 17
3. Arbeitssicherheit ......................................................................................................................... 17
4. Beschreibung............................................................................................................................... 18
5. Einbau und Montage.................................................................................................................... 19
6. Wartung........................................................................................................................................ 22
7. Ersatzteile .................................................................................................................................... 22
8. Entsorgung .................................................................................................................................. 22
9. Service ........................................................................................................................................ 22
DEUTSCH

17
Technische Daten:
•VentielkörperausRotguss,Messing,vernickelt: DN20-3/4“
•ThermostatpassendfürVentilemitGewindeanschluss: M30x1,5
•Max.Betriebstemperatur: 120°C
•Max.Durchussmenge: 300l/h
•Sollwertbereich: 7-28°C
•Max.Betriebsdruck: 10bar
•Max.Schließdruck: 1bar
•Kapillarrohrlänge: 5m
1. Transport, Lagerung
Bitte prüfen Sie das Gerät nach Erhalt auf einwandfreien Zustand und Funktion.
Nachstehende Angaben sind bei der Entgegennahme zu prüfen und mit der Bestellung zu
vergleichen:
1. Modell
2. Ausführung
3. Technische Daten
Bitte lagern Sie das Gerät originalverpackt, trocken und wettergeschützt.
Halten Sie Lagertemperaturen zwischen -10°C und +40°C ein.
Für den Transport des Gerätes gelten auf jeden Fall die örtlichen Sicherheitsbestimmungen.
–Bitte transportieren Sie das Gerät originalverpackt.
3. Arbeitssicherheit
–Der Betreiber hat dafür zu sorgen, dass nur qualifiziertes Personal am Gerät arbeitet.
–Die erforderlichen Tätigkeiten dürfen nur von Personal ausgeführt werden, das auf Grund seiner
Ausbildung, Erfahrung und Unterweisung, sowie seiner Kenntnisse über einschlägige Normen,
Bestimmungen,Unfallverhütungsvorschriften und Betriebsverhältnisse dafür geeignet ist.
–Der Betreiber hat dafür Sorge zu tragen, dass das Gerät nur in einwandfreiem Zustand
eingesetzt wird.
–Jeder, der mit der Montage, Inbetriebnahme, Bedienung und Instandhaltung des Geräts
beauftragt ist, muss die Bedienungsanleitung gelesen und verstanden haben.
–Der Gerät ist von Fremdkörpern (z. B. Schrauben, Spänen oder Werkzeugen) freizuhalten.
–Kontakt mit rotierenden Teilen muss verhindert werden.
2. Bestimmungsgemäße Verwendung
Die Regeleinheit TRW besteht aus einem Thermostatventil mit Fernverstellung und einem
Kapillarrohr-Fühler. Sie dient der Anpassung der Massenströme für eine
Konstant-Zulufttemperatur-Regelung.
Die Regeleinheit TRW ist geeignet für Warmwasser-Heizregister MBW100 bis MBW250

18
4. Beschreibung
Die Temperatur-Regeleinheiten Typ TRW sind Proportionalregler. Sie regeln die Temperatur durch
Veränderung des Heißwasser-Durchflusses.
Zu jeder Fühlertemperatur gehört eine bestimmte Ventilstellung. Das Ventilteil ist mit einem
voreinstellbaren Ventileinsatz ausgerüstet; bei Auslieferung ist die Stellung 6 eingestellt.
Für ein optimales Regelverhalten kann die Voreinstellung zwischen 1 und 6 mittels eines Gabel-
schlüssels SW13 an das jeweilige Warmwasser-Heizregister Typ MBW angepasst werden
(Abbildung 1).
Der gewünschte Einstellwert muss auf eine Markierung zeigen,
Zwischenstellungen sind nicht zulässig.
(Abb. 1)

19
5. Einbau und Montage
Abdeckhaube der Fernverstellung entfernen. Fernverstellung so anbringen bzw. bei der
Fernverstellung + Fernfühler den Fühler so platzieren, dass die Raumtemperatur gut erfasst werden
kann. Die Fernverstellung bzw. der Fühler darf nicht durch Vorhänge oder ähnliches verdeckt werden
bzw. dem direkten Sonnenlicht ausgesetzt sein.
Das Kapillarrohr ist so zu verlegen, dass es nicht geknickt oder flachgedrückt wird.
Das überschüssige Kapillarrohr kann innerhalb der Verstellung aufgewickelt werden (Abbildung 2).
Abdeckhaube wieder aufdrücken und die Fernverstellung in die maximale Offenstellung „Ziffer 5“
bringen. Die Schutzkappe vom Ventil abschrauben und stattdessen Stellkolben aufschrauben.
Abdeckklappe lässt sich nur in einer bestimmten Stellung aufschieben.
Die Nase an der Abdeckklappe in die Nut an der Wandhalterung einführen (Abbildung 3).
Temperaturbegrenzung:
Zur Verhinderung einer eventuellen Sollwertverstellung durch Unbefugte kann der Thermostat auf
jede beliebige Temperatur begrenzt werden.
Arbeitsfolge bei Begrenzung auf einen oberen Maximalwert:
Abdeckklappe entfernen (Abbildung 4). Skalenklappe auf den zu begrenzenden Wert einstellen.
Einen Begrenzungsschieber aus der Wandhalterung entnehmen und rechts neben dem Anschlagsteg
von hinten in die Skalenklappe einsetzen. Abdeckklappe wieder montieren (Abbildung 5).
Die Begrenzung auf einen unteren Maximalwert ist wie vor durchzuführen. Der Begrenzungsschieber
ist jedoch links neben dem Anschlagsteg einzusetzen.

20
Temperaturblockierung:
Arbeitsfolge wie bei Temeraturbegrenzung. Die Begenzungsschieber werden links und rechts des
Anschlagsteges eingesetzt.
Temperaturjustierung:
Die Fernverstellung ist werkseitig auf 20°C = Ziffer 3 justiert. Sollte diese einmal verstellt sein, kann
sie wie folgt wiederhergestellt werden:
–Abdeckklappe wie unter Temperaturbegrenzung beschrieben abnehmen.
–Skalenklappe nach vorn abziehen.
–Rändelschraube bis zum Anschlag in die Wandhalterung eindrehen.
–Rändelschraube so weit wieder herausdrehen, bis die rote Justiermarkierung mit dem
Anschlagsteg auf einer Ebene liegt.
–Skalenkappe so wieder aufsetzen, dass die Ziffer 3 mit dem Anschlagsteg auf einer Ebene liegt.
–Abdeckklappe montieren (Abbildung 6).
Table of contents
Languages:
Other S&P Electric Heater manuals
Popular Electric Heater manuals by other brands

Bimar
Bimar NSB-40A Instruction booklet

Bradford White
Bradford White Convection Heater Installation and operating instruction manual

SeasonsComfort
SeasonsComfort ERH185 user manual

Harvia
Harvia BX Instructions for installation and use

Pentair
Pentair DAH1001A user manual

Trotec
Trotec IR 2010 SC operating manual