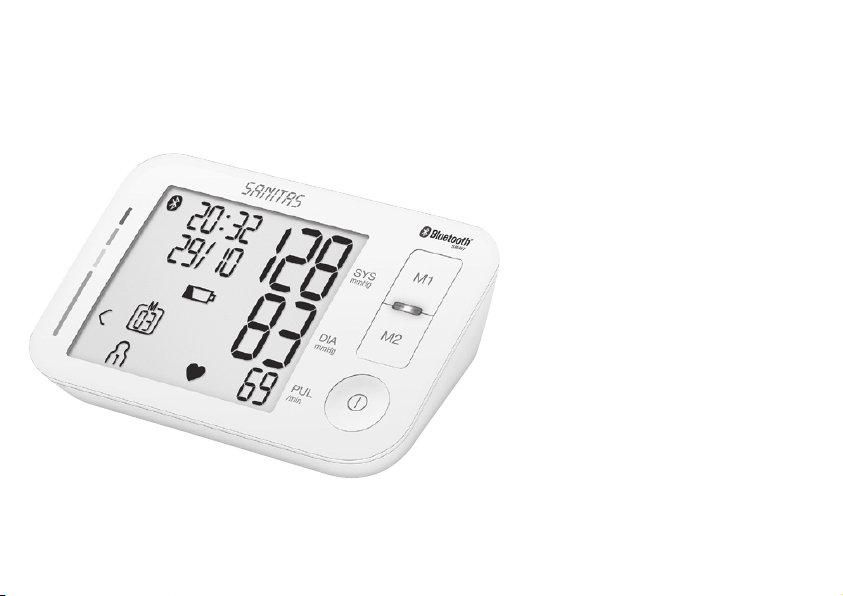
25
Measurement
•
Now select the desired user memory by pressing the
M1 or M2 memory buttons. If you do not select a user
memory, the measurement is stored in the most re -
cently used user memory. The relevant or symbol
appears on the display.
•
Press the START/STOP button to switch o˛ the
blood pressure monitor. The measurement is then sto -
red in the selected user memory.
•
If the device is not switched o˛ manually, it will switch
o˛ automatically after 3 minutes.
If Bluetooth ® data transfer has been activated, data is
by transferred after having confirmed the user memory by
pressing the pressing the START/STOP button .
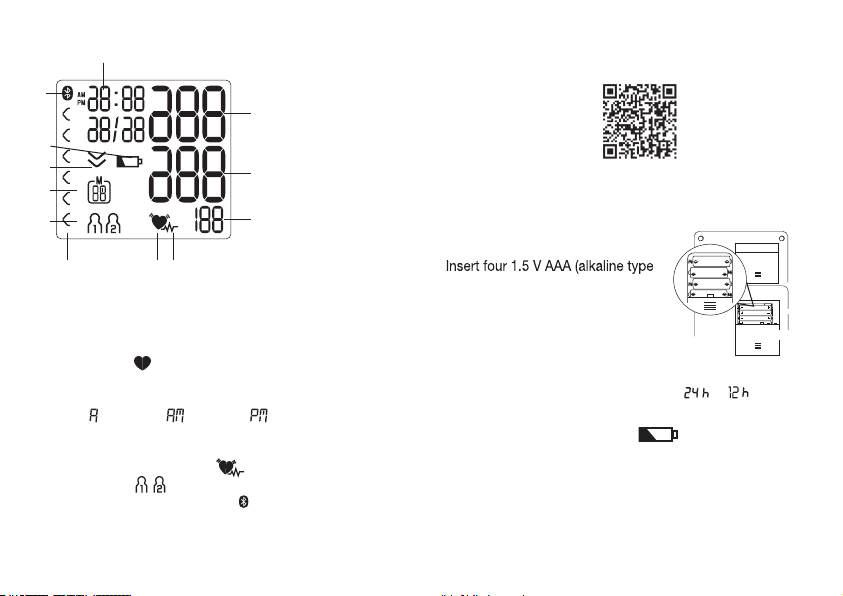
• The Bluetooth
®
symbol on the display flashes and the
blue LED lights up. The blood pressure monitor now
attempts to connect to the app for approx. 30 seconds.
• The Bluetooth
®
symbol stops flashing as soon as a
connection is established. All measurement data is
automatically transferred to the app. Once the data
has been successfully transferred, the device switches
o˛. If the data transfer was unsuccessful, the blue LED
goes out and " " appears on the display.
• If a connection to the app cannot be established after
30 seconds, the Bluetooth
®
symbol goes out and the
blood pressure monitor switches o˛ automatically after
3 minutes.
Measurement
Please note that you must add the blood pressure
monitor in "My devices" in the "HealthCoach" app to
enable data transfers. The "HealthCoach" app must
be active to allow data transfer.
If the latest data is not displayed on your smart -
phone, repeat the data transfer as described in
chapter 7.
If you forget to turn o˛ the blood pressure monitor, it will
switch o˛ automatically after approximately 3 minutes. In
this case too, the value is stored in the selected or most
recent user memory and the data is transferred if Blue-
tooth
®
data transfer has been activated.
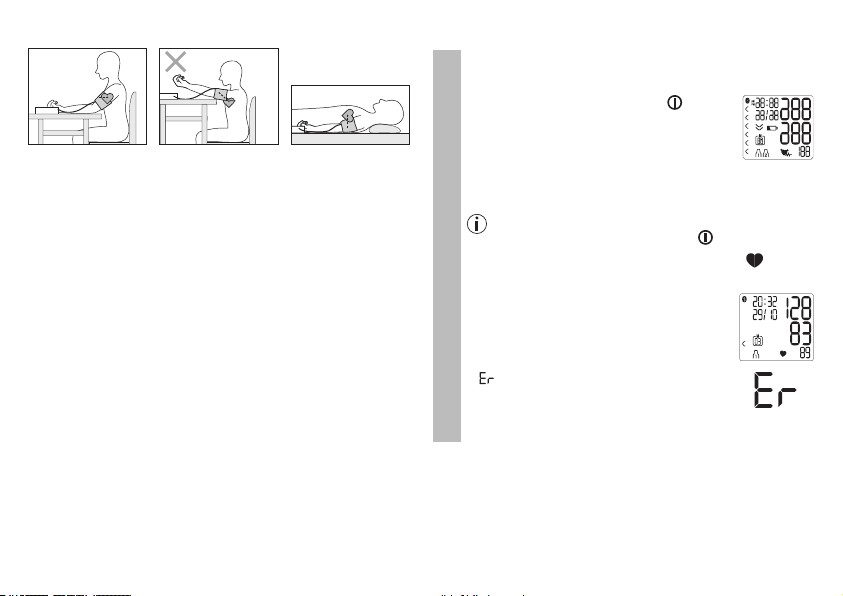
•
Wait at least 5 minutes before taking ano -
ther measurement.
6. Evaluating results
Cardiac arrhythmia:
This device can identify potential disruptions of the heart
rhythm when measuring and if necessary, indicates this after
the measurement with the symbol .
This can be an indicator for arrhythmia. Arrhythmia is a condi -
tion in which the heart rhythm is abnormal because of flaws in
the bioelectrical system that regulates the heartbeat. The sym -
ptoms (skipped or premature heart beats, pulse being slow or
too fast) can be caused by factors such as heart disease, age,
physical make-up, excess stimulants, stress or lack of sleep.