Sanyo A5514SA Installation guide


Welcome
Thank you very much for purchasing the A5514SA.
Before using, read the A5514SA “Basic Manual (this PDF manual)” to ensure correct use of your
A5514SA. After you have finished reading, store this PDF manual and the printed manuals in a
safe place so that you can retrieve them whenever you need.
Contact au shop or au Customer Service Center if you lose either of these manuals.
Printed Manuals for the A5514SA
The A5514SA comes with Basic Manual and Manual.
The following manuals are also available from au home page:
¡The downloadable “Basic Manual” and “Manual”
(http://au-pro.kddi.com/phone/torisetu/index.html)
¡The au online manual (Japanese) for searching by keyword
(http://www.au.kddi.com/manual/index.html)
The au online manual (Japanese) is also available from the EZ web:
<How to access>
EZ Top Menu →料金・申込・インフォ (Charges, application and information)
→auオンラインマニュアル (au online manual)
Have access to the au online
manual by reading the bar code
(QR code).
Note that the shape and typeface used in the screens of this manual may differ from those used
in the actual screens, and some screens are partly omitted.
Manual
English version is not available.
仮
Basic Manual
Equivalent to this English PDF manual.

Cellphone Etiquette
Cellphones emit weak radio waves at all times even if you just turn the
power on. Enjoy and safely use your cellphone without forgetting those
around you.
Some places forbid the use of cellphones.
Consider where to use your cellphone and be careful of how loudly you talk.
Radio waves from cellphones may adversely influence medical apparatus and
equipment.
¡Some people close to you in busy places such as
crowded trains may be using pacemakers. Turn your
cellphone off in such places.
¡Abide by the instructions of hospitals and other medical
institutions where it is forbidden to use or carry
cellphones.
¡Do not make calls from cinemas, theaters, museums,
libraries, and other similar places. Turn your cellphone off
or set it to the silent mode to prevent others around you
from being inconvenienced by ring tones.
¡Use your cellphone in places where you do not prevent
others from passing through.
¡Move to areas where you do not cause others
inconvenience on trains or in hotel lobbies.
¡Take care not to talk too loudly during conversations.
¡Get other peopleʼs permission before you start taking
photos with the cellphoneʼs camera.
¡Using cellphones while driving is dangerous
and forbidden by law.
¡Using cellphones in airplanes is forbidden by
law. Be sure to turn your cellphone OFF.
1

Page 44 Page 56
Page 70 Page 62
Page 34 Page 74
What You Can Do with the A5514SA
You can send mail to other
cellphones or personal computers.
Mail
You can download Chaku-Uta®,
wallpaper and others.
EZweb
You can take photos or movies and
send them easily by E-mail.
Camera
You can access position
information using the functions
such as EZ Navi Walk, Position
Search, and Area Message.
EZnavi
You can use the A5514SA
overseas with global functions.
Use Overseas
You can use the A5514SA as FM
radio.
EZ・FM
2

Page 31 Page 32
Page 13
Page 13
Page 13
Silent Mode and In-Phone Ans Machn
Silent Mode
In-Phone Ans Machn
You can use the silent mode to turn incoming
rings and other tones off to prevent others
from being inconvenienced.
Press for more than one second in
the standby screen.
You can play answering message and record
callerʼs message when you cannot answer a
call.
Press for more than one second
in the standby screen.
Check the Power, Radio Waves, and Battery!
Usually, keep the “power” ON.
You cannot talk on the phone if you are not receiving “radio waves” .
Keep the power on to make or answer calls.
Press for more than one second.
It may be difficult to receive radio waves in some places
even in service areas.
indicates the reception state.
You cannot use the cellphone when the battery goes off.
Charge the battery soon when the remaining power is too
low.
indicates the remaining battery power.
Pay attention to the remaining “battery” power.
I canʼt answer
the phone right
now.(Japanese)
3

Do Not Use the Cellphone While Driving
Using cellphone while driving is subject to penalties.
Drive Mode
Holding a cellphone in a hand and use it for a call or gazing at a screen to
see mails, etc. while driving is subject to penalties.
(November 1, 2004 Implementation of the Revised Road Traffic Law)
Holding a cellphone in a
hand and use it for a call
Gazing at a screen to see
mails, etc.
When the drive mode is set, the caller
will hear the answering message
“Now driving. I canʼ t answer the phone
right now... (Japanese)” , and can leave a
message in the In-Phone Ans Machn.
Standby screen
From the standby screen, press , use to select “Car” , and press
[Select].
Use drive mode or turn the power off while driving.
Select “Car”
and press .
Back Select Confirm
Silent Mode Settings
Standard1: ON
Standard2: OFF
Sleep
Personal
Car
Release
Now driving.
I canʼt answer the
phone right now...
(Japanese)
4

Watch Out for Junk Mail and One-Ring Calls!
If you receive junk mail…
You can prevent arrival of junk mail by changing E-mail
address.
¡Mail Filter
¡Change E-mail Address
Using the mail filter function, you can reject mails sent from specific
addresses or mails that contain “未承諾広告※ (Unsolicited Ad)” in the title,
which is the biggest source of junk mail.
The following mail functions are available for preventing arrival of junk mail:
¡“未承諾広告フィルター” : Rejects Unsolicited Ad mails.
¡“アドレスフィルター” : Rejects mails sent from specific addresses.
If you receive a call from unknown number…
It may be a “One-Ring Call” which intends to trick you into calling back and
accessing unwanted pay programs. Be careful to a call from unknown
number.
The icon ( ) is displayed in the log of One-Ring Call and lets you know
the caller hung up within 3 seconds.
¡Icon for One-Ring Calls
Back Select Submenu
Received
Dialed
Sat12/24 12:34
0900003××××
Sat12/24 7:20
Mike
Thu12/22 12:45
0900004××××
Thu12/22 12:07
Mary
Page 22
Page 51
5

Disaster Message Board Service
About Disaster Message Board
Registering
safety
information
Confirming
safety
information
When a big scale disaster occurs, you can register your safety
information through EZweb. The registered safety information can
be confirmed from anywhere in Japan through EZweb or Internet.
→Top Menu →
災害用伝言板 (Disaster Message Board)
http://dengon.ezweb.ne.jp/
How to access
¡When a big scale disaster occurs, you can register
your safety information such as your condition and
comments from au cellphone to the “災害用伝言板
(Disaster Message Board)” created on the EZweb.
¡After registering your safety information, you can notify
by E-mail your family or acquaintances you have
previously specified that you registered your safety
information on the “災害用伝言板 (Disaster Message
Board)” .
¡You can confirm the safety information of the person
you want to know about by entering his/her phone
number from EZweb or Internet.
* When you confirm the safety information from other
carrierscellphone (except TU-KA), PHS or personal
computer, access the following URL.
6

* The maximum preservation period of the registered information is 72 hours.
* The maximum available number of each registration is 10.
* The demonstration of this service can be referred to anytime by accessing
EZ Top Menu →料金・申込・インフォ (Charges, application and information)
→災害用伝言板(デモ版)(The demonstration of Disaster Message Board)
* You can use English version by selecting “English” .
Register
Confirm
Top screen of
Disaster Message
Board
Safety
information
registration
screen
Safety
information
confirmation
screen
OK
BrsrMnu
災害用伝言板
〜登録〜
被災状況
無事です。
被害があります。
自宅に居ます。
避難所に居ます。
コメント見て
コメント入力
(
全角
100
文字まで
)
※登録内容確認画面
にて、お客様の携帯
電話番号および登録
日時が表示されます。
伝言板トップへ
(C)KDDI/TUーKA Group
登録
OK
BrsrMnu
災害用伝言板
〜確認〜
安否情報を確認した
い相手の
au/
ツーカー
携帯電話番号を入力
して下さい。
伝言板トップへ
(C)KDDI/TUーKA Group
検索する
OK
BrsrMnu
災害用伝言板
伝言板トップ
〜サービス提供中〜
安否情報の登録・確
認ができます。
登録
(
ご利用可能地域
の方のみ登録可能で
す
)
確認
削除
お知らせメール設定
サービス概要
ご利用地域情報
お問合せ
English
(C)KDDI/TUーKA Group
7

Before Use Confirming the Packed Contents ................................... 10
Names of Parts .......................................................... 11
How to Charge the Battery Pack ................................... 12
Turn the Power On/Off ................................................ 13
Basic Operation ......................................................... 14
Viewing the Screen ..................................................... 16
About Menu ............................................................... 17
Setting the Language to English ................................... 18
Initial Setting for E-mail and EZweb ............................... 20
Confirming Your Cellphone Number/E-mail Address .......... 21
Changing Your E-mail Address...................................... 22
Address Book/
Pair Function
Saving to the Address Book......................................... 36
Making a Call from the Address Book ............................ 39
Editing an Entry in the Address Book ............................ 40
Saving from Dialed/Received Log .................................. 41
Setting a Pair Person .................................................. 42
Making a Call to a Pair Person...................................... 43
Phone Call Making a Call ............................................................. 24
Answering a Call ......................................................... 25
Calling Back (Dialed/Received) ..................................... 26
Adjusting the Callerʼs Voice Volume ............................... 27
Adjusting the Ringer Volume......................................... 28
Changing the Ringer Type ............................................ 30
Setting the Silent Mode ............................................... 31
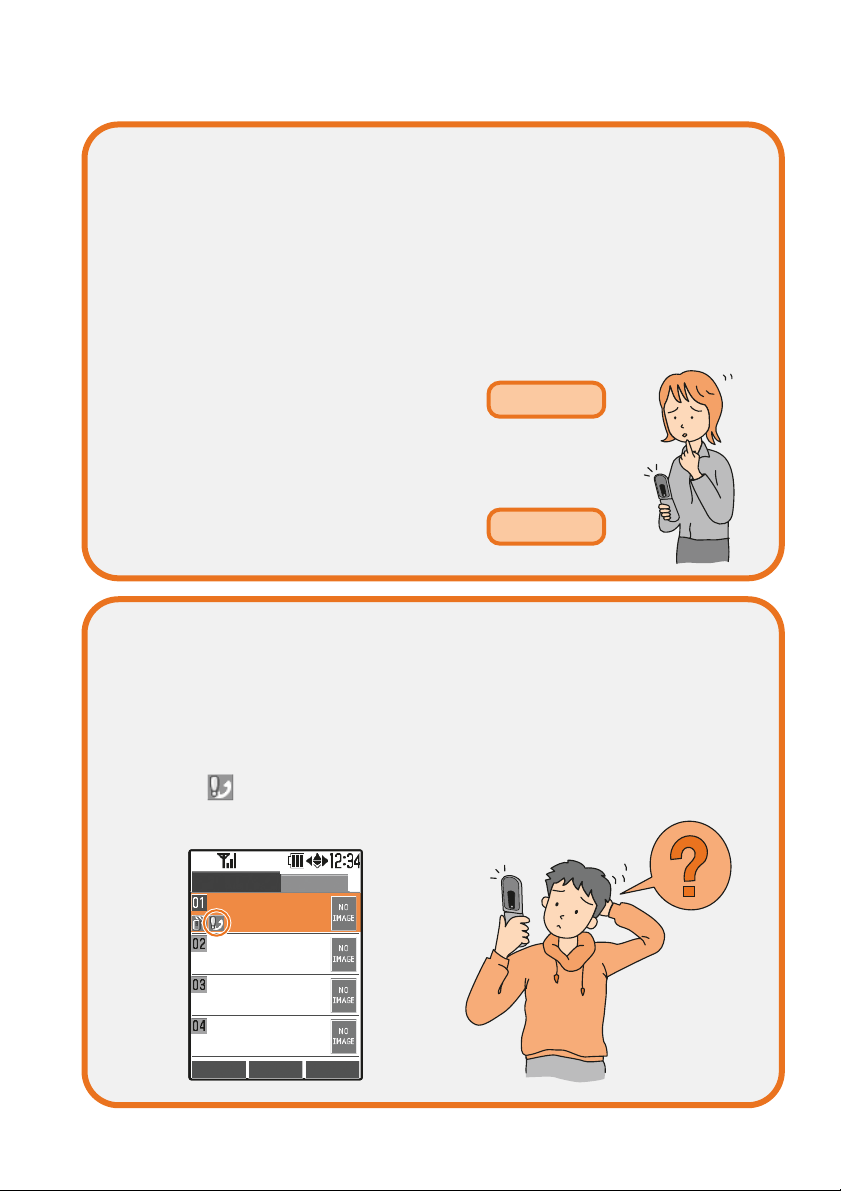
Using the In-Phone Ans Machn ..................................... 32
Using Overseas ......................................................... 34
Mail About E-mail .............................................................. 44
Creating and Sending an E-mail .................................... 45
Reading a Received E-mail........................................... 48
Replying to a Received E-mail ...................................... 50
Blocking Junk Mail...................................................... 51
About C-mail .............................................................. 52
Creating and Sending a C-mail ...................................... 53
Reading a Received C-mail........................................... 55
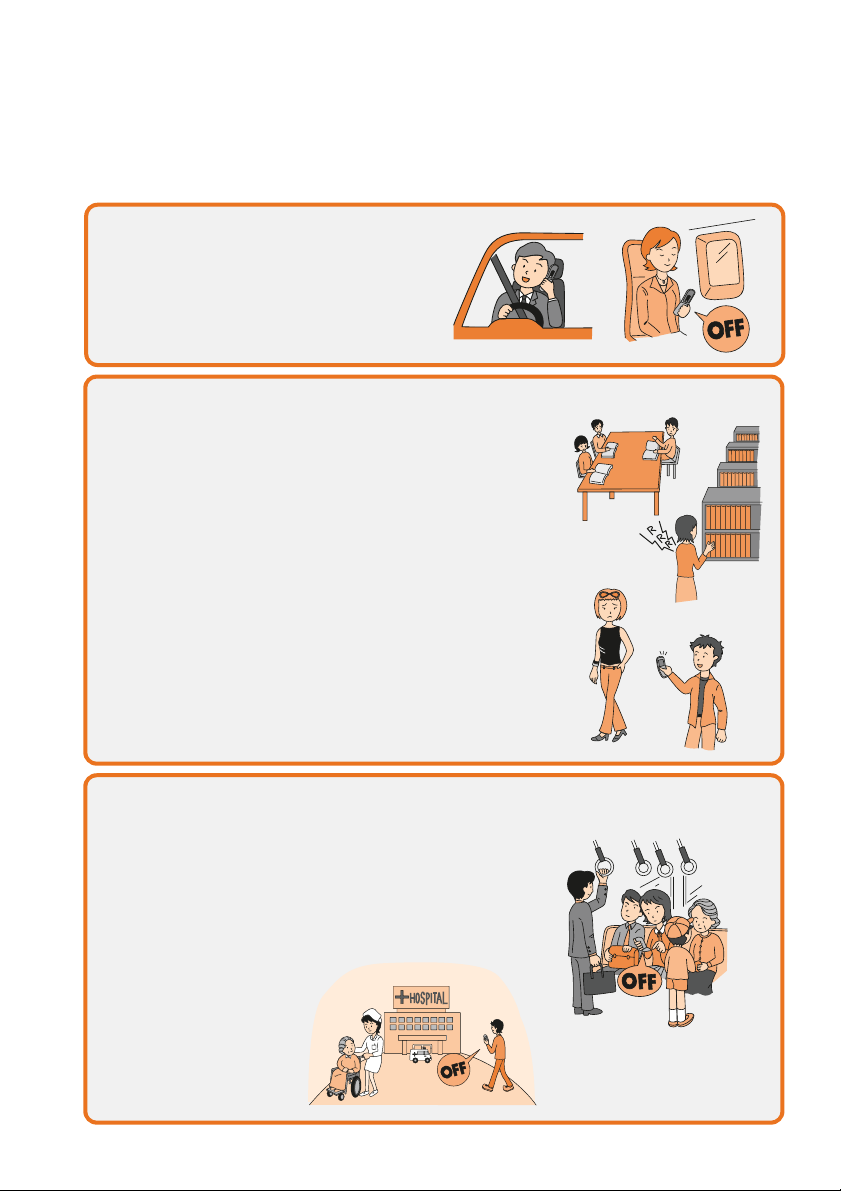
Cellphone Etiquette .................................................................. 1
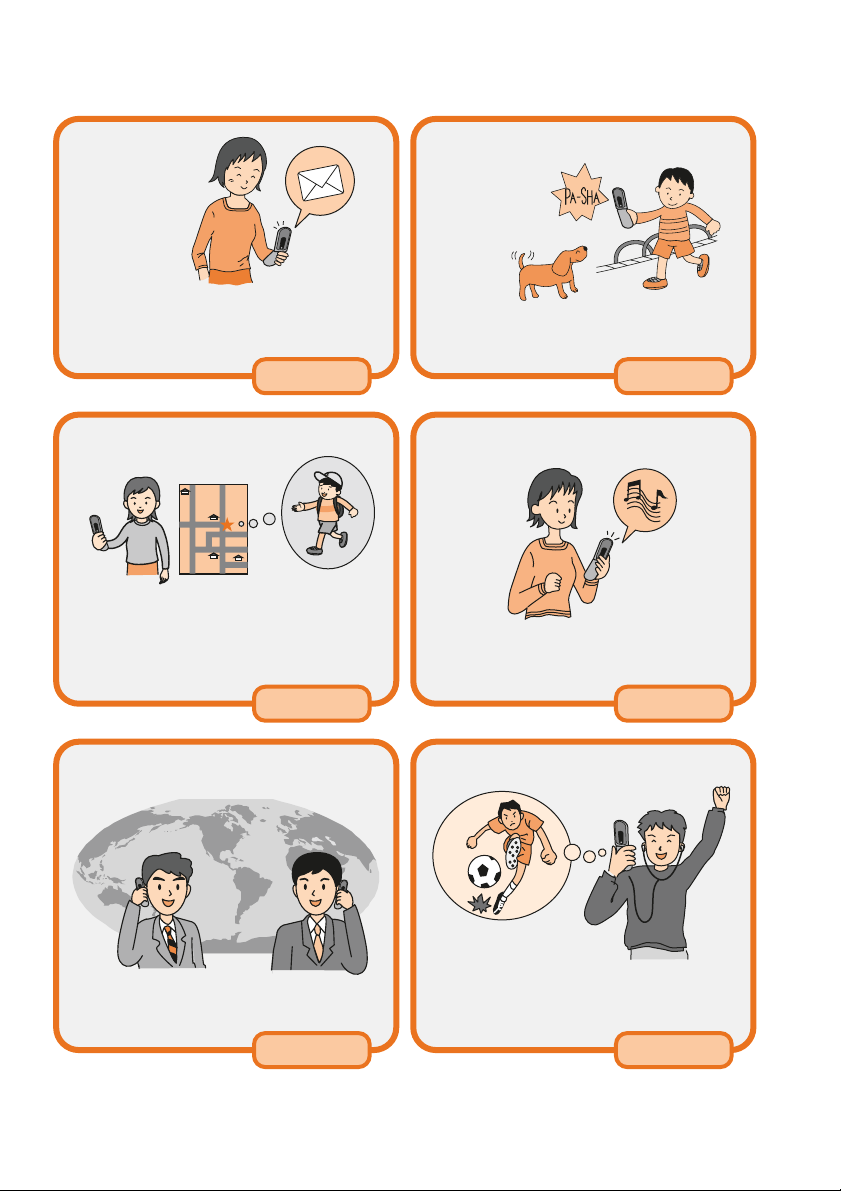
What You Can Do with the A5514SA....................................... 2
Silent Mode and In-Phone Ans Machn..................................... 3
Check the Power, Radio Waves, and Battery! ......................... 3
Do Not Use the Cellphone While Driving.................................. 4
Watch Out for Junk Mail and One-Ring Calls!.......................... 5
Disaster Message Board Service ............................................. 6
Contents ................................................................................... 8
Contents
8
Contents/Before Use

Infrared
Communication
About Infrared Communication ...................................... 76
Using Infrared Communication ...................................... 77
Camera
EZnavi What You Can Do with EZnavi ...................................... 70
What You Can Do with Security Navi ............................. 72
EZ・FM How to Use the EZ・FM................................................ 74
What You Can Do with the Camera ................................ 56
Taking a Photo........................................................... 58
Recording a Movie ...................................................... 59
Sending Photos or Movies by E-mail.............................. 61
EZweb About EZweb ............................................................. 62
Accessing Sites ......................................................... 63
Downloading Chaku-Uta®and Set It as a Ringer for Incom ing Calls
.... 65
Registering Frequently-Accessed Sites .......................... 67
Inquiring Toll .............................................................. 69
Inputting
Characters
About Inputting Characters .......................................... 90
How to Input Characters .............................................. 92
Smart Mode About Smart Mode ...................................................... 80
Using Smart Mode ...................................................... 84
Troubleshooting/
Remote Auto Lock
Troubleshooting .......................................................... 96
Before Losing…(Remote Auto Lock) .............................. 97
Other Features Other Features........................................................... 99
Index Index .......................................................................100
9
Contents/Before Use

¡A5514SA Main Unit
¡AC Adapter ¡
SANYO Flat-type Stereo Earphones 04
¡Desktop Holder¡Battery Pack
(Installed in the main unit)
Confirming the Packed Contents
¡Warranty (Japanese)
¡Precautions in Use (Japanese)
¡GLOBAL PASSPORT Ownerʼs Manual
¡Basic Manual (Japanese) ¡Manual (Japanese)
Before Use
仮
10
Contents/Before Use

Names of Parts
Main Display
External Terminal
Infrared Port
Receiver
Camera Lens
Incoming Indicator
Sub Display
Charge Indicator
Power/End Key
Speaker-Phone/Light Key
Memo Key
Dial Keys
Built-in Antenna
Talk/Pair Key
Clear/Manner Key Cursor Keys
Center Key
Battery Pack Cover
(Battery Pack is installed)
Close-Up Switch
Flat-type Earphone-
Microphone Jack
Flash
Speaker
Charger Connector
Microphone
11
Contents/Before Use

1
AC Adapter
2
Desktop Holder
3
1
2
AC Adapter
External Terminal
Power Plug
Fold outFold outFold out
Power Plug
Fold outFold outFold out
How to Charge the Battery Pack
To Charge Using the Desktop Holder
To Charge Using the AC Adapter
Connect the AC adapter to the external terminal of the A5514SA and plug the power
plug into a power outlet.
Connect the AC adapter to the desktop holder, plug the power plug into a power outlet,
and insert the A5514SA to the desktop holder.
Charge Indicator
¡Red light is on →Charging
¡Light is off →Charging is completed
Charge Indicator
¡Red light is on →Charging
¡Light is off →Charging is completed
Connector
Connector
The battery pack is not fully charged at the time of purchase. Before
using your cellphone, charge the battery pack in the following ways.
12
Contents/Before Use

Fold out
Fold out
Turn the Power On/Off
Press for more than one
second.
The standby screen is displayed.
Press for more than one
second.
To Turn the Power On
To Turn the Power Off
* You cannot receive or make calls when “Out” (Out of
service area) is displayed.
* is displayed while charging.
Standby screen
Check here for the reception state!
Check here for remaining battery power!
Strong Medium Too weak Out of
service area
Weak
Fully
charged Low Fully
discharged
Requires
charging
Confirming the Reception State and Remaining Battery Power
13
Contents/Before Use

Back Select
Functions
M_
Time/Toll/Apply
Sound/Vibration
Screen Display
Privacy Stngs
User Support
Useful Tools
Guide Functions
Profile
Basic Operation
Cursor
Address Book Key
¡Displays Address Book
Cursor Keys
¡Move cursor or screen
¡In the standby screen,
display Dialed calls log
by pressing right or
Received calls log by
pressing left
Talk/Pair Key
¡Makes/Receives calls
¡Displays Pair Menu
Power/End Key
¡Turns the power on/off
¡Ends a call
EZweb Key
¡Connects to EZweb
Center Key
¡Displays Main Menu
¡Selects an item where the
cursor is placed
Application Key
¡Launches EZ apps(BREW®)
Dial Keys
¡Enter phone numbers or
characters
Memo Key
¡Sets the In-Phone Ans Machn
¡Plays recorded messages
Speaker-Phone/Light Key
¡For using Speaker-Phone function
¡For using as Light
Mail Key
¡Displays E-Mail/C-Mail Menu
Clear/Manner Key
¡Sets the silent mode
¡Deletes entered characters
Key Functions
Cursor keys are indicated in
this manual as follows:
Up Down Left Right
14
Contents/Before Use

Edit
NaviWalk
Submenu
My
スポット
自宅
半蔵門駅
東京丸の内
To select an item, use to move the cursor and press .
An item with numeric icon can also be selected by pressing the corresponding
dial key. To go back to the previous screen, press . When is displayed
at the bottom of the screen, pressing the corresponding key also allows you to
return to the previous screen.
To return to the standby screen, press .
Pressing the key executes
the function displayed at the
lower center.
Pressing the key executes
the function displayed at the
lower right.
Pressing the key executes
the function displayed at the
lower left.
The functions displayed at the bottom of the screen correspond with the keys as follows:
Press dial key.
Standby screen
<Example>
Executing Functions Displayed at the Bottom
Selecting Items/Returning
Press .
Press .
Back
Use to select
an item and
press .
Press or .
Use to select
an item and
press .
Press or .
Back Select Switch Back Select
Screen Display
M3_
Main Display
Sub Display
Display Light
Light Settings
Font Size
バイリンガル機能
Back Select
Functions
M_
Time/Toll/Apply
Sound/Vibration
Screen Display
Privacy Stngs
User Support
Useful Tools
Guide Functions
Profile
15
Contents/Before Use

MissdCls 2
EーMail
2
CーMail
2
Mesgs
2
Main Menu
Viewing the Screen
The following icons are displayed in the main screen and indicate
the status of your A5514SA. Icons and the number of cases are
displayed when you have received missed calls or mails.
⑨
⑩⑪
⑫
⑬
⑭
①
③
During a call
⑮
⑯
Using EZweb
Running EZ apps
Running EZ・FM
Reception state
Area setting
*No indication when Japan is set
②
①② ③④
④
⑤⑥⑦⑧
⑰
:
New service area
: Indonesia
: Thailand
: Taiwan
: New Zealand
:
China (Hong Kong)
:
China (except Hong Kong)
: Korea: Australia
: Canada
: USA: Mexico
⑧
Battery level
⑩
Current date and time
Current time
⑪
In-Phone Ans Machn is ON
Missed Call
New E-mail*
New C-mail*
New memo in the In-Phone Ans Machn
To main menu
Looking for service area while roaming
Silent Mode is ON
Charging
⑦
Unchecked missed call
Phone calls are available in roaming area
Packet communication is available in roaming area
⑫
⑬
⑭
⑮
⑯
⑰
⑨
Indicates the directions to scroll
Appears when the volume setting is available
while confirming or playing data
⑤
⑥
Unread E-mail
Unread C-mail
Indication in the Main Screen
* is displayed when you have a mail from pair person.
16
Contents/Before Use

Pressing in the standby screen launches the Main Menu.
Each function can be accessed by using to select an image
and pressing .
<Example> Accessing Camera from Main Menu
Camera function screen
Main Menu screen
About Menu
When “Submenu” is displayed at the bottom of the screen during
each operation, you can access related functions or information by
pressing the key that corresponds to Submenu.
<Example> Displaying Photoʼs Submenu
Standby screen
[Submenu]
About Main Menu
About Submenu
Use to select
“Camera” and
press .
Back Select
Camera
Photo
Movie
Bar Code Reader
Character Reader
Back Select
Submenu
Frame
Special Effects
Portrait Flash
Self Timer
Add GPS Info
Shoot Mode
Barcode Reader
OFF
Movie Shoot Submenu
Back Select Switch
17
Contents/Before Use

Setting the Language to English
Press in the standby screen.
Use to select “画面表示” and
press [選択].
Use to select “機能” and
press [選択].
1
2
3
Use to select “Set Language”
and press [選択].
4
戻る 選択
Set Language M36
日本語
English
戻る 選択 切替
戻る 選択
機能
M_
時間
/
料金
/
申込
音
/
バイブ
画面表示
プライバシー
ユーザー補助
便利機能
ガイド機能
プロフィール
戻る 選択
画面表示
M3_
メインディスプレイ
サブディスプレイ
照明
ランプ設定
文字サイズ
Set Language
●
18
Contents/Before Use
Other manuals for A5514SA
1
Table of contents
Other Sanyo Cell Phone manuals

Sanyo
Sanyo SCP-7300 User manual

Sanyo
Sanyo Sprint KATANA User manual

Sanyo
Sanyo SCP-5150 User manual

Sanyo
Sanyo Katana DLX User manual

Sanyo
Sanyo SCP-5500 User manual

Sanyo
Sanyo MVP User manual

Sanyo
Sanyo SCP-4920 User manual

Sanyo
Sanyo SCP-2700 User manual

Sanyo
Sanyo SCP-5300 User manual

Sanyo
Sanyo A5527SA Installation guide

Sanyo
Sanyo Sprint SCP-3810 User manual

Sanyo
Sanyo SCP-8100 User manual

Sanyo
Sanyo PCS Vision RL-4920 User manual

Sanyo
Sanyo Vero User manual

Sanyo
Sanyo SCP-4930 User manual

Sanyo
Sanyo SCP-6200 User manual

Sanyo
Sanyo SCP-2700 User manual

Sanyo
Sanyo Sprint SCP-7000 User manual

Sanyo
Sanyo SCP-6650 User manual

Sanyo
Sanyo Katana LX User manual