manuals.online logo
Brands
  1. Home
  2. •
  3. Brands
  4. •
  5. Sartorius
  6. •
  7. Water Filtration System
  8. •
  9. Sartorius Arium Advance RO User manual

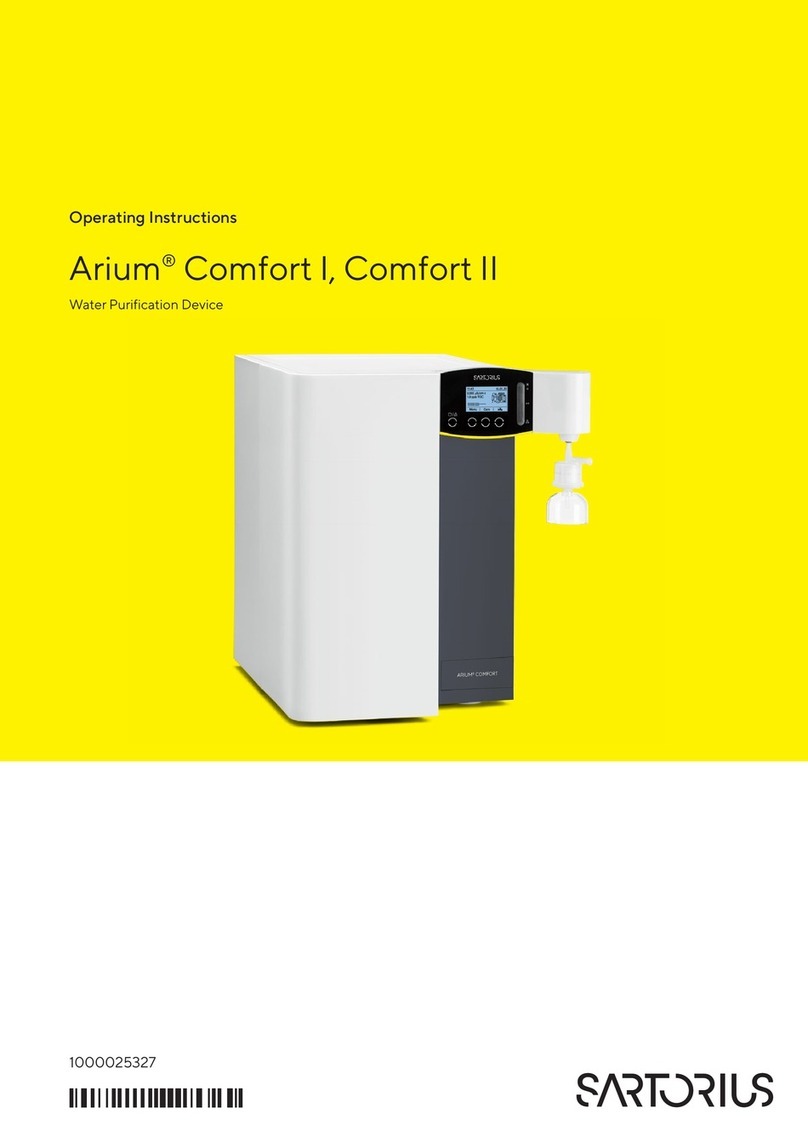
Sartorius Arium Advance RO User manual

Operating Instructions
Original Operating Instructions
Arium®Advance RO|EDI
Water Purification Device
1000025326
Operating Instructions Arium®Advance RO|EDI 3
Contents
Contents
1 User Information..................................................................... 5
1.1 Warning | Danger Symbols.........................................................5
1.2 Explanation of Symbols ............................................................5
2 Safety Information ................................................................... 6
3 Product Description ................................................................. 8
3.1 Flow diagram of theArium®Advance EDI (with 2 RO modules) ...................9
3.2 Flow diagram of the Arium®Advance RO (with 2 RO modules)...................10
3.3 Electrical Connections on theArium®Advance...................................10
3.4 Arium®Advance Tubing Connectors..............................................11
4 Operating Concept ..................................................................12
4.1 Display ............................................................................12
4.2 Operation in the Operating Mode ................................................13
4.3 Navigation in the Menus ..........................................................14
5 Installation ...........................................................................16
5.1 Unpacking ........................................................................16
5.2 Bench Mounting ..................................................................17
5.3 Operation as a Wall-mounted System ............................................18
5.4 Arium®Bagtank ..................................................................20
6 Getting Started ......................................................................21
6.1 System Startup....................................................................21
6.2 Setting the Language .............................................................21
6.3 Setting the Date and Time .......................................................22
6.4 Setting the Measurement Unit...................................................22
6.5 iJust ..............................................................................22
6.5.1 CO2......................................................................22
6.5.2 Water Hardness .......................................................... 23
6.6 Setting up a Bagtank............................................................. 23
6.7 Purification Component Installation ............................................. 24
6.8 System Rinsing...................................................................26
7 Operation...........................................................................28
7.1 Operating Mode .................................................................28
8 System Menu .......................................................................29
8.1 Menu Tree........................................................................29
8.2 Settings ..........................................................................30
8.2.1 Displayed Values..........................................................30
8.2.2 Limit (for the RO version only).............................................31
8.2.3 iJust........................................................................31
8.2.4 Tank Volume ..............................................................32
8.2.5 Date | Time ...............................................................33
8.2.6 Language.................................................................33
8.2.7 Acoustic Signals ..........................................................33
8.2.8 Display ...................................................................33
8.2.9 Pin ........................................................................34
8.2.10 Reset to Default ..........................................................34
4 Operating Instructions Arium®Advance RO|EDI
Contents
8.3 System Status ....................................................................34
8.3.1 Device ....................................................................34
8.3.2 Timer......................................................................35
8.3.3 Service....................................................................35
8.3.4 Warnings .................................................................35
8.3.5 Errors .....................................................................35
9 Care and Maintenance..............................................................36
9.1 System Cleaning ..................................................................37
9.2 Start Bag Replacement ..........................................................42
9.3 Changing the Prefilter (Pretreatment Cartridge) ................................43
9.4 Replace RO Modules ............................................................46
9.5 Replace Softener (for the EDI version only) ......................................48
9.6 Tank Rinsing ......................................................................51
9.7 Backflushing .....................................................................52
9.8 Replacing Electrical Fuses .......................................................52
10 Malfunctions........................................................................53
10.1 Warning Messages...............................................................53
10.2 Error Messages...................................................................55
11 Disposal.............................................................................57
11.1 Information on Decontamination ................................................ 57
11.2 Shipping Instructions ............................................................ 57
11.3 Information on Disposal.......................................................... 57
11.3.1 Disposal................................................................... 57
12 Specifications.......................................................................58
12.1 Arium®Advance RO .............................................................58
12.1.1 Product Water Quality....................................................59
12.2 Arium®Advance EDI .............................................................59
12.2.1 Product Water Quality....................................................60
13 Accessories and Replacement Parts .................................................61
13.1 Arium®Advance RO ..............................................................61
13.1.1 Consumables ..............................................................61
13.1.2 Accessories ................................................................61
13.2 Arium®Advance EDI .............................................................62
13.2.1 Consumables.............................................................62
13.2.2 Accessories ...............................................................62
14 EC/EU Declaration of Conformity..................................................63
15 UK Declaration of Conformity ......................................................64
16 CSA Declaration of Conformity .....................................................65
Operating Instructions Arium®Advance RO|EDI 5
User Information
1 User Information
1.1 Warning | Danger Symbols
WARNING
These notes identify hazards that have a high probability of resulting in
death or serious physical injury if not avoided.
CAUTION
These notes identify hazards that can result in moderate or mild injuries if
not avoided.
NOTICE
These notes identify hazards associated with the risk of material damage.
1.2 Explanation of Symbols
This symbol identifies useful information and tips.
The following symbols are used in these instructions:
– Texts that use this mark are lists.
tIndicates required steps.
yDescribes what happens afteryou have performed a particular step.
About these Instructions
Please read these instructions carefully and completely before putting the
equipment into operation for the first time. Observe the safety instructions.
These instructions are an important part of the product. Keep these
instructions in a safe place. If you give the device to others to use, give them
these instructions, too. If these instructions are lost, please contact Sartorius
for a replacement or download the latest manual from ourwebsite:
www.sartorius.com
Applications Advice | Technical Support
Contact addresses for application advice and our technical support can be
found online at: www.sartorius.com
6 Operating Instructions Arium®Advance RO|EDI
Safety Information
2 Safety Information
Please read the following safety instructions thoroughly and follow the
instructions exactly. These instructions serve to instruct you on how to use
the Arium®Advance system properly and prevent damage.
WARNING
Danger of electric shock!
−To plug in yourArium®Advance system, use a properly grounded
electrical outlet with a voltage of 100–240 V, 50/60 Hz.
−Do not place your Arium®Advance system on top of electrical
equipment. Routine maintenance of theArium®Advance system may
involve water spillage.
−Remove the plug from the electrical outlet prior to replacing defective
fuses.
WARNING
Danger of injury from fire and explosion!
−Do not use yourArium®Advance system in the vicinity of highly
flammable or combustible materials as it contains components that may
ignite such materials.
−The Arium®Advance system is to be operated with water only. Sanitizing
and cleaning agents should only be used according to the instructions
given in this manual.
CAUTION
Danger of injury to eyes and skin!
−Avoid splashing cleaning agents on clothing, eyes or skin (wear
protective clothing).
−Make sure that all tubing connections are sealed tightly to avoid the
liquid cleaning agent leaking.
−Carefully follow the manufacturer’s safety instructions included on the
liquid cleaning agent containers and filter cartridges.
NOTICE
Danger of irreversible damage to Arium®Advance system components!
−Be sure to replace defective fuses with those of the same type and
rating.
−Make sure that the outlet tubing for the rinse water is directed to an
open drain.
−Protect against frost.
−Never connect peripheral devices to the device interfaces unless they
have been recommended by Sartorius. This will prevent damage to your
Arium®Advance system.
−Never unplug any cables from yourArium®Advance when it is running as
this can cause malfunctions.
Operating Instructions Arium®Advance RO|EDI 7
Safety Information
Intended Use
The Arium®Advance system was designed for the sole purpose of creating
ultrapure water for laboratory use. In order to ensure proper device
operation, you should only use the filter media and | or accessories listed in
this manual. Using the device for purposes other than that listed here is
considered improper use.
−The Arium®Advance system may only be operated by trained personnel.
−Only operate the Arium®Advance system with original accessories or
replacement parts. If you modify this water purification device
independently, the performance and proper functioning of the system
are no longer guaranteed. This can also endanger the safety of the
operator.
−If you encounter any problems with your system, please contact your
local Sartorius Service Center.
−Please take all pertinent precautions to prevent accidents and observe
the generally valid technical and occupational safety rules and
regulations.
−Only use materials recommended by Sartorius (e.g. connections, seals,
tools, spare parts, cleaning agents, pretreatment cartridges, softeners
and RO modules).
8 Operating Instructions Arium®Advance RO|EDI
Product Description
3 Product Description
1
2
Fig.1: Arium®Advance front view
Pos. Description
1 Display and control panel
2 Door
The Arium®Advance systems from Sartorius are fed with potable water
and produce ultrapure water. The system is available in the versions RO and
EDI. An Arium®Advance RO system produces Type 3 pure water using
reverse osmosis treatment. In addition to reverse osmosis modules, an
Arium®Advance EDI system features built-in EDI technology
(electrodeionization) and produces ASTM Type 2 pure water.
The pure water produced by the Arium®Advance systems is stored in an
Arium®Bagtank. The Arium®Bagtank is described in a separate manual.
The figures on the next few pages show the flow diagram of an Arium®RO
and EDI system. At the system inlet, a measuring cell measures the conduc-
tivity of the feed water (LFF). A membrane pump subsequently pumps the
water through a pretreatment cartridge and the RO modules (reverse
osmosis). Arium®Advance RO systems can be optionally equipped with one
to three RO modules,Arium®Advance EDI systems with one or two RO
modules. Each RO module has two outlets: one for permeate and one for
concentrate flow. The concentrate flow is connected to the outlet (drain) of
Operating Instructions Arium®Advance RO|EDI 9
Product Description
the system. While the Arium®Advance system fills the tank, water drains out
at the outlet. The permeate flow contains the purified RO water. A conduc-
tivity measuring cell (LFR) monitors the quality of the RO water.
An Arium®Advance EDI system additionally contains a softener cartridge,
EDI module and a second conductivity measuring cell (LFA). This measuring
cell tests the quality of the EDI product water. For technical reasons, on
both the EDI module and the RO modules, some of the water is discarded
during purification. Next, the ultrapure water produced by the Advance RO
and | orAdvance EDI is pumped into the Arium®Bagtank. There, the water
can be dispensed directly for further use in ported equipment (e.g. auto-
claves) or for manual dispensing (e.g. via an optionally supplied remote
dispenser).
3.1 Flow diagram of the Arium®Advance EDI
(with 2 RO modules)
Outlet
(waste water)
Conductivity
measurement
LFF (feed water)
Inlet
(feed water)
Pre-treatment
cartridge
RO module #1
Pump
Arium®
Bagtank
Conductivity
measurement LFA
(product water
EDI)
Softener
cartridge
Conductivity
measure-
ment LFR
(RO
permeate)
RO module #2
EDI module
10 Operating Instructions Arium®Advance RO|EDI
Product Description
3.2 Flow diagram of the Arium®Advance RO
(with 2 RO modules)
Conductivity
measurement
LFF (feed water)
Inlet
(feed water)
Pre-treatment
cartridge
RO module #1
Pump
Arium®
Bagtank
Outlet
(waste water)
Conductivity measurement
LFR (RO permeate)
RO module #2
3.3 Electrical Connections on the Arium®
Advance
1 2 3 4 5 6 7
Fig.2: Electrical connections, side view, right
Pos. Description
1 Ethernet connection (for connecting an Arium®Smart Station)
2 Serial RS-232 interface (for Sartorius Service personnel only)
Operating Instructions Arium®Advance RO|EDI 11
Product Description
Pos. Description
3 Arium®Exchange Interface
4Connection forArium®Bagtank
5 Fuse drawer
6 Main power switch
7 AC Power Supply
The Arium®Exchange interface enables communication with an Arium®
ultrapure water system. When such a cable is connected, the Arium®will
stop dispensing water if the fill level of the Arium®Bagtank (< 2 liter) falls
below the minimum.This is to prevent any malfunction of the Arium®
system.
When supplying anArium®from the Bagtank, we recommend using the
device communication with the enclosed cable via the Arium Exchange
interface.
3.4 Arium®Advance Tubing Connectors
31 2
Fig.3: Tubing connectors, side view, right
Pos. Description
1 Connection for product water tubing
2 Connection for rinse water tubing
3 Connection for feed water
The two connections made with the tubing bridge have no function on the
Arium®Advance. To avoid faults in the tubing, do not remove the tubing
bridge.
The connection for the rinse water tubing (drain) must be permanently
directed towards to drain via the rinse water tubing. During operation of the
Arium®Advance system, water may leak from here.
12 Operating Instructions Arium®Advance RO|EDI
Operating Concept
4 Operating Concept
The Arium®system is operated using the control panel and the display. The
control panel consists of four function keys: The keys are described in the
figure below. The display shows system information and menu items. The
figure depicts the display in the operating mode your Arium®system will be
in after initial startup.
Home L M R
11:43 01.01.12
0.07 µS/cm c
25 l
IIIIIIIIIIII---------
Menu Care Info
1
2
3
All display pictures shown in this manual are for the Arium®Advance EDI
system, unless otherwise stated.
4.1 Display
As illustrated in the figure above, the display is divided into the following
three main areas.
Header (1)
When yourArium®is in the operating mode, the header displays the current
time and current date. When navigating through menu items, the open
menu item and the menu level are displayed.
Working environment (2)
When yourArium®is in the operating mode, the working environment
displays the following information:
−The current conductivity of the product water is pumped into the
Arium®Bagtank (display only when the tank is filling).
−The current Arium®Bagtank fill volume (tank level indicator)
−The flow diagram of the Arium®Advance system
Operating Instructions Arium®Advance RO|EDI 13
Operating Concept
The flow chart shows all of the system purification components
(pretreatment cartridge, RO modules, softener (onAdvance EDI version
only) and Arium®Bagtank).As soon as a component change is due, the
corresponding element starts blinking and a warning message appears.
If yourArium®Advance system is not in the operating mode, the working
environment of the display shows the current menu item.
Footer (3)
The footer displays the current key function assignment for the keys L, M
and R.
4.2 Operation in the Operating Mode
The keys L, M, R and ECO/Home are available for operation in the operating
mode.
“Menu” Key (L)
You can use this key to switch to the system menu. Information on the
system menu can be found in Chapter “8 System Menu”, page 29.
“Care” Key (M)
You can use this key to switch to the care menu. Information on the care
menu can be found in Chapter “9 Care and Maintenance”, page 36.
“Info” Key (R)
Use this key to switch to the Info section.You can find information about
conductivity, temperature, retention rate, inlet pressure and tank filling here.
This button is unavailable during backflushing.
”ECO/Home” Key
If the display has gone dim, the AriumAdvance system can be reactivated
by pressing the “ECO/Home” button.
Key Locking Function
The Arium®Advance system has a key locking function. If a warning or an
error appears while the key lock is activated, the device will likewise
automatically cancel the key lock and display the corresponding message.
To activate the key lock, simultaneously press the ECO/Home key and the
“Info” Key (R). Use the same key combination to deactivate the key locking
function.
ECO/Home
14 Operating Instructions Arium®Advance RO|EDI
Operating Concept
4.3 Navigation in the Menus
The L, M, R keys and the ECO/Home key are available for navigating within
the menus. The keys (L), (M) and (R) have different functions, depending on
the menu item selected.
Examples for the assignment of the keys (L), (M) and (R):
Symbol Function
Move upwards
Short press = one item at a time
Longer press = scroll
Move downwards
Short press = one item at a time
Longer press = scroll
Confirm
OK Confirm
Start Start a process
Cancel Cancel a process
Back Move up 1 level higher in the menu
The display header displays the current menu level. The number of black
arrows indicates the submenu level.
An example of menu levels:
Menu rSettings 1. Submenu level
rrDisplayed values 2. Submenu level
rrrConductivity 3. Submenu level
The display working environment displays the menu items. The different
forms of display are described in the following.
Back Go to the next higher menu level.
Comes before menu items whose selection triggers a direct action
(example “Single printout”).
Comes before menu lists that only allow list item selection
(Example “Set language”).
Comes before menu lists that allow the selection of several list
items (Example “Acoustic Signals”).
Menu rSettings
Displayed values
Limit values
iJust
ECO mode

Operating Instructions Arium®Advance RO|EDI 15
Operating Concept
Inputting Numbers
There are various places where numbers must be entered (example
“Conductivity limit value for pure water”). Numbers that have several digits
are entered digit by digit from left to right. Enter the first digit with the arrow
keys “  ”, then switch to the next with “ ”.
In some cases, it may only be possible to select numbers in set increments.
“ECO/Home” Key
Here, the ECO/Home key features a “Home function”. Click on the home
key to return from the current menu item to the operating mode of the
Arium®Advance system. Processes such as cleaning are excluded from this
function. The Home function cannot be used in this status.
The Home function is unavailable during initial startup.
rrCO2
CO2 value of feed water:
13.0 mg/l:

16 Operating Instructions Arium®Advance RO|EDI
Installation
5 Installation
We recommend that you have the setup and initial startup of your
Arium®Advance system carried out by a qualified Sartorius service
technician.
5.1 Unpacking
Remove yourArium®Advance from its packaging. You will find the accesso-
ries inside the Arium®Advance housing and in the top cover of the box.
The equipment supplied includes the following:
Part Description Quantity
Arium®Advance system (with pre-installed display unit and
RO module(s))
1
Feed water tubing with quick-fit adapter,
PE, ⅜” outer diameter, length 2.40 m
1
Rinse water tubing for the concentrate, PE, ¼” outer
diameter, 2.40 m length
1
Firewire 400 cable, 3 m, for device communication with
Arium®pro
1
Tubing adapter for feed waterwith ½” internal thread and
⅜”outer diameter
1
Two-part tubing adapter for feed waterwith G ¾” internal
thread and ⅜” outer diameter
1
Wall mounting bracket (for wall-mounted systems) 1
Power cord 1
Operating instructions 1
QA certificate 1
Cleaning tubing to clean RO modules, PE, ¼” outer diameter,
2.40 m length (EDI version only)
1
Connector ¼”–¼” (EDI version only) 1
Plug ¼” (EDI version only) 1
Pretreatment cartridges, softener cartridge (for EDI version), bags and
Bagtanks are not part of the equipment supplied with the Arium®Advance
systems and must be purchased separately.
Operating Instructions Arium®Advance RO|EDI 17
Installation
5.2 Bench Mounting
WARNING
Danger of electric shock!
Do not place your Arium®Advance system on top of electrical equipment.
Water may spill when using the system.
WARNING
Danger of injury from fire or explosion!
Do not use yourArium®Advance system in the vicinity of highly flammable
or combustible materials as it contains components that may ignite such
materials.
Fig.4: Arium®Advance as a benchtop system
−Place the Arium®Advance system on a flat surface.
−When selecting a place of installation foryour Arium®Advance system,
you must ensure that a feed water supply, a 100–240 V electric socket
and an atmosphericallyvented drain are available.
18 Operating Instructions Arium®Advance RO|EDI
Installation
5.3 Operation as a Wall-mounted System
The Arium®Advance is optionally supplied with a wall bracket to enable you
to attach the system securely to the wall so that it occupies a minimum
amount of space.A clear wall area of 63 × 63 cm is required.
The wall bracket and the required screws forwall installation are not part of
the equipment supplied.
Fig.5: Arium®Advance as a wall-mounted system
Operating Instructions Arium®Advance RO|EDI 19
Installation
Fig.6: Back panel of the Arium®Advance with the unit’s screw holes and wall rail on models
used as wall-mounted systems
CAUTION
The wall rail included for intended wall installation is suitable to bear a
weight of up to 100 g and is designed only for securing theArium®Advance
(including water). Do not put any additional load on the Arium®Advance.
When mounting the unit on a wall, make sure that the mounting surface
and fasteners selected are capable of supporting a minimum of 100 kg
(220lbs). Inadequate support and | or fasteners may result in injury to the
operator and damage to the equipment.
When selecting a place of installation foryour Arium®system, you must
ensure that a feed water supply, a 100–240 V electric socket and an
atmosphericallyvented drain are available.
−Use the pre-drilled slotted holes in the wall rail to mount it onto the wall.
t Fasten the wall rail to the wall using suitable screws and dowels (ensure
that it is horizontally aligned).
t Mount the Arium®Advance by hooking it into the wall mounting bracket.
20 Operating Instructions Arium®Advance RO|EDI
Installation
5.4 Arium®Bagtank
An Arium®Advance system can only be in operated in combination with an
Arium®Bagtank!
The pure water produced by the Arium®Advance system is stored in the
Arium®Bagtank. The tank systems listed in the following are available.
Arium®Bagtank 20 Arium®Bagtank 50 Arium®Bagtank 100
Stores product
water in a 20-liter
plastic bag
Stores product water in
a 50-liter plastic bag
Stores product water
in two 50-liter plastic
bags
Without pressure-
booster pump
With built-in pressure-
booster pump or
without pressure-
booster pump
With built-in pressure-
booster pump or
without pressure-
booster pump
For further technical data on the Arium®Advance systems (see Chapter “12.1
Arium®Advance RO”, page 58).
Install and connectArium®Bagtank systems during the initial startup of
Arium®Advance system.
Please refer to the “Arium®Bagtank” installation instructions to learn how
Arium®Bagtank systems are installed and connected as well as for addi-
tional technical specifications.

This manual suits for next models

5

Other Sartorius Water Filtration System manuals

Sartorius Arium Comfort I H2O-I Series User manual

Sartorius

Sartorius Arium Comfort I H2O-I Series User manual

Sartorius Sartolab RF 150 Sartolab BT 150 User manual

Sartorius

Sartorius Sartolab RF 150 Sartolab BT 150 User manual

Sartorius Minisart RC User manual

Sartorius

Sartorius Minisart RC User manual

Sartorius Sartolab RF 50 User manual

Sartorius

Sartorius Sartolab RF 50 User manual

Sartorius arium 611VF User manual

Sartorius

Sartorius arium 611VF User manual

Sartorius arium pro User manual

Sartorius

Sartorius arium pro User manual

Sartorius Sartoclear 29XDL10-FCFFF Manual

Sartorius

Sartorius Sartoclear 29XDL10-FCFFF Manual

Sartorius arium mini plus User manual

Sartorius

Sartorius arium mini plus User manual

Sartorius Sartoclear Caps User manual

Sartorius

Sartorius Sartoclear Caps User manual

Sartorius arium bagtank 50 User manual

Sartorius

Sartorius arium bagtank 50 User manual

Popular Water Filtration System manuals by other brands

Yamato WG 1000 instruction manual

Yamato

Yamato WG 1000 instruction manual

velda Floating Combi Filter 2500 User instructions

velda

velda Floating Combi Filter 2500 User instructions

BWT PERMAQ COMPACT 51 Installation and operating manual

BWT

BWT PERMAQ COMPACT 51 Installation and operating manual

Franklin Water Treatment POZ1-10 Installation instructions and owner's manual

Franklin Water Treatment

Franklin Water Treatment POZ1-10 Installation instructions and owner's manual

Fiap BioSieve Active 50.000 2840 manual

Fiap

Fiap BioSieve Active 50.000 2840 manual

Santevia Alkaline user manual

Santevia

Santevia Alkaline user manual

Puralytics Shield 1500 owner's manual

Puralytics

Puralytics Shield 1500 owner's manual

GE E4-2200 Operation and maintenance manual

GE

GE E4-2200 Operation and maintenance manual

Hayward AquaRite 120 Operation and installation manual

Hayward

Hayward AquaRite 120 Operation and installation manual

AQUA SZUT AQUA 2 instruction manual

AQUA SZUT

AQUA SZUT AQUA 2 instruction manual

Steinbach Speedclean Comfort 50 ORIGINAL OWNER'S MANUAL

Steinbach

Steinbach Speedclean Comfort 50 ORIGINAL OWNER'S MANUAL

A.J.Antunes UF-216C Series owner's manual

A.J.Antunes

A.J.Antunes UF-216C Series owner's manual

Lifegard All-In-One Single instructions

Lifegard

Lifegard All-In-One Single instructions

Pentair FLECK 9000 SXT Installer manual

Pentair

Pentair FLECK 9000 SXT Installer manual

Crystal Quest CQE-SP-00809 Installation and operation guide

Crystal Quest

Crystal Quest CQE-SP-00809 Installation and operation guide

DVS ECO15 quick guide

DVS

DVS ECO15 quick guide

BWT bestaqua 6 Fitting and operating instructions

BWT

BWT bestaqua 6 Fitting and operating instructions

Standen MEGASTAR GEN-2 Operator's handbook

Standen

Standen MEGASTAR GEN-2 Operator's handbook

manuals.online logo
manuals.online logoBrands
  • About & Mission
  • Contact us
  • Privacy Policy
  • Terms and Conditions

Copyright 2025 Manuals.Online. All Rights Reserved.