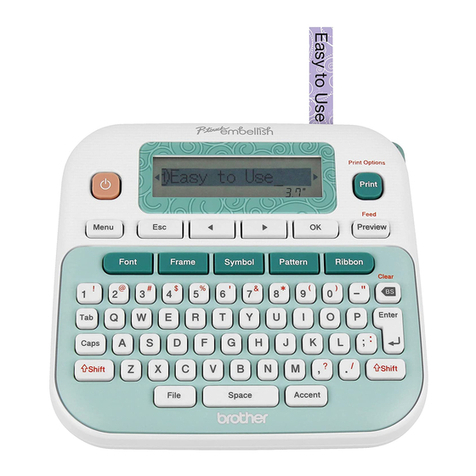
SATO CT400i Series User manual

Thank you for purchasing
the SATO CT400i Series
barcode printer. Please
read this manual carefully
to ensure you understand
the CT400i Series
functions and how to
operate it properly.
203dpi/305dpi/600dpi
Quick Guide
Label Printer
CT400i Series
CT400iDT Series
CT400iTT Series
Thermosensitive type
203dpi/305dpi/600dpi
Thermal transfer type
* Be sure to use SATO genuine parts
(labels, ribbons).
EnglishGermanChineseKorean

2
EnglishGermanChineseKorean
You are cautioned that changes or modifications not expressly approved by
the party responsible for compliance could void your authority to operate the
equipment.
This device complies with Part 15 of the FCC Rules. Operation is subject
to the following two conditions: (1) this device may not cause harmful
interference, and (2) this device must accept any interference received,
including interference that may cause undesired operation.
This equipment has been tested and found to comply with the limits for a
Class B digital device, pursuant to Part 15 of the FCC Rules. These limits
are designed to provide reasonable protection against harmful interference
in a residential installation. This equipment generates, uses and can radiate
radio frequency energy and, if not installed and used in accordance with the
instructions, may cause harmful interference to radio communications.
However, there is no guarantee that interference will not occur in a particular
installation.
If this equipment does cause harmful interference to radio or television
reception, which can be determined by turning the equipment off and on, the
user is encouraged to try to correct the interference by one or more of the
following measures:
- Reorient or relocate the receiving antenna.
- Increase the separation between the equipment and receiver.
- Connect the equipment into an outlet on a circuit different from that to
which the receiver is connected.
- Consult the dealer or an experienced radio/TV technician for help.
AC power cord with ferrite core must be used for RF interference
suppression.
FCC WARNING

Version 1 December 10, 2007 Q02073000
©2007 SATO CORPORATION
Safety Precautions
Pictographic Symbols
This instruction manual and the printer labels uses a variety of pictographic symbols to facilitate safe and correct use of the printer and to
prevent injury to others and property damage. The symbols and meanings for them are given below. Be sure to understand these symbols
well before reading the main text.
This section describes how to use the printer safely. Be sure to read it carefully before using the printer.
Ignoring the instructions
marked by this symbol and
erroneously operating the
printer could result in death or
serious injury.
Ignoring the instructions
marked by this symbol and
erroneously operating the
printer could result in injury or
property damage.
Example Pictographs
Warning
Caution
Warning
The pictograph means “Caution is required.” A specific
warning symbol is contained inside this pictograph (The symbol
at left is for electric shock).
The pictograph means “Should not be done.” What is
specifically prohibited is contained in or near the pictograph
(The symbol at left means “Disassembly prohibited”).
The pictograph means “Must be done.” What is specifically to
be done is contained in the pictograph (The symbol at left
means “Unplug the power cord from the outlet”).
Do not set on an unstable area
• Do not set on an unstable area,
such as a wobbly table or
slanted area or an area subject
to strong vibration. If the printer
falls off or topples over, it could
injure someone.
Always ground the connections
• Always connect the printer’s
ground wire to a ground. Not
grounding the ground wire
could result in electric shock.
Do not use the printer when
something is abnormal about it
• Continuing to use the printer in
the event something is
abnormal about it, such as
smoke or unusual smells
coming from it, could result in
fire or electric shock.
Immediately turn off the power
switch, unplug the power cord
from the outlet, and contact a
store, dealer, or the Support
Center for repairs. It is
dangerous for the customer to
try to repair it, so absolutely do
not attempt repairs on your
own.
Do not disassemble the printer
• Do not disassemble or modify
the printer. Doing so could
result in fire or electric shock.
Ask the store, dealer, or the
Support Center to conduct
internal inspections,
adjustments, and repairs.
Regarding the cutter
• Do not touch the cutter with
your hands or do not put
something into the cutter. Doing
so could result in an injury.
Using the head cleaning fluid
• Use of flame or heat around the
head cleaning fluid is
prohibited. Absolutely do not
heat it or subject it to flames.
•Keep the fluid out of reach of
children to prevent them from
accidentally drinking it. If the
fluid is drunk, immediately
consult with a physician.
Handling of the power cord
• Do not damage, break, or
modify the power cord. Also, do
not place heavy objects on the
power cord, heat it, or pull it
because doing so could
damage the power cord and
cause a fire or electric shock.
• If the power cord becomes
damaged (core is exposed,
wires broken, etc.), contact a
store, dealer, or the Support
Center. Using the power cord in
this condition could cause a fire
or electric shock.
• Do not modify, excessively
bend, twist, or pull the power
cord. Using the power cord in
such a condition could cause a
fire or electric shock.
When the printer has been dropped
or broken
• If the printer is dropped or
broken, immediately turn off the
power switch, unplug the power
cord from the outlet, and
contact a store, dealer, or the
Support Center. Using the
printer in this condition could
cause a fire or electric shock.
Do not place containers full of water
or other liquid on the printer.
• Do not place flower vases,
cups, or other containers
holding liquids, such as water
or chemicals, or small metal
objects near the printer. If they
are spilled and get inside the
printer, immediately turn off the
power switch, unplug the power
cord from the outlet, and
contact a store, dealer, or the
Support Center. Using the
printer in this condition could
cause a fire or electric shock.
Do not put objects inside the printer
• Do not insert or drop in metal
or burnable objects inside the
printer’s openings (cable
outlets, etc.). If foreign objects
do get inside the printer,
immediately turn off the power
switch, unplug the power cord
from the outlet, and contact a
store, dealer, or the Support
Center. Using the printer in this
condition could cause a fire or
electric shock.
Do not use other than
the specified voltage
• Do not use other than the
specified voltage. Doing so
could result in fire or electric
shock.
3
EnglishGermanChineseKorean

Safety Precautions
Caution
(1)
(2)
(3)
Reproduction in any manner of all or part of this document is prohibited.
The contents of this document may be changed without prior notice.
Great care has been taken in the preparation of this document, but if any problems, mistakes, or
omission are found, please contact the store or dealer where you purchased the printer.
Caution
Do not place in areas with high humidity
•Do not place the printer in
areas with high humidity or
where condensation forms. If
condensation forms,
immediately turn off the power
switch and do not use the
printer until it dries. Using the
printer while condensation is on
it could result in electric shock.
Power cord
•Keep the power cord away from
hot devices. Getting the power
cord close to hot devices could
cause the cord’s covering to
melt and cause a fire or
electrical shock.
•When unplugging the power
cord from the outlet, be sure to
hold it by the plug. Pulling it by
the cord could expose or break
the core wires and cause a fire
or electric shock.
• The power cord set that comes
with the printer is especially
made for this printer. Do not
use it with any other electrical
devices.
Opening and closing the thermal head
•When opening or closing the
thermal head, make sure
nothing other than paper gets
in it. Debris getting in could
cause injury or damage.
Loading paper
•When loading roll paper, be
careful not to get your fingers
pinched between the paper roll
and the supply unit.
• Be careful not to become
injured when opening the fan-
folded paper loading slot
window.
When not using the printer
for a long time
•When not using the printer for a
long time, unplug the power
cord from the outlet to maintain
safety.
During maintenance and cleaning
•When maintaining and cleaning
the printer, unplug the power
cord from the outlet to maintain
safety.
Cover
• Be careful not to pinch your
fingers when opening or closing
the cover. Also be careful the
cover does not slip off and
drop.
Thermal head
• The thermal head is hot after
printing. Be careful not to get
burned when replacing paper
or cleaning immediately after
printing.
•Touching the edge of the
thermal head with bare hands
could result in injury. Be careful
not to become injured when
replacing paper or cleaning.
• The customer should not
replace the thermal head.
Doing so could result in injury,
burns, or electric shock.
Carrying the Printer
•When moving the printer,
always unplug the power cord
from the outlet and check to
make sure all external wires
are disconnected before
moving it. Moving the printer
with the wires still connected
could damage the cords or
connecting wires and result in a
fire or electrical shock.
• Do not carry the printer with
paper loaded in it. The paper
could fall out and cause an
injury.
•When setting the printer on the
floor or a stand, make sure not
to pinch your fingers or hands
under the printer feet.
Power supply
• Do not operate the power
switch or plug in/unplug the
power cord with wet hands.
Doing so could result in electric
shock.
4
EnglishGermanChineseKorean

Accessories Check
¡
Quick Guide
¡
Safety manual
¡
Manual (for RoHS)
¡
GWP leaflet
¡Power cord and AC adapter
¡Test labels and ribbons
¡Dial adjustment screwdriver
* Attached to the printer unit.
¡Ribbon adapter
* The test ribbons and ribbon adapter
come with the thermal transfer model.
The following items are packed together with the main unit in the
box. Be sure to check to make sure nothing is missing. If something
is missing, contact the store or dealer where you purchased the
product.
¡USB cable
The power cord set included with this printer is only for use with this printer.
Do not use it with other electrical products.
Caution
5
EnglishGermanChineseKorean

[Back (USB + LAN interface)]
¡DC input power
terminal
(Power connector)
¡USB interface
¡LAN interface
¡I/F Cover
¡I/F Cover
[Back (USB + RS-232C interface)]
¡DC input power
terminal
(Power connector)
¡USB interface
¡Interface board
¡RS-232C interface
Names of Parts
¡Window
¡Top cover
¡Label discharge
outlet
¡Front cover
¡Opening lever
¡Operation panel
Printer unit [unit exterior]
*Handling of an I/F Cover:
Please close with an I/F Cover after shutting off a
power supply and attaching or removing an I/F
board, in case an I/F Cover is opened.
The interface can be
changed using an optional
interface board.
6
EnglishGermanChineseKorean

Names of Parts
When top cover is opened
¡Thermal head
¡Paper holder
¡Paper sensor
¡Platen roller
¡Paper holder
slide lever
¡Paper holder
¡Ribbon unit
¡Paper sensor
¡Platen roller
¡Paper holder
slide lever
[For CT400iDT Series]
[For CT400iTT Series]
7
EnglishGermanChineseKorean

Names of Parts
(When front cover is open)
(When front cover is open)
¡Cutter top knife
¡Cutter bottom knife
¡Cutter unit
¡Paper holder
¡Paper sensor
¡Platen roller
¡Paper holder
slide lever
¡Separation unit
When top cover is opened
[Cutter Type]
¡Paper holder
slide lever
¡Backing paper
discharge outlet
¡Platen roller
¡Paper holder
¡Paper sensor
[Separation Type]
8
EnglishGermanChineseKorean

Names of Parts
[Operation Panel]
¡[POWER] lamp
[When the front cover is opened]
Illuminates (green) when the power switch is on.
¡[ERROR] lamp
Illuminates or flashes (red) when an error occurs.
¡[ON LINE] lamp
Illuminates (green) when reception is possible.
¡[ON LINE] key
This is press to stop/restart and
to terminate data reception.
¡[FEED] key
¡Power switch
¡Separator connector
¡Cutter connector
¡Error display lamp
¡Adjustment dial
¡Dip switches
This feeds the paper when pressed
while the printer is online.
(DSW1)
9
EnglishGermanChineseKorean

Loading the Roll Paper [Continuous, Cutter, Linerless types]
While pressing the paper
holder slide lever (1),
adjust the paper holder to
match the paper size (2).
Press down the opening
lever (1) on the right side
of the printer to release
the lock and open the top
cover (2).
Load the paper into the
paper holder.
After pulling out the
paper, pass the paper
through the paper sensor.
1
2
3
4
Paper sensor
(2)
(2)
(1)
(1)
10
EnglishGermanChineseKorean

Close the top cover.
At this time, press on the
top where shown by the
arrows to close the cover
until you hear the lock
engage.
(1) Press the [FEED] key
to feed the leading edge
of the paper.
(2) Finally, press the [ON
LINE] key to bring the
printer online.
After printing, the thermal head and surrounding area are hot. Be careful not
to get burned when replacing paper immediately after printing.
Touching the thermal head with bare hands could result in an injury.
Be careful not to become injured when replacing paper.
Be careful not to pinch your fingers when closing the top cover.
Caution
5
6
(1)
(2)
Loading the Roll Paper [Continuous, Cutter, Linerless types]
11
EnglishGermanChineseKorean

Loading fan-folded paper [Continuous, Cutter types]
Press down on the
open lever (1) on the
right side of the printer
to release the lock and
then open the top
cover (2).
Open the window from
the back edge.
Pass the paper through
the opened window.
1
2
3
Window
(1)
(2)
12
EnglishGermanChineseKorean

Loading fan-folded paper [Continuous, Cutter types]
While pressing the paper
holder slide lever (1), adjust
the paper holder to match
the paper size (2).
After pulling out the paper,
pass it through the paper
sensor.
Close the top cover.
At this time, press on the
top where shown by the
arrows to close the cover
until you hear the lock
engage.
(1) Press the [FEED] key to
feed the leading edge of the
paper.
(2) Finally, press the [ON
LINE] key to bring the
printer online.
4
5
6
Be careful not to become injured when replacing paper.
After printing, the thermal head and surrounding area are hot. Be careful not
to get burned when replacing paper immediately after printing.
Be careful not to pinch your fingers when closing the top cover.
Caution
Touching the thermal head with bare hands could result in an injury.
(1)
(2)
(1)
(2)
Paper sensor
13
EnglishGermanChineseKorean

Loading Roll Paper [Separator]
Open the front cover forward.
Press down on the open
lever (1) on the right side of
the printer to release the lock
and then open the top cover
(2).
While pushing on the [PUSH
DOWN] mark on the
separator unit, tilt it forward
(1) to open the separator
unit (2).
When the separator unit is
opened, the separator bar
will automatically open in the
direction shown by the
arrow.
1
2
3
4
Separator bar
[PUSH DOWN] mark
Separator bar
(1)
(2)
(1)
(2)
14
EnglishGermanChineseKorean

Loading Roll Paper [Separator]
Pass the backing paper
between the separator unit
and the platen roller.
Set the backing paper so
that it is below the separator
plate.
Press on the [PUSH DOWN]
mark on the separator unit in
the direction shown by the
arrows to close it.
If the backing paper is slack,
turn the labels to wind it up
and remove the slack.
Close the front cover.
6
7
8
Peel off labels to expose 15
cm of only the backing paper
and then load the paper into
the paper holder.
After pulling out the paper,
pass it through the paper
sensor.
5
Platen roller
Separator unit
Separator plate
[PUSH DOWN] mark
15
EnglishGermanChineseKorean

Loading Roll Paper [Separator]
Be careful not to become injured when replacing paper.
After printing, the thermal head and surrounding area are hot. Be careful not
to get burned when replacing paper immediately after printing.
Be careful not to pinch your fingers when closing the top cover.
Caution
Touching the thermal head with bare hands could result in an injury.
Close the top cover.
At this time, press on the top
where shown by the arrows
to close the cover until you
hear it lock closed.
9
(1) Press the [FEED] key to
feed the leading edge of the
paper.
(2) Finally, press the [ON
LINE] key to bring the printer
online.
10
(1)
(2)
16
EnglishGermanChineseKorean

Printing Position Adjustment
▲Printing Standard Position
The printing standard position when using labels is the top of the label.
The printing standard position when using fan folded paper is the top of the match mark on the back of
the fan folded paper.
If the printing standard position is not at the correct position, open the top cover and used the flat head
end of the dial adjustment screwdriver that comes with the printer to adjust the printing standard
position.
(Use the dial adjustment screwdriver.)
Turn left: Moves the printing position forward relative
to the printing direction.
Turn right: Moves the printing position backward relative
to the printing direction.
Label
Fan folded paper
Paper feed direction
Label
Match mark
Standard position (Vertical position 1 dot)
Paper feed direction
Fan folded paper
Match mark
Standard position (Vertical position 1 dot)
17
EnglishGermanChineseKorean

Cut Position Adjustment
▲Label Cut
▲Cutting paper with perforated lines
The cut position when using labels is the designated cut position between labels on the blank area (the
area where there is only backing paper).
If the cut position is not the prescribed position, open the top cover and use the Philips head end of the
dial screwdriver attached to the printer unit to adjust the cut position.
Absolutely do not cut on top of the labels because the adhesive will stick to the cutter knife and cause
poor cutting.
Turn left: Stops the label behind the printing direction.
Turn right: Stops the label in front of the printing direction.
For paper with perforated lines, cutting on or in front of the perforated lines is prohibited.
Cutting in those locations could cause the printer to malfunction.
If cutting on or in front of the perforated line, use the Philips head end of the dial screwdriver
attached to the printer unit to adjust the [OFFSET] so that the cut is behind the perforated line.
The following items are specifications for paper that can be used by this printer, so check them
before using the printer.
(1) Paper thickness (including the backing paper) is 0.08 mm to 0.19 mm. For details contact
the store, dealer, or Support Center.
(2) Cut accuracy is ±1.5 mm.
(3) The cutter unit has a valid cut pitch of 20 to 400 mm. However, the cut size may be
restricted depending on the usage conditions.
(4) The perforated line +1 mm is the cut prohibited zone (Fig. 1).
(5) The folded perforated line +4 mm to +25 mm of fan folded paper is the cut prohibited zone
(Fig.2).
(6) After adjusting the volume, issue about 2 to 5 labels to stabilize the cut position.
(Use the dial adjustment screwdriver.)
(Fig. 1) (Fig. 2)
25mm
4mm
Folded perforated
line
Cut prohibited
zone
Perforated
line
Cut position
Labels
Backing
paper
(Fig. 1) (Fig. 2)
18
EnglishGermanChineseKorean

Loading the Carbon Ribbon
[Loading the Carbon Ribbon]
Press down on the open
lever (1) on the right side of
the printer to release the
lock and open the top cover
(2).
Pull the ribbon unit’s [PULL]
mark to pull the ribbon unit
forward.
If the carbon ribbon width is over 92 mm and under 76 mm, use
Steps 3 to 6 to set the carbon ribbon.
1
2
For a carbon ribbon with a
width greater than 92 mm,
load the carbon ribbon
directly into the ribbon unit.
For a carbon ribbon with a
width under 76 mm, use a
ribbon adapter to load it into
the ribbon unit.
Ribbon adapter
[PULL] mark
(1)
(2)
19
EnglishGermanChineseKorean

After setting the carbon
ribbon in the right side of
the ribbon supply unit (1),
press the core guide (2).
3
After setting the ribbon core
in the right side of the
ribbon windup unit (1),
press the core guide (2).
4
Pass the carbon ribbon
from the ribbon supply unit
beneath the thermal head
and to the ribbon windup
unit. Affix the carbon ribbon
to the ribbon core using
tape, etc., and wind it up
several times in the
direction shown by the turn
arrow.
Be sure to pass the carbon
ribbon between the thermal
head and the label restraint.
Do not pass it beneath the
label restraint.
5
Ribbon supply unit core guide
Ribbon windup unit core guide
Label restraint
Loading the Carbon Ribbon
[Loading carbon ribbons with a width greater than 92 mm]
(1)
(2)
(1)
(2)
20
EnglishGermanChineseKorean
This manual suits for next models
6
Table of contents
Other SATO Label Maker manuals
SATO
SATO TH2 Series User manual
SATO
SATO RWG500 User manual
SATO
SATO s84ex User manual
SATO
SATO Argox O4-250 User manual
SATO
SATO CX Series User manual
SATO
SATO Argox D2 Series User manual
SATO
SATO Argox MX-200 Series User manual

SATO
SATO SX4M User manual
SATO
SATO CLLM Basic 412e User manual
SATO
SATO CX208 User manual

