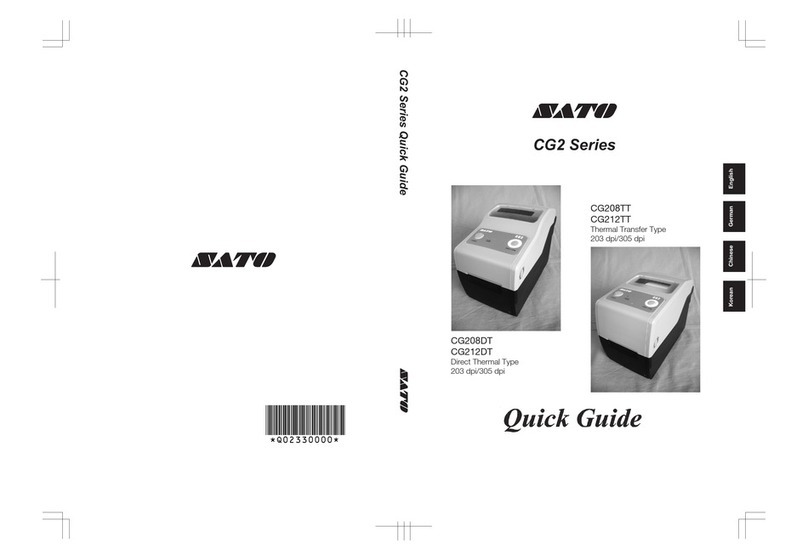
SATO CX208 User manual

CX208/212
Desktop Label Printer
®
USER’S
GUIDE

SATO America, Inc.
10350-A Nations Ford Rd.
Charlotte, NC 28273
MainPhone:(704) 644-1650
Technical SupportHotLine:(704) 644-1660
Fax:(704) 644-1661
http://www.satoamerica.com
© Copyright 2001
SATO America, Inc.
Warning: This equipment has been tested and found to comply with the lim-
its for a Class B computing device pursuant to Part 15 of the FCC rules.
These limits are designed to provide reasonable protection against harmful
interference in a residential installation. This equipment generates, uses, and
can radiate radio frequency energy and, if not installed in accordance with
the instructions may cause harmful interference to radio communications.
However, there is no guarantee that interference will not occur in a particu-
lar installation. If this equipment does cause harmful interference to radio or
television reception, which can be determined by turning the equipment off
and on, the user is encouraged to try and correct the interference by one or
more of the following measures:
•Reorient or relocate the receiving antenna.
•Increase the separation between the equipment and the receiver.
•Connect the equipment into an outlet or a circuit different from that
to which the receiver is connected.
•Consult an experienced radio/TV technician for help.
Caution: The FCC warns the users that changes or modifications of the unit
not expressly approved by the party responsible for compliance could void
the user’s authority to operate the equipment.
All rights reserved. No part of this document may be reproduced or issued
to third parties in any form whatsoever without the express permission of
SATO America, Inc. The material in this document is provided for general
information and is subject to change without notice. SATO America, Inc.
assumes no responsibility for any errors that might appear.
PN9001091Rev.B

WARRANTY
1. SATO America, Inc. warrants that, when purchased from an authorized
SATO America, Inc. distributor, this printer is in good working order
and is free from defects in workmanship and materials.
2. The warranty period is one (1) year from the date of purchase, exclud-
ing the print head. The warranty period for the print head is one (1)
year or 500,000 linear print inches, whichever comes first.
3. Modification of the printer, improper use or maintenance will void the
printer warranty. The use of non-approved thermal carbon ribbon or
physical damage to the print head will void the print head warranty.
4. You may obtain warranty service for this printer by returning it to:
SATO America, Inc., 545 Weddell Drive, Sunnyvale, CA 94089.
5. You must prepay all shipping charges to the above address and assume
all risk of loss or damage in shipment. You must also include proof of
purchase of the printer, including the purchase date.
6. The printer will be repaired or replaced, at SATO America, Inc.’s op-
tion, and returned to you prepaid via United Parcel Service. Standard
warranty repair is five (5) working days, but SATO America, Inc. can-
not guarantee that all repairs will be completed within this time.
7. If, on our inspection, it is determined that the warranty has been voided
for any reason, you will be notified prior to the initiation of any charge-
able repair activity.
8. The foregoing warranties are the only warranties provided by
SATO America, Inc. in connection with the products covered by
this warranty, and are in lieu of all other warranties whether ex-
pressed or implied. The remedy provided herein is the sole remedy
should the printer fail to conform to the foregoing warranties.
SATO America, Inc. hereby disclaims all other warranties, includ-
ing, without limitation, the implied warranties of merchantability
and fitness for a particular purpose.
9. SATO America, Inc. shall not be liable for any incidental or conse-
quential damages or any other loss or expense directly or indirectly
arising from any use of the printer by you or any other person, or
the failure of the printer to operate. In no event shall SATO Amer-
ica, Inc. be liable to you or any other person for damages exceeding
the amount paid by you for the printer.
SATOAmerica,Inc.10350-A Nations Ford Rd., Charlotte, NC 28273

PN9001091Rev.B
SATO America, Inc.
10350-A Nations Ford Rd.
Charlotte, NC 28273
®

Table of Contents
What You Get ...............................1
Controls, Indicators, and Connections ..................2
Printer Power Connection .....................2
Printer Interface Connection....................4
Setup ...................................4
Loading Labels or Tags ......................4
Loading Ribbon ..........................6
Sensor Calibration .........................8
Selecting the Label Sensor Type..................8
Using the Printer ..............................9
Printing a Self-test Label .....................9
Feeding Blank Labels .......................9
Label Reprint ...........................9
Sending Data to the Printer ....................9
Printer Ready/Standby/Reset Control ...............9
Printing Labels ..........................10
Controlling the Printer Using Direct Commands ........10
Routine Maintenance ...........................11
What To Do If... ..............................12
READY light is not lit ......................12
READY light glows red .....................12
Self-test label will not print ...................13
Labels will not feed........................13
Host stops responding ......................13
Labels feed continuously .....................14
Poor print quality .........................14
Common Problems and Their Solutions ................12
READY light is not lit ......................12
READY light glows red .....................12
Selt-test label will not print....................13
Labels will not print .......................13
Host stops responding or “printer not ready” message......13
Technical Support.............................14
Printer Specifications...........................15
Communication Ports ..........................16
Standard Printer Cables .....................16
Serial Port Parameters ......................16
CX Software................................17
Label Wizard CX .........................17
Windows Drivers .........................18
Media and Supplies ............................18
PN9001091Rev.BPagei
CX208/212 User's Guide


What You Get
The SATO CX208/212 Printers come complete and ready to install and
print labels. Your CX208/212 shipping carton contains the following items:
•CX208/212 Printer
•Parallel Printer Cable
•40 Watt Power Supply (80 Watt Supply optional)
•Roll of 4"x 4" Labels
•Thermal Transfer Ribbon (not supplied with the CX208DT)
•User’s Guide
•CD-ROM Containing:
Label Wizard CX Label Design and Production Software
Label Wizard CX Manual Files
CX208/212 User’s Guide
CX208/212 Programming Reference Guide
Windows Printer Driver for CX208/212
Label Wizard SE Evaluation Software
SATO Product Catalog
Adobe Acrobat Reader
®
for viewing and printing the manuals.
PN9001091Rev.BPage1
CX208/212 User's Guide

Controls, Indicators, and Connections
Device Name Primary Function Use
FEED Button Advances print media
PRESS - to advance media
PRESS while pressing READY
indicator - to print test label
PRESS - to pause printing during
batch mode operation
READY
Indicator
ON-OFF Button
Shows printer status
Places printer in On-Line
or Off-Line mode
GREEN - Printer ready for data
OFF - Printer busy, or Off-Line
RED - Printer needs attention
PRESS to switch to/from Off-Line
or to reset the printer
Power Input Connects to power supply Connect to transformer provided
with printer
Serial Port Data input DB9 female connector for
connection to host controller,
RS232 interface
Parallel Port Data input Centronics compatible connector
for connection to host controller
Print Head
Release Unlocks print head Push both releases toward rear
of printer to release print head
Top Cover Protects print media and
mechanism Lift to open
Push outward at hinge to remove
Printer Power Connection
1. Plug the output of the AC power supply
provided with the printer into the connec-
tor on the bottom panel.
2. Connect the supply into an AC outlet
having the proper voltage.
Note:
CX208/212 printers consume very little power
when idle, so are not equipped with a power
switch. Pressing the READY indicator/ON-OFF (a
combined control) will reset the printer and switch
it from Off-Line to On-Line mode.
Important!
The required AC voltage is marked on the power supply.
Confirm that your AC voltage matches the power supply
requirements. Do not use any power supply other than
the one provided with the printer.
Page2PN9001091Rev.B
CX208/212 User's Guide

Printer Interface Connection
1. Connect the supplied interface cable to the parallel printer port on the
computer.
2. Connect the other end to the parallel input port on the printer.
PN9001091Rev.BPage3
CX208/212 User's Guide
Ready LED Indicator/
ON-OFF Button
Top Cover
FEED Button
Paper
Guide
Print Head
Release
Print Head
Release
Ribbon
Cover
Parallel
Port Wall Mount Slots
Power Cable
Routing Channel
External Media
Feed Knockout
Power Input
Serial
Port

Page4PN9001091Rev.B
CX208/212 User's Guide
Media
Roll
Center Justified
Paper Guides
Paper Guide
Lock
Print Head
Drive Platen
Sensor Light
Source
Labels
Print Head
Release
Label Exit
Slot

Setup
Loading Labels or Tags
1. Lift open the top cover.
2. Press the two print head releases back to unlock the print head.
3. Unwrap the new media, and unwind a few labels from the roll. La-
bels should be wound face-in for the best results.
4. Slide the center justified Paper Guides apart until the label roll will
drop down between them.
5. Place media roll in the paper tray such that the media unwinds from
the bottom of the roll toward the front of the printer. The label imag-
ing surface must face up as it passes under the print head.
6. Lock the Paper Guides in place by pressing down on the green lock-
ing tab.
7. Lift the print head and slip the free end of the media under the print
head and out the front paper exit
8. Lower the print head and press it down firmly until it locks closed on
both sides.
9. Close the top cover.
10. Wait until the Ready Indicator glows green and press the FEED but-
ton to feed a label or to resume printing.
Loading Ribbon
The CX208/212TT thermal transfer printer transfers ink from a ribbon to
the label to produce an image.
1. Lift open the top cover.
2. Press the two print head releases back to unlock the print head and
open the Ribbon Cover to expose the ribbon take-up spindles.
3. Unwrap the new ribbon and unwind about 4" from the roll. The end of
the ribbon is attached to a take-up core.
4. Observe the notches on both ends of the supply core and the take-up
core. These notches must fit on the corresponding nibs on both the sup-
ply and take-up spindles.
5. Roll several turns of ribbon on the take-up core, winding to the under-
side as shown. The dull (coated) side of the ribbon must be on the out-
side of the take-up roll.
PN9001091Rev.BPage5
CX208/212 User's Guide

Page6PN9001091Rev.B
CX208/212 User's Guide
Left Take-up
Core Spindle
Spring Loaded
Take-up Spindle
Left Supply
Spindle Spring Loaded
Supply Spindle
Take-up Core
Ribbon Supply Roll
Spindle Notches
Spring Loaded
Take-up Spindle
Supply Roll Mounted
on Spindles
Supply Roll
Take-up Core
Ribbon Path
Ribbon Cover

6. Place the take-up core (ribbon unrolling from the top side) into the left
take-up spindle. The take-up spindles are the top set of spindles.
7. Pull out the spring loaded knob on the right take-up spindle and place
the right end of the take-up core into the right spindle, lining up the
notches with the spindle nibs.
8. Pull the ribbon down and over the print head and insert the supply core
onto the left supply spindle, making sure the notches in the core fit over
the nibs.
9. Pull out the spring loaded knob on the right supply spindle and place
the right end of the supply core into the right spindle, lining up the
notches with the spindle nibs.
Note:
Make sure the (coated) dull side of the ribbon is to the outside where it will
be in contact with the label media.
10. Turn the supply spindle to pull the ribbon over the print head without
any slack. Check to make sure there are no ribbon wrinkles.
11. Close the Ribbon Cover and lower the print head. Press the print head
down firmly until it locks closed on both sides.
10. Close the top cover.
11. Wait until the Ready Indicator glows green and press the FEED button
to feed a label or to resume printing.
Sensor Calibration
The CX208/212 uses a single sensor element for both direct thermal (with-
out a ribbon) and thermal transfer (with a ribbon) printing. The method of
printing can be selected by using configuration settings in the software pro-
gram or by sending the command directly to the printer (see page 92 of the
Programming Guide).
The mode of operation
can be determined by
running a Self Test Label
(see page 9). The
CX208DT direct thermal
printer cannot be used for
thermal transfer printing
since there is no provi-
sion for controlling a rib-
bon and it is always in the
Direct Thermal mode. It
will ignore any com-
PN9001091Rev.BPage7
CX208/212 User's Guide
Label Gap
and Eye
Mark Sensor
Print
Head
Gap Sensor
Light Source

mands that try to set it to the Thermal Transfer mode.
A CX208/212TT unit is calibrated at the factory for use with SATO Stan-
dard ribbon and media. Other ribbon/media combinations may or may not
index properly with these settings. If you are experiencing difficulty with la-
bel indexing and are not using SATO labels and/or ribbon, it may be neces-
sary to recalibrate the unit for your particular ribbon/media. This can be
done by selecting the Calibration buttons provided in the Label Wizard CX
software or the CX208/212 Windows Printer Driver. If you are not using ei-
ther of these, you will have to send the calibration command directly to the
printer. See the Programming Guide, page 86, for instructions on using the
Sensor Calibration command.
Important!
The ribbon must be installed in the printer when calibrat-
ing in the thermal transfer mode.
Selecting the Label Sensor Type
CX208/212 printers can use Eye-Mark, gap, or notch label sensing. The
sensing method used by the printer must match to the media being used. If
you are using label printing software, it should provide a means to set up
these parameters. See your software documentation for details. If you are
writing your own software or controlling the printer using direct commands,
you must use printer commands to set up the print mode and sensing
method. Refer to the programming information provided in the Program.pdf
file for further information.
Note:
The Program.pdf file is in Adobe Acrobat format. To view it, you must install
Adobe Acrobat Reader which is included on the CD-ROM in the AcroRead
directory.
Selecting the Label Sensor Type
CX200 printers can use Eye-Mark, gap, or notch label sensing. The sensing
method used by the printer must match to the media being used. If you are
using label printing software, it should provide a means to set up these pa-
rameters. See your software documentation for details. If you are writing
your own software or controlling the printer using direct commands, you
must use printer commands to set up the print mode and sensing method.
Refer to the programming information provided in the Program.pdf file for
further information.
Note:
The Program.pdf file is in Adobe Acrobat format. To view it, you must install
Adobe Acrobat Reader which is included on the CD-ROM in the AcroRead
directory.
Page8PN9001091Rev.B
CX208/212 User's Guide

Using the Printer
Printing a Self-test Label
Printing a self-test label checks the printer’s overall operability. To run a
self-test, confirm that the printer is loaded and connected to AC power and
no print jobs are in process. Then:
1. Press and hold in the READY Indicator.
2. Press and release the FEED button.
3. The printer should begin printing a self-test label. Release the
READY indicator after printing starts.
4. After the self-test label finishes printing, press the READY indicator
twice to reset the printer and restore normal operation.
Important!
The printer will be in hex dump mode after printing the
self-test label. It cannot print normal labels in hex dump
mode. The printer will return to normal operation after
you reset it as described in step 4 above.
Feeding Blank Labels
To feed a label, press and release the FEED button with the printer Off-
Line. Press and hold in the FEED button to feed multiple labels.
Label Reprint
If the last label printed has not been cleared from the print buffer by press-
ing the READY indicator to take the printer Off-Line, then pressing the
FEED button will cause the last printed label to be reprinted.
Sending Data to the Printer
To print labels using data sent from a host computer or terminal:
1. Connect the host and printer serial or parallel ports together using a
correctly wired interface cable (see page 16 for wiring information).
2. If you are using the serial port, confirm that the host and printer are
using the same communications parameters.
3. Confirm that the READY indicator is glowing green.
4. Send your data to the printer.
Printer Ready/Standby/Reset Control
The CX208/212 does not have a power switch, but you can effectively turn
it “off” by pressing the READY indicator. This resets the printer’s micro-
processor and places the printer in Off-Line. Resetting the microprocessor
will:
PN9001091Rev.BPage9
CX208/212 User's Guide

•stop any printing.
•delete the label format in process from memory.
•reset the printer communication ports.
•return all printer parameters to their default (first power-on) state.
Pressing the READY indicator a second time will return the printer to On-
Line mode (its default condition). Resetting the printer in this manner does
not does not harm it in any way, nor does it affect the contents of nonvola-
tile RAM or remove any stored objects. The effect is the same as if you had
unplugged and reconnected the printer power supply.
Printing Labels
To print labels, the host computer sends commands to the printer via the se-
rial or parallel communications port. If you are using the Label Wizard CX
label printing software supplied on the CD-ROM, the computer and soft-
ware control the entire printing process. You only need to set up the printer,
start your label printing program, and follow its instructions. If you are us-
ing another vendor’s software package, contact the software supplier or
manufacturer if you encounter difficulties. A complete Reference Manual
for the Label Wizard CX label design and printing software is included on
the CD-ROM. If you want to print labels from another Windows applica-
tion, the CX208/212 Windows Printer Driver must be installed. It is found
on the CD-ROM and must be loaded using the standard Windows printer in-
stallation instructions.
Controlling the Printer Using Direct Commands
You can also produce labels by sending commands directly to the printer.
Simple ASCII commands control the printer. You can write command files
using any text editor program that can output ASCII text (including the con-
trol codes). Since printer programming is potentially complex, program-
ming information is not provided here. A printer command reference and
basic programming procedures are provided on the CD-ROM packed with
the printer. The file CXManual.pdf on the disk is in Adobe Acrobat format,
readable using the Adobe Acrobat Reader provided in the AcroRead direc-
tory on the CD-ROM or can be downloaded free of charge from
http://www.adobe.com. This program will allow you to search the contents
of the manual and/or print a hard copy. If you need programming informa-
tion and are not using Windows (or cannot read the CXManual.pdf file for
any other reason), contact our Technical Support department for assistance
(please see page 14 for contact information).
Page10PN9001091Rev.B
CX208/212 User's Guide

Routine Maintenance
SATO America printers need very little maintenance other than occasional
cleaning. Clean the printer body as required, using soft cloth moistened with
a mild detergent cleaner. Clean the print head if it appears dirty or if print
quality is poor. Print head cleaning is easy and fast:
1. Unlatch and raise the print head if it is not already raised and latch it
in the open position.
2. Using a SATO Direct Thermal Print Head Cleaning Sheet or a soft
cotton sheet moistened with 99% pure isopropyl or denatured alco-
hol, clean all dirt and label residue from the print head, paying par-
ticular attention to the “burn line” (this is the thin black line near the
front edge of the print head). DO NOT USE SATO THERMAL
PRINT HEAD AND PLATEN CLEANER, it contains solvent that
can attack the plastic frame.
Caution!
Do not clean the print head or drive roller using abrasive
or metallic objects, ammonia-based cleaners or other
harsh chemicals. These practices can cause serious dam-
age and will void the warranty.
3. Wipe the drive roller with the cleaning cloth. To reach all portions of
the drive roller, press the FEED button. The roller will rotate 1/4 turn
each time you press the FEED button when the print head is
unlatched.
Caution!
Keep all objects clear of the drive roller when you press
the FEED button.
4. Confirm that the label sensor is unobstructed. Clean away any ob-
struction with a soft brush if necessary.
5. Resume the media loading procedure, or if there is already media in
the printer, lower and lock the print head.
6. Resume normal operation.
PN9001091Rev.BPage11
CX208/212 User's Guide

What To Do If...
SATO printers are very reliable, so printing problems are unlikely. If you do
think you have a printer problem, proceed as follows:
1. Confirm that the printer has the right media installed, and that it is
loaded correctly. See page 4 for media loading instructions.
2. Confirm that the printer is connected to its power supply and the sup-
ply is plugged into an AC outlet having the proper voltage.
3. Open the print head and inspect the media path. Remove any obstruc-
tions, and clean the print head and drive roller according to the in-
structions on page 11.
4. Press down firmly on both print head latches to confirm that they are
closed.
5. Confirm that the printer READY indicator glows green.
6. Print a self-test label as described on page 9.
7. Press FEED to confirm that the printer will feed a label.
8. Review the common problems described in the following section.
9. If these steps do not correct the problem, contact your SATO Amer-
ica dealer or our Technical Support Department. You will find Tech-
nical Support contact information on page 14.
Note:
The information here assumes you are using label printing software. If you
are programming the printer, please review the information in the CXMan-
ual.pdf file located on the CD-ROM.
Common Problems And Their Solutions
READY light is not lit
Double-check the AC source and the power supply connections. Disconnect
the cable between the printer and host, then reset the printer as described on
page 8. If the READY light glows green with the host disconnected, suspect
a host computer or cabling problem.
READY light glows red
1. Press the FEED switch to assure that the printer is not paused in
batch mode printing.
2. Confirm that the print media is not exhausted.
3. Confirm that the print head is securely latched down on both sides.
Page12PN9001091Rev.B
CX208/212 User's Guide

4. If you have been printing many labels, the printer may have over-
heated. Normal operation will resume after the printer has cooled suf-
ficiently.
Self-test label will not print
1. If printing in the direct thermal mode, confirm that you have loaded
direct thermal media.
2. Disconnect the cable between the printer and the host computer. Re-
set the printer as described on page 10. Then try to print a self-test la-
bel again.
Labels will not feed
1. Confirm that the print media is loaded correctly.
2. Reset the printer as described on page 10. Confirm that the printer
LED indicator glows green. Press the FEED button.
3. If the printer still does not feed, disconnect the communications cable
and repeat step 2. If the printer feeds with the cable disconnected,
suspect a problem with the host computer or cable.
Host stops responding or displays “printer not ready” message
1. Review your software setup, following the instructions provided with
the software.
2. Confirm that the host-to-printer communication cable is connected
and undamaged. If using the serial port, confirm that you are using a
null modem cable or adapter.
3. If using the serial port, confirm that the host and printer are both us-
ing the same serial port parameters. The self-test label shows the cur-
rent printer serial port parameters.
4. If using a communications switch between the host and printer, re-
move the switch and connect the printer directly to the host.
5. Reset the printer as described on page 10, reset the host computer
and software, and try printing again.
PN9001091Rev.BPage13
CX208/212 User's Guide

Labels feed continuously
1. Check that the print media is loaded correctly.
2. Confirm that the sensor type (Eye-Mark or gap) in your software
setup matches your print media.
Poor print quality
1. Confirm that the print media is properly loaded, and there is no side-
to-side motion of the paper as it feeds through the printer.
2. Check your software’s print darkness and print speed settings. These
settings may need adjustment for optimum results.
3. Try different print media. Old or inferior quality media will degrade
print quality.
4. If you are printing in the direct thermal mode, make sure you are us-
ing direct thermal labels.
Technical Support
Please contact your local dealer for technical support. Your dealer is knowl-
edgeable about SATO America printers, printing software, and your unique
system. If you still need technical assistance on your CX208/212 after con-
tacting your dealer, 90 days of free telephone support is provided to all us-
ers who have returned the filled in registration card. The 90 day period
starts with the receipt of your first telephone support call. If you are having
difficulty with application software other than that supplied with the printer,
please contact the software vendor for support. SATO America cannot pro-
vide support for third party software problems.
The Technical Support Department can be reached at 408-745-1379,
8 AM to 5 PM Pacific Time, Monday through Friday, or FAX them at 408-
745-1309. If you must return any products to the factory, first obtain a re-
turned material authorization number (RMA) from our Technical Support
Department. When calling, please have your printer model number and se-
rial number handy.
Unlimited support for the CX208/212 is provided via fax at 408-745-1309
information is available in the Tech Tips page at http://www.satoamer-
ica.com.
Page14PN9001091Rev.B
CX208/212 User's Guide
Other manuals for CX208
2
This manual suits for next models
1
Table of contents
Other SATO Printer manuals
SATO
SATO GL 4xxe Series Quick guide

SATO
SATO MB200 User manual
SATO
SATO HT200e User manual
SATO
SATO GL408e User manual
SATO
SATO HT200e User manual
SATO
SATO M8485S User manual
SATO
SATO CL608VA Use and care manual
SATO
SATO MR-4206 User manual
SATO
SATO Argox I4 Series User manual
SATO
SATO XL400 Use and care manual
