I
English
Safety Precautions
Pictographic Symbols
This instruction manual and the printer labels use a variety of pictographic symbols to facilitate safe and correct use of the printer and to
prevent injury to others and property damage. The symbols and meanings for them are given below. Be sure to understand these symbols
well before reading the main text.
This section describes how to use the printer safely. Be sure to read it carefully before using the printer.
Ignoring the instructions
marked by this symbol and
erroneously operating the
printer could result in death or
serious injury.
Ignoring the instructions
marked by this symbol and
erroneously operating the
printer could result in injury or
property damage.
Example Pictographs
Warning
Caution
Warning
The pictograph means “Caution is required.” A specific
warning symbol is contained inside this pictograph (The symbol
at left is for electric shock).
The pictograph means “Should not be done.” What is
specifically prohibited is contained in or near the pictograph
(The symbol at left means “Disassembly prohibited”).
The pictograph means “Must be done.” What is specifically to
be done is contained in the pictograph (The symbol at left
means “Unplug the power cord from the outlet”).
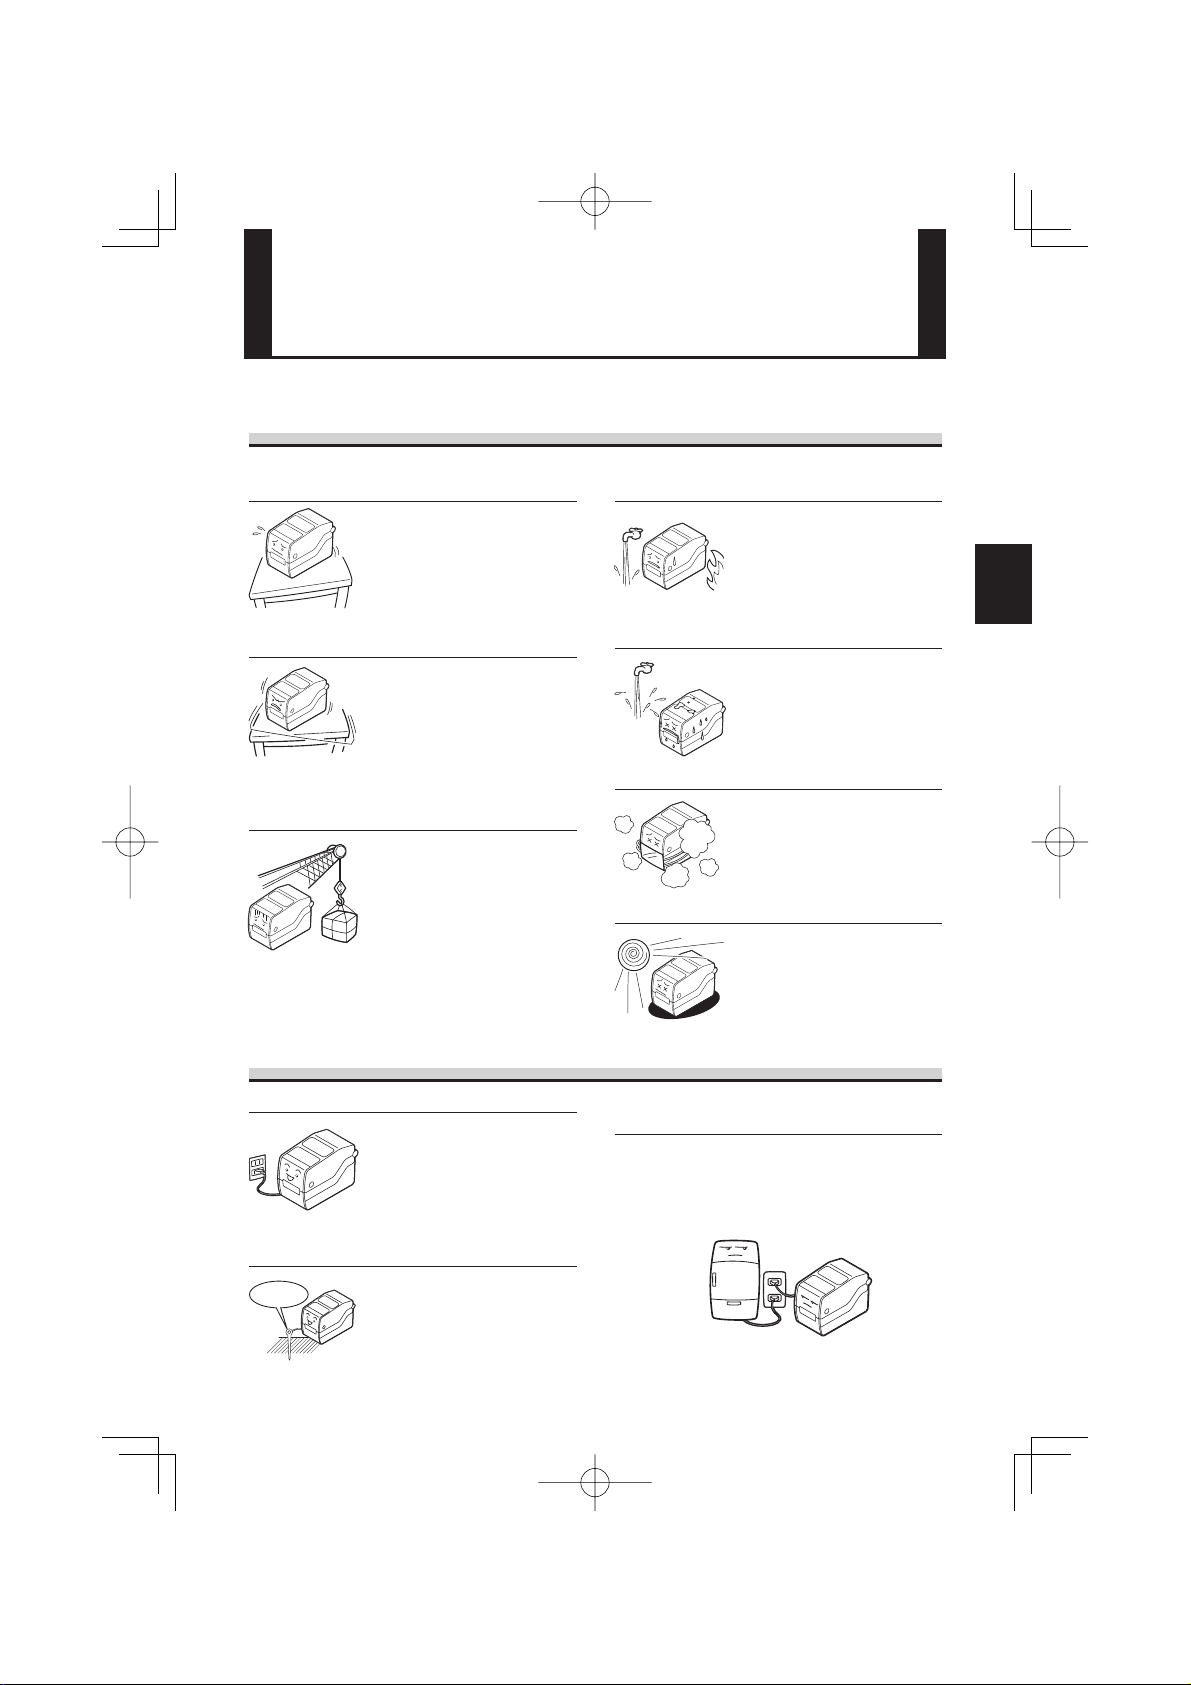
Do not set on an unstable area
•Do not set on an unstable area,
such as a wobbly table or
slanted area or an area subject
to strong vibration. If the printer
falls off or topples over, it could
injure someone.
Always ground the connections
•Always connect the printer’s
ground wire to a ground. Not
grounding the ground wire
could result in electric shock.
Do not use the printer when
something is abnormal about it
Do not disassemble the printer
Regarding the cutter
•Do not touch the cutter with
your hands or do not put
something into the cutter. Doing
so could result in an injury.
Using the head cleaning fluid
•Use of flame or heat around the
head cleaning fluid is
prohibited. Absolutely do not
heat it or subject it to flames.
•Keep the fluid out of reach of
children to prevent them from
accidentally drinking it. If the
fluid is drunk, immediately
consult with a physician.
Handling of the power cord
When the printer has been dropped
or broken
Do not place containers full of water
or other liquid on the printer.
Do not put objects inside the printer
Do not use other than
the specified voltage
•Do not use other than the
specified voltage. Doing so
could result in fire or electric
shock.
•Do not place flower vases,
cups, or other containers
holding liquids, such as water
or chemicals, or small metal
objects near the printer. If they
are spilled and get inside the
printer, immediately turn off the
power switch, unplug the power
cord from the outlet, and
contact the store, dealer, or
Support Center. Using the
printer in this condition could
cause a fire or electric shock.
•Do not insert or drop in metal
or burnable objects inside the
printer’s openings (cable
outlets, etc.). If foreign objects
do get inside the printer,
immediately turn off the power
switch, unplug the power cord
from the outlet, and contact the
store, dealer, or Support
Center. Using the printer in this
condition could cause a fire or
electric shock.
•Do not damage, break, or
modify the power cord. Also, do
not place heavy objects on the
power cord, heat it, or pull it
because doing so could
damage the power cord and
cause a fire or electric shock.
•If the power cord becomes
damaged (core is exposed,
wires broken, etc.), contact the
store, dealer, or Support
Center. Using the power cord in
this condition could cause a fire
or electric shock.
•Do not modify, excessively
bend, twist, or pull the power
cord. Using the power cord in
such a condition could cause a
fire or electric shock.
•If the printer is dropped or
broken, immediately turn off the
power switch, unplug the power
cord from the outlet, and
contact the store, dealer, or
Support Center. Using the
printer in this condition could
cause a fire or electric shock.
•Continuing to use the printer in
the event something is
abnormal about it, such as
smoke or unusual smells
coming from it, could result in
fire or electric shock.
Immediately turn off the power
switch, unplug the power cord
from the outlet, and contact
the store, dealer, or Support
Center for repairs. It is
dangerous for the customer to
try to repair it, so absolutely do
not attempt repairs on your
own.
•Do not disassemble or modify
the printer. Doing so could
result in fire or electric shock.
Ask the store, dealer, or
Support Center to conduct
internal inspections,
adjustments, and repairs.
Version 1 May 5, 2008 Q02330000
©2008 SATO CORPORATION
CG208iE00.inddICG208iE00.inddI 2008/05/1410:07:362008/05/1410:07:36