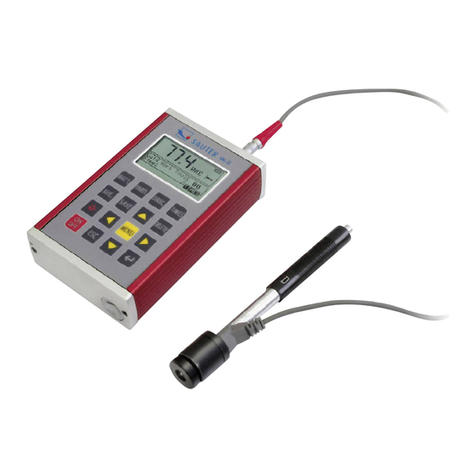
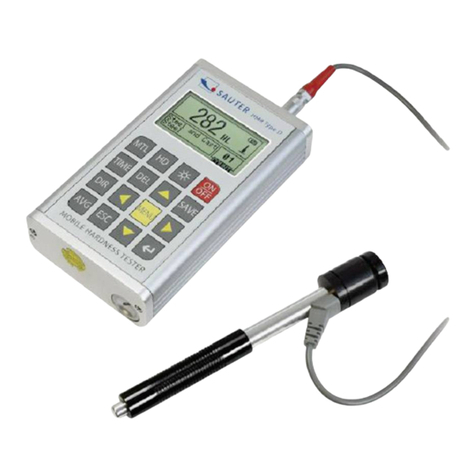
sauter HN-D User manual

Sauter GmbH
Ziegelei 1
D-72336 Balingen
e-mail: info@kern-sohn.com
Phone : +49-[0]7433- 9933-0
Fax: +49-[0]7433-9933-149
Internet: www.sauter.eu
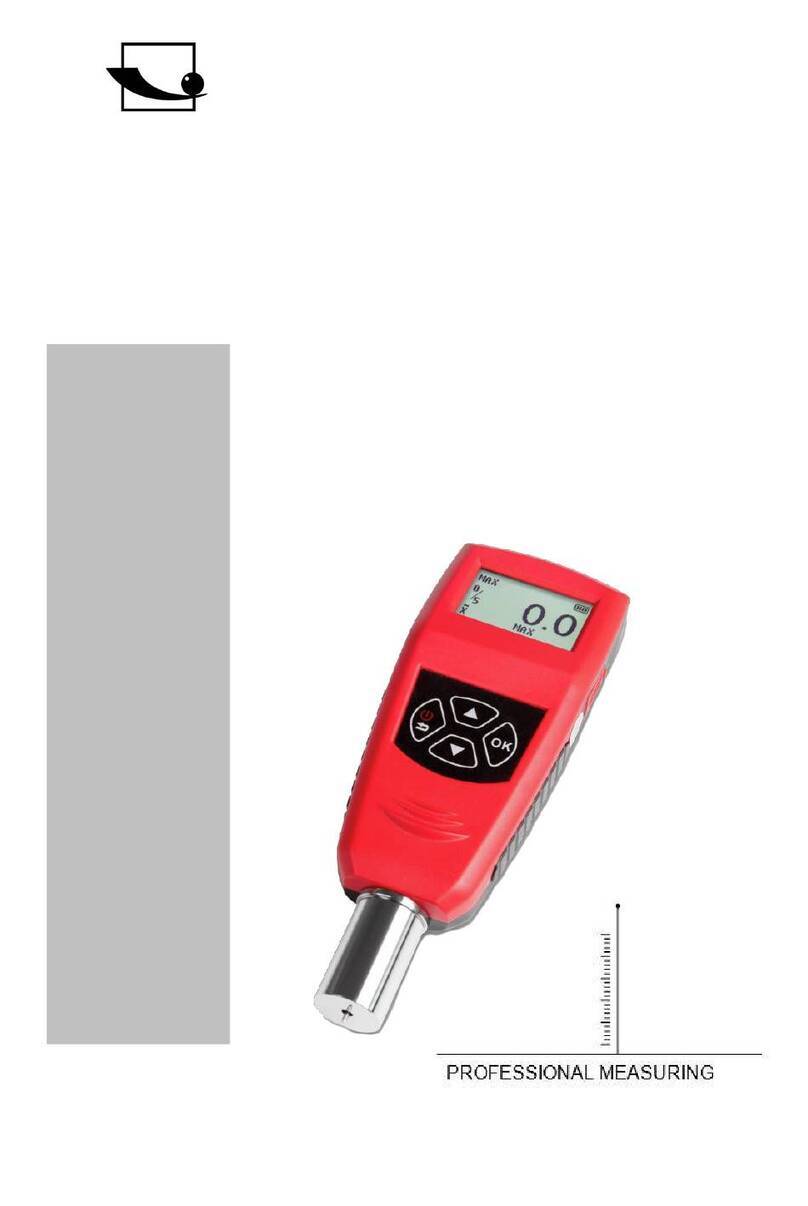
Instruction manual mobile Leeb
hardness tester
SAUTER HN-D
Version 2.0
04/2020
GB
HN-D-BA-d-2020
PROFESSIONAL MEASURING

2 HN-D-BA-e-2020
GB
SAUTER HN-D
V. 2.0 04/2020
Instruction manual mobile Leeb hardness tester
Thank you for purchasing the mobile digital Leeb impact hardness tester from
SAUTER. We hope that you will be very satisfied with the high quality of this device
and its extensive functionality. For any questions, wishes and suggestions we are at
your disposal.
Table of contents:
1Before commissioning.................................................................................. 3
2Summary ........................................................................................................ 3
2.1 Application area Measuring principle .................................................................................... 3
2.2 Hardness value "L.................................................................................................................... 4
2.3 General characteristics............................................................................................................ 4
2.4 Scope of application ................................................................................................................ 4
2.5 Application: Primary industries.............................................................................................. 5
3Technical execution....................................................................................... 5
4Device view .................................................................................................... 5
5Check the supplied accessories................................................................... 5
6Instructions .................................................................................................... 6
6.1 Keys and their functions.......................................................................................................... 6
6.2 LCD display............................................................................................................................... 7
6.3 Settings ..................................................................................................................................... 7
6.4 Format of the stored data...................................................................................................... 10
6.5 Backlit display ........................................................................................................................ 10
6.6 Automatic switch-off.............................................................................................................. 10
6.7 Recharge ................................................................................................................................. 10
7The endurance test...................................................................................... 11
7.1 Check preset........................................................................................................................... 11
7.2 Preparation of the test piece................................................................................................. 11
8Problems and finding solutions ................................................................. 12
9Service and maintenance............................................................................ 13
9.1 Maintenance and care of the rebound sensor..................................................................... 13
9.2 Procedures for maintenance................................................................................................. 13

HN-D-BA-e-2020 3
1 Before commissioning
Before putting the device into operation, check the delivery for any transport damage
to the packaging, the plastic case and the device itself. Should this be the case,
SAUTER must be contacted immediately.
Cautions
Please read the following carefully first:
1. the complete device must not be immersed in water or exposed to rain, which could
cause unforeseeable damage, the battery or the display could be destroyed
2. if the device is not used for a longer period of time, it should be stored in a dry and
cool place, preferably in its original packaging. The ambient temperature should be in
the range of -30°C to +80°C and the relative humidity (RH) 5% to 95%.
2 Summary
2.1 Application area Measuring principle
When the test is performed, a rebound body with a tungsten carbide test tip is driven
with spring force against the surface of the test object from which it rebounds. The
impact and rebound velocities are measured in the following manner: A fixed magnet
in the rebound body generates an induced voltage inthe simple wire coil of the rebound
body during the forward and backward movement. The voltage of the signal is
proportional to the speed of the rebound sensor. The signal processing by the
electronics ensures that the hardness value L can be read on the display and stored.
Modern electronics with energy-saving features ensure a long service life of the
hardness tester.
Figure
The LCD display shows how the HN-D is designed (configured) for the test. Various
function keys allow a quick change of the test settings. No subjective measurement
errors are possible, as the device has a high repetition frequency of the measurement
results. Internal self-diagnostics with error messages ensure a reliable measurement

4 HN-D-BA-e-2020
result. Readings can be automatically deleted from the internal memory or directly
forwarded to a printer. The PC evaluation software enables data analysis.
These conversions to other hardness scales (HRC, HRB, HB, HV, HSD etc.) are
programmed into the electronics and can be shown directly on the display as test
results. All data are stored in the original L-scale to eliminate possible errors with other
conversions.
2.2 Hardness value "L
This value was introduced to measurement technology in 1978 by Dr. Dietmar Leeb. It
represents the quotient of the impact speed of the rebound sensor and the rebound
speed, multiplied by 1000.
Harder materials produce a higher rebound speed than less hard materials. With
reference to a certain group of materials (e.g. steel, aluminium etc.) the L-value
represents a direct hardness measurement value and is also used as such.
Comparison curves with standard static hardness values have been set up for the most
common materials (Brinell, Vickers, Rockwell C, B, Shore D). This enables the L-
values to be converted to the corresponding other hardness values.
With the HN-D hardness tester such hardness values can be shown directly in the
hardness scales HRC, HRB, HB, HV, HSD on the display.
2.3 General characteristics
- This is a highly advanced measuring device (rebound sensor D is integrated): no
cables
- High measuring accuracy (± 4 HL) in each rebound direction (360°) automatically
compensated
- Integrated display for measuring results with conversion to all common hardness
scales.
- Large, high-contrast display for optimal visibility in all conditions.
- Easy to calibrate
- Full USB communication with PC possible, internal data storage with date and time.
- Rechargeable Li-ion battery to be charged through the USB port.
- Intelligent "sleep" mode
2.4 Scope of application
- suitable for all metals
- suitable for testing heavy, large or already installed parts on site
- handy to get to test positions that are difficult to access or limited
-automatic compensation of the alignment of the rebound sensor
- excellent for material selection and acceptance tests

HN-D-BA-e-2020 5
2.5 Application: Primary industries
- Metal production and development
- Self-propulsion and transport
- Machinery industry & power plants
- Oil industry, chemical industry, refineries
- Aviation & Shipbuilding
- Metal constructions
- Test operations & laboratories
3 Technical execution
- Display range: 170 to 9 HLD
- Accuracy: ±4 HL (at 800 HLD)
- Measuring direction: all directions possible
- LCD: large, (128 x 64 dot) backlit LCD
- Data memory: 500 measuring groups
- Measurement results can be automatically converted
will be in: HRC, HRB, HB, HV, HSD
- Impact energy: 11N
- Weight of the rebound body: 5,5 g
- diameter of the test tip: 3mm
Material of the test tip: tungsten carbide
Hardness of the test tip: ≥ 1600 HV
- Power source: Li-ion rechargeable battery
- Charger: DC 5V/500mA or USB connector socket
- Maximum continuous operating time: approx. 16 hours
- Operating temperature: -10°C to +60°C
- Air humidity: 5% to 95%.
- Dimensions: 147 x 35 x 22 mm
- Weight: 63 g
4 Device view
5 Check the supplied accessories

6 HN-D-BA-e-2020
It should be checked in advance whether all accessories have been supplied properly.
The various optional parts can be purchased at any time from SAUTER GmbH. These
should only be used with approved equipment. This could cause problems with other
measuring instruments and the repair costs cannot then be covered by the warranty.
Packing list:
Attention: The test block is not included in the delivery!
- sturdy carry case
- HN-D hardness tester for metals
- USB cables
- Charger for HN-D
- Small stabilizing ring
- Cleaning brush
6 Instructions
6.1 Keys and their functions
1st "Next", for material selection, hardness scale...
2nd "Menu & Selection"
3. "Print"
4. switch on/off & back
5. + : "Hardness calibration": press down and hold, then press for
2 seconds to enter calibration mode.
6. +: "Delete": press and hold down, then press to delete the current data.
7. + : "Date and time setting": press and hold down when the unit isswitched
off, then press to set the date and time
8 + : "Browse data": press and hold down, then press to enter the data
browse mode.

HN-D-BA-e-2020 7
6.2 LCD display
6.3 Settings
Material type
In measuring mode, press three times to show the material type on the display. The
desired material type can now be selected with the key. This changes in a certain
sequence, namely
Note: It is necessary to define the material classification. If the material type is
not known, the material manual can be consulted.
If the material group is changed, the rebound counter starts at "0" again.
Hardness scale
In measuring mode, press the key twice, then the field of the hardness scale is
backlit. The desired hardness scale can now be selected with the key. The order of
the available hardness scales always changes as follows:
Figure: Hardness scale range backlit
HLD= hardness Leeb
HB= Brinell
HRB= Rockwell (B)

8 HN-D-BA-e-2020
HRC= Rockwell (C)
HV= Vickers
HSD= Shore hardness (D)
Note:
If the symbol "---" appears, means: out of range.
The standard hardness scale is always HLD.
Data in a measuring group
In the measuring mode, press the key four times to backlight the field for the
measurement data groups. Press the key to enter the desired number for the data
in a measurement group, the maximum number being 9.
Searching (browsing) data
1. search the measurement data in the current, running measurement group
In measuring mode, press the key once to backlight the rebound field. Then the key
is pressed and the current measuring group can be searched.
2. search older data: In measuring mode, press and hold the key. The key is then
pressed to display the mode of older data.
Pressing down will select the next group and pressing will select the previous one.
Use the key to search the selected group.
Press the button to search the next group and the button to search the previous
one.
If the key is pressed, the previous menu is entered.
Figure: Searching the measurement data group
Setting the date and time
This hardness tester has a built-in real time clock. The date and time can be set in the
following way if required:
When the power is off, press the button , then press and hold the button for about
3 seconds to enter the date and time mode.

HN-D-BA-e-2020 9
By pressing the key in succession, it is possible to select days of the month from 1
to 31 in ascending order, and by pressing the key in descending order from 31 to 1.
The month is set by pressing the key downwards , and by pressing the key
downwards, it is possible to select months in ascending order from 1 to 12, and by
pressing the key in descending order from 12 to 1. The same procedure is used to
set the year, hour, minute and second.
When the seconds setting process has been reached, pressing the key ends this
setting and returns to the measuring mode.
Calibration
Calibration must be performed to calibrate the measured value (HLD) of the hardness
tester in order to keep any measurement errors as small as possible.
The procedure is as follows:
1. with the instrument switched off, press and hold the button and simultaneously
press the button for three seconds to enter calibration mode, see figure
Now 5 tests are made on the test block to get the average value of the same.
2. 5 test measurements can be viewed one after the other by pressing the key and
the faulty measurements can be deleted with .
3. press the key to set the value imprinted on the test block: first the 100 digit step
lights up.
4. by pressing the key it can be changed and entered from 0 to 9.
5. when the key is pressed, the 10-digit binary digit lights up This can be changed
and entered from 0 to 9 by pressing the key.

10 HN-D-BA-e-2020
6. pressing the key lights up the 1 digit binary digit. This can be changed and
entered from 0 to 9 by pressing the key.
7. pressing the key ends the calibration and returns to the measuring mode.
Note: Before using the hardness tester for the first time, it is essential to
calibrate it on the test block with the impact direction always straight (vertical,
at right angles to the test block) downwards.
6.4 Format of the stored data
The data, such as hardness value, scale, material sample, rebound direction, time,
date, etc. are automatically stored in the memory after each measurement. The HN-D
can store 500 measurement data. If the number of tests is higher, the last
measurement is placed in the first position and the previous first position is deleted.
The same procedure is followed with each subsequent measurement: it is moved to a
lower position.
6.5 Backlit display
In case of sparse or poor lighting, the LED backlight function is used. However, this
switches off again if no key is pressed within 3 seconds. During testing or when keys
are pressed, this function becomes active again immediately.
6.6 Automatic switch-off
If no measurement is taken for three minutes or no key is pressed for three minutes,
the instrument switches off automatically to save the batteries. All parameters are
always stored automatically before.
6.7 Recharge
Before first use and before the battery voltage is exhausted, the batteries must be
charged.
To do this, connect the HN-D and the charger using the USB cable and then plug the
charger into the socket to start the charging process.

HN-D-BA-e-2020 11
The display shows the charging mode during this time.
However, another USB cable (e.g. from a laptop) can also be used. The charging time
is 2-3 hours. The following figure shows the end of the charging time:
7 The endurance test
7.1 Check preset
It is switched on with the key and checked whether charging is necessary. Then it
is checked whether each presetting is also correct, especially the type of material and
the hardness scale. If the preset parameters do not match the current conditions,
measuring errors are very likely.
7.2 Preparation of the test piece
Unsuitable material samples can cause measuring errors. Therefore preparation and
processing should be carried out under the original conditions of the sample. The
preparation of the sample and its surface should meet these basic requirements:
1) During surface preparation of the sample, the rebound sensors should not be
exposed to thermal cooling or heating.
2) The surface should be even or better still have a metallic shine, there should be no
oxide layers or other dirt on it.
3) The roughness of the surface should be Ra≤ 1.6
4) The material sample should be of sufficient quality and hardness. If this is not the
case, larger measuring errors may result (e.g. due to shaking of the rebound sensor
when it is placed on the material, etc.).

12 HN-D-BA-e-2020
The basic rule is:
If the weight of the sample material is more than 5 kg,testing can be carried out directly.
If the weight is 2 to 5 kg, the material should be clamped with suitable means.
With a weight of 0.05 to 2 kg, the sample should be coupled in advance with a heavier
object. Coupling method: The back side is smoothed, a little coupling agent (industrial
vaseline can be used) is applied to the support and the surface of the support is
pressed onto the underside of the material sample. The total weight should now exceed
5 kg. It can also be replaced by the test block.
If the weight of the sample material is less than
0.05 kg, the hardness tester is not suitable for use with this.
5) The samples should have a sufficient material thickness with a suitable surface.
For the rebound sensor type D the material thickness is at least 5mm and the surface
hardness coating should not be less than 0.8mm. To determine the exact hardness of
the material, it is best to remove the surface coating.
6) If the material surface to be tested is not horizontal, the radius of curvature of the
surface should be greater than
30 mm. A suitable stabilizing ring should be selected and attached to the rebound
sensor.
7) The test material must not be magnetic. The signal of the rebound sensor would be
seriously affected by the magnetism and the result would be inaccurate measurement
results.
Modern electronics with energy-saving features ensure the long service life of the HN-
D. The large LCD display always shows the configuration of the instrument for testing.
Variable function keys allow a quick change of the general influencing variables.
Further tests can be performed byrepeating the above steps. Subjective measurement
errors are excluded and the measurement results are highly reproducible. Internal self-
diagnostics with error messages ensure a reliable measurement result.
Reading values can be automatically stored in the memory of the device or sent directly
to the printer. The PC evaluation software enables data analysis.
8 Problems and finding solutions
No.
Problem
Reasons
Solutions
1
cannot be switched on
No power
Charging the batteries
2
Extremely high measurement
results
Test tip is worn out
Replace test probe
3
No measurement results
Damage
of the coil
SAUTER Company
contact
Please contact SAUTER GmbH in the event of other errors or defects.
We will look for a solution to your existing problem with the HN-D as soon as possible.

HN-D-BA-e-2020 13
9 Service and maintenance
9.1 Maintenance and care of the rebound sensor
After using the rebound sensor 1000 to 2000 times, the cannula should be cleaned
with a nylon brush. First the screw and the stabilizing ring are removed. The nylon
brush is turned counterclockwise in the loading tube until the lower end of the tube is
reached. Then the nylon brush is carefully pulled out again. This procedure is repeated
several times. Afterwards the rebound body with the stabilizing ring is reattached. After
each use, the rebounding body should be unlocked (released) again. Please do not
use lubricant!
9.2 Procedures for maintenance
If the error value during calibration of the hardness tester is more than 12 HLD, the
steel ball or rebound body should be replaced, as these can be worn out and this can
lead to malfunctions during use. If any other abnormal phenomena occur with the
tester, never unscrew or modify any of the fixed parts yourself. We should be contacted
in advance and the device should be sent to us so that the service can be carried out.
Appendix 1 Daily checking
The optionally available test block is generally used to calibrate the hardness tester.
The measurement deviation and reproducibility of the hardness tester HN-D should be
in the range of the following table:
Note:
HLD is the average of 5 values measured on the test block.
The HLD value is signed on the test block.
2. repeatability=
is the highest value of 5 values measured on the test block.
is the smallest of 5 values measured on the test block.
Appendix 2 Factors influencing the measurement accuracy
Incorrect operation or inappropriate conditions can have serious consequences for the
accuracy of measurement in the tests. Below are some examples:
1. The roughness of the surface of the test piece
Rebound
sensor
Alignment
Rebound-
sensor
Hardness
of the
Test
Blocks
(HL)
permitted
Messab-
softness
permitted
Again-
holbark.
D
750~830
±12 HLD
12 HLD
490~570
±12 HLD
12 HLD

14 HN-D-BA-e-2020
When the rebound body hits the test piece, a small impression is made on its surface.
The rougher this surface is, the less loss of rebound energy. If the surface is less rough,
the more loss of rebound energy is observed.
The roughness of the test points of the test piece on the surface should be Ra≤ 1.6.
2. The profile of the surface of the test piece
The Leeb test principle is based on the fact that the velocity of impact and rebound
occur in the same line because the rebound body moves back and forth in the metal
tube. If the radius of curvature of the surface to be tested is smaller, different support
rings can be used. These are available in addition to the scope of delivery.
3. The weight of the test piece
Ideally, the weight of the test piece should be 5 kg or more. If it is less than 5 kg, it
must be weighted. This is done by connecting the test piece to a supporting, additional
attachment using a coupling device to achieve the required weight. This allows more
accurate measurement results to be obtained. There should be a specific area for the
test points on each test piece, which is free of shock and vibration. If the test piece is
not sufficiently heavy, all the more care should be taken to avoid fluctuations and
vibrations, especially if the test piece has been weighted, coupled and compressed.
4. The measurement stability of the material sample
In any test, external interference should be kept to a minimum. This is very important
for dynamic measurements like Leeb hardness tests. Therefore measurements are
only possible in a stable Leeb hardness test setup. If it is foreseeable that the test piece
will change position during the test, it should be fixed in advance.
Annex 3 Measuring range and conversion range
Materials
AGM
HB
HRC
HRB
HSD
Steel & cast steel
81-955
81-654
20.0-68.4
38.4-99.5
32.5-99.5
Tool Steel Alloy
80-898
20.4-67.1
Stainless steel
85-802
85-655
19.6-62.4
46.5-101.7
Grey cast iron
63-336
Ductile cast iron
140-387
Aluminium casting alloy
19-164
23.8-84.6
Cu-Zn alloy (brass)
40-173
13.5-95.3
Cu-Sn alloy (bronze)
60-290
Copper
45-315
Forged steel
83-976
142-651
19.8-68.5
59.6-99.6
26.4-99.5

HN-D-BA-e-2020 15
DEVELOPED IN ACCORDANCE WITH THESE STANDARDS:
DIN 50156 (2007), ASTM A956 (2006), GB/T 17394 (1998), JB/T 9378 (2001), JJG
747 (1999), DGZfP Guideline MC 1 (2008), VDI/VDE Guideline 2616 Paper 1 (2002),
ISO 18625 (2003), CNAL T0299 (2008), JIS B7731 (2000).
Note:
To view the CE declaration, please click on the following link:
https://www.kern-sohn.com/shop/de/DOWNLOADS/
Other manuals for HN-D
1
Table of contents
Other sauter Test Equipment manuals

sauter
sauter TE 1250-0.1 FN User manual
sauter
sauter SD Series User manual

sauter
sauter TN-EE User manual

sauter
sauter SAUTER HMO User manual

sauter
sauter TVP User manual

sauter
sauter HMM User manual
sauter
sauter SAUTER HMO User manual
sauter
sauter TVO 500N300 User manual

sauter
sauter DA User manual
sauter
sauter SD 50N100 User manual
Popular Test Equipment manuals by other brands

Simons Voss Technologies
Simons Voss Technologies WaveNet-Funktester quick guide

Phenix Technologies
Phenix Technologies BK Series user manual

Parker
Parker icountBS user manual

Circutor
Circutor Mi5500e user guide

Tru-Test
Tru-Test 702 user manual

Webasto
Webasto Hollandia 900 Installation, operation and maintenance manual