Sauter GmbH
Tieringerstr. 11-15
D-72336 Balingen
Tel: +49- 0]7433- 9976-174
Fax: +49- 0]7433-9976-285
Internet: www. sauter.eu
Instruction Manual
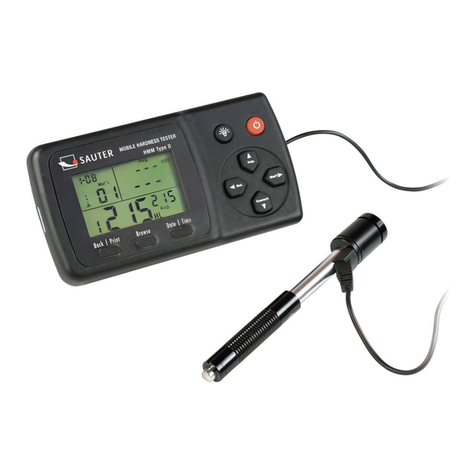
HMM
HMM-BA-e-1111 4
If button is pressed continuously, material changes
according to following sequence:
Note:
1. It is necessary to select the material classification. If
the type of material isn’t known, the related material
handbook will help.
2. If the material roup is chan ed, the impact times
counter will be set to “0”.
3. Default settin : steel and cast steel.
4. .3.2 Impact Direction
Ideal Leeb Hardness Testing is a downward straight
testing method. As a result of gravity, the test should be
amended when measuring other directions in order to
measure correct hardness values of materials. As long as
the impact direction is chosen correctly, impact direction is
automatically amended by the hardness tester.
There are five impact directions to chose:
In measurement mode, the button has to be pressed to
select the impact direction. It changes to following
sequence:
Note: Default settin is .
4. .3.3 Scale
HLD values can be automatically converted by HMM
Hardness Tester to other scales HRC,HRB, HB, HV, HSD
or tensile strength (MPa) according to a particular material
group (e.g. steel, aluminium etc.)
In measurement mode, the button has to be pressed to
convert all common hardness scales or tensile strength
(MPa). button has to be pressed continuously and the
scale changes according to following sequence:
Notes:
1. If the conversion is out of ran e, the conversion
value is indicated by “---“.
2. If the conversion is set from hardness scale to
tensile stren th or the other way round, the material
roup has to be reset.
2. Conversion value only supplies a eneral reference,
which results in some offset. Generally, comparative
tests are necessary to achieve precise conversion.
3. If the hardness scales are chan ed, the current
impact times counter will be cleared to “0”.
4. Standard settin for the conversion is “HRC”.
4. .3.4 Browse
“Browse” button has to be pressed to browse stored data
and to display the first data group of the last nine test data,
including hardness value HLD, material, conversion
values, impact direction, date and time etc.
The button has to be pressed to browse the next data
group. button has to be pressed to browse the
previous data group. “Back/Print” button has to be
pressed to get back to measurement mode.
4. .3.5 Adjusting Clock and Calendar
HMM Hardness Tester has got an inbuilt real-time clock-
system. Clock and calendar have to be adjusted if, i.e. the
dry cell has been reinstalled. The procedure is as follows:
The “Date/Time” button has to be pressed to enter clock
and calendar adjustment mode. If the “month” bit starts
flickering, the button has to be pressed to increase
and button to decrease. Valid numbers are 1 to 12.
The button has to be pressed and the “day” bit starts
flickering, the button has to be pressed to increase
and button to decrease. Valid numbers are 1 to 31.
The button has to be pressed and the “year” bit starts
flickering, the button has to be pressed to increase
and button to decrease. Valid numbers are 00 to 99.
The button has to be pressed and the “hour” bit starts
flickering, the button has to be pressed to increase
and button to decrease. Valid numbers are 00 to 23.
The button has to be pressed and the “minute” bit
starts flickering, the button has to be pressed to
increase and button to decrease. Valid numbers are 00
to 59.
“Back/Print” button can be pressed every time if the
adjustment is completed and to return to measurement
mode.
4. .3.6 Calibration
Calibration is used to calibrate the measured value (HLD)
of the hardness tester to decrease the measuring error as
far as possible. The procedure is as follows:
1) “Back/Print” button has to be pressed to clear the
testing times to “0”. It has to be impacted 5 times on the
test block to get an average value (some previous error
data can be deleted).
