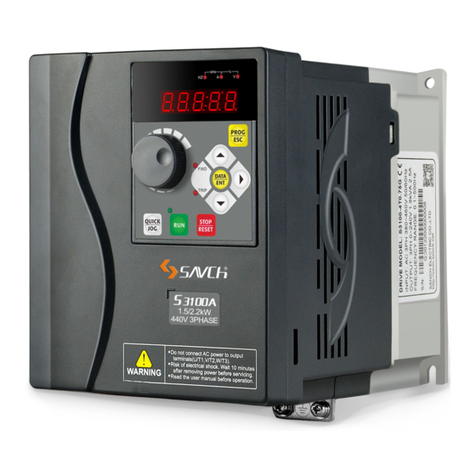
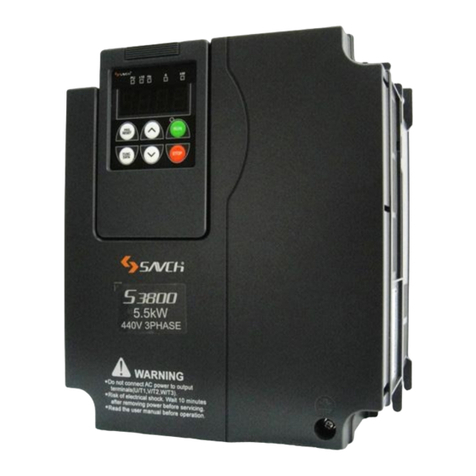
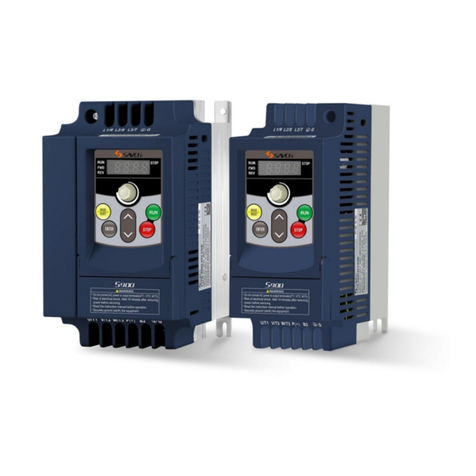
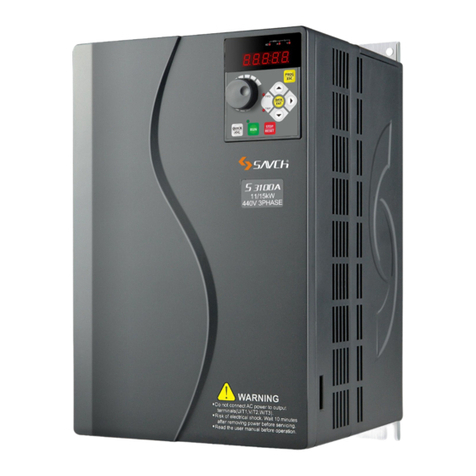
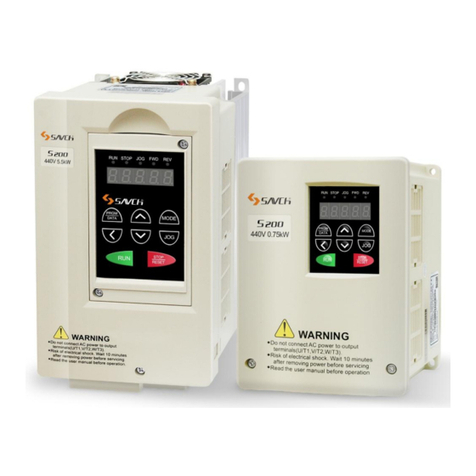
Savch S100 Series User manual

S100 Series Inverter
Built-in type
User Manual
User Manual

Contents
PREFACE ............................................................................................................................................ 1
CHAPTER 1 DESCRIPTIONS FOR BODY AND INSTALLATION ....................................................... 2
1.1. Model description.................................................................................................................... 2
1.2 External dimensions ................................................................................................................ 2
1.3 Product specification................................................................................................................ 3
CHAPTER 2 WIRING .......................................................................................................................... 4
2.1 Basic wiring diagram................................................................................................................ 4
2.2 Main circuit wiring .................................................................................................................... 5
2.3 Precautions for wiring .............................................................................................................. 6
CHAPTER 3 LIST OF DESCRIPTIONS FOR FUNCTIONAL PARAMETERS ..................................... 7
CHAPTER 4 TROUBLE SHOOTING ................................................................................................. 15
4.1 Alarm and corrective measures ............................................................................................. 15

1
PREFACE
Thanks for your use of SAVCH inverter! This instruction manual, which includes operation descriptions and notes
for maintenance, shall be delivered to the end-user.
For safety running and effective operation, this instruction manual shall be read thoroughly prior to use, which
shall also be preserved for later use.
Provided problems occur and solution is not provided in this instruction manual, contact your SAVCH Electric
representative or contact with our company directly. Our professional technicians will serve for you actively. And
please continue to adopt products of SAVCH, give valuable opinion and advice.
1. Reading Instructions
Symbols of” DANGER” and” CAUTION” in the manual indicates that, for safety running or maintenance of
inverters or other electrical products, attention shall be attached during delivering, installation, operation and
checks for the inverter. And these notes shall be applied for a better and safer operation.
DANGER
Indicates a potentially hazardous situation visiting. If not used correctly, personnel
damage even death may be caused.
CAUTION
Indicates a potentially hazardous situation visiting. If not used correctly, serious
damage to inverter or machine may be resulted.
CAUTION
● Do not perform a withstand voltage tests for components of inverter,it can cause semi-conductor
components to be damaged by high voltage.
● Never connect the output terminals U, V, W to AC power supply.
● IC of CMOS on control circuit of the inverter shall be damaged by electrostatic influence. Do not touch main
circuit board.
2. Products receiving
All products have been performed with strict test and inspection. After receiving the inverters, the following checks
shall be performed.
● To check that SAVCH inverter, an instruction manual.
● To check whether model number correspond with model and capacity your purchase order.
● To check whether there are damaged parts during transportation and delivering. If there are, do not connect
with power supply.
If any of the above checkpoints are not satisfactory, contact your SAVCH representative for a quick resolution.
DANGER
● Never connect wires while power on. Do not check components or signal for circuit board during operation.
● Do not dismantle or change inner wire, circuit or components unnecessarily.
● Make sure grounding terminals are correctly grounded. 220V class: Grounding Ⅲ;
● After power supply is switched off, if CHARGE indicator is still ON, it indicates that there is still hazardous
high voltage inside the inverter, pay attention not to touch circuit board or other components.

2
CHAPTER 1 DESCRIPTIONS FOR BODY AND INSTALLATION
1.1. Model description
MODEL:S100-2S0.4G
SOURCE:AC 1PH 200~240V 50/60Hz
OUTPUT:3PH 0~240V 1.0KVA 2.5A
FREQUENCYRANGE:1.0~400Hz
Designed by Taiwan Savch Electric
SAVCH ELECTRIC CO.,LTD
Model
Input power supply Spec.
Output power supply Spec.
Output frequency
Product
series
S 100 - 2S 0.4 G
0.4:0.4kW
0.75:0.75kW
SAVCH G:constant
torque load
220V
single phase
1.2 External dimensions
Uint:mm

3
1.3 Product specification
Input voltage
220V
Model number S100-2S
0.4G
0.75G
Max applicable motor output power (kW)
0.4
0.75
Output
Output rated capacity(kVA)
1.0
1.6
Output rated current (A)
2.5
4.2
Max output voltage(V)
Three phase corresponding input voltage
Output frequency range(Hz)
1.0~400Hz
Input
Rated Input current(A)
6.5
9.7
Allowable variation range for
Voltage. Frequency
Single phase power supply 200~240V 50/60Hz
Variation range for power
supply frequency
±5%
Controlling
Characteristics
Control mode
SVPWM space vector modulation(Carrier frequency 2kHz~12kHz)
Output frequency resolution
0.1Hz
Torque characteristics
Provided with torque-compensation and slip compensation, at
5Hz,the activation torque can be 150% above the rated torque.
Over-load tolerance
150% of the rated output current, one minute
Acceleration/deceleration time
0.1~600 seconds(Available to be set respectively)
V/f curve
Any V/f curve setting
Stall Prevention Level
Set in accordance with percentage value of rated current, 20~200%
Operation Characteristics
Frequency
setting signal
External
terminals
Potentiometer 5kΩ/0.5W, DC 0 to +10V(Input impedance 47 kΩ),
multi-function input selection 1 to 3 (3 step speed: jog-on, up/down
command), communication setting
Running
operating signal
External
terminals
Various operation modes combined by M0, M1, M2 and M3; RS485
communication board
Multi-function input terminal
Step-speed reference 0~15 selection, forward / reverse jog
reference, acceleration/deceleration prohibited reference, switching
of first/second acceleration/deceleration, selection of counter,
program operation, external B.B (NC, NO) selection, pulse input,two
kinds of three wire connection mode, and Inhibiting output.
Multi-function output terminal
During running, operation frequency arrival, set frequency arrival,
counter arrival, zero speed, B.B anomaly indication, program
operation indication, forward / reverse direction
Other functions
AVR function, overvoltage stall prevention, over current stall
prevention, abnormal record check, carrier frequency adjustment,
reverse run Inhibition setting, DC braking, initiation frequency
setting, restarting after momentary power loss, Max/Min frequency
setting and parameter locking / reset.
Protection functions
Over current, over voltage, low voltage,overload limitation,
electronic thermal relay, overheating, self testing, grounding
protection, and abnormal contactor
Cooling methods
Natural cooling
Environment
Installation height
Lower than 1000m, without corrosive gas, fluid and dust.
Environment temperature
-10℃~40℃(no condensation, no freezing)
Storing temperature
-20℃~+60℃
Environment dampness
Below 90%RH without moister
Vibration
Below 20Hz 9.80665m/s2(1G),20~50Hz 5.88m/s2(0.6G)

4
CHAPTER 2 WIRING
2.1 Basic wiring diagram
Wiring of inverter can be divided into two parts, the main circuit and control circuit. Users must connect
terminals as diagram shows.
The following diagram is the standard wiring diagram of S100 series inverter.
Main circuit power supply

5
2.2 Main circuit wiring
Control circuit wiring diagram
Wire gauge:12-20AWG
Torque:5KG-CM
Wiring Diagram

6
2.3 Precautions for wiring
•The selection of wire gauge during wiring shall be in accordance with relative specifications of Electrical code
to guarantee the security.
•A non-fuse switch and fuse must be connected between the single-phase AC input power supply and the main
circuit terminals (L and N).A magnetic contactor(MC) is recommended to be connected in series additionally
facilitating to switch off power supply simultaneously while the protection of inverter is in function.
Note:15A rated current is recommended for the non -fuse switch.
•The input power supply L and N can be used without phase sequence, thus they can be connected
and used randomly; the grounding category shall be adopted for the grounding terminal. (grounding
resistance shall be below 100Ω)
•Never ground simultaneously for inverter ground wire with other large current loads such as welding machine
or large power motor, They shall be grounded separately. Ground wiring must be short as possible
•Ground circuit shall be avoided when several inverters are grounded simultaneously. See diagram below for
reference.
•If output terminals U/T1, V/T2, W/T3 of AC motor drive are connected to U, V, W of the motor correspondently,
and the Forward Run (FWD) indicator on digital control panel of AC motor drive lights up, it indicates that the
AC motor drive is in forward Run, and direction of rotation of the motor is the same to direction indicated on
the diagram at right above; if Reverse Run(REV) indicator light up, it indicates that the AC motor drive is in
reverse on, and direction of rotation shall be reverse to that of the diagram. In case it is not certain whether
output terminals U/T1, V/T2, W/T3 of AC motor drive is connected to U,V,W of the motor in correspondence,
and if the inverter output is forward run reference. while motor is at reverse run, change any two of the motor U,
V or W, then the motor will forward run.
•Confirm the voltage and max capacity that is available to be supplied of the power supply system.
•Never connect or dismantle any wiring when the digital operator is in display or power supply indicator is still
ON.
•Extend the deceleration time to avoid the drive from pass over the over- voltage or over- current protection.
•Never connect AC power supply to the output terminals U/T1, V/T2, W/T3 of AC motor drive.
•Make sure that the screw(s) for main circuit terminal is securely tightened; otherwise sparks may occur due to
loosening as t result of vibration.
•Wiring for the main circuit and for control circuit must be separated from each other otherwise mal-function
may occur. If cross wiring is mandatory, cross them in 90°.
•In case of a noise filter is necessary to be fitted at main circuit output terminals U/T1, V/T2 and W/T3 of
inverter, it is mandatory to use the inductive L- filter, while phase advance capacitor or L-C or R-C filters shall
not be allowed.
•Isolation wire is preferred for the control wiring, and the stripped part without isolation mesh at the front of the
terminal shall not be exposed.
•Shielded wire or shielded wire tube shall be used for wiring of power supply. Both ends of the shielded wire or
tube shall be grounded.
•In case the inverter is fitted to a place which is extremely sensitive to interference, please fit RFI filter in
addition, and location of installation shall be as close to inverter as possible. The low carrier frequency of
PWM is, the less interference there is.
•If leakage circuit breaker is provided for the inverter as protection measures against leakage, to prevent
mal-operation of the leakage breaker, please select those of which the sensitivity circuit is above 200mA,and
operation time is more than 0.1 sec.

7
CHAPTER 3 LIST OF DESCRIPTIONS FOR FUNCTIONAL PARAMETERS
0. User’s parameters set during running available
Parameter
Parameter functions
Setting range
Factory
setting
0-00
Inverter type code recognition
(Only for Reading)
4:220V/0.4kW
5:220V/0.75kW
Factory
setting
0-01
Rated Current Display for
Inverter (Only for Reading)
220V/0.4kW:2.5A
220V/0.75kW:4.2A
Factory
setting
0-02
Data initialization
10: Parameter reset to factory setting
0
0-03
Machine ON Display Selection
0: F(Display set frequency reference)
1: H(Display actual running frequency)
2: U (Display multi-function determination)
3: A(Display motor running current)
4: P(Master frequency display)
5: b(Auxiliary frequency display)
0
0-04
Determining multifunctional
display
0: Displaying output physical quantity(u)
defined by operators
1: Displaying count value (c)
2: Displaying program operation content (X=tt)
3: Displaying DC-BUS voltage(U)
4: Displaying output voltage (E)
5: Displaying rotating speed(r )
6: Reserved
7: Module temperature
8: Charging resistance temperature
9: Display the current carrier frequency
0
0-05
Proportional constant setting
0.1 to 160
1.0
0-06
Software Version
Only for reading
#.##
0-07
Input parameter password
protection
0 to 999
0
0-08
Setting parameter password
protection
0 to 999
0
1. Basic Parameters Set during running available
Parameter
Parameter functions
Setting range
Factory
setting
1-00
Max operation frequency
setting
5.0 to 400Hz
50.0
1-01
Maxi voltage frequency setting
10.0 to 400.0Hz
50.0
1-02
Maxi output voltage setting
2.0 to 255.0V
220
1-03
Intermediate frequency setting
0.1 to 400Hz
0.5
1-04
Intermediate voltage setting*
2.0 to 255V
12.0
1-05
Min output frequency setting
0.1 to 60.0Hz
0.5
1-06
Output voltage at starting
frequency
2.0 to 255V
12.0
1-07
Frequency limiter(Upper)
1 to 110%
100
1-08
Frequency limiter(Lower)
0 to 100%
0.0

8
1. Basic Parameters Set during running available
Parameter
Parameter functions
Setting range
Factory
setting
1-09
Acceleration time 1
0.1 to 600s
10.0
1-10
Deceleration time 1
0.1 to 600s
10.0
1-11
Acceleration time 2
0.1 to 600s
10.0
1-12
Deceleration time 2
0.1 to 600s
10.0
1-13
Acceleration time (JOG)
0.1 to 600s
10.0
1-14
Deceleration time (JOG)
0.1 to 600s
10.0
1-15
JOG frequency setting
1.0 to 400Hz
6.0
1-16
Auto acceleration /
deceleration setting
0:Normal acceleration / deceleration
1:Reserved
2:Reserved
3:Reserved
4:Reserved
5:Reserved
0
1-17
Reserved
1-18
Reserved
1-19
V/f curve setting
0 to 6
0
2. Operation mode parameters Set during running available
Parameter
Parameter functions
Setting range
Factory
setting
2-00
Master frequency reference
source setting
0: Keys on keypad
1: Input DC 0 to 10V by external terminals AVI
2: Reserved
3: Reserved
4:Operated by RS485 communications
interface
5:Operated by RS485 communications
interface(Frequency memory)
6:Controlled by UP/DOWN
7:Controlled by UP/DOWN (Frequency
memory)
8: Reserved
0
2-01
Auxiliary frequency reference
source setting 2(Reserved)
0: Keys on keypad
1: Input DC 0 to 10V by external terminals AVI
2: Reserved
3: Reserved
4: Operated by RS485 communications
interface
5: Reserved
6: Controlled by UP/DOWN
7: Reserved
8: Reserved
0
2-02
Selection of Master / Auxiliary
frequency (Reserved)
0: Master frequency
1: Master frequency + Auxiliary frequency
2: Master frequency - Auxiliary frequency
0

9
2. Operation mode parameters Set during running available
Parameter
Parameter functions
Setting range
Factory
setting
2-03
Operation method
0: Operated by keypad
1: Operated by external terminals. STOP on
keypad available
2: Operated by external terminals. STOP on
keypad unavailable
3: Operated by Communications Interface
RS485. STOP on keypad available
4: Operated by Communications Interface
RS485. STOP on keypad unavailable
0
2-04
Deceleration mode
0: Normal deceleration
1: Coast to stop
0
2-05
Reserved
2-06
External fault (EF) stop mode
0: Reserved
1: External fault (EF) coast to stop
1
2-07
Reference loss detection
(Terminal AVI)( stop mode)
0:Deceleration stop
1:Coast to stop
2:Holding operation command after
deceleration stop
0
2-08
Reserved
2-09
Motor sound(Carrier
frequency)
2 to 12kHz
6
2-10
REV run inhibition
0: Rev run available
1: Rev run inhibited
2: Fwd run inhibited
0
2-11
Reserved
2-12
Power on start
0: Operation available
1: Operation unavailable
0
3. Output Function Parameters Set during running available
Parameter
Parameter functions
Setting range
Factory
setting
3-00
Reserved
3-01
Count value setting
0 to 999
0
3-02~3-06
Reserved
3-07
Min,AVI input voltage
0.0 to 10V
0
3-08
Min,AVI input voltage
corresponding frequency
0 to 100% Fmax
0
3-09
Max.AVI input voltage
0.0 to 10V
10.0
3-10
Max.AVI input voltage
corresponding frequency
0 to 100% Fmax
100
3-11~3-19
Reserved
3-20
AVI filter coefficient
0~12
4

10
4. Input Function Parameters Set during running available
Parameter
Parameter functions
Setting range
Factory
setting
4-00
[VR] Input frequency bias
setting
0.0 to 350Hz
0.0
4-01
Bias direction setting
0: Positive direction
1: Negative direction
0
4-02
Input frequency gain setting
1 to 200%
100
4-03
Negative bias operation setting
0: No negative bias
1: Reversible negative bias
2: not reversible negative bias
0
4-04
Terminal (M0 M1) function
(Setting range from d0 to d31)*
0: No function
1: M0: forward run/stop, M1: reverse run/stop
2: M0: run/stop, M1: fwd/rev run
3: 3-line operation control(1): M0 run, M1
fwd/rev run, M2 stop(Normally closed)
4: 3-line operation control(2): M0 forward run
(Normally open), M1 reverse run (Normally
open), M2 stop (Normally closed)
5: External fault(EF), normally open interface
input (N.O)
6: External fault(EF) normally closed interface
input (N.C)
7: RESET alarm
8: Select multi-frequency 1
9: Select multi-frequency 2
10: Select multi-frequency 3
11: Select multi-frequency 4
12: Reserved
13: Accel /decel inhibition command
14: Select 1ST and 2nd Accel/Decel time
15: External alarm, normally open (NO) input
16: External alarm, normally closed(NC) input
17: Up command
18: Down command
19: Pattern operation command
20: Pattern operation pause command
21: Counter trigger signal input
22: Count reset
23: Reserved
24: JOG-FWD
25: JOG-REV
26: Reserved
27: Reserved
28: Reserved
29: Inhibiting output (N.O)
30 :Inhibiting output (N.C)
31: Reserved
1
4-05
Terminal (M2) function
(Setting range d0, d5 to d31)
8
4-06
Terminal (M3) function
(Setting range d0, d5 to d31)
9

11
4. Input Function Parameters Set during running available
Parameter
Parameter functions
Setting range
Factory
setting
4-09
Speed tracking after external
alarm reset
0:Tracking downwards from speed before
external alarm
1:Tracking upwards from min speed
0
5. Multi-step Speed and Auto-Program Operation Parameters
Set during running available
Parameter
Parameter functions
Setting range
Factory
setting
5-00
Multi frequency 1
0.0 to 400Hz
0.0
5-01
Multi frequency 2
0.0 to 400Hz
0.0
5-02
Multi frequency 3
0.0 to 400Hz
0.0
5-03
Multi frequency 4
0.0 to 400Hz
0.0
5-04
Multi frequency 5
0.0 to 400Hz
0.0
5-05
Multi frequency 6
0.0 to 400Hz
0.0
5-06
Multi frequency 7
0.0 to 400Hz
0.0
5-07
Multi frequency 8
0.0 to 400Hz
0.0
5-08
Multi frequency 9
0.0 to 400Hz
0.0
5-09
Multi frequency 10
0.0 to 400Hz
0.0
5-10
Multi frequency 11
0.0 to 400Hz
0.0
5-11
Multi frequency 12
0.0 to 400Hz
0.0
5-12
Multi frequency 13
0.0 to 400Hz
0.0
5-13
Multi frequency 14
0.0 to 400Hz
0.0
5-14
Multi frequency 15
0.0 to 400Hz
0.0
5-15
Pattern Operation(Mode)
0. Pattern operation inactive
1. Active (Stop after operating for 1 cycle)
2. Active (Pattern operation performs in cycles
until STOP command input)
3. Active (Stop after operating for 1 cycle) (with
STOP intervals).
4. Active (Pattern operation performs in cycles
until STOP command input) (with STOP
intervals).
0
5~16
(Rotating Operation) (0 to 7th
step speed)
0 to 255( 0: Forward Run 1: Reverse Run)
0
5-17
(Rotating Operation) (8 to 15th
step speed)
0 to 255( 0: Forward Run 1: Reverse Run)
0
5-18
(Step 0 Time)
0 to 65500S
0
5-19
(Step 1 Time)
0 to 65500S
0
5-20
(Step 2 Time)
0 to 65500S
0
5-21
(Step 3 Time)
0 to 65500S
0
5-22
(Step 4 Time)
0 to 65500S
0
5-23
(Step 5 Time)
0 to 65500S
0
5-24
(Step 6 Time)
0 to 65500S
0
5-25
(Step 7 Time)
0 to 65500S
0
5-26
(Step 8 Time)
0 to 65500S
0
5-27
(Step 9 Time)
0 to 65500S
0

12
5. Multi-step Speed and Auto-Program Operation Parameters
Set during running available
Parameter
Parameter functions
Setting range
Factory
setting
5-28
(Step 10 Time)
0 to 65500S
0
5-29
(Step 11 Time)
0 to 65500S
0
5-30
(Step 12 Time)
0 to 65500S
0
5-31
(Step 13 Time)
0 to 65500S
0
5-32
(Step 14 Time)
0 to 65500S
0
5-33
(Step 15 Time)
0 to 65500S
0
6. Protection Parameters Set during running available
Parameter
Parameter functions
Setting range
Factory
setting
6-00
Over voltage stall prevention
function setting
0: Inactive
390
350-410V
6-01
Over current stall prevention
level setting
0: Inactive
170
20-200%
6-02
Over-torque detection (Mode
selection)
0: No detection
1: Over torque detection (OL2) during constant
speed running, continue to run after detection.
2: Over torque detection (OL2) during constant
speed running, stop running after detection.
3: Over torque detection (OL2) during
acceleration, continue to run after detection.
4: Over torque detection (OL2) during
acceleration, stop running after detection.
0
6-03
Over torque detection
(Detection level)
30 to 200%
150
6-04
Over torque detection time
0.1 to 10.0s
0.1
6-05
Electrical thermal overload
protection for Motor
(Select motor characteristics)
0: No action
1: Action in standard motor
2: Action in special motor
1
6-06
Electronic thermal relay
selection
30 to 600s
60
6-07
Alarm history (Latest)
0: No alarm records
1: OC (Over current)
2: OV(Over voltage)
3: OH(Over heating)
4: OL(Inverter overload)
5 :OL1(Motor overload)
6: EF(External fault)
7: Reserved
8: Reserved
9: OCA(Over current in acceleration)
10: OCD(Over current in deceleration)
11: OCN(Over current in constant speed)
0
6-08
Alarm history (1st last)
0
6-09
Alarm history (2nd last)
0
6-10
Alarm history (3rd last)
0
6-11
Alarm history (4th last)
0
6-12
Alarm history (5th last)
0

13
7. Motor Parameters Set during running available
Parameter
Parameter functions
Setting range
Factory
setting
7-00
Motor(Rated current)
30 to 120%
85
7-01
Motor(No load current)
0 to 90%
30
7-02
Manual torque compensation
setting
0.0 to 30.0%
0.0
7-03
Auto slip compensation setting
0.1 to 10
0.0
7-04
Torque boost cutoff frequency
0~50%
10
7-05~7-09
Reserved
Remark:1. When 7-02 is set to 0, it means no torque boost function.
2. The reference value for 7-02 is parameter 1-02 (maximum output voltage).
3. The reference value for 7-04 is parameter 1-00 (maximum operating frequency).
8. High Function Parameters Set during running available
Parameter
Parameter functions
Setting range
Factory
setting
8-00
DC braking(Braking level)
0.0 to 100%
0.0
8-01
DC braking(Braking time
setting at starting)
0.0 to 60.0S
0.0
8-02
DC braking(Braking time
setting at stopping)
0.0 to 60.0S
0.0
8-03
DC braking(Braking starting
frequency)
0.0 to 400Hz
0.0
8-04
Restart after momentary power
failure (Mode selection)
0: Stop running after momentary power loss.
1: Run continuously after momentary power
loss, inverter tracks downwards from
frequency after power loss.
2: Run continuously after momentary power
loss, inverter tracks upwards from frequency
after power loss.
0
8-05
(Max allowable time for power
failure)
0.3 to 5.0s
2.0
8-06
(Restart time)
0.3 to 5.0s
0.5
8-07
(Max current setting for speed
tracking)
30 to 200%
150
8-08
Jump frequency 1(Upper)
0.0 to 400Hz
0.0
8-09
Jump frequency 1(Lower)
0.0 to 400Hz
0.0
8-10
Jump frequency 2(Upper)
0.0 to 400Hz
0.0
8-11
Jump frequency 2(Lower)
0.0 to 400Hz
0.0
8-12
Jump frequency 3(Upper)
0.0 to 400Hz
0.0
8-13
Jump frequency 3(Lower)
0.0 to 400Hz
0.0
8-14
Auto-reset(Times)
0 to 10
0
8-15
AVR function selection
0:AVR function available
1:AVR function unavailable
2:AVR function cancelled during deceleration
2
8-16
Reserved

14
Note: When setting the 8-00 parameter, it must be slowly increased from small until sufficient braking torque is
obtained, but it should not exceed the rated motor.
9. Communications Parameters Set during running available
Parameter
Parameter functions
Setting range
Factory
setting
9-00
Communication address
1 to 247
1
9-01
Communication transmitting
speed
0: Baud rate 4800 bps
1: Baud rate 9600 bps
2: Baud rate 14400 bps
3: Baud rate 19200 bps
4: Reserved
1
9-02
Transmitting fault treatment
0: Warning and running continuously
1: Warning and deceleration to stop
2: Warning and coasting to a stop
3: No warning and running continuously
0
9-03
No-response error detection
time
0: Not detected
1-20: 1 to 20s
0
9-04
Communications format 1
ASCII mode
0: ASSII mode <8, N,1>
1: ASSII mode <8, N,2>
2: ASSII mode <8, E,1>
3: ASSII mode <8, E,2>
4: ASSII mode <8, O,1>
5: ASSII mode <8, O,2>
6: RTU mode <8, N,2>
7: RTU mode <8, E,1>
8: RTU mode <8, O,1>
0
Communications format 2
RTU mode

15
CHAPTER 4 TROUBLE SHOOTING
Inverter is provided with functions of warning and protection such as over voltage, low voltage and over current.
Once fault occurs, protection function shall act, inverter output stops, fault contactor act and also free running of
motor shall stop. For causes and corrective measures of fault, display of fault shall be taken for reference. Fault
records shall be stored into computer memory inside inverter (fault records for recent six times shall be available),
and records shall be read at digital control keypad.
Attention shall be paid that, pressing RESET after fault shall only be available after fault has been eliminated.
4.1 Alarm and corrective measures
Display
Descriptions of fault
Corrective measures
Oc
Inverter detects Over current at
output side.
1.Check rated current of motor complies with that of
inverter.
2.Check that there is no short circuit in U, V, and W.
3.Check that no short circuit or grounding occur to
connection of motor.
4.Check that screws are securely tightened to inverter.
5.Increase acceleration time (1-09, 1-11).
6.Check there is no over load to motor.
Ou
Inverter detects Over voltage at DC
high voltage side.
1.Check input voltage is within rated voltage range of
inverter, and see that no voltage surge occurs.
2.If over voltage occurs at DC high voltage side of inverter
caused by inertia back up voltage, deceleration time shall
be increased.
OH
Inverter detects over heat, exceeding
protection level.
1.Check that ambient environment is not over heat.
2.Check radiator and air fan is running.
3.Check enough clearance for air flowing is provided to to
inverter
OHc
The inverter detects that the internal
charging resistor is too hot and
exceeds the level.
Factory maintenance
Lu
DC high voltage side over low inside
inverter.
1.Check power supply voltage is correct.
2.Check no sudden heavy load.
OL
Output current exceeds allowable
current of inverter. 60 sec shall be in
station if 150% of rated current of
inverter is output.
1.Check motor over load.
2.Decrease torque (7-02) to improve set value.
3.Increase output capacity of inverter.
OL1
Inner electric relay protection acts
1.Check motor over load.
2Check rated current (07-00) of motor is proper.
3.Check electric relay function setting.
4.Increase motor capacity.

16
Display
Descriptions of fault
Corrective measures
OL2
Motor load overlarge
1.Check motor load is not overlarge.
2.Check over-torque detection level setting (06-03).
Oca
Over current during acceleration
1.Check screws securing inverter and motor are tightened.
2.Check insulation of wiring from U-V-W to motor.
3.Increase acceleration time.
4.Decrease torque (7-02) to improve set value.
5.Replace with AC motor with larger output capacity.
OcD
Over current during deceleration
1. Check insulation of wiring from U-V-W to motor.
2.Increase deceleration time.
3.Replace with inverter with larger output capacity.
OcN
Over current during running
1.Check insulation of wiring from U-V-W to motor.
2.Check motor running normally.
3.Replace inverter with larger output capacity.
EF
Output of inverter stops when
external multifunction input
terminal(M1~M3) is set to emergency
stop
Depress RESET key after alarm eliminated.
CF1
Inner memory IC data writing alarm
1.Supply power again after power off.
2.Factory maintenance and overhaul.
CF2
Inner memory IC data reading alarm
1.Depress RESET key and reset parameter to factory
setting.
2.If unavailable, search for factory maintenance and
overhaul.
CF3
Inverter detects wiring fault (with
seven categories from CF3.1 to
CF3.7)
Factory maintenance and overhaul.
HPF
Control device protection wiring fault
(Three types: HPF.1,HPF.2,HPF.3)
Factory maintenance and overhaul.
b.b
When external multifunction terminals
(MI1, MI2, and MI3) is set to this
function and GND is closed, inverter
output stops.
b.b shall disappear immediately after signal source
eliminated.
CFa
Auto accel/decel mode failure
1.Check inverter complies with motor properly.
2.Load back up inertia overlarge.
3.Sudden load variation.
CE1
Communication fault
1.Check communication signals were not connection
(SG+,SG-).
2.Check communication format is proper.
CODE
Software protection activation
Factory maintenance and overhaul.

■ Innovate for more | win forever
■ Industry intelligence | Energy saving | Green power
Savch wechat
Service Number
Quanzhou Factory
Address:3# Zixin Road, Jiangnan Hi-Tech Industrial Park,
Quanzhou, Fujian, China
Tel:0595-24678267 Fax:0595-24678203
Service Network
Website:www.savch.net
Qualification
Received ISO9001 and CE recognition
520000013267 V2.3 2021-05-21
All rights reserved. Subject to change without further notice.
Sales service contact address
Table of contents
Other Savch Inverter manuals