manuals.online logo
Brands
  1. Home
  2. •
  3. Brands
  4. •
  5. Saxby Lighting
  6. •
  7. Floodlight
  8. •
  9. Saxby Lighting Olea Manual

Saxby Lighting Olea Manual

• Thissystemcontainsnon-replaceablepartsand
cannotbeserviced.Ifdamageoccursthepartshould
bescrapped.
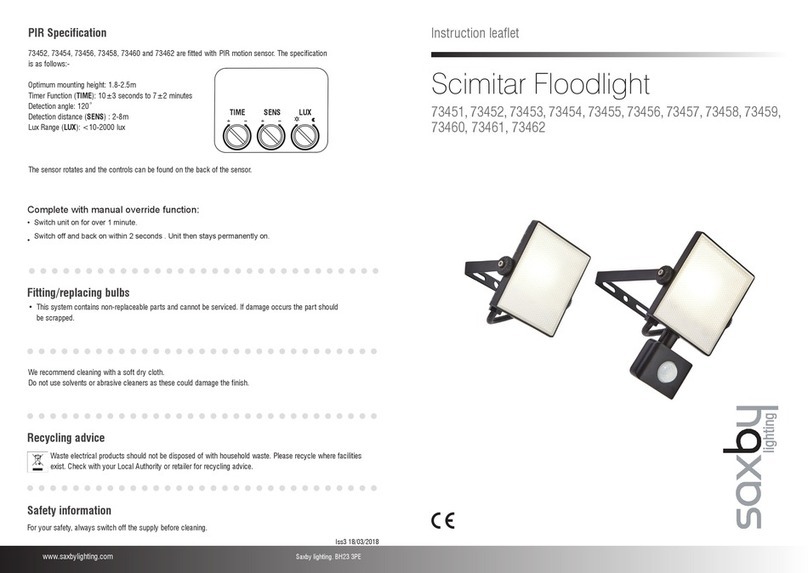
Instructionleaflet
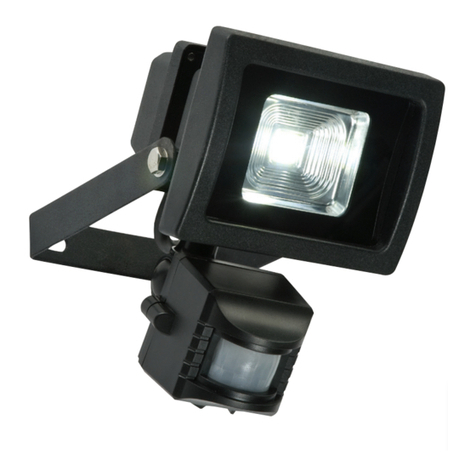
Olea 10W PIR Flood Light
48742
www.saxbylighting.com
Foryoursafety,alwaysswitchoffthesupplybeforecleaning.
Wasteelectricalproductsshouldnotbedisposedofwithhouseholdwaste.Pleaserecyclewherefacilities
exist.CheckwithyourLocalAuthorityorretailerforrecyclingadvice.
Recycling advice
Safety information
SaxbyLightingLtd.BH233PE
Werecommendcleaningwithasoftdrycloth.
Donotusesolventsorabrasivecleanersasthesecould
damagethefinish.
The LED's are protected by a lens. This part must be replaced immediately should the lens become
cracked or damaged. This fitting must not be used without the lens in place.
Replace Cracked
Shade
Fitting/replacing bulbs
Iss.112032014
• Loosenthe wallbracket bolts,and adjustthe fitting
tothe desiredposition. Ensurethat thecable isnot
snagged.Re-tightenthebolts.
• Replacefuse orcircuit breakerandswitchon.Your
lightisnowreadyforuse.
Commissioning
PIR Adjustment
• Theunitmustbeinstalledinaverticalposition,and
fitted2m-4.5mabovetheground.
• ThePIRsensorcanbeadjusted.Thedetectionangle
is set at 120 degrees. The duration that the lamp
staysoncanbealteredfrom5seconds-10minutes
±2minutes.Useasmallscrewdrivertoadjustthe
‘TIME’and‘DAYLIGHT’ screws.When adjustingthe
sensitivity (detection distance) in daylight it will be
necessarytocoverthesensortosimulatenighttime.
The daylight sensitivity is adjustable
by turning ‘DAYLIGHT’ screw.
Detection range is fixed between 1
and 6 metres
Fixed 1 - 6 metres
Duration the bulb stays on is
adjustable by turning 'TIME' screw
Base of product
2-4.5 Metres
4M2M 6M
TIME
DAYLIGHT
Thankyouforpurchasingthislightfitting.Pleasereadtheinstructionscarefullybeforeusetoensuresafeand
satisfactoryoperationofthisproduct.Pleaseretaintheseinstructionsforfuturereference.
Warning
This is a Class 1 product and must be earthed.
Pleasereadtheseinstructionscarefullybefore
commencinganywork.
Thisunitmustbefittedbyacompetentandqualified
electrician.
InstallinaccordancewithIEEWiringregulationsand
currentBuildingRegulations.
Topreventelectrocutionswitchoffatmainssupply
beforeinstallingormaintainingthisfitting.Ensure
otherpersonscannotrestoretheelectricalsupply
withoutyourknowledge.Ifyouareinanydoubt,
pleaseconsultaqualifiedelectrician.
Thislightfittingshouldbeconnectedtoacircuitwitha
30mARCDfitted.
Ifreplacinganexistingfitting,makeacarefulnoteof
theconnections.
Theunitcannotbedimmed.
Thissystemcontainsnon-replaceablepartsand
cannotbeserviced.Ifdamageoccursthepartshould
bescrapped.
Wasteelectricalproductsshouldnotbedisposedof
withhouseholdwaste.Pleaserecyclewherefacilities
exist.Checkwithyourlocalauthorityorretailerfor
recyclingadvice.
ThisproductisratedatIP65.
Thisproductisnotsuitableforlocationinorneara
marineenvironment.
Theentireunitgetshotwhilstonforaperiodoftime.
Specification
Voltage: 240V~50Hz
Lamp: 1x10WLEDCOB,
IPrating: 65
Layout
• Planthedesiredlayoutofthisfittingcarefully,
ensuringthecablehasenoughflextoallowfor
futuretiltadjustmentsifnecessary.
• Avoidlocatinganycablesinpositionsthatwould
causeahazard.Positioncablesandoutdoorrated
junctionboxes(notsupplied)awayfromareas
wheretheymaybeatriskfrombeingcut,trappedor
damaged.
• Thisisafloodlightproduct,andthereforeshouldbe
positionedwhereitwillnotcauseaglarehazard.
• WerecommendthatyouuseH05RN-Fspecification
cable(notsupplied)whichisanoutdoorgrade,
rubbersheathedcable.Themainssupplycablemust
haveaminimumcrosssectionalareaof1.0mm²
Cablesmustbeprotectedusingsuitableconduitor
plastictrunking.
• Avoidmountingonsurfacessubjecttovibration,as
thismayaffectthePIRsensor.
• Toavoiddamagetotheunit,donotaimthesensor
towardsthesunorareasofstrongelectro-magnetic
disturbances.
• Toavoidnuisancetriggering,thesensorshouldbe
aimedawayfromheatsources,suchasBBQ’s,
Air-Conditioners,otheroutsidelighting,movingcars
andflueventsorreflectivesurfacessuchassmooth
whitewallsorswimmingpools.
• Whenselectinglocation,itisadvisabletonotethat
movementacrossthesensorsfieldismoreeffective
thantowards/awayfromit.
Existingfittingsmustbecompletelyremovedbefore
installationofanewproduct.Beforeremovingthe
existingfitting,carefully note the position of each set
of wires.
• Decideontheoptimumlocationfortheproduct.
• Removethefixingbracketfromtheproductby
removingtheboltsandspringwashers.Keepsafe
forrefittinglater.
• Holdthebracketinpositionandmarkthelocation
ofthefixingholes.Aminimumoftwofixingpoints
mustbeused.
• Drillandplugthewallatthemarkedpositions.
• Fixthebrackettothewallusingthescrewsand
plugs.Ensurethewalliscapableofholdingthe
weightoftheproduct.Takecaretoavoiddamaging
anyconcealedwiringandpipes.Thecorrectfixings
shouldbeusedforbrickorcavitywalls.
• UndoscrewsholdingtheJunctionBoxCoverand
remove.
• LoosenGlandtoallowcabletopassthrough.Feed
cablethrough,allowingenoughlengthtoconnectto
terminalblock.
• Wireasdetailedbelow.
• Re-fitJunctionBoxCover,ensuringexcesscable
slackispulledthrough,andsealiscorrectlyseated
andglandisfullytightened.
• Refitproducttobracketensuringspringwashers
arefittedontotheboltsandthattheboltsarefully
tightened.
Installation
Connectthesupplycabletotheterminalsasindicated
below:-
Wiring
NEUTRAL
EARTH
SWITCHEDLIVE
BLUE(N)
GREEN/YELLOW
BROWN(L)
SUPPLY LIGHTFITTING
Check that...
• Youhavecorrectlyidentifiedthewires.
• Theconnectionsaretight.
• Noloosestrandshavebeenleftoutoftheconnection
block.

This manual suits for next models

1

Other Saxby Lighting Floodlight manuals

Saxby Lighting Vanguard RP500 User manual

Saxby Lighting

Saxby Lighting Vanguard RP500 User manual

Saxby Lighting Vanguard User manual

Saxby Lighting

Saxby Lighting Vanguard User manual

Saxby Lighting 78963 Manual

Saxby Lighting

Saxby Lighting 78963 Manual

Saxby Lighting 91860 User manual

Saxby Lighting

Saxby Lighting 91860 User manual

Saxby Lighting Salde User manual

Saxby Lighting

Saxby Lighting Salde User manual

Saxby Lighting 108672 User manual

Saxby Lighting

Saxby Lighting 108672 User manual

Saxby Lighting 107632 User manual

Saxby Lighting

Saxby Lighting 107632 User manual

Saxby Lighting Mantra 78971 User manual

Saxby Lighting

Saxby Lighting Mantra 78971 User manual

Saxby Lighting 48742 Manual

Saxby Lighting

Saxby Lighting 48742 Manual

Saxby Lighting Magma 43784 Manual

Saxby Lighting

Saxby Lighting Magma 43784 Manual

Saxby Lighting Scimitar Series Manual

Saxby Lighting

Saxby Lighting Scimitar Series Manual

Saxby Lighting Max User manual

Saxby Lighting

Saxby Lighting Max User manual

Saxby Lighting Deluge PRS250 Manual

Saxby Lighting

Saxby Lighting Deluge PRS250 Manual

Saxby Lighting Laryn 5278J Manual

Saxby Lighting

Saxby Lighting Laryn 5278J Manual

Saxby Lighting 98443 User manual

Saxby Lighting

Saxby Lighting 98443 User manual

Popular Floodlight manuals by other brands

Defiant CD-5936-BK Use and care guide

Defiant

Defiant CD-5936-BK Use and care guide

King Tony 9TA45 manual

King Tony

King Tony 9TA45 manual

Defiant DFI-7005-WH-G quick start guide

Defiant

Defiant DFI-7005-WH-G quick start guide

ViSAGE VIS060 user manual

ViSAGE

ViSAGE VIS060 user manual

Terex AL4000D2 Series Operator, service & parts manual

Terex

Terex AL4000D2 Series Operator, service & parts manual

GE Ultra Sport GEH-5897 instructions

GE

GE Ultra Sport GEH-5897 instructions

LF PORTFOLIO EL0885BKS manual

LF

LF PORTFOLIO EL0885BKS manual

Life 39.9F4020T user manual

Life

Life 39.9F4020T user manual

SGM P-5 Wash Light user manual

SGM

SGM P-5 Wash Light user manual

Rebel URZ3480 user manual

Rebel

Rebel URZ3480 user manual

Eagle L330A quick start guide

Eagle

Eagle L330A quick start guide

Eurolux FS235 manual

Eurolux

Eurolux FS235 manual

Intermatic FL150MH installation instructions

Intermatic

Intermatic FL150MH installation instructions

ORBILOC Run Dual Safety Light quick guide

ORBILOC

ORBILOC Run Dual Safety Light quick guide

Philips Clearflood Large BVP651 manual

Philips

Philips Clearflood Large BVP651 manual

hylite Mightylite MFL015 Installation & operating instructions

hylite

hylite Mightylite MFL015 Installation & operating instructions

ANSMANN FL800AC manual

ANSMANN

ANSMANN FL800AC manual

Cyclops Lighting PR-20W user manual

Cyclops Lighting

Cyclops Lighting PR-20W user manual

manuals.online logo
manuals.online logoBrands
  • About & Mission
  • Contact us
  • Privacy Policy
  • Terms and Conditions

Copyright 2025 Manuals.Online. All Rights Reserved.