SCHEU BIOPLAST XTREME PRO Kit User manual

Pressure Moulding Technique
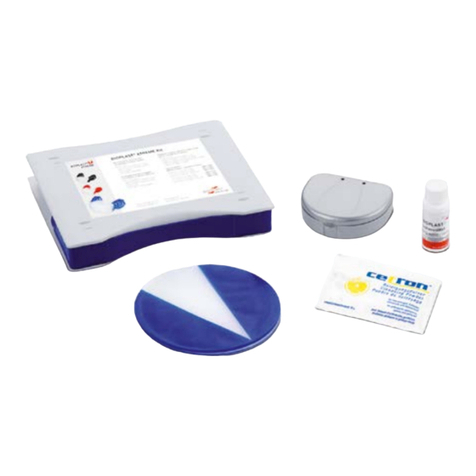
BIOPLAST®XTREME PRO Kit
Herstellanleitung / Instruction manual /
Mode d’emploi / Manual de instrucciones

Materialliste
BIOPLAST®XTREME PRO 4,0 mm
BIOPLAST®2,0 mm
DURAN®-Folie 0,75 mm
BIOPLAST®-Isoliermittel
Heiz-Support
Liste des matériaux
BIOPLAST®XTREME PRO 4,0 mm
BIOPLAST®2,0 mm
DURAN®0,75 mm
BIOPLAST®agent isolant
Support de chauffe
List of materials
BIOPLAST®XTREME PRO 4,0 mm
BIOPLAST®2,0 mm
DURAN®0,75 mm
BIOPLAST®insulating agent
Heating Support
Lista de materiales
BIOPLAST®XTREME PRO 4,0 mm
BIOPLAST®2,0 mm
DURAN®0,75 mm
BIOPLAST®líquido separador
Soporte de calentamiento

3
Herstellanleitung ............................................................... 4 - 10
Instruction manual ...........................................................11 - 17
Mode d’emploi ................................................................. 18 - 24
Manual de instrucciones ................................................... 25 - 31
Heizzeiten und Codes
Heating times and codes
Temps de chauffe et codes
Tiempos de calentamiento y códigos ................................ 32 - 33
BIOPLAST®XTREME PRO Kit

Nur die für den Sportmundschutz notwen-
digen Modellbereiche mit einmaligem,
dünnem Auftrag von BIOPLAST®-Isolier-
mittel versehen. Plangetrimmtes Modell so
auf der Modellstützplatte platzieren, dass
der klare Keil der BIOPLAST®XTREME PRO
Folie nach dem Tiefziehen in gewünschter
Ausdehnung die Front des Modells ab-
deckt (z.B. von 3-3). Beim Einlegen der
Folie darauf achten, dass die Etikettierung
zum Strahler zeigt. Mittels programmier-
tem Code bzw. empfohlener Heizzeit die
Folie vorschriftsmäßig erwärmen. Druck-
kammer verriegeln und nach Ablauf der
Abkühlphase öffnen.
Herstellanleitung
4
BIOPLAST®XTREME PRO
Herstellanleitung
DE
1

5
Folie mit Schere oder Skalpell am Modell-
boden beschneiden und im Frontbereich
mit Silikonspray isolieren.
Zur Herstellung eines Schutzschildes das
Modell mit der isolierten Folie vertikal im
Granulat einbetten und die DURAN®-Folie
(0,75 mm) mittels programmiertem Code
bzw. empfohlener Heizzeit vorschriftsmäßig
erwärmen. Druckkammer verriegeln und
nach Ablauf der Abkühlphase öffnen.
DE
2
3

6
Herstellanleitung
Die BIOPLAST®XTREME PRO Folie wird
bis zur gewünschten Ausdehnung aus-
geschnitten. Der Rand muss hierbei gerade
abgeschnitten werden, da ein Anschrägen
die optimale Laminierung der zweiten
BIOPLAST®-Folie unmöglich machen kann.
Die DURAN®-Folie wird ebenfalls mit einer
Schere bis zur gewünschten Ausdehnung
ausgeschnitten.
Die Ausdehnung der DURAN®-Folie in
Richtung vordere Umschlagfalte sollte auf
jeden Fall einige Millimeter geringer sein
als die Ausdehnung der darunter liegenden
BIOPLAST®XTREME PRO-Folie. Anson-
sten kann es später zu Problemen beim
Laminieren oder Ausarbeiten kommen.
DE
4
5

7
Die BIOPLAST®XTREME PRO-Folie wird
mit einem Fräser an allen Interdentalstellen
und okklusal perforiert, um die Bildung von
Luftblasen unter dem Schutzschild und
zwischen den BIOPLAST®-Folien zu ver-
hindern.
Die BIOPLAST®XTREME PRO-Folie wird
mit einem feuchten Tuch gereinigt, um die
Silikonisolierung zu entfernen.
DE
7
6

Herstellanleitung
Vor dem Tiefziehen der BIOPLAST®2 mm-
Folie wird der Schutzschild aus DURAN® in
der Front platziert. Das Modell muss mit
der Front zur Druckkammer zeigen.
Mittels programmiertem Code bzw.
empfohlener Heizzeit wird die BIOPLAST®
2 mm-Folie vorschriftsmäßig erwärmt, die
Druckkammer verriegelt und nach Ablauf
der Abkühlphase wieder geöffnet. Folie am
Modellboden beschneiden.
8
DE
8
9

Okklusalflächen unter dem IR-Strahler
mittels Heiz-Support bei geschlossener,
nicht verriegelter Druckkammer erwär-
men und das Gegenkiefermodell okklusal
mit BIOPLAST®-Isoliermittel behandeln,
damit beim Einbiss im Artikulator keine
Gipsspuren übertragen werden. Im Arti-
kulator den Gegenkiefer einbeißen lassen.
Mittels Druckluft oder Wasser abkühlen
und entformen.
Die Folie wird mit einer Schere bis zur
gewünschten Ausdehnung beschnitten.
9
DE
10
11

Herstellanleitung
Die Ränder können mit dem BIOPERM-
Trimmer oder mit einer DIMO®PRO-Scheibe
geglättet werden. Die zugerichtete POLY-
FIX-Scheibe eignet sich gut zum Aus-
sparen von Bändchen. Zum Entfernen von
harten Kanten im Labial- und Palatinal-
bereich wird der Sportmundschutz schräg
angeschliffen. Die Endbearbeitung des
Randes erfolgt mit dem OSAMU-Polierer
bei geringer Drehzahl und geringem An-
pressdruck. So wird ein Glänzen mit einer
Flamme überflüssig.
10
DE
12

11
Apply one thin layer of BIOPLAST®insula-
ting agent only to those parts of the model
which will be covered by the mouthguard.
Trim model flat and place on model plat-
form with the clear V-shaped part of the
BIOPLAST®XTREME PRO material cove-
ring the desired extension of the anterior
section (e.g. from 3-3). Make sure the side
of the label with the imprint is facing the in-
frared heater when fixing the material. Heat
the foil by setting the code or recommen-
ded heating time according to the instruc-
tions. Close pressure chamber and open
after cooling phase has elapsed.
11
BIOPLAST®XTREME PRO
Instruction manual
GB
1

12
Instruction manual
Cut material with scissors or scalpel on
the model bottom and insulate the anterior
section with a silicone spray.
For the fabrication of a protection insert:
embed the model vertically in the pellets
and heat DURAN®0,75 mm by setting the
code or recommended heating time. Lock
pressure chamber and open after cooling
phase has elapsed.
2
3
GB

13
Cut the BIOPLAST®XTREME PRO to the
desired extensions. Make sure the mate-
rial is being cut straight edge, as cutting it
diagonally might impair the optimum lami-
nation with the 2nd BIOPLAST®. Cut the
DURAN®, too, with scissors to the desired
extensions.
Make sure the extension of DURAN®
towards the alveolar ridge is some milli-
meters shorter than the extension of
BIOPLAST®XTREME PRO underneath, in
order to avoid problems in laminating the
material.
4
5
GB

14
Instruction manual
Pierce holes into the BIOPLAST®XTREME
PRO – occlusally and interdentally – by
means of a bur, in order to avoid air bubbles
under the protection insert and between the
BIOPLAST®material.
Clean BIOPLAST®XTREME PRO with moist
tissue paper to remove the silicone insu-
lation.
6
7
GB

15
Before pressurising the BIOPLAST®
2 mm, place the protection insert made of
DURAN®in the front, the front of the model
facing the pressure chamber.
Then heat BIOPLAST®2,0 mm by setting
the code or recommended heating time,
lock the pressure chamber and open after
cooling phase has elapsed. Cut material at
model bottom.
8
9
GB

16
Instruction manual
Heat the occlusal surfaces under the in-
frared heater using the heating support
with the pressure chamber closed, but not
locked. Insulate occlusally the antagonist
model with BIOPLAST®insulating agent,
in order to avoid plaster residues. Then put
models in the articulator for counter bite.
Cool down with compressed air and water
and remove.
Cut the material with scissors to desired
extensions.
GB
10
11

17
Polish the edges with BIOPERM trimmer
or DIMO®PRO wheel. Cut the mouthguard
diagonally to remove sharp edges in the
labial and palatinal area. Finish the rims
using the OSAMU polisher at a low RPM
exerting low pressure.
GB
12

18
Mode d’emploi
Appliquer une couche fine de BIOPLAST®
agent isolant uniquement sur les parties
du modèle qui seront couvertes par le
protège-dent. Tailler le socle du modèle
de façon plane et le placer sur le porte-
modèle, la partie claire en forme de V de
la plaque BIOPLAST®XTREME PRO cou-
vrant le bloc antérieur dans les dimensions
désirées (p.e. de 3-3). En fixant la plaque
de thermoformage, veillez à ce que le côté
de l’étiquette avec l’impression soit tourné
vers la lampe à infrarouge. Chauffer la
plaque selon les instructions. Fermer la
chambre de compression et ouvrir une fois
la durée de refroidissement écoulée.
BIOPLAST®XTREME PRO
Mode d’emploi
1
FR

19
Couper la plaque à la base du socle avec
des ciseaux ou scalpel et isoler d’un spray
silicone dans le bloc antérieur.
Comment fabriquer une renfort de pro-
tection: Enrober le modèle avec la feuille
isolée verticalement dans les granulés et
chauffer une plaque DURAN®0,75 mm
selon les instructions. Fermer la chambre
de compression et ouvrir une fois la phase
de refroidissement écoulée.
2
3
FR

20
Mode d’emploi
Tailler la plaque BIOPLAST®XTREME PRO
à la forme désirée. Veuillez à ce que le bord
soit coupé de façon droite, parce que les
bords coupés de façon diagonale peuvent
avoir des effets négatifs sur la combinaison
avec la 2ème plaque BIOPLAST®. Tailler la
plaque DURAN®également avec des
ciseaux aux dimensions désirées.
L’extension de la plaque DURAN®jusqu’au
limbe alvéolaire devrait être quelques milli-
mètres plus courte que celle de la plaque
BIOPLAST®XTREME PRO se trouvant
en-dessous, pour éviter des problèmes en
laminant et finissant les plaques.
4
5
FR
Table of contents
Languages:
Other SCHEU Medical Equipment manuals