TB-9042 Page 2 of 4 © 2024 DESCO INDUSTRIES, INC.
Employee Owned
Desco Asia - 193-12 Yachimata-i, Yachimata-shi, Chiba, 289-1143 Japan • 043-309-4470 • Website: DescoAsia.com
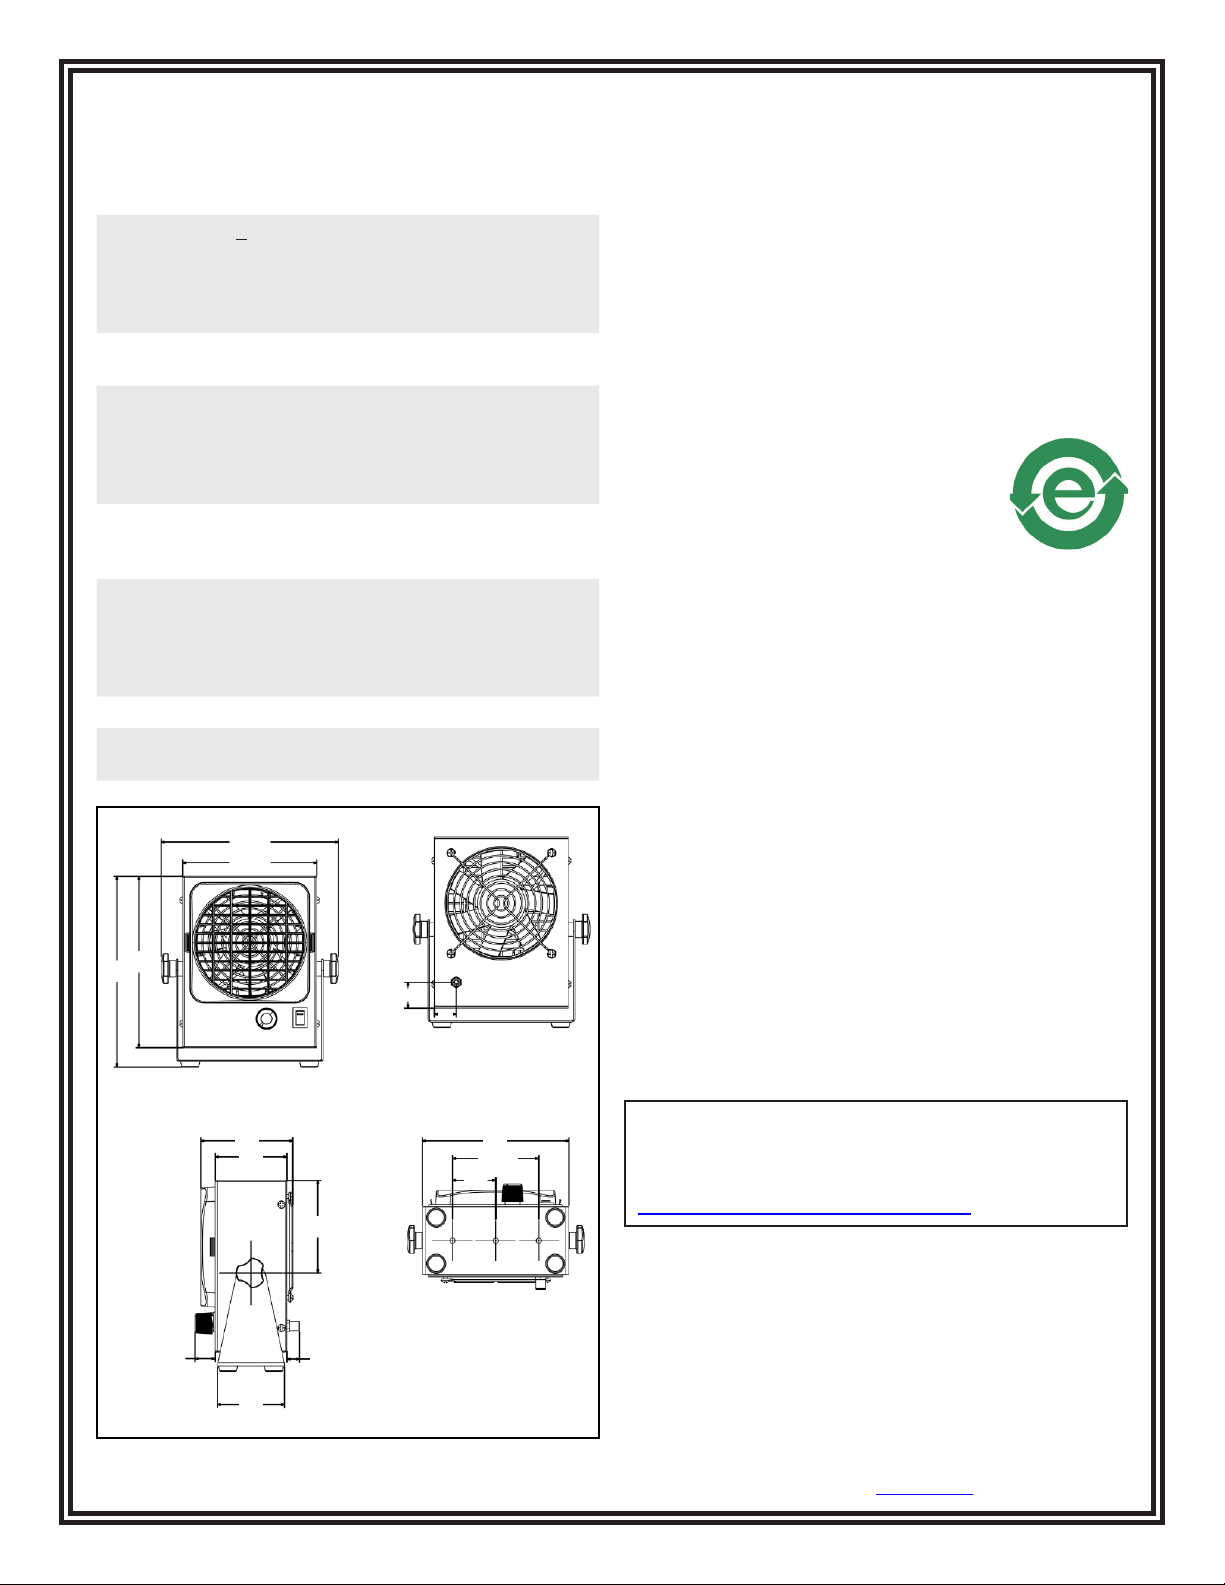
Installation
The Benchtop Air Ionizer mounts easily in a variety of
positions using the provided tilting bracket/stand. Mount
the bracket by following the illustration below. Secure
the mounting bracket with screws on table top. Adjust
the angle of air flow towards the target and secure it by
tightening the side knobs.
Maintenance
1. When performing emitter points maintenance,
disconnect the power cord from the electrical outlet.
Do not connect or disconnect the power plug with
wet hands as doing so puts you at risk of electrical
shock or injury.
2. Occasional cleaning of the case and emitter points
is the only routine maintenance required. Check
for any particle build-up on the emitter points.
Verification and adjustment may be required to keep
the balance within the specification range.
3. Cleaning the Case - Wipe the case with a
moistened, fully squeezed soft cloth with deionized
water. If a stronger cleaning solution is required,
use a soft cloth with a mixture of alcohol and water
(70% IPA and 30% DI water). Do not use any other
solvents that can damage the coating of the case.
Fully squeeze the cloth or sponge to remove any
excess liquid.
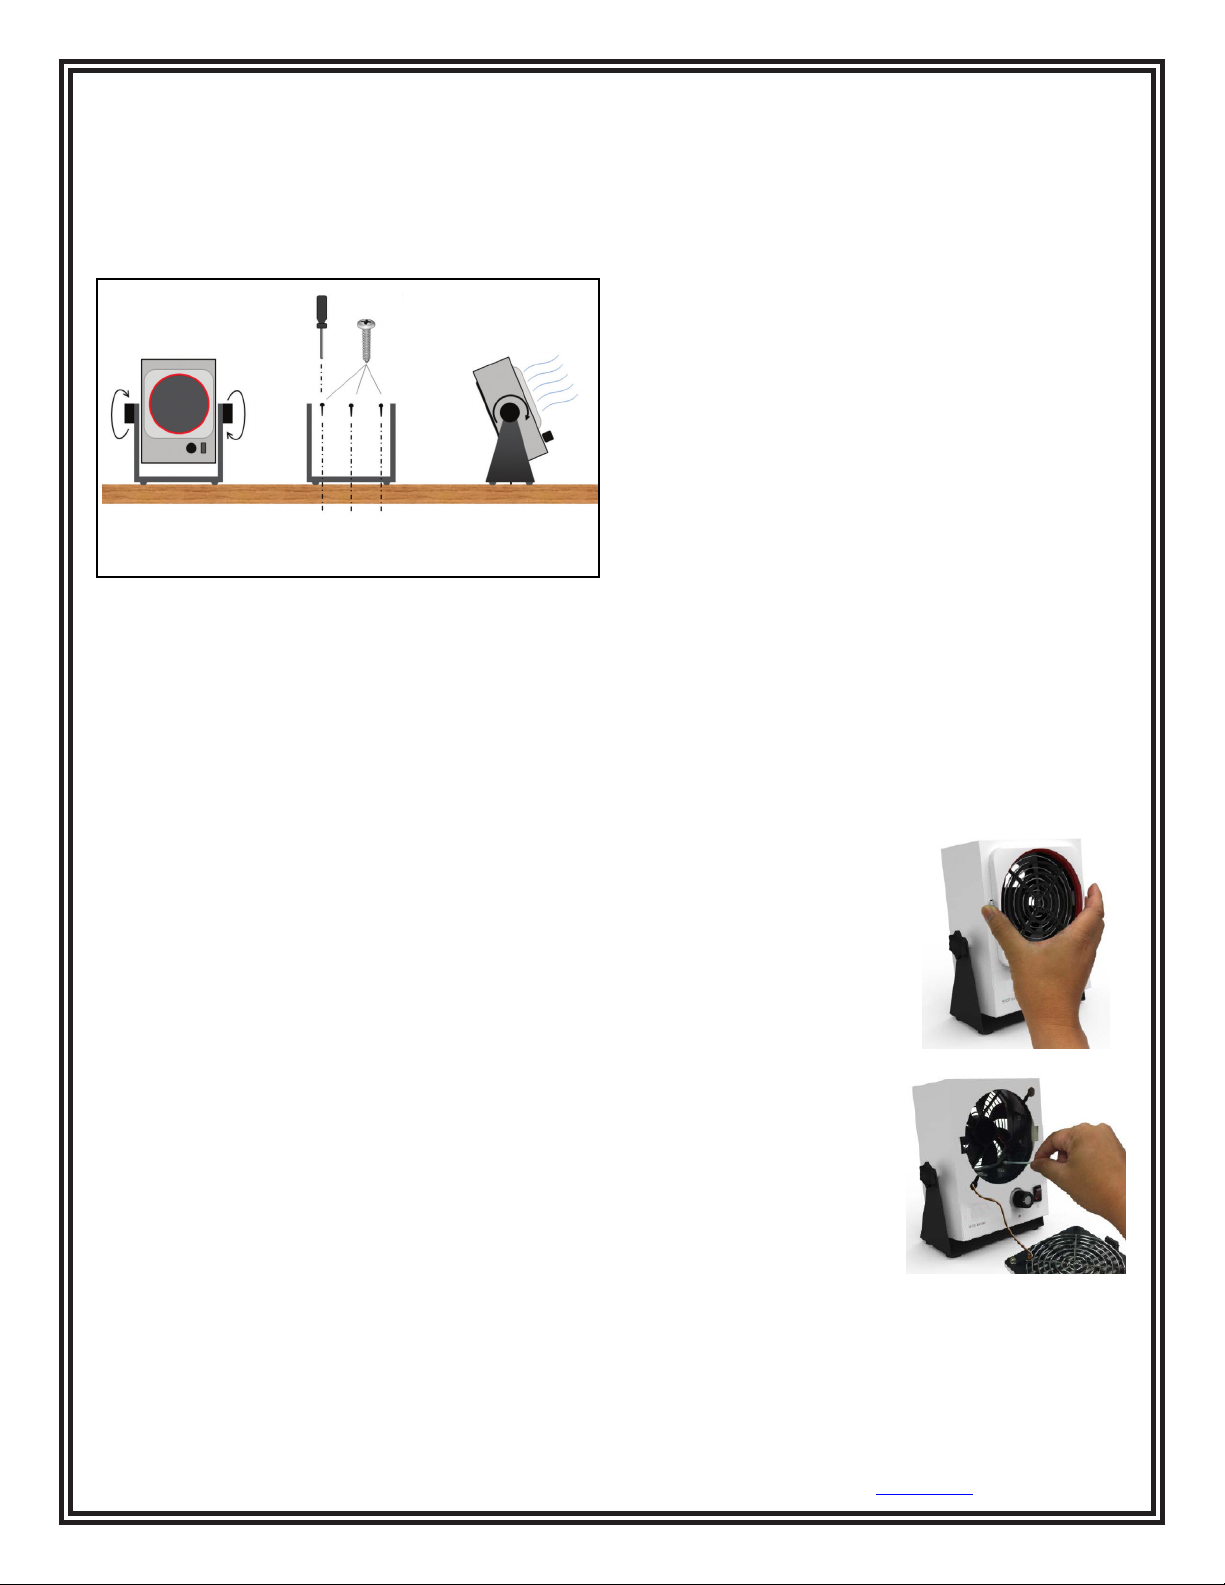
4. Cleaning the Emitter Points - The emitter points are
accessible through the front grill. To clean them,
turn off the unit; clean the points with a cotton swab.
Use caution when accessing the emitter points to
avoid injury. Access to the points is available by
pressing the side tabs, and pulling off the grill (see
images below). Use caution when removing the
grill to avoid breaking the cable that connects the
grill. Be careful not to bend the emitter points during
cleaning. The emitter points are fixed and therefore
not replaceable.
Metal screw
4x 20mm
1. Remove bothside knobs one
at a time.
2. Mount the bracket using
three screws.
3. Replace the fan body. Tighten
both knobs to a desired air flow
abgle towards the target of
ionization.
1. Remove both side
knobs one at a time.
2. Mount the bracket
using three screws.
3. Replace the fan body. Tighten
both knobs to a desired air flow
angle towards the target of
ionization.
Metal screw
4mm x 20mm
Figure 4. Installing the Benchtop Air Ionizer
The safety of any system incorporating this equipment
is the responsibility of the assembler of the system. The
ionizer’s performance is affected by its distance from
the worksurface and fan speed. As distance increases
or fan speed is reduced, the discharge time at the work
surface will increase.
WARNING: The Benchtop Air Ionizer is not designed to
be used in explosive areas or flammable atmospheres.
Sparks from the fan motor or emitter points may cause
ignition.
Electrical
Use the included power cord located at the back of
the ionizer. For proper operation, the unit must be
grounded for safe operation.
Grounding
The Benchtop Air Ionizer must be connected to ground
through the GROUND Terminal behind the unit and
the ground wire included in the package. Connect the
ground wire to a known good electrical ground. Failure
to connect the ground terminal may cause the unit to
malfunction.
Operation
1. Insert the power cord into an electrical outlet.
Make certain that power line voltage is within the
operating range of the ionizer. The use of improper
power line voltages may impair operation or damage
the unit. This will void the warranty.
2. The power switch on the front of the unit turns
the power and LED Power Indicator illuminates
when it’s on. The dial knob adjusts the fan speed.
Rotating it clockwise increases the fan speed.
Remove the front grill by
pressing and pulling the tabs
on each side of the grill.
Wipe the emitter tips and fan
blades with a cotton swab or
brush.
5. Re-attach the front grill after cleaning the emitter
points and fan blades.