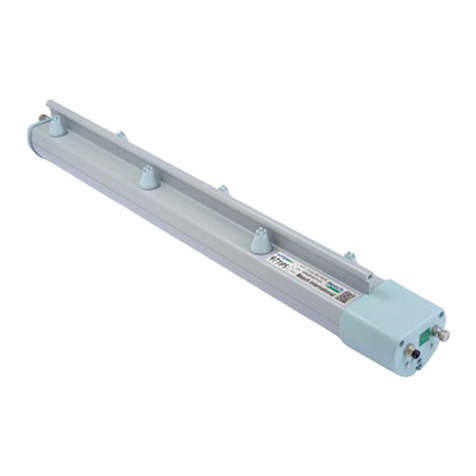
SCS 992X User manual

© 2024 DESCO INDUSTRIES INC
Employee Owned
DESCO ASIA
TB-9052 January 2024
Thank you for purchasing the SCS 992X Bar Ionizer.
Before installing and using the product, please read this instruction manual
carefully and be sure you fully understand all safety information and operating
procedures. Please store the manual in a secure location for convenient
reference. If you need further help on the instructions and precautions given
here, please contact a Desco Japan sales representative or authorized dealer.
Safety Information............................................................................................. 1
1. Product Overview.............................................................................................. 5
2. Specications.................................................................................................... 6
3. Model No. ......................................................................................................... 7
4. Package Contents............................................................................................. 7
5. Appearance and Names/Functions of Parts ..................................................... 8
6. Installation and Wiring..................................................................................... 10
7. Wiring and Tubing ........................................................................................... 14
8. Operating the Product..................................................................................... 17
9. Maintenance.................................................................................................... 18
992X BAR IONIZER
INSTRUCTION MANUAL

DESCO ASIA
TB-9052 Page 1 of 20 January 2024
© 2024 DESCO INDUSTRIES INC
Employee Owned
SAFETY INFORMATION
Please read, understand, and follow all safety information
contained in these instructions prior to the use of this device.
Retain these instructions for future reference.
Explanation of Signal Word Consequences
DANGER:Indicates a hazardous situation which, if not avoided, will
result in death or serious injury.
WARNING: Indicates a hazardous situation which, if not avoided, could
result in death or serious injury.
CAUTION: Indicates a hazardous situation which, if not avoided, could
result in minor or moderate injury and/or property damage.
NOTICE: Indicates a situation which, if not avoided, could result in
property damage.
Explanation of Safety and Related Symbols
Warning: Hazardous Voltage
CAUTION

DESCO ASIA
TB-9052 Page 2 of 20 January 2024
© 2024 DESCO INDUSTRIES INC
Employee Owned
WARNING
• To reduce the risks associated with hazardous voltage:
- Do not use this product with any AC adapter other than the provided
SCS AC adapter or power supply unit (LPS type) certied by UL60950-1.
- Be sure to connect to 24VDC output.
- Do not touch high voltage emitting needle while this product is powered
on. Unplug power source before maintenance and/or service is
performed.
- Keep ngers and other body parts, as well as screws, tools, jewelry, and
other electrically conductive objects, away from device.
- Unplug power cord during maintenance and/or service.
- Do not use this device outdoors or in a wet environment.
- Never attempt to open the device or service it yourself; no user
serviceable components are inside.
- Be sure to turn OFF (disconnect) the power before performing wiring,
installation, or inspection work.
• This equipment should be inspected and cleaned frequently. This will prevent
excessive accumulation of dirt, which may result in ashover or risk
of re.
• To reduce the risks associated with static charge:
- Use of this AIR IONIZER device is not intended to replace proper
grounding of personnel.
• To reduce risks associated with re or explosion:
- Do not install or use this product in a location or environment where
ammable or combustible gases, oil, or solvents are present. This product
is not designed to be intrinsically safe. Arcing between emitter
points can occur.

DESCO ASIA
TB-9052 Page 3 of 20 January 2024
© 2024 DESCO INDUSTRIES INC
Employee Owned
CAUTION
• To reduce the risks associated with environmental contamination:
- Product disposal must be in accordance with all applicable regulations.
• To reduce the risks associated with sharp needle points:
- Use caution when handling the unit and when working around the sharp
electrode needle.
• To reduce the risks associated with impact:
- Ensure the ionizer is installed onto a frame or similar structure with
adequate strength.
• To reduce the risks associated with hazardous air pressure:
- Always wear protection for eyes when working with pneumatic
components.
• To reduce the risks associated with ozone exposure:
- Only use product and/or equipment in an adequately ventilated
workspace.
NOTICE
• Ensure that proper pneumatic pressure is fed to this product. Read instruction
manual before the installation.
• Do not use this product with intermittent air ow. If you want to use this
product with intermittent air ow, contact Desco Japan beforehand.
• Ensure the installation location is stable and the surface is level before
installation is performed.
Other precautions
Complete the necessary information on the enclosed warranty card (postcard), and
be sure to return it to Desco Japan. Failure to do so may prevent you from receiving
services such as repair, replacement, and inspection.
Do not disassemble the product or subject it to strong impact. The warranty does not
cover, even within the warranty period, malfunctions resulting from i) these causes, ii)
repair or alteration not performed by us or our authorized agents, iii) natural disasters,
or iv) causes not attributable to us.

DESCO ASIA
TB-9052 Page 4 of 20 January 2024
© 2024 DESCO INDUSTRIES INC
Employee Owned
This product is an air bar ionizer (static electricity eliminating
device) used to neutralize electrostatic buildup in locations where it
is a frequent problem. In contains an ionized air emitter and can be
set up easily by supplying 24 VDC. It must be grounded to work
properly. It generates ionized air quickly and eciently. It also
includes functions to detect operating malfunctions and a cleaning
timer that counts electried time, ensuring that it can be used safely
and reliably.
1. Product Overview

DESCO ASIA
TB-9052 Page 5 of 20 January 2024
© 2024 DESCO INDUSTRIES INC
Employee Owned
Ion generation method
Structure
Ion balance
Eective elimination distance
Rating Power voltage
Power consumption
Air Tube Connection Size:
Corona discharge
Capacitive-couple type
30V± or less*1
50mm ~ 1500mm*2
DC24V±5%*3
150mA
For Bar Lengths 300-1650 OD 6mm
For Bar Lengths 1850 and greater OD 8mm
(Use nylon, soft nylon, or polyurethane tube)
Material Body
Emitter Connector
Emitter
Service Temperature
Environment Humidity
Altitude up to 2000m
ABS
Stainless steel
Tungsten
5~40°C
15~85% (No Condensation)
*1At the time of shipment from the factory, the product is set for a
measurement distance of 300mm and air pressure of 0.3MPa.
*2Elimination eect is due to the distance between the ionizer and the
object, so please x it with careful consideration.
*3Use the LPS (Limited Power Source) certied by IEC/EN60950-1.
Use proper type due to your usage.
2. Specications

DESCO ASIA
TB-9052 Page 6 of 20 January 2024
© 2024 DESCO INDUSTRIES INC
Employee Owned
3. Model No.
4. Package Contents
When this Product has been delivered to your site, check the
package for any missing part or for any abnormality or damages
that may have occurred during delivery before using the Unit. In
case any damage should be found or any abnormal operation
should be observed, please contact the distributor from which you
bought this unit or Desco Japan directly.
aMain unit .................................
bInstruction manual...................
cInstallation brackets ................
dWarranty card .........................
eCerticate of compliance.........
fIntermediate brackets .............
1unit
This document
2units(with 2 installation screws)
1each
1each
listed in the table below
(Installed on product at the time of shipment)
Length
(mm)
350
600
850
1100
1350
1600
1850
Qty. 0 1 2

DESCO ASIA
TB-9052 Page 7 of 20 January 2024
© 2024 DESCO INDUSTRIES INC
Employee Owned
5. Appearance and Names/Functions of Parts
Figures with brackets to x in vertical direction
Figures with brackets to installs angle

DESCO ASIA
TB-9052 Page 8 of 20 January 2024
© 2024 DESCO INDUSTRIES INC
Employee Owned
Model
No.
L(mm)
Length
50pxeach=B(mm) weight(kg)
992X-0350 350 50pX9=450 0.5
992X-0600 600 50pX9=450 0.7
992X-0850 850 50pX14=700 0.9
992X-1100 1100 50pX19=950 1.1
992X-1350 1350 50pX24=1200 1.3
992X-1600 1600 50pX29=1450 1.5
992X-1850 1850 50pX34=1700 1.7
Display area
Indication Explanation
POWER The green LED illuminates when the power is
ON and normal.
RUN The green LED illuminates when the system is
operating normally.
ALARM
The red alarm LED will illuminate during the
following conditions:
- Discharge occurs at the emitter needles or
other high-voltage parts
- Over-current is applied to the ionizer’s circuits
CLEANING
TIMER
CLEANING Yellow LED illuminates when you have exceeded
the running hours limit chosen by using T-Select.
RESET Resets hour counter and turns o Yellow LED.
T▪SELECT Selector to set up the number of hours between
cleaning reminders.

DESCO ASIA
TB-9052 Page 9 of 20 January 2024
© 2024 DESCO INDUSTRIES INC
Employee Owned
6. Installation and Wiring
6-1) Conguration
This product has CLEANING TIMER function that enables you to
inform proper time for cleaning. By setting up the accumulative
running time, when it reaches the time, CLEAN LED illuminates.
If you use this function, please set up the conguration of T-SELECT
to optional number with a cabinet screwdriver.
* Its number is set up to No.0 when shipping.
* With this function, running time is added up by every one hour, so
within one hour, this function does not work.
* When CLEANING LED illuminates, that does not indicate
ALARM. Please note that when T·SELECT No CLEANING LED
illuminates, this product does not work as ALARM mode.
*As amount of attached substances to discharge needles diers by
atmosphere and air ow, please set up the cleaning period with
your considering those elements.
T▪SELECT No. Accumulative running time (h)
0This function will not work.
(Default setting when shipping)
1 100
2 300
3 500
4 800
5 1000
6 3000
7 5000
8 8000
9 10000

DESCO ASIA
TB-9052 Page 10 of 20 January 2024
© 2024 DESCO INDUSTRIES INC
Employee Owned
6-2) Installation
Before Installation
*Install so that the main unit does not contact any grounded object.
Such contact may result in unit malfunction. In particular, if the
emitter electrode contacts the ground, a safety circuit operation
failure may occur.
*Be sure to fasten the brackets securely. Failure to do so may
cause the unit (particularly longer unit) to bend or twist, resulting
in malfunction.

DESCO ASIA
TB-9052 Page 11 of 20 January 2024
© 2024 DESCO INDUSTRIES INC
Employee Owned
*Install the unit onto a frame or similar structure of adequate
strength. if the strength is insucient, the unit may become
unstable and fall, or may cause bending of the body.
*Be sure to check the installation location and other conditions
before installing the unit. In particular, if there are problems such as
vibration or level dierences at the installation location, bending of
the unit may occur, resulting in malfunction.
*Be sure to turn the power OFF before installing the unit. High
voltage is applied to the emitter needle. If ngers, tools, jewelry, or
other conductive objects are brought close to the needle, electrical
shock or malfunction may occur.
*Before installing the unit, verify that there is no looseness of the
emitter needle nozzle. If the nozzle is loose, it may fall o during
installation or, during operation when the power is turned ON.
*If there are any structural objects between the unit installation
position and target for electrostatic eliminiation, the ions in
the emitted air may be depleted, preventing the full ectrostatic
elimination eects from being achieved. Select a unit installation
position so that no objects can interfere with the operation. Please
be careful not to omit some structural objects moving nearby, when
installing.
*The distance of the ground point from the target for electrostatic
elimination is 50mm-1500mm. The electrostatic elimination eects
are optimum at a distance of 50mm. As the distance increases,
the eects decrease and a longer amount of time may be required
for electrostatic elimination. Please conrm the elimination eect
beforehand.
6-3) Installation method when using vertical-direction-installation-bracket
a Remove M5 Screw of unit installation bracket and intermediate
installation bracket, and remove L metal ttings.
b Position the unit in its proper place with M4 screws in 4.2mm OD holes.

DESCO ASIA
TB-9052 Page 12 of 20 January 2024
© 2024 DESCO INDUSTRIES INC
Employee Owned
*Fix the unit to proper place with M4 tapping, or with nuts from the
backside.
*Fix with plane washers and spring washers.
*Use two nuts per one bracket.
*Distance between nut hole for installation and the body is narrow,
we recommend you to use bolt nuts with hexagonal holes and x
with a ball-point-type wrench.
6-4) Installation method when using angle-installation brackets
a Please x to the hole of φ5.2 of the bracket with the M5 screw
in the place where it wants to installation bracket and intermediate
bracket.
*Fix the body to proper place with M5 tapping, or with nuts from the
backside.
*Fix with plane washers and spring washers.
*Screw up tightly to x the brackets completely.
bSet up angle and screw up M5 screws tightly.
*If tightening of M5 screws is loose, the installed angle may be
changed, and may make elimination eect lower.

DESCO ASIA
TB-9052 Page 13 of 20 January 2024
© 2024 DESCO INDUSTRIES INC
Employee Owned
7. Wiring and Tubing
Connect the cable as shown in the gure below.
*Securely connect the ground wire to the ground. (type a or type b).
*Use LPS (Limited Power Source) certied with IEC/EN60950-1.
*Securely insert the connector.
*Use the wire diameter 18-24 AWG.
*The alarm signal is a maximum of DC30V 0.2A
*Connect a φ 6 air tube (nylon, soft nylon, or polyurethane) to both
sides of the unit.
*There are air connection ports on both sides of the unit. However,
if sucient air can be supplied from just one side, it is possible to
supply air from one side for this product to work eciently. In this
case, be sure to use a plug for the φ 6 (or φ 8) air connection port
on the unused side.
*The compressed air supplied must be clean, dry air. If an air lter
Connector : AMP 172168-1
Pin : AMP 170365-1
Status Power OFF RUN LED ON ALARM LED ON
Contact Signal OPEN CLOSE OPEN

DESCO ASIA
TB-9052 Page 14 of 20 January 2024
© 2024 DESCO INDUSTRIES INC
Employee Owned
is necessary for the air supply equipment you are using, use an
in-line lter system or similar item.
*The maximum air pressure that can be supplied to the unit is
0.5MPa. Because this unit does not include a regulator speed
controller or similar function, an air pressure regulator must be
provided by the user.
*As the amount of compressed air consumed varies depending on
the unit length of your model, the air pressure level, the diameter,
and the length of piping, use devices that are suitable for the
conditions of use.
Piping of measurement of owing quantity of air
Air ow with L-type (low air consumption type) nozzle
Air Pressure
Length
(mm) 0.1MPa 0.2MPa 0.3MPa 0.4MPa 0.5MPa
350 11 15 17 19 21
600 23 28 32 37 40
850 34 41 48 54 59
1100 43 43 62 71 77
1350 51 62 75 85 96
1600 58 74 87 100 113
1850 80 103 121 138 154
Air ow (l/min)

DESCO ASIA
TB-9052 Page 15 of 20 January 2024
© 2024 DESCO INDUSTRIES INC
Employee Owned
Air Pressure
Length
(mm) 0.1MPa 0.2MPa 0.3MPa 0.4MPa 0.5MPa
350 23 28 31 35 39
600 42 52 59 67 73
850 58 71 83 94 105
1100 68 88 101 117 133
1350 75 98 116 132 149
1600 80 105 125 145 162
1850 138 171 192 225 256
H-type (high speed type) nozzle
Air ow (l/min)

DESCO ASIA
TB-9052 Page 16 of 20 January 2024
© 2024 DESCO INDUSTRIES INC
Employee Owned
8. Operating the Product
8-1) Setup before Starting Operation
a Check the ionizer wiring and air tubing.
b Supply air to the unit from the air equipment that is used.
* Use air pressure o 0.5MPa or less.
c Supply DC24V power to the unit. The POWER LED and RUN
LED on the unit illuminate and elctrostatic elimination starts.
* If the optional power adapter is used, supply
AC100-240V, 50/60Hz
8-2) Steps when Stopping Operation
a Remove power source.
b Remove air supply
8-3) Cancelling the Alarm
* Because this device utilizes high voltage, if a safety or operating
problem is detected, the high voltage is shut o. At this time the
RUN LED turns OFF and the ALARM LED illuminates. The system
is congured so that the system cannot be restarted unit the alarm
has been reset.
* When the ALARM LED is illuminated, refer to "9. Troubleshooting"
in this manual and correct the problem before restarting operation.
Remove power source, correct problem per troubleshooting guide
in Section 9 and then restore power supply.
Remove power source.
Correct problem per troubleshooting guide in Section 9 and then
restore power supply.

DESCO ASIA
TB-9052 Page 17 of 20 January 2024
© 2024 DESCO INDUSTRIES INC
Employee Owned
9. Maintenance
* This device should be installed and used in a location where it will
not contact water, oil, or similar substances. However if water, oil,
or another substance contacts the product, immediately turn OFF
the power and wipe away the substance with a cloth or other item.
Use particular caution at the high voltage sections and surrounding
area.
* If the emitter needle and surrounding area become fouled, the
electrostatic elimination eects will be reduced. If the electrostatic
elimination eects diminish, clean the emitter needle and the
surrounding area periodically ( in particular, the emitter needle
nozzle ) for preventing drop of elimination eect. Be sure to turn the
power OFF beforehand.
9-1) Cleaning the Emitter Needle Nozzle
* Be sure to turn the power OFF before cleaning the emitter
needle nozzle. Failure to do so may result in electric shock or
malfunction of this unit.
* The emitter needle nozzle is removable. When dust or other
substances become noticeable at the location where the product is
used, remove the emitter needle nozzle and take it to another
location for cleaning.
* The tip of the emitter needle is extremely sharp. Use sucient
care when handling it. The needle tip can cause injury.
* If the emitter needle tip accidentally becomes bent or chipped, or
resin part of needle is damaged during cleaning, replace the
emitter needle nozzle. If the emitter needle nozzle is not replaced,
the full product performance will not be achieved or it may cause
some accidents.
1. Verify that the power is turned OFF (disconnected).
2. Verify that the supply of air is stopped.
* To perform cleaning without removing the emitter needle nozzle,
proceed to 4.
3. Twist the emitter needle nozzle counterclockwise in
order to remove it from the unit.
* It is possible that the O-ring may become stuck to the unit when
the emitter needle nozzle is removed. If this occurs, remove the

DESCO ASIA
TB-9052 Page 18 of 20 January 2024
© 2024 DESCO INDUSTRIES INC
Employee Owned
O-ring, taking care not to lose or damage it. If the O-ring is not
reinstalled after cleaning, it will cause air leakage, preventing full
performance from being achieved.
4. Use cotton swabs or a similar thing moistened with
alcohol to wipe away the ouling from inside the emitter
nozzle, the emitter needle area, and other areas that are
dirty.
* If only performing cleaning without removing the emitter needle
nozzle, then cleaning is now nished. Verify that the tip of the
emitter needle is not bent or chipped, and that resin part of
discharge needle is damaged.
* Be sure to allow the alcohol to fully evaporate (dry) after cleaning.
* When you clean discharge needles taken o from the body, do
not clean needles soaked in alcohol. If you do so, it may cause
residual of alcohol inside discharge needles and because of its
structure, it cannot be easily dried, so it may lead to damage of the
body when you apply high voltage again.
5. Securely reinstall the emitter needle nozzle by placing
it in its original position and turning it clockwise until it
stops.
* When reinstalling the emitter needle nozzle, be sure to verify that
the O-ring is correctly poitioned on the nozzle before installing.
6. Verify that the tip of the emitter needle nozzle is not
bent or chipped, and that resin part of discharge needle
is damaged, and that the emitter needle unit is securely
installed.

DESCO ASIA
TB-9052 Page 19 of 20 January 2024
© 2024 DESCO INDUSTRIES INC
Employee Owned
9-2) Replacing the Emitter Needle Nozzle
* Because the emitter needle nozzle is consumable part, it
eventually becomes necessary to replace it. In addition, the emitter
needle or the emitter needle nozzle may become bent or chipped
during maintenance or due to accidents. If the tip of the emitter
needle becomes worn through use or damaged, it may become
impossible to achieve this product's full performance. In this case,
replace with a new emitter needle. ( Refer to "Optional Parts." )
1. Verify that the power is turned OFF (disconnected).
2. Verify that the supply of air is stopped.
3. Twist the old emitter needle nozzle counterclockwise in
order to remove it from the unit.
* It is possible that the O-ring may become stuck to the unit when
the emitter needle nozzle is removed. If this occurs, remove the
O-ring carefully.
4. Securely install the new emitter needle nozzle by
placing it in the position and turning it clockwise until it
stops.
* When installing the new emitter needle nozzle, be sure to verify
that the O-ring is in the designated location on the nozzle before
installing.
5. Verify that the tip of the emitter needle is not bent or
chipped, and that resin part of discharge needle is
damaged, and that the emitter needle unit is securely
installed.
This manual suits for next models
7
Table of contents
Other SCS Air Ionizer manuals
Popular Air Ionizer manuals by other brands
Desco EMIT
Desco EMIT 50664 Installation, Operation, and Adjustment Instructions

LIFE Ionizer
LIFE Ionizer M7 X NG user manual

Real Spirit
Real Spirit Aqua-Ionizer Pro Deluxe owner's manual

ESD SYSTEMS
ESD SYSTEMS Auto-Ion Operation installation and maintenance

EMIT
EMIT 50643 Installation, operation and maintenance manual
AtmosAir
AtmosAir Matterhorn Series Installation, operation and maintenance guide