manuals.online logo
Brands
  1. Home
  2. •
  3. Brands
  4. •
  5. Sealey
  6. •
  7. Controllers
  8. •
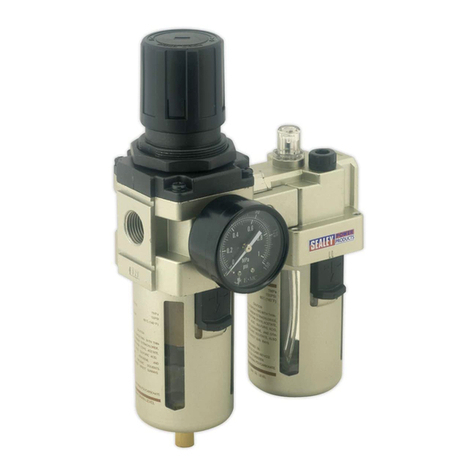
  9. Sealey POWER PRODUCTS SA106 User manual

Sealey POWER PRODUCTS SA106 User manual

This manual suits for next models

4

Other Sealey Controllers manuals

Sealey SA2001 User manual

Sealey

Sealey SA2001 User manual

Sealey ELECTROSTART E/START3012 User manual

Sealey

Sealey ELECTROSTART E/START3012 User manual

Sealey SUPERSTART220.V3 User manual

Sealey

Sealey SUPERSTART220.V3 User manual

Sealey SGA4 User manual

Sealey

Sealey SGA4 User manual

Sealey ARD01.V2 User manual

Sealey

Sealey ARD01.V2 User manual

Sealey REG/MM User manual

Sealey

Sealey REG/MM User manual

Sealey SUPERBOOST 180.V5 User manual

Sealey

Sealey SUPERBOOST 180.V5 User manual

Sealey START800 User manual

Sealey

Sealey START800 User manual

Sealey REG/MM.V2 User manual

Sealey

Sealey REG/MM.V2 User manual

Sealey SA106 User manual

Sealey

Sealey SA106 User manual

Sealey RS22 User manual

Sealey

Sealey RS22 User manual

Sealey SA4FR/38 User manual

Sealey

Sealey SA4FR/38 User manual

Sealey REG/MO.V2 User manual

Sealey

Sealey REG/MO.V2 User manual

Sealey ECS350 User manual

Sealey

Sealey ECS350 User manual

Sealey SGA40 User manual

Sealey

Sealey SGA40 User manual

Sealey SUPERBOOST 140.V4 User manual

Sealey

Sealey SUPERBOOST 140.V4 User manual

Sealey SGA3.V2 User manual

Sealey

Sealey SGA3.V2 User manual

Sealey SUPERSTART300.V5 User manual

Sealey

Sealey SUPERSTART300.V5 User manual

Sealey SA206 User manual

Sealey

Sealey SA206 User manual

Sealey SGA4.V2 User manual

Sealey

Sealey SGA4.V2 User manual

Sealey SGA4.V2 User manual

Sealey

Sealey SGA4.V2 User manual

Sealey ARD01 User manual

Sealey

Sealey ARD01 User manual

Sealey SA2FR.V3 User manual

Sealey

Sealey SA2FR.V3 User manual

Sealey ECS400 User manual

Sealey

Sealey ECS400 User manual

Popular Controllers manuals by other brands

Sunricher SR-ZV9003T3-RGBW-US Installation

Sunricher

Sunricher SR-ZV9003T3-RGBW-US Installation

Ksenia intro Installation and configuration manual

Ksenia

Ksenia intro Installation and configuration manual

Inovance CAN200 Series manual

Inovance

Inovance CAN200 Series manual

Gauzy LC6 FLEX Controller Installation and operation guide

Gauzy

Gauzy LC6 FLEX Controller Installation and operation guide

Viking SLP-1 Technical practice

Viking

Viking SLP-1 Technical practice

CKD KBX-30E-U Series instruction manual

CKD

CKD KBX-30E-U Series instruction manual

Sharp Energy Sun Flux User manual & installation guide

Sharp Energy

Sharp Energy Sun Flux User manual & installation guide

Yamaha RCX40 user manual

Yamaha

Yamaha RCX40 user manual

AB Quality PowerFlex 400 Frames D-H Service bulletin

AB Quality

AB Quality PowerFlex 400 Frames D-H Service bulletin

Yamaha MJC8 owner's manual

Yamaha

Yamaha MJC8 owner's manual

AL-KO ATC operating instructions

AL-KO

AL-KO ATC operating instructions

Savant SmartControl 2 Deployment guide

Savant

Savant SmartControl 2 Deployment guide

GameSir T3S user manual

GameSir

GameSir T3S user manual

Kostal inveor operating manual

Kostal

Kostal inveor operating manual

Emerson Yarway 20-55 Operating and safety instructions

Emerson

Emerson Yarway 20-55 Operating and safety instructions

CoCo ACM-LV24 Quick installation guide

CoCo

CoCo ACM-LV24 Quick installation guide

Brooks SLA5810/20 Installation and operation manual

Brooks

Brooks SLA5810/20 Installation and operation manual

SIGMA TEK SR 011 Technical manual

SIGMA TEK

SIGMA TEK SR 011 Technical manual

manuals.online logo
manuals.online logoBrands
  • About & Mission
  • Contact us
  • Privacy Policy
  • Terms and Conditions

Copyright 2025 Manuals.Online. All Rights Reserved.

INSTRUCTIONS FOR:
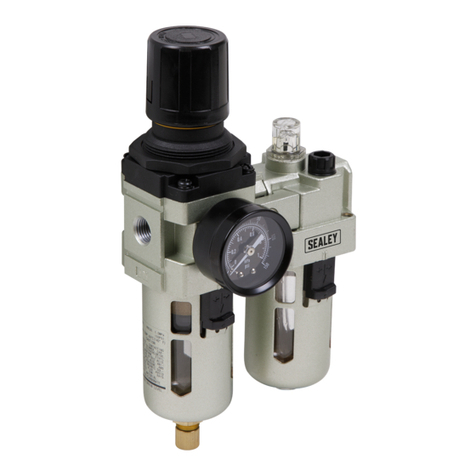
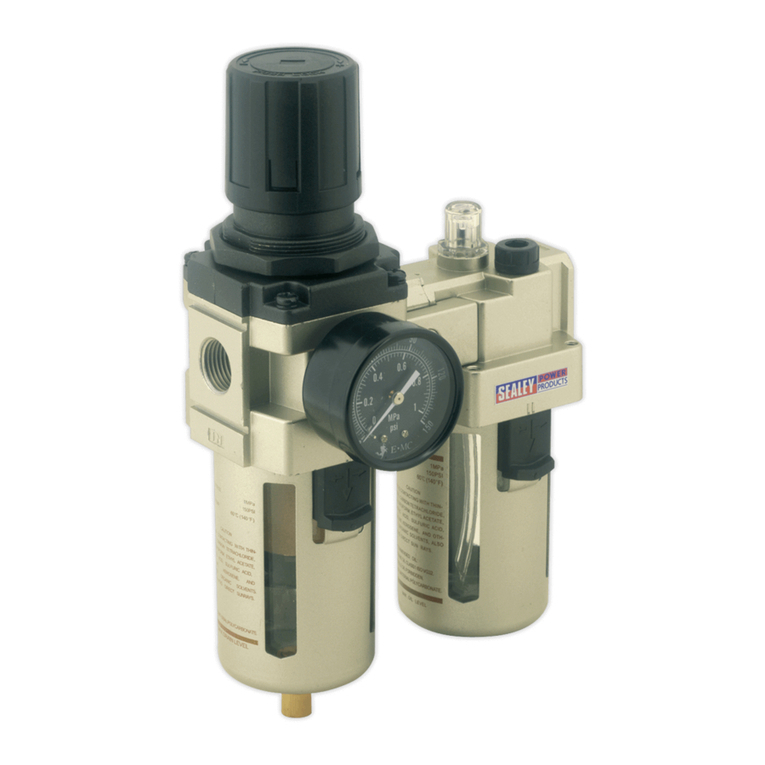
AIR REGULATOR, FILTER, LUBRICATOR RANGE
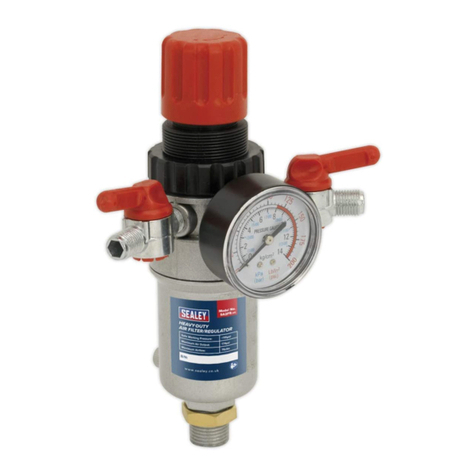
Models: SA106, SA106FR, SA106F, SA106L, SA106R
Thank you for purchasing a Sealey product. Manufactured to a high standard this product will, if used according to these instructions
and properly maintained, give you years of trouble free performance.
1. SAFETY INSTRUCTIONS
IMPORTANT: PLEASE READ THESE INSTRUCTIONS CAREFULLY. NOTE THE SAFE OPERATIONAL REQUIREMENTS, WARNINGS & CAUTIONS.
USE THE PRODUCT CORRECTLY AND WITH CARE FOR THE PURPOSE FOR WHICH IT IS INTENDED. FAILURE TO DO SO MAY CAUSE
DAMAGE AND/OR PERSONAL INJURY AND WILL INVALIDATE THE WARRANTY. PLEASE KEEP INSTRUCTIONS SAFE FOR FUTURE USE.
!WARNING! Ensure Health & Safety, local authority, and general workshop practice regulations are adhered to when using this equipment.
!WARNING! Disconnect the equipment from the air supply before changing accessories, servicing or performing any maintenance.
"Keep the equipment clean and maintain it in good condition (use an authorised service agent).
"Replace or repair damaged parts. Use genuine parts only. Unauthorised parts may be dangerous and will invalidate the warranty.
!WARNING! Ensure that the correct air pressure is maintained and not exceeded.
"Keep air hoses away from heat, oil and sharp edges. Check hoses for wear before each use and ensure that all connections are secure.
#DO NOT direct air from the air hose at yourself, others or animals.
"Drain the compressor air tank daily. Water in the air line will damage your equipment.
"When work is complete ensure that the air supply is turned off.
Suitable for workshop air supply set-ups. Regulator features locking control knob for pre-setting air pressure and pressure gauge. Filter has
manual drain facility with female 1/8”BSP outlet. Lubricator includes oil/air mix control and sight glass. Filter and lubricator are fitted with
metal bowl cages for protection. SA106, SA106FR and SA106R supplied with mounting bracket.
2. INTRODUCTION & SPECIFICATIONS
Filter/Lubricator/Regulator - SA106
Max. inlet pressure . . . . . . . . . . . . . . . . . . .150psi (10.3 bar)
Max. outlet pressure . . . . . . . . . . . . . . . . . . .125psi (8.6 bar)
Max. flow rate @ 100psi (6.9 bar) . . . . . . . . . . . . . . . .60cfm
Filter . . . . . . . . . . . . . . . . . . . . . . . . . . . . . . . . . . .25 micron
Lubricant . . . . . . .Sealey Air Tool Oil - ATO/500 or ATO/1000
Ports-Inlet . . . . . . . . . . . . . . . . . . . . . . . . . . . . . . . .1/4”BSP
Outlet . . . . . . . . . . . . . . . . . . . . . . . . . . . . . . .1/4”BSP
Gauge . . . . . . . . . . . . . . . . . . . . . . . . . . . . . .1/8”BSP
Filter/Regulator - SA106FR
Max. inlet pressure . . . . . . . . . . . . . . . . . . .150psi (10.3 bar)
Max. outlet pressure . . . . . . . . . . . . . . . . . . .125psi (8.6 bar)
Max. flow rate @ 100psi (6.9 bar) . . . . . . . . . . . . . . . .70cfm
Filter . . . . . . . . . . . . . . . . . . . . . . . . . . . . . . . . . . .25 micron
Ports-Inlet . . . . . . . . . . . . . . . . . . . . . . . . . . . . . . . .1/4”BSP
Outlet . . . . . . . . . . . . . . . . . . . . . . . . . . . . . . .1/4”BSP
Gauge . . . . . . . . . . . . . . . . . . . . . . . . . . . . . .1/8”BSP
Regulator - SA106R
Max. inlet pressure . . . . . . . . . . . . . . . . . . .150psi (10.3 bar)
Max. outlet pressure . . . . . . . . . . . . . . . . . . .125psi (8.6 bar)
Max. flow rate @ 100psi (6.9 bar) . . . . . . . . . . . . . . . .88cfm
Ports-Inlet . . . . . . . . . . . . . . . . . . . . . . . . . . . . . . . .1/4”BSP
Outlet . . . . . . . . . . . . . . . . . . . . . . . . . . . . . . .1/4”BSP
Gauge . . . . . . . . . . . . . . . . . . . . . . . . . . . . . .1/8”BSP
Filter - SA106F
Max. inlet pressure . . . . . . . . . . . . . . . . . . .150psi (10.3 bar)
Max. outlet pressure . . . . . . . . . . . . . . . . . . .125psi (8.6 bar)
Max. flow rate @ 100psi (6.9 bar) . . . . . . . . . . . . . . . .53cfm
Filter . . . . . . . . . . . . . . . . . . . . . . . . . . . . . . . . . . .25 micron
Ports-Inlet . . . . . . . . . . . . . . . . . . . . . . . . . . . . . . . .1/4”BSP
Outlet . . . . . . . . . . . . . . . . . . . . . . . . . . . . . . .1/4”BSP
Lubricator - SA106L
Max. inlet pressure . . . . . . . . . . . . . . . . . . .150psi (10.3 bar)
Max. outlet pressure . . . . . . . . . . . . . . . . . . .125psi (8.6 bar)
Max. flow rate @ 100psi (6.9 bar) . . . . . . . . . . . . . . . .60cfm
Lubricant . . . . . . .Sealey Air Tool Oil - ATO/500 or ATO/1000
Ports-Inlet . . . . . . . . . . . . . . . . . . . . . . . . . . . . . . . .1/4”BSP
Outlet . . . . . . . . . . . . . . . . . . . . . . . . . . . . . . .1/4”BSP
WARNING! Filter and lubricator bowls are manufactured
from polycarbonate and must not be used at temperatures
over 125OF (52OC) or for pressures over 218psi (15 bar).
Polycarbonate can be damaged and may fail if exposed to
certain solvents either internally or externally - strong
alkalies, compressor oils containing aromatic hydrocarbons
or fire retardant oils, or the fumes of any of these.
Clean with warm water only.
SA106/106FR/106F/106L/106R - 1 - 120406
SA106 SA106FR SA106F SA106L SA106R
4. OPERATION
4.1. Regulator - The output pressure is controlled by the knob. Before pressurising the air system
for the first time, pull out and rotate the knob anticlockwise to remove any loading on the
regulator spring. Pressurise the system and then rotate knob clockwise to set required output
pressure, as shown on gauge. When the required pressure is achieved push in knob to prevent
inadvertent adjustment.
Note: For correct pressure setting always adjust up from a lower pressure. Therefore to
reset from 90 to 70psi for example, reduce pressure from 90 to 60psi and then increase to 70psi.
4.2. Filter - The bowl should be drained regularly to prevent an excessive build-up of water/oil. Pull down
the drain valve at the bottom of the bowl, allow to drain and then release. Drain valve has
female 1/8” BSP outlet.
4.3. Lubricator - Remove the filler plug (fig.2.A) and fill bowl up to max. level, with air tool oil.
This can be done with the air line pressurised. With air flowing through the lubricator the oil
delivery rate can be adjusted by screw (fig.2.C) whilst watching the drip rate through the sight
dome (fig.2.B). The oil delivery rate will automatically increase or decrease in line with the air flow.
4.4. Both the filter and the lubricator are supplied with a metal bowl guard. To remove the guard, pull
down the latch (fig.3.D) and rotate the guard until either of the two pairs of lines (fig.3.E) on
the guard align with the similar marks (fig.3.F) on the head. The guard can now be removed.
To refit, slide the top of the guard into the head with the guard and head markings aligned,
and then rotate the guard so that the latch aligns with the marks on the head. The latch will
lock into place.
5. PARTS
6. DECLARATION OF CONFORMITY
The following fittings are also available from your supplier:
SA1/1214F . .1/2”BSP male -1/4”BSP female reducer
SA1/3814F . .3/8”BSP male -1/4”BSP female reducer
SA1/1414 . . .1/4”BSP male -1/4”BSP male connector
Declaration of Conformity We, the sole importer into the UK, declare that the products listed here are in conformity with the following standards and directives.
The construction files for these products are held by the Manufacturer and may be inspected, by a national authority, upon
request to Jack Sealey Ltd.
For Jack Sealey Ltd. Sole importer into the UK of Sealey Power Products.
Air Regulator, Filter & Lubricator Range
Models: SA106, SA106FR, SA106F,
SA106L & SA106R
97/23/EC Pressure Equipment Directive
98/37/EC Machinery Directive
93/68/EEC Marking Directive
Signed by Mark Sweetman Date: 12th April 2006
3. CONTENT & INSTALLATION
3.1. Confirm that all items are present and undamaged. If any parts are missing or damaged please contact the supplier.
SA106 - Combined filter, regulator with gauge, lubricator and mounting bracket.
SA106FR - Combined filter, regulator with gauge and mounting bracket.
SA106F - Filter.
SA106L - Lubricator.
SA106R - Regulator with gauge and mounting bracket.
3.2. Fig.1 shows a typical air line installation. The filter is located
upstream of the regulator - unless combined, as in SA106
and SA106FR - and the lubricator downstream.
3.3. Filter/regulator - Install using the mounting bracket provided.
Before connecting system piping ensure that gauge is visible,
unused gauge port is sealed with plug provided and that flow
direction arrow matches system air flow.
3.4. Filter and Lubricator - Install into air piping or connect directly to bracket mounted regulator using fittings provided. Always check that
flow arrows are correct and that filter is upstream, and lubricator downstream, of regulator.
Note: To ensure air-tight joints, use PTFE tape.
fig.1
fig.2
fig.3
SA106/106FR/106F/106L/106R - 1 - 120406
01284 757500
01284 703534 sales@sealey.co.uk
Sole UK Distributor
Sealey Group,
Bury St. Edmunds, Suffolk.
www.sealey.co.uk
Web
email
NOTE: It is our policy to continually improve products and as such we reserve the right to alter data, specifications and component parts without prior notice.
IMPORTANT: No liability is accepted for incorrect use of this product.
WARRANTY: Guarantee is 12 months from purchase date, proof of which will be required for any claim.
INFORMATION: For a copy of our catalogue and latest promotions call us on 01284 757525 and leave your full name, address and postcode.
MODEL: SA106 SA106FR SA106F SA106L SA106R
Filter Bowl: SA106.B SA106.B SA106.B --- ---
Lubricator Bowl: SA106.B1 --- --- SA106.B1 ---
Regulator gauge: SA106.G SA106.G --- --- SA106.G
Plastic Ring: SA106.PR SA106.PR --- --- SA106.PR
Wall Bracket: SA106.WB SA106.WB1 --- --- SA106.WB1