INSTRUCTIONS FOR:
WHEEL SKATE
MODEL: WS680
Your new Wheel Skate is produced and manufactured to a high standard of dependability and will, if used according to these instructions and
properly maintained, give you years of trouble free performance.
IMPORTANT: READ THESE INSTRUCTIONS CAREFULLY. NOTE THE SAFE OPERATIONAL REQUIREMENTS, WARNINGS AND CAUTIONS. USE
THESE SKATES CORRECTLY AND WITH CARE FOR THE PURPOSE FOR WHICH THEY ARE INTENDED. FAILURE TO DO SO MAY CAUSE
DAMAGE AND/OR PERSONAL INJURY AND WILL INVALIDATE THE WARRANTY. RETAIN THESE INSTRUCTIONS FOR FUTURE USE.
1. SAFETY PRECAUTIONS
2. INTRODUCTION & SPECIFICATION
3.1. Preparation.
3.1.1. Ensure that the area where the vehicle is to be moved is clear of any obstructions. The floor surface should be smooth and level.
Take note of any features in the floor that may catch the skate wheels such as floor
mounted power and data points, room divider tracks, drainage features, or damage
to the floor surface.
3.1.2 Enlist sufficient manpower to move the vehicle safely. Do not attempt to move the
vehicle into an area where there is insufficient space to manoeuvre the vehicle
safely.
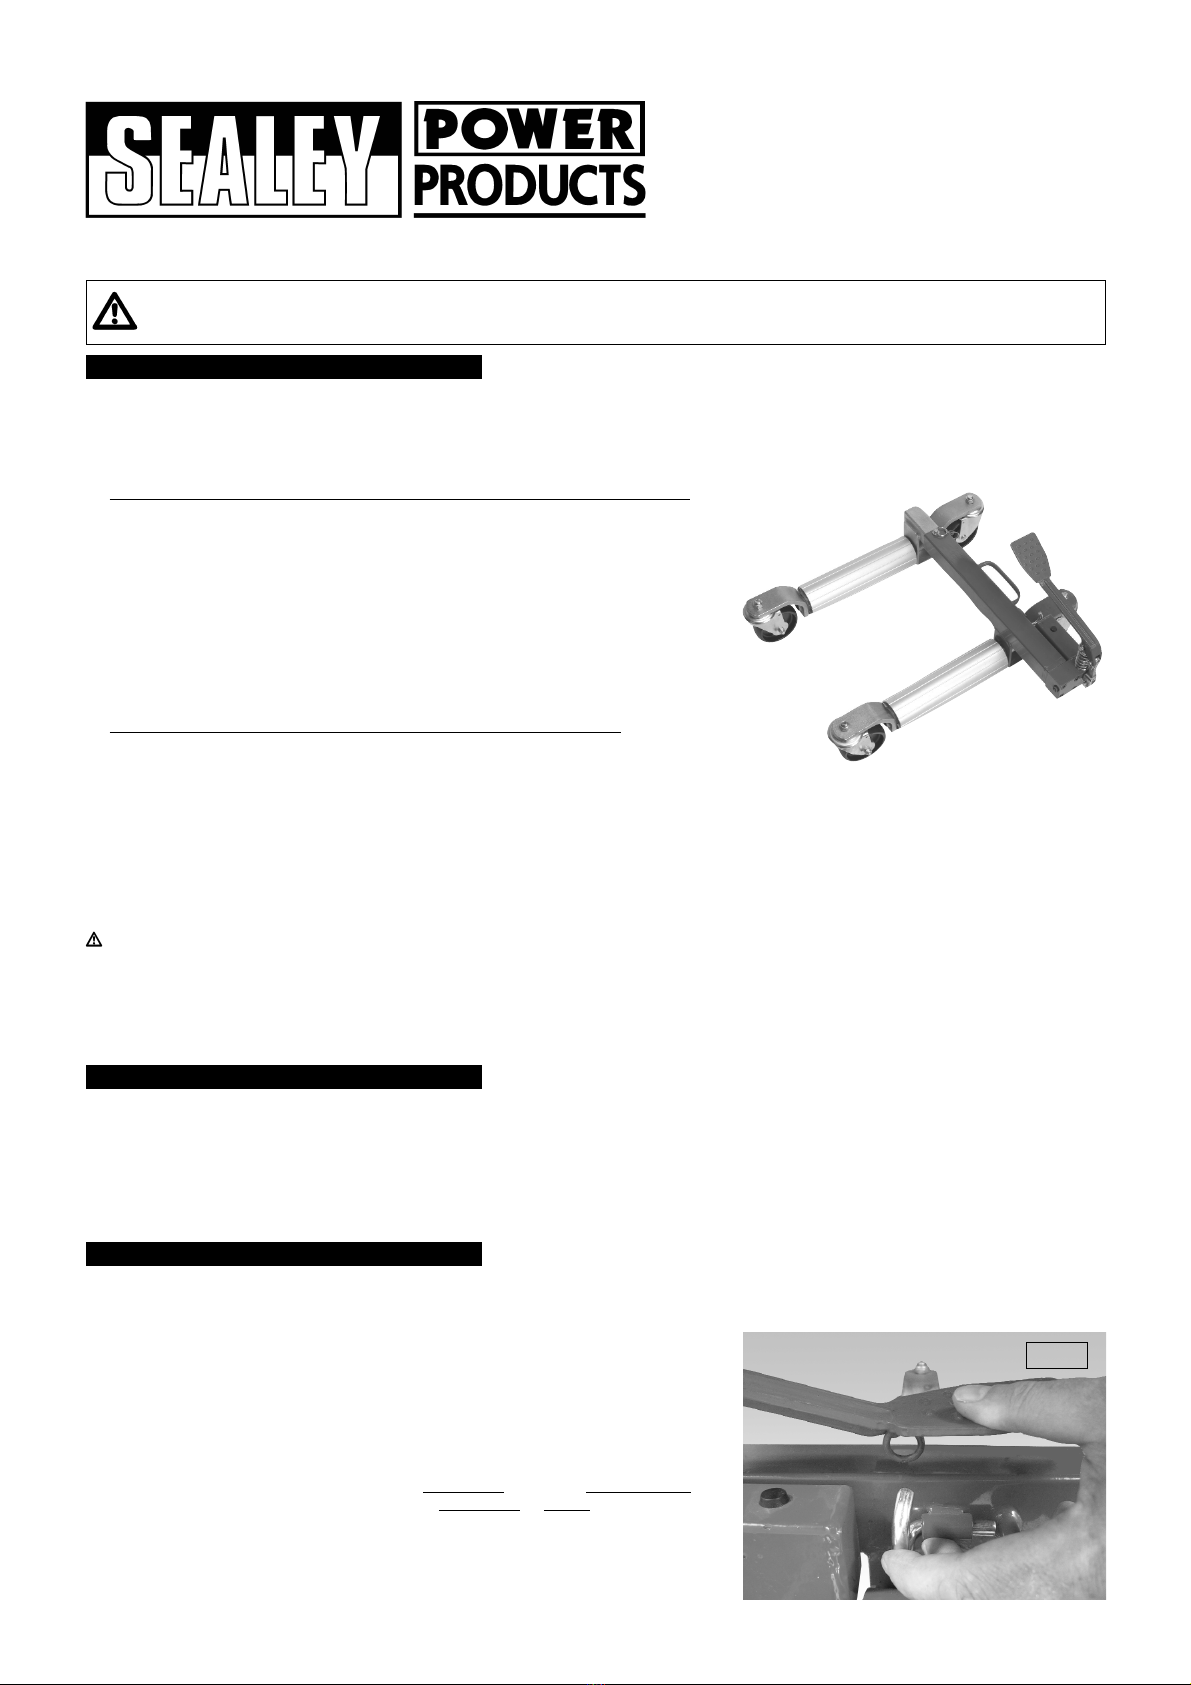
3.1.3 Prior to operation, release the foot pedal from the transit hook by depressing the
pedal slightly and moving the hook to one side to allow the pedal to rise up (fig.1).
3.1.4. Wheel Skates must be used as a pair. Attach to the front wheels to swing the
front of the vehicle. (Do not release the handbrake or remove wheel chocks until
both Skates are attached. Re-engage the handbrake or chock the wheels
immediately the movement has been made.) Attach to the back wheels to swing the
back of the vehicle. (Ideally the front wheels should be straight.) If you intend to
use two pairs of skates to move a vehicle in one movement great care should be
exercised in order to avoid injury to persons or property.
Read the safety instructions above.
Steel tube chassis with four Ø100mm nylon castors. Pedal operated hydraulic lifting action with safety locking pin when under load. Composite
rollers cradle vehicle’s tyre and are capable of handling up to 240mm profile. Suitable for body shops, garages, showrooms or anywhere a
disabled vehicle needs moving on an even surface.
Lifting capacity per Skate: . . .680kg Maximum Opening: . . . .540mm Maximum Tyre Profile: . . . . . . . . . .240mm
Wheel Ø: . . . . . . . . . . . . . . .Ø100mm Weight (Each): . . . . . . . . . .17kg
!WARNING! Ensure Health & Safety, local authority, and general workshop practice regulations are adhered to when using this equipment.
"Familiarise yourself with this product’s application and limitations, as well as the specific warnings below relating to their use.
"Ensure the Wheel Skates are in sound condition and good working order. Take action for immediate repair or replacement of damaged parts.
Use genuine parts only. The use of improper parts may be dangerous and will invalidate the warranty.
"Wheel Skates should only be used in suitable, well lit areas.
""Wheel Skates must be used in pairs at either the front or rear of the vehicle.
They must never be used diagonally.
"Keep general area clean and tidy and free from obstructions.
"Use Wheel Skates on level and solid ground, preferably concrete. Avoid tarmacadam as Wheel Skates
may sink in.
"Maintain the Wheel Skates in good condition (use an authorised service agent).
"Ensure there are no passengers in the vehicle.
"Ensure the Wheel Skates are free to move and that there are no obstructions in the
area of use.
"When not in use store Wheel Skates in a safe, dry, childproof area.
!DANGER: Use the Wheel Skates for manoeuvring or positioning of vehicles in interior situations.
They are not designed for use outdoors.
Do not start or drive the vehicle whilst it is raised on wheel skates.
#DO NOT use the Wheel Skates for purposes other than that for which they are intended.
#DO NOT allow untrained persons to operate the Wheel Skates.
#DO NOT leave the vehicle unattended whilst it is raised on the Wheel Skates.
#DO NOT operate the Wheel Skates when you are tired or under the influence of alcohol, drugs or intoxicating medication.
#DO NOT get the Wheel Skates wet or use in damp or wet locations or areas where there is condensation.
#DO NOT exceed the rated capacity of the Wheel Skates. Remember that the front of a vehicle is usually heavier than the rear.
#DO NOT use the Wheel Skates to lift or support a vehicle in order to do work underneath it.
"Maintain correct balance and footing when moving vehicle. Ensure the floor is not slippery and wear non-slip shoes.
"Ensure there are no obstructions beneath the vehicle when it is to be lowered.
"Ensure all non-essential persons keep a safe distance whilst the Wheel Skates are in use.
IMPORTANT - We recommend that at least 2 persons are involved in manoeuvring the vehicle when supported on wheel skates. The
vehicle’s weight provides a large amount of inertia which has to be overcome to get the vehicle moving and more importantly, stopped.
!WARNING! The warnings, cautions and instructions discussed in this manual cannot cover all possible conditions and situations
that may occur. It must be understood that common sense and caution are factors which cannot be built into this product, but must be
applied by the operator.
fig.1
3. OPERATING INSTRUCTIONS