manuals.online logo
Brands
  1. Home
  2. •
  3. Brands
  4. •
  5. Sealey
  6. •
  7. Ladder
  8. •
  9. Sealey LFT03 User manual

Sealey LFT03 User manual

INSTRUCTIONS FOR:
ALUMINIUM LOFT LADDER
Model No.: LFT03
Thank you for purchasing a Sealey product. Manufactured to a high standard this product will, if used according to these instructions
and properly maintained, give you years of trouble free performance.
IMPORTANT: PLEASE READ THESE INSTRUCTIONS CAREFULLY. NOTE THE SAFE OPERATIONAL REQUIREMENTS, WARNINGS & CAUTIONS.
USE THE PRODUCT CORRECTLY AND WITH CARE FOR THE PURPOSE FOR WHICH IT IS INTENDED. FAILURE TO DO SO MAY CAUSE DAMAGE
AND/OR PERSONAL INJURY AND WILL INVALIDATE THE WARRANTY. PLEASE KEEP INSTRUCTIONS SAFE FOR FUTURE USE.
1. SAFETY INSTRUCTIONS
1.1 GENERAL SAFETY
pWARNING! Ensure Health and Safety, local authority, and general workshop practice regulations are adhered to when using this equipment.
3Familiarise yourself with the application and limitations of the ladder, as well as the potential hazards.
3Maintain the equipment in good condition.
3Replace or repair damaged parts. Use genuine parts only. Non-authorised parts may be dangerous and will invalidate the warranty.
3Keep the work area clean, uncluttered and ensure there is adequate lighting.
pWARNING! Rest the base of the ladder on level and solid ground.
pWARNING! Never over-reach when on the ladder.
3Keep children and unauthorised persons away from the working area.
7DO NOT use the ladder for any purpose other than that for which it was designed.
7DO NOT use the equipment if any parts are damaged or missing as this may cause failure and/or personal injury.
7DO NOT allow children to climb the ladder.
7DO NOT use the equipment when you are tired, under the influence of alcohol, drugs or intoxicating medication.
3When not in use, stow securely.
2. INTRODUCTION
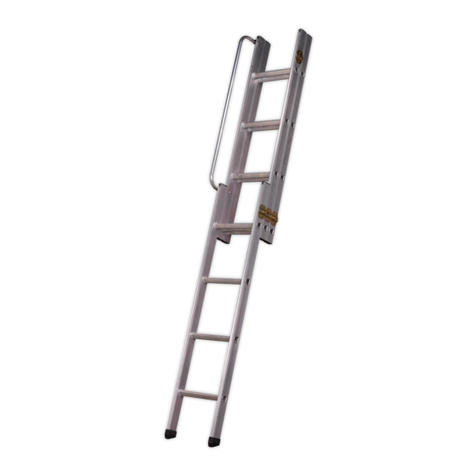
Aluminium loft ladder manufactured to BS7553:1992 class G. Complete with hand rail and all fixings with factory assembled components for
quick and easy installation. 3-Section design enables ladder to fit in smaller areas than standard 2-section ladders.
3. CONTENTS & SPECIFICATION
AB
C
D
G
E
H
F
L
I
K
J
3.1 Contents:
Included with the ladder you should find:
A 3 x washers
B 6 x screws (31mm)
C 2 x nuts
D2 x screws (64mm)
E 8 x screws (15mm)
F 2 x screws (18mm)
G Pole (for opening trap door and lowering ladder)
H Hand-rail
IFixing pins/screws and marker for auto latch
J Trap door hinges
KAuto latch
L Stabilisers/retainers for hand rail
3.2 Specification:
No. of sections 3
Max floor to floor 3m (see fig )
Min loft clearance 1050mm
Min loft opening 432 x 508mm
Max load 100kg (15.7 stone)
3m (max)
fig 1
LFT03 - 1 - 130104
4. INSTALLATION AND USE
4.1 Ensure the trap door leading into the loft is hinged to
open downwards. Use the hinges and screws
(15mm) provided, fixing them to that side of the opening
to which the loft ladder will be attached.
A minimum 19mm block wood or plywood door is
recommended, which should be fitted flush with the
ceiling.
4.2 Fit the ladder guide assembly to the frame with the 6
screws (31mm) provided. Ensure the fixing brackets are
positioned at each end of the guide assembly as illustrated
(fig 3).
Remove any obstructions and ensure that the ladder
is central to the opening.
4.3 Lower the ladder to the floor. Ensure catches are
engaged and locked in position. Check angle indicator
on the side of the ladder and position the ladder
accordingly i.e. the diagonal white stripe found on the
red safety label should be perpendicular to the floor
on which the base of the ladder rests.
4.4 Slide the two black plastic stops down to the top of
the guide assembly and tighten the four screws. This
will allow the adjustment needed for slightly different
floor to floor heights.
4.5 With the ladder in the climbing position, fix the pivot
arm to the floor of the loft, using the two screws (18mm)
provided.
4.6 Push the ladder back up and fully into the loft. The
sections should be closed together - ensure the
catches lock in position. Slide the two plastic stops up
to the underside of the guide assembly and tighten
the four screws provided.
4.7 Attach the handrail to the middle or top section as
shown in fig 8 using the screws (65mm), washers
and nuts provided.
4.8 Use the pole provided to lower and raise the loft ladder
by inserting it into a rung hole and controlling the
descent. Warning: Always maintain control of the
ladders descent and ensure that no persons/animals
are in danger of being struck.
4.9 Fitting the auto-latch. The latch is to be positioned in
the centre of the frame surround and opposite the trap
door hinges. The latch must be set back by the
thickness of the trap door. Fit the pointed marker to the
latch and close the trap door - the point now marked
on the trap door is the position at which the striker
plate should be fitted.
Fit the striker plate using the screws provided and test
the position by opening and closing the trap door until
you are satisfied with its operation.
Ensure all screws are tightened and fix the two pins
provided, into the latch.
fig 2
fig 3
fig 4
fig 5
fig 6
fig 7
fig 8
fig 9
fig 10
LFT03 - 1 - 130104
01284 757500 01284 703534
Sole UK Distributor,
Sealey Group,
Bury St. Edmunds, Suffolk.
NOTE: It is our policy to continually improve products and as such we reserve the right to alter data, specifications and component parts without prior notice.
IMPORTANT: No liability is accepted for incorrect use of this product.
WARRANTY: Guarantee is 12 months from purchase date, proof of which will be required for any claim.
INFORMATION: For a copy of our latest catalogue call us on 01284 757525 and leave your full name and address, including postcode.
Declaration of Conformity We, the sole importer into the UK, declare that the product listed here is in conformity
with the following standards and directives.
The construction file for this product is held by the Manufacturer and may be inspected on request by
contacting Jack Sealey Ltd.
For Jack Sealey Ltd. Sole importer into the UK of Sealey Power Products.
Aluminium Loft Ladder
Model No.: LFT03
EN131 - Ladders
BS 7553: 1992 9th January 2004
Signed by Mark Sweetman
sales@sealey.co.uk www.sealey.co.uk
e-mail Web
5. MAINTENANCE
5.1 Always keep the ladder clean and dry i.e. free of dirt, grease and any liquids.
5.2 Before use, ensure that the rungs are free of any hazardous materials e.g. paper, sticking tape etc.
5.3 Ensure the guide assembly is well lubricated and free to move correctly.
5.4 Check the ladder thoroughly for signs of damage/wear before and after each use. If you suspect the ladder may be damaged/weakened
in any way, remove it from service immediately and contact your authorised Sealey dealer for repairs/replacement.
6. PARTS
Part No. Description
LFT03.F Foot for LFT03 loft ladder
LFT03 - 1 - 130104
Other Sealey Ladder manuals

Sealey ACL3.V5 User manual

Sealey

Sealey ACL3.V5 User manual

Sealey ACL3.V4 User manual

Sealey

Sealey ACL3.V4 User manual

Sealey SLC2 User manual

Sealey

Sealey SLC2 User manual

Sealey ATL09.V2 User manual

Sealey

Sealey ATL09.V2 User manual

Sealey ATL09.V3 User manual

Sealey

Sealey ATL09.V3 User manual

Sealey LAD002 User manual

Sealey

Sealey LAD002 User manual

Sealey ACL3.V2 User manual

Sealey

Sealey ACL3.V2 User manual

Sealey ACL3.V4 User manual

Sealey

Sealey ACL3.V4 User manual

Sealey ASCL2 User manual

Sealey

Sealey ASCL2 User manual

Sealey APS2E.V2 User manual

Sealey

Sealey APS2E.V2 User manual

Sealey LAD004 User manual
Sealey

Sealey LAD004 User manual

Sealey Power Products LAD002 User manual

Sealey

Sealey Power Products LAD002 User manual

Sealey LFT03.V2 User manual

Sealey

Sealey LFT03.V2 User manual

Sealey LAD-002 User manual

Sealey

Sealey LAD-002 User manual

Sealey LAD004 User manual

Sealey

Sealey LAD004 User manual

Sealey ASCL2 User manual

Sealey

Sealey ASCL2 User manual

Sealey AFPL3 User manual

Sealey

Sealey AFPL3 User manual

Sealey ACL3.V4 User manual

Sealey

Sealey ACL3.V4 User manual

Sealey ATL07 User manual

Sealey

Sealey ATL07 User manual

Sealey ACL3.V3 User manual

Sealey

Sealey ACL3.V3 User manual

Sealey AFPL2 User manual

Sealey

Sealey AFPL2 User manual

Popular Ladder manuals by other brands

Arke 5127 Assembly instructions

Arke

Arke 5127 Assembly instructions

HSS Hire Youngman Megastep Operating & safety guide

HSS Hire

HSS Hire Youngman Megastep Operating & safety guide

Loft Centre ELECTRIC manual

Loft Centre

Loft Centre ELECTRIC manual

zarges ZAP Safemaster S Assembly and use instructions

zarges

zarges ZAP Safemaster S Assembly and use instructions

WERNERCO AH2512 installation instructions

WERNERCO

WERNERCO AH2512 installation instructions

Realtree RTLS-314 Instruction & safety manual

Realtree

Realtree RTLS-314 Instruction & safety manual

SUPPORTPLUS FF8296 quick start guide

SUPPORTPLUS

SUPPORTPLUS FF8296 quick start guide

TAD TIVA Assembly instructions

TAD

TAD TIVA Assembly instructions

PRIMAL TREESTANDS PVLS-316 Instruction and safety manual

PRIMAL TREESTANDS

PRIMAL TREESTANDS PVLS-316 Instruction and safety manual

Dolle LOFT LADDER Installation instruction

Dolle

Dolle LOFT LADDER Installation instruction

Instant Span 300 Assembly guide

Instant

Instant Span 300 Assembly guide

Hard Head 012643 operating instructions

Hard Head

Hard Head 012643 operating instructions

Wenger Trouper owner's manual

Wenger

Wenger Trouper owner's manual

MetalTech I-CAIRC Alu series OPERATIONAL SAFETY AND ASSEMBLY INSTRUCTIONS

MetalTech

MetalTech I-CAIRC Alu series OPERATIONAL SAFETY AND ASSEMBLY INSTRUCTIONS

Trigano J-C9305 Assembling instructions

Trigano

Trigano J-C9305 Assembling instructions

Primal Vantage COMFORT ZONE HEH00582 Instruction and safety manual

Primal Vantage

Primal Vantage COMFORT ZONE HEH00582 Instruction and safety manual

TRI-ARC U-DESIGN Assembly instructions

TRI-ARC

TRI-ARC U-DESIGN Assembly instructions

WaterDog Adventure Gear WAG Boarding Steps LM-6 owner's manual

WaterDog Adventure Gear

WaterDog Adventure Gear WAG Boarding Steps LM-6 owner's manual

manuals.online logo
manuals.online logoBrands
  • About & Mission
  • Contact us
  • Privacy Policy
  • Terms and Conditions

Copyright 2025 Manuals.Online. All Rights Reserved.