Sebo Airbelt E User manual

GEBRAUCHSANWEISUNG / INSTRUCTION MANUAL
MADE IN GERMANY
MADE IN GERMANY
SEBO AIRBELT E

B
21
22
23
20
CLOSE
A2
4
6
11
12
16
15
3
5
7
8
10
13 14
9
1
17
Diese Gebrauchsanleitung ist für mehrere
Modelle der SEBO AIRBELT E Baureihe vor-
gesehen, die sich durch unterschiedliches
Zubehör und verschiedene technische Da-
ten unterscheiden. Nicht alle Eigenschaften
sind gleich, es gelten aber die gleichen Ge-
brauchshinweise. Der genaue Lieferumfang
Ihres Gerätes ist dem Kartonaufkleber (Ver-
packung) zu entnehmen bzw. auf www.sebo.
de für aktuelle Geräte zu finden.
A. Zubehör*
1 8210gs Polsterdüse
2 8066gs Fugendüse
3 7260GS SEBO KOMBI
4 1397gs Standard-Kombibodendüse
5 7200GS SEBO PARQUET
6 8118ER Standarddüse
7 9950ER Elektroteppichbürste ET-1
8 9433 SEBO DISCO
9 6728ER Möbelpinsel mit Clip
10 6780ER Turbobürste SEBO TT-C
11 6179ER Polsterturbobürste SEBO PT-C
12 1496gs Heizkörperpinsel
13 1090gs Flachpolsterdüse
14 1325GS Wand- und Polsterdüse
15 1084gs Verlängerungsrohr
16 1495ER Verlängerungsschlauch
17 8347 Ritzendüse
B. Service-Teile
8300ER SEBO FILTERBOX E inkl.
20 8x Ultra-BagTM Filtertüte
8322ER Microfilterbox E inkl.
21 1x Motorschutzfilter
22 1x Hospital Grade Abluftfilter
23 8221ER Airbelt Stoßschutz
* Serie oder Sonderzubehör, je nach Modell.
This manual is intended for use with several
models of the SEBO AIRBELT E range which
have different technical specifications and in-
clude different attachments. This manual cov-
ers the general operation and maintenance of
the E range. The exact specification and at-
tachments included with your machine are dis-
played on the carton sticker, or can be found at
www.sebo.co.uk. The SEBO ET-1 power head
and SEBO Disco are only suitable for E3 models.
A. Attachments*
1 8210gs Upholstery Nozzle
2 8066gs Crevice Nozzle
3 7260GS SEBO Kombi
4 1397gs Vario Kombi
5 7200GS SEBO Parquet
6 8118ER Standard Brush
7 9950ER Power Head ET-1
8 9433 SEBO Disco
9 6697ER Dusting Brush and Clip
10 6780ER Floor Turbo Brush SEBO TT-C
11 6179gs
Stairs & Upholstery Turbo Brush
SEBO PT-C
12 1496gs Radiator Brush
13 1090gs Special Upholstery Nozzle
14 1325GS Floor and Wall Brush
15 1084gs Straight Tube
16 1495ER Extension Hose
17 8347 Hard Floor Crevice Nozzle
B. Service Parts
8300ER SEBO filter box E incl.
20 8 x Ultra BagTM Filterbag
8322ER Micro filter box E incl.
21 1x Motor filter
22 1x Hospital-Grade-Filter
23 8221ER Airbelt bumper
* Depending on model
2

Lesen Sie bitte diese Gebrauchsanweisung auf-
merksam durch und beachten Sie die darin enthal-
tenen Sicherheits- und Warnhinweise, bevor Sie
den Staubsauger in Betrieb nehmen. Bitte bewah-
ren Sie die Gebrauchsanweisung unbedingt auf.
Vielen Dank, dass Sie sich für einen SEBO entschieden ha-
ben. Wir sind sicher, dass Sie viel Freude an diesem Gerät
haben werden. Für Ihre Hinweise und Wünsche stehen wir
Ihnen gerne unter www.sebo.de zur Verfügung.
Ihr neuer SEBO ist ein hochwertiges, langlebiges und
innovatives Produkt, das nach neuester Technologie in
Deutschland entwickelt und gefertigt wird. Seine effiziente
Saugleistung und sein serienmäßig integriertes dreistufi-
ges Filtrationssytem bieten Ihnen außergewöhnlich hohe
Standards. Erleben Sie selbst das professionelle Sauger-
lebnis!
1. Sicherheitshinweise
Die Gebrauchsanweisung bitte gut aufbewahren. Wird der
Staubsauger an Dritte weitergegeben, muss unbedingt die
Gebrauchsanweisung mit übergeben werden.
Die Benutzung des Gerätes geschieht auf eigene Verant-
wortung. Der Hersteller haftet nicht für Schäden, die durch
falsche Bedienung oder nicht bestimmungsgemäßen Ge-
brauch verursacht werden.
Bestimmungsgemäße Verwendung
Dieser Staubsauger ist dazu bestimmt, im Privathaushalt
und vergleichbarer Umgebung verwendet zu werden. Die-
ses Gerät kann von Kindern ab 8 Jahren und darüber und
von Personen mit verringerten physischen, sensorischen
oder mentalen Fähigkeiten oder Mangel an Erfahrung
und/oder Wissen benutzt werden, wenn sie beaufsichtigt
werden oder bezüglich des sicheren Gebrauchs des Ge-
rätes unterwiesen wurden und die daraus resultierenden
Gefahren verstanden haben. Kinder dürfen nicht mit dem
Gerät spielen. Reinigung und Wartung dürfen nicht durch
Kinder ohne Beaufsichtigung durchgeführt werden.
Beaufsichtigen Sie Kinder und Tiere, die sich in der Nähe
des Staubsaugers aufhalten.
Im Elektroschlauch* sind elektrische Bauteile, deshalb
den Schlauch nicht in Wasser tauchen.
Reinigen Sie den Saugschlauch niemals mit einem Stab
und tauchen Sie ihn niemals in Wasser (elektrische Bau-
teile)!
Keine scharfen, leicht entflammbaren, explosiven und ge-
sundheitsschädlichen Stoffe oder Gase aufsaugen. Nichts
Glühendes, Heißes oder Wasser aufsaugen.
Niemals bei angeschlossenem oder laufendem Gerät
an die Bürste/Pflegepad der SEBO Elektroteppichbürste*,
SEBO PT-C*, SEBO TT-C*und des SEBO DISCO* fassen!
Es besteht Verletzungsgefahr durch Einklemmung und
Schürfungen.
* Serie oder Sonderzubehör, je nach Modell.
Please read these instructions carefully before us
-
ing the machine and save them for future reference.
Thank you for choosing SEBO. Your new SEBO is an inno-
vative, high quality product that has been developed and
made in Germany utilising the most modern technology.
The advanced filter system and superb cleaning power en
-
sure the highest standards of cleanliness for your home.
To ensure you get the most from your SEBO vacuum
cleaner, please take time to read these instructions. We
value your feedback and if you have any suggestions,
please contact us at www.sebo.co.uk.
1. Safety Instructions
Please save these instructions. If you pass this vacuum to
a third party, please pass these on as well. The use of the
machine is at your own risk. The manufacturer/ supplier
is not liable for any injury or damage caused by incorrect
usage of the machine.
Safe Use
This vacuum cleaner must only be used for normal do-
mestic household purposes. This appliance can be used
by children aged from 8 years and above and persons with
reduced physical, sensory or mental capabilities or lack of
experience and knowledge if they are given supervision or
instruction concerning use of the appliance in a safe way
and understand the hazards involved. Children should not
play with the appliance. Cleaning and user maintenance
should not be done by children without strict supervision.
Children and pets must be strictly supervised during use of
this appliance.
The electrical hose* and handle* contain electrical parts.
Do not expose them to liquid. Inspect the hose frequently
for damage.
Never attempt to clear the hose by using a sharp object and
do not immerse in water for cleaning.
This machine must not be used for picking up liquid, sharp
objects, hot material , such as fire ash, or hazardous/
harmful dust.
Do not use in the presence of flammable, explosive or
harmful materials and gases.
If your SEBO vacuum cleaner has a powered brush, a
SEBO PT-C turbo brush, a SEBO TT-C turbo brush, or a
SEBO DISCO please do not touch rotating parts, such as
the brush, when they are turning as this will cause a risk of
injury to the fingers.
* Depending on model 3

4
Vor allen Arbeiten am Gerät: Erst das Gerät ausschalten
und Netzstecker ziehen.
Vor Inbetriebnahme und Nutzung des Staubsaugers ist die-
ser auf sichtbare Schäden am Gerät, der Netzanschluss-
leitung sowie dem Saugschlauch zu untersuchen. Falls ein
Defekt festgestellt wird, muss dieser durch den Hersteller,
seinem Kundendienst oder einem qualifiziertem Service-
personal behoben werden. Ein Gerät mit Defekten nicht
anschließen!
Sicherer Gebrauch
Den Staubsauger nur gemäß der Anschlusswerte des Ty-
penschildes anschließen und betreiben.
Den Staubsauger nur an den vorgesehenen Griffen trans-
portieren und bedienen. Handgriff während des Betriebes
stets festhalten. Das Gerät erst abstellen sobald die rotie-
rende Bürste* komplett zum Stillstand gekommen ist, der
Netzschalter ausgeschaltet und der Netzstecker gezogen
ist.
Menschen oder Tiere nicht ab- bzw. aufsaugen.
Dieser Staubsauger ist nur zur Trockenan-
wendung be stimmt und darf nicht im Freien
und unter nassen Bedin gungen verwendet
oder aufbewahrt werden.
Achten Sie auf einen sicheren Stand des Staubsauger und
wickeln Sie die Netzanschlussleitung nach dem Betrieb
wieder auf, da durch sie eine Stolpergefahr für Personen
entsteht.
Benutzen Sie die Anschlussleitung oder den Saugschlauch
nicht zum Tragen des Gerätes.
Netzstecker nicht an der Anschlussleitung aus der Steck-
dose ziehen.
Anschlussleitung von scharfen Kanten fern halten.
Achten sie darauf, dass die Anschlussleitung niemals ein-
gequetscht wird.
Den Staubsauger niemals ohne Filtertüte bzw. Filter be-
nutzen. Der Filterdeckel schließt nur mit korrekt einge-
setzter Filtertüte. Wenden sie keine Gewalt an. Beobach-
ten Sie die Füllanzeige des Staubbeutels und wechseln
Sie diesen bitte rechtzeitig. Motorschutz- und Abluftfilter
bei Verschmutzung, spätestens aber nach 16 Filtertüten
wechseln, um die optimale Saugleistung zu erhalten.
Vor Hitzequellen, Feuchtigkeit und Wasser schützen und
nur trocken oder mit einem leicht feuchten Tuch reinigen.
Der Staubsauger darf nur mit original SEBO
Filtertüten und original SEBO Ersatz- und
Verschleißteilen betrieben werden. Nur die
Verwendung von Originalteilen für dieses
Produkt berechtigt zu Garantieleistungen
und gewährleistet die Betriebssicherheit
des Gerätes. Änderungen am Staubsauger
sind nicht zulässig.
* Serie oder Sonderzubehör, je nach Modell.
Always turn off and unplug the machine before undertaking
any maintenance.
Before using the vacuum cleaner, always check for any
signs of damage, especially to the mains cable and hose.
If a component is damaged, for your safety it must be re
-
placed with a genuine SEBO part. Also for safety reasons,
this must be done by a SEBO service representative or an
authorised Service technician.
Do not use a damaged machine.
Ensure that the connection data on the data label (voltage
and frequency) match the mains electricity supply.
Only carry the vacuum cleaner by the carrying handle. Al
-
ways hold the hose handle when operating the vacuum
cleaner.
Always stand the machine on a stable surface. Rewind the
mains cable if the machine is not in use to reduce the risk
of tripping.
When you finish or interrupt your work, always turn off,
unplug the machine and ensure the rotating brush has
stopped.
Do not carry the vacuum cleaner by the cable or hose.
Only disconnect from the socket by pulling the plug, not the
cable.
Keep the cable away from sharp edges and prevent it be
-
coming trapped, crushed, or over-stretched. Rewind the
cable with care.
Use on dry surfaces only. Do not store out-
doors or in damp conditions.
Do not use on people or animals.
Do not use the vacuum cleaner without the filter bag or fil
-
ters. If a filter bag is not fitted, the cover will not close. Never
force it.
Inspect the filter bag indicator regularly and change the
filter bag when necessary. We recommend changing all fil
-
ters regularly, either when they have become dirty, or once
16 filter bags have been used.
Electrical appliance, do not expose to liquid, moisture or
heat. Only clean with a dry or slightly damp cloth.
This machine should only be operated with
genuine SEBO filter bags, filters and re-
placement parts. The use of non-genuine
parts will waive the warranty for this prod-
uct and could pose a serious safety risk.
*Depending on model

5
Führen Sie keine selbstständigen Reparaturen am Elekt-
roschlauch* durch, da es sich hier um ein sicherheitsrele-
vantes Bauteil handelt. Ein beschädigter Elektroschlauch
kann Auswirkungen auf die Funktionsfähigkeit Ihres
Staubsaugers haben. Eine Reparatur darf ausschließlich
durch den Hersteller, seinem Kundendienst oder von ein-
gewiesenem, qualifiziertem Servicepersonal durchgeführt
werden.
Zubehör
Die Steckdose* am Staubsauger ist nur für original Zube-
hör zu verwenden.
Zur Benutzung der Elektroteppichbürste* und des UHS
Saugbohner SEBO DISCO* achten Sie bitte unbedingt auf
die Sicherheitshinweise in der separaten Gebrauchsan-
weisung.
ALLGEMEINE BESTIMMUNGEN
Die angegebenen Messwerte dieser Gerätebaureihe wur-
den nach der delegierten Verordnung (EU) Nr. 665/2013
und der Verordnung (EU) NR. 666/2013 unter Anwendung
der harmonisierten Normen EN 60312-1 und den zugehö-
rigen Teilen der Normen EN 60335 erstellt.
Die Gerätebaureihe ist als Universalstaubsauger nach den
oben genannten Verordnungen eingeordnet und muss als
solcher geprüft werden.
Die mitgelieferte Kombibodendüse* ist bei den Modellen
SEBO AIRBELT E1/E2/E3 für den Einsatz auf Teppich- und
Hartboden geeignet.
Wenn dem Modell eine Ritzendüse* beigelegt ist, so ist
diese für den Einsatz auf Hartboden vorgesehen.
Die Modelle SEBO AIRBELT E3 PREMIUM sind mit einer
Elektroteppichbürste SEBO ET für den Einsatz auf Tep-
pichböden ausgestattet. Für die angegebene Energieeffi-
zienz Ihres Staubsaugers und tiefgründige Reinigung Ihres
Teppichbodens empfehlen wir die Nutzung Ihres Staub-
saugers mit Einstellung der Bürstenhöhe auf Stufe 1.
Die mitgelieferte Kombibodendüse* bzw. Ritzendüse* ist
für den Einsatz auf Hartboden vorgesehen.
2. Hinweis zur Entsorgung
Elektroaltgeräte gehören nicht in den Restmüll.
Sie können dieses Gerät kostenlos an jeder öffent-
lichen Sammelstelle abgeben. Weitere Informatio-
nen erhalten Sie durch Ihre Kommune.
* Serie oder Sonderzubehör, je nach Modell.
All repairs within the guarantee period should be per-
formed by an authorised SEBO service representative.
Do not attempt to repair the electric hose* yourself as this
is a safety-related component. A damaged electrical hose
may affect the functionality of your vacuum cleaner. A
repair should be performed exclusively by a SEBO service
representative or an authorised Service technician.
Attachments
Use only genuine SEBO Attachments.
For use of a power head* or SEBO DISCO polisher* please
read the safety instructions, which you can find in separate
instruction manuals.
MISCELLANEOUS PROVISIONS
The declared values of this series has been evaluated ac
-
cording to the commission delegated regulation (EU) No.
665/2013 and commission regulation (EU) No. 666/2013
applying the harmonized standards EN 60312-1, and the
applicable parts of the EN 60335.
The series is classified as general purpose vacuum clean
-
er according to the named above regulations and has to be
tested as such.
SEBO AIRBELT E1/E2/E3: The included combination noz
-
zle* is intended for use on carpets and hard floors.
If a hard floor crevice nozzle* is included, this is intended for
use on hard floors.
SEBO AIRBELT E3 PREMIUM: The included power head
SEBO ET is intended for use on carpets. For the stated
energy efficiency of your vacuum cleaner with a deep and
intensive cleaning performance we recommend using Po
-
sition 1 of the height adjustment knob.
The included combination nozzle* or hard floor crevice
nozzle* is intended for use on hard floors.
2. Note on Disposal
For advice on disposal of used appliances, please
contact your local authority or visit :
www.recycle-more.co.uk
*Depending on model

7
21
20
6
1
2
5
3
19
4
18
9
10
8
11
21
12
14
19
13
17
16
15
13
12
8
3. Gerätebeschreibung
1 Kombibodendüse*
2 Tritttaste*
3 SEBO KOMBI*
4 Fußschieber*
5 Teleskoprohr /
Elektroteleskoprohr*
6 Handgriff, optional mit
Leistungsregulierung*
7 Schlauch / Elektroschlauch*
8 Schlauchstutzen
9 Rastknopf
10 Filteranzeige
11 Entriegelungstaste
12 Schaltknopf, optional mit
Leistungsregulierung
13 Kabeleinzugstaste
14 Anschlussleitung
15 Fugendüse
16 Polsterdüse
17 Parkhilfe
18 Abstellhilfe
19 Filterdeckel
20 Filterabdeckung
21 Airbelt
* Serie oder Sonderzubehör, je nach Modell.
4. Inbetriebnahme
Stecken Sie den Schlauchstutzen (8) in
den Sauganschluss (22) bis er einra-
stet. Schieben Sie eine SEBO Bodendü-
se oder Elektroteppichbürste* auf das
untere Ende des Teleskoprohres (5), bis
dieses einrastet. Stecken Sie nun den
Handgriff (6) in die andere Seite des Te-
leskoprohres (5) ein.
Fertig!
5. Handhabung
Rollen Sie die Anschlussleitung (14)
vollständig von der Leitungsaufwick-
lung ab und stecken Sie den Netzstek-
ker bei ausgeschaltetem Gerät ein. Die
Anschlussleitung arretiert automatisch.
Durch das Betätigen der Kabeleinzugs-
taste (13) wird die Anschlussleitung au-
tomatisch wieder aufgerollt.
Das Teleskoprohr (5) sollte vor Arbeits-
beginn auf die gewünschte Arbeitshöhe
eingestellt werden. Betätigen Sie dazu
die Schiebetaste (23).
3. Machine Description
1 Vario Kombi*
2 Hard floor/carpet switch*
3 SEBO Kombi*
4 Slider*
5 Telescopic tube /
Electric telescopic tube*
6 Hose handle/ Hose handle
with power control*
7 Hose / Electrical hose*
8 Hose end*
9 Release buttons
10 Bag full indicator
11 Catch
12 On/Off knob with/ without
power control*
13 Rewind button
14 Mains cable
15 Crevice nozzle
16 Upholstery nozzle
17 Parking groove
18 Carrying / Parking groove
19 Filter bag cover
20 Exhaust filter cover
21 Airbelt
* Depending on model.
4. Assembly
Push the hose end (8) into the neck (22).
Push a SEBO floor head onto the low-
er end of the telescopic tube (5) until it
locks. Insert the telescopic tube (5) onto
the hose handle (6) until it locks into
place.
5. Operating Instructions
Please ensure that the on / off knob (12)
is in the off position. Pull out the mains
cable (14) completely and plug it into an
appropriate mains outlet. The cable re-
wind is operated by pushing the rewind
button (13). Before using, adjust the tel-
escopic tube (5) to a comfortable height
using the slide button (23)
14
13
23
23
5
5
8
22
8
22
6
5
5
6

6
16
6
1515
5
16
26
5
3
6
18
17
Schalten Sie nun das Gerät durch das Drü-
cken des Schaltknopfes (12) ein. Nach dem
Einschalten leuchtet der Schaltknopf (12)
dauerhaft blau. Dies zeigt den normalen
Betriebszustand des Gerätes an. Die ge-
wünschte Saugkraft können Sie, je nach
Geräteausstattung, von 0 (Standy by-Mo-
dus) bis zur maximalen Saugleistung mit
dem Schieberegler (24) im Handgriff (6)
bzw. durch Drehen des Schaltknopfes (12)
am Gerät regulieren.*
Alle SEBO AIRBELT E-Modelle sind mit
einer Temperaturregelung ausgestattet.
Bei Überhitzung wechselt die Farbe des
Schaltknopfes (12) von blau auf rot.
Schaltknopf (12) leuchtet dauerhaft rot:
Das Gerät regelt dynamisch herunter, da
die Temperatur im Gerät zu hoch ist. Mögli-
che Ursache können eine Verstopfung oder
eine volle Filtertüte sein (siehe Abschnitt
Verstopfung beseitigen und Abschnitt
Wechsel der Ultra BagTM Filtertüte).
Schaltknopf (12) blinkt rot: Das Gerät
wurde automatisch abgeschaltet, da eine
Überhitzung vorliegt. Mögliche Ursache
kann eine Verstopfung sein (siehe Ab-
schnitt Verstopfung beseitigen). Das Gerät
mit dem Schaltknopf (12) ausschalten und
erst nach Beseitigung der Ursachen wie-
der einschalten, da es sonst zu Beschä-
digungen bei weiterem Betrieb kommen
kann.
Um eine Gefährdung durch ein unbeab-
sichtigtes Wiedereinschalten zu vermei-
den, darf das Gerät nicht über eine externe
Schaltvorrichtung wie beispielsweise eine
Zeitschaltuhr versorgt werden oder mit
einem Stromkreis verbunden sein, der re-
gelmäßig durch eine Einrichtung ein- und
ausgeschaltet wird.
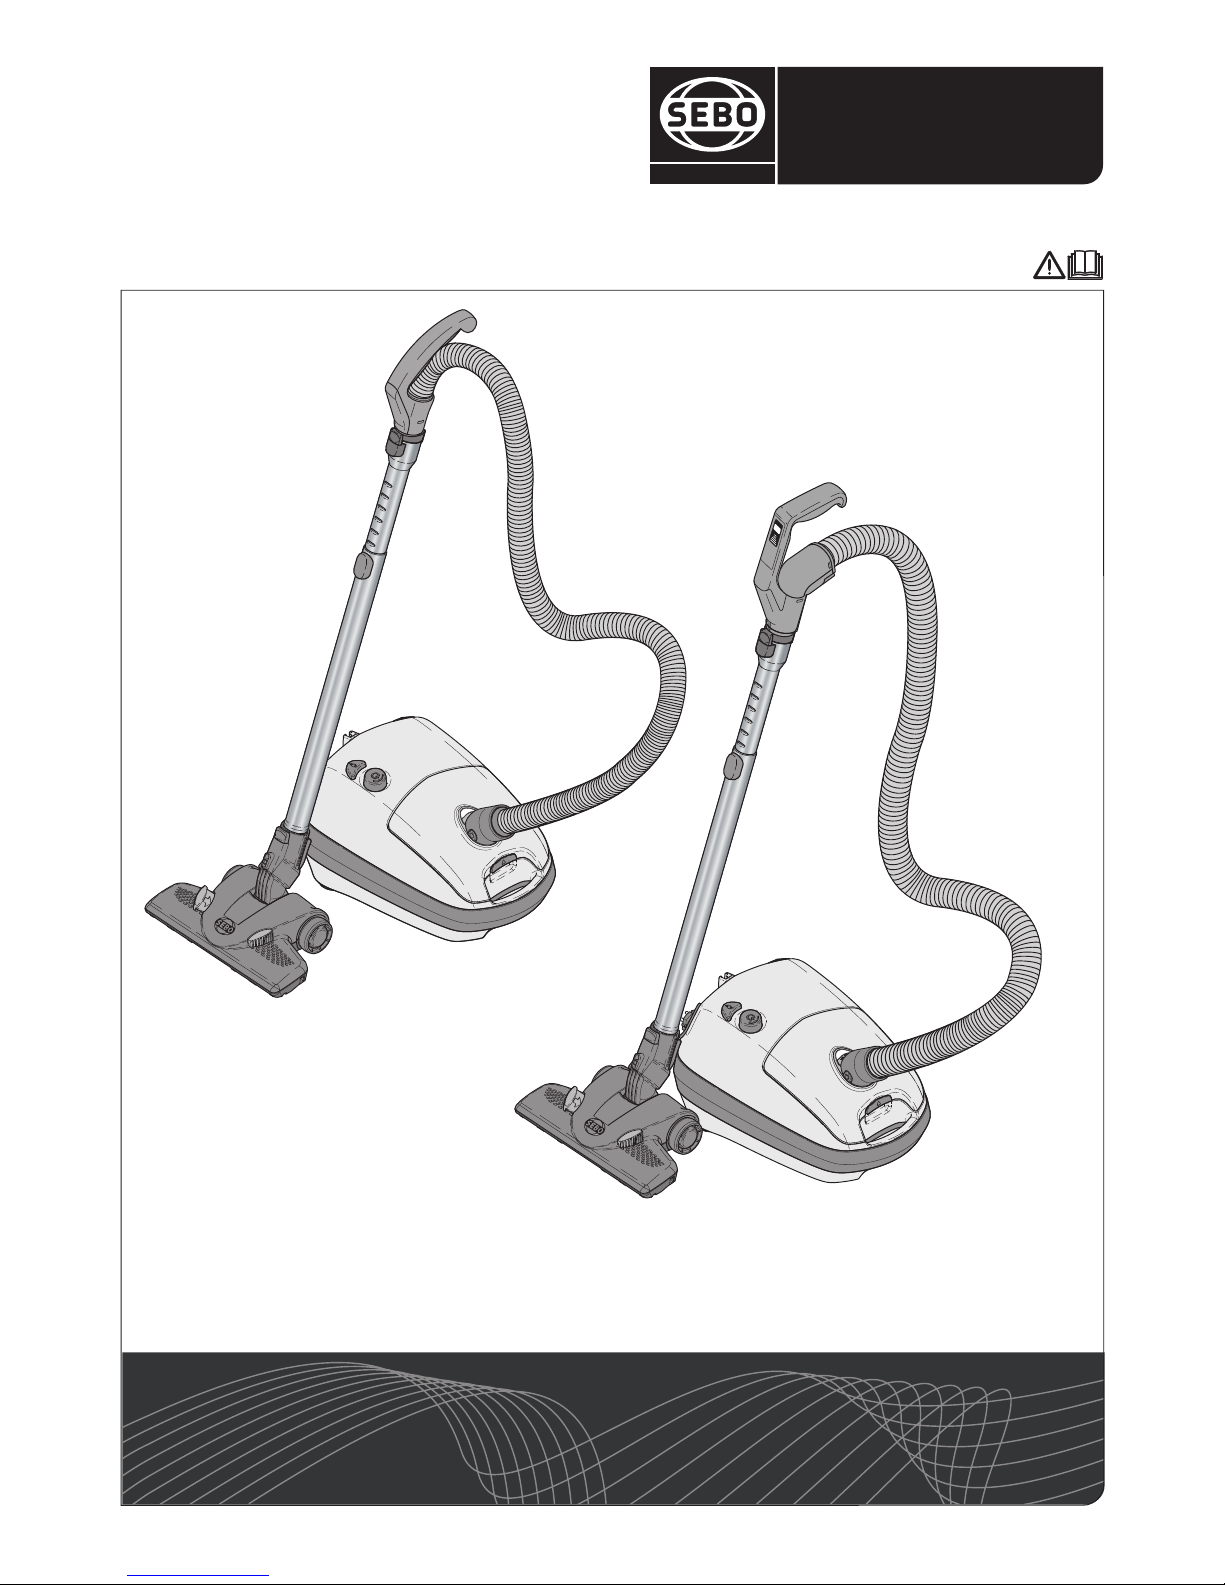
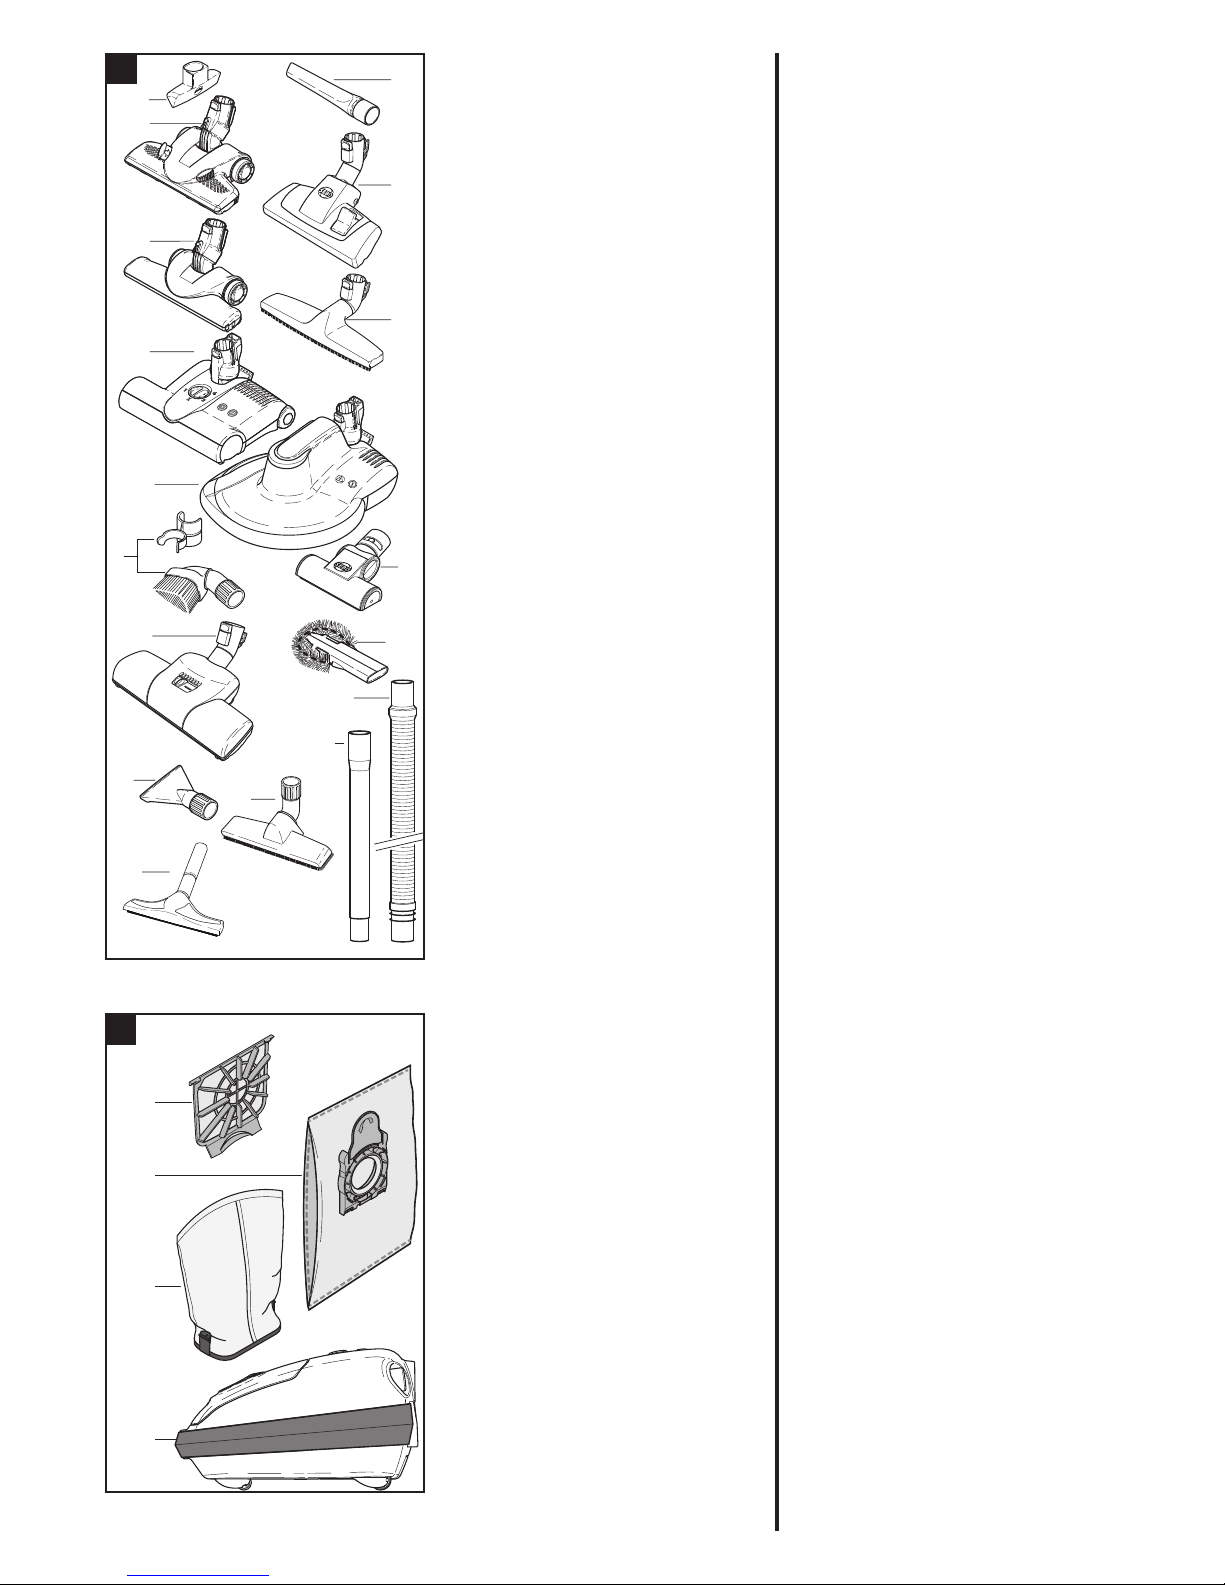
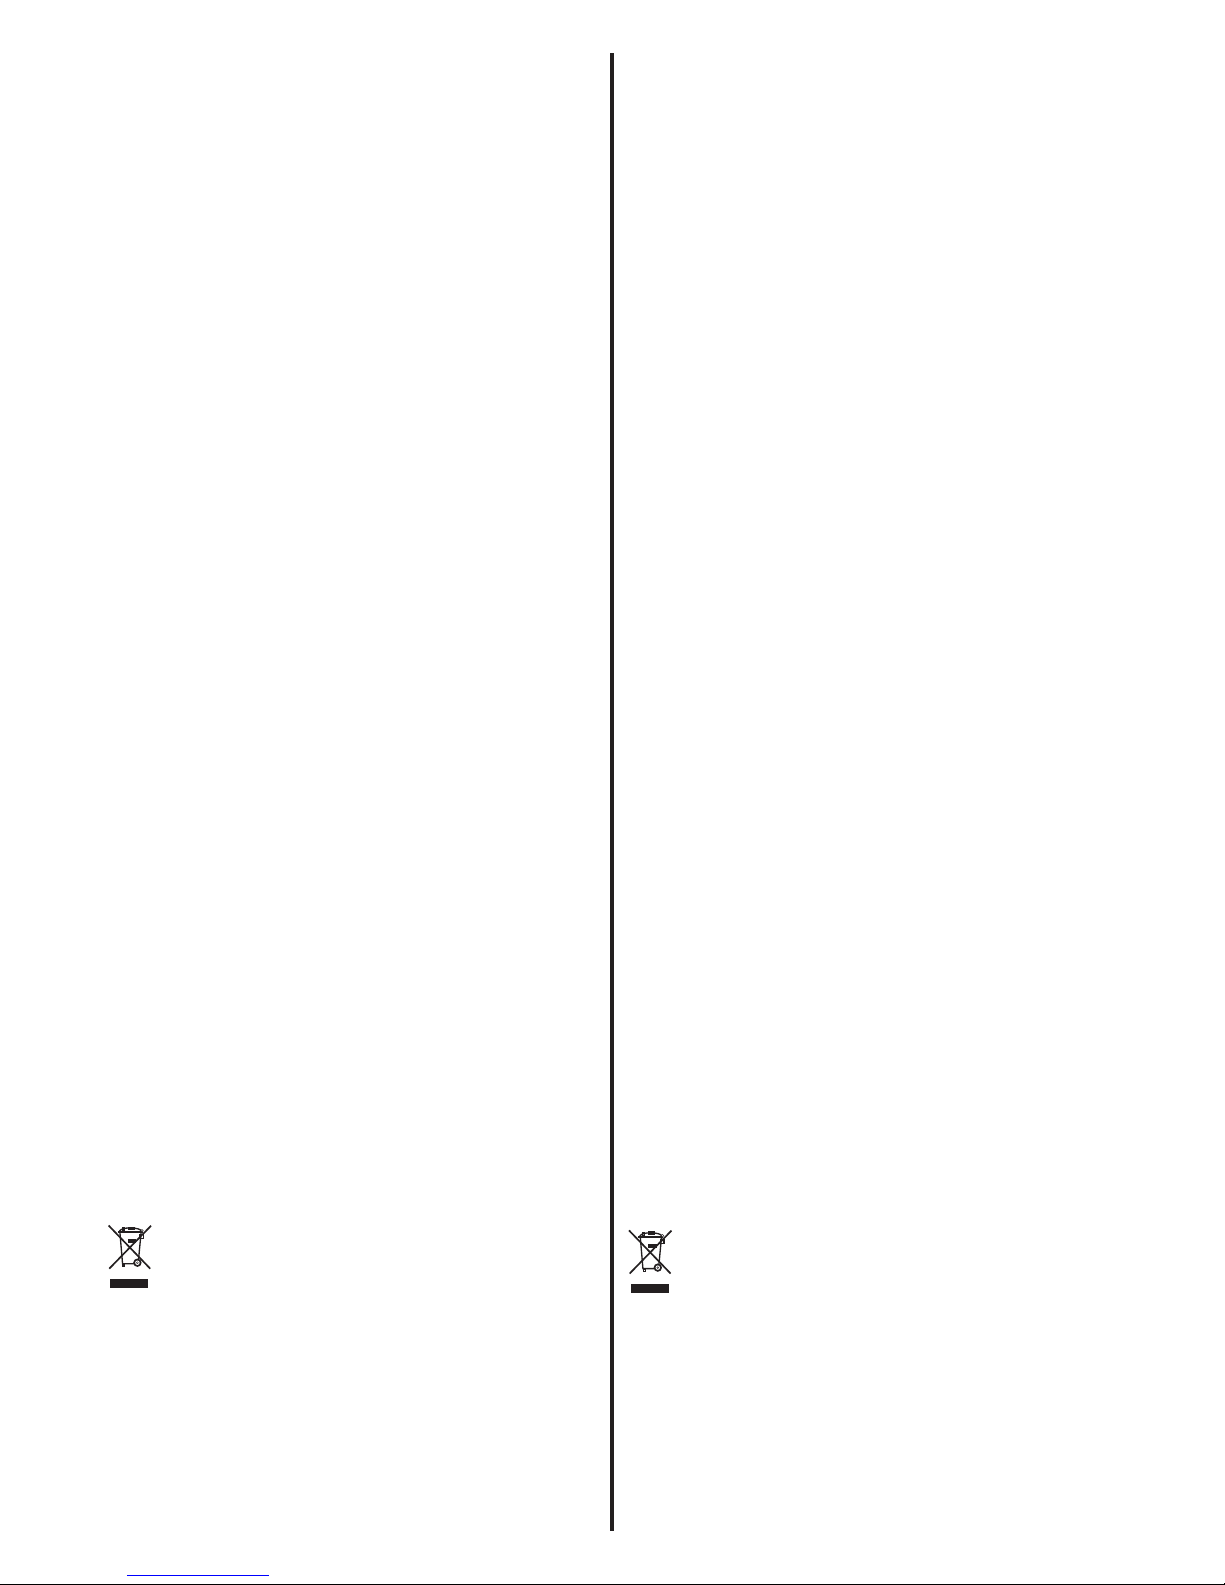
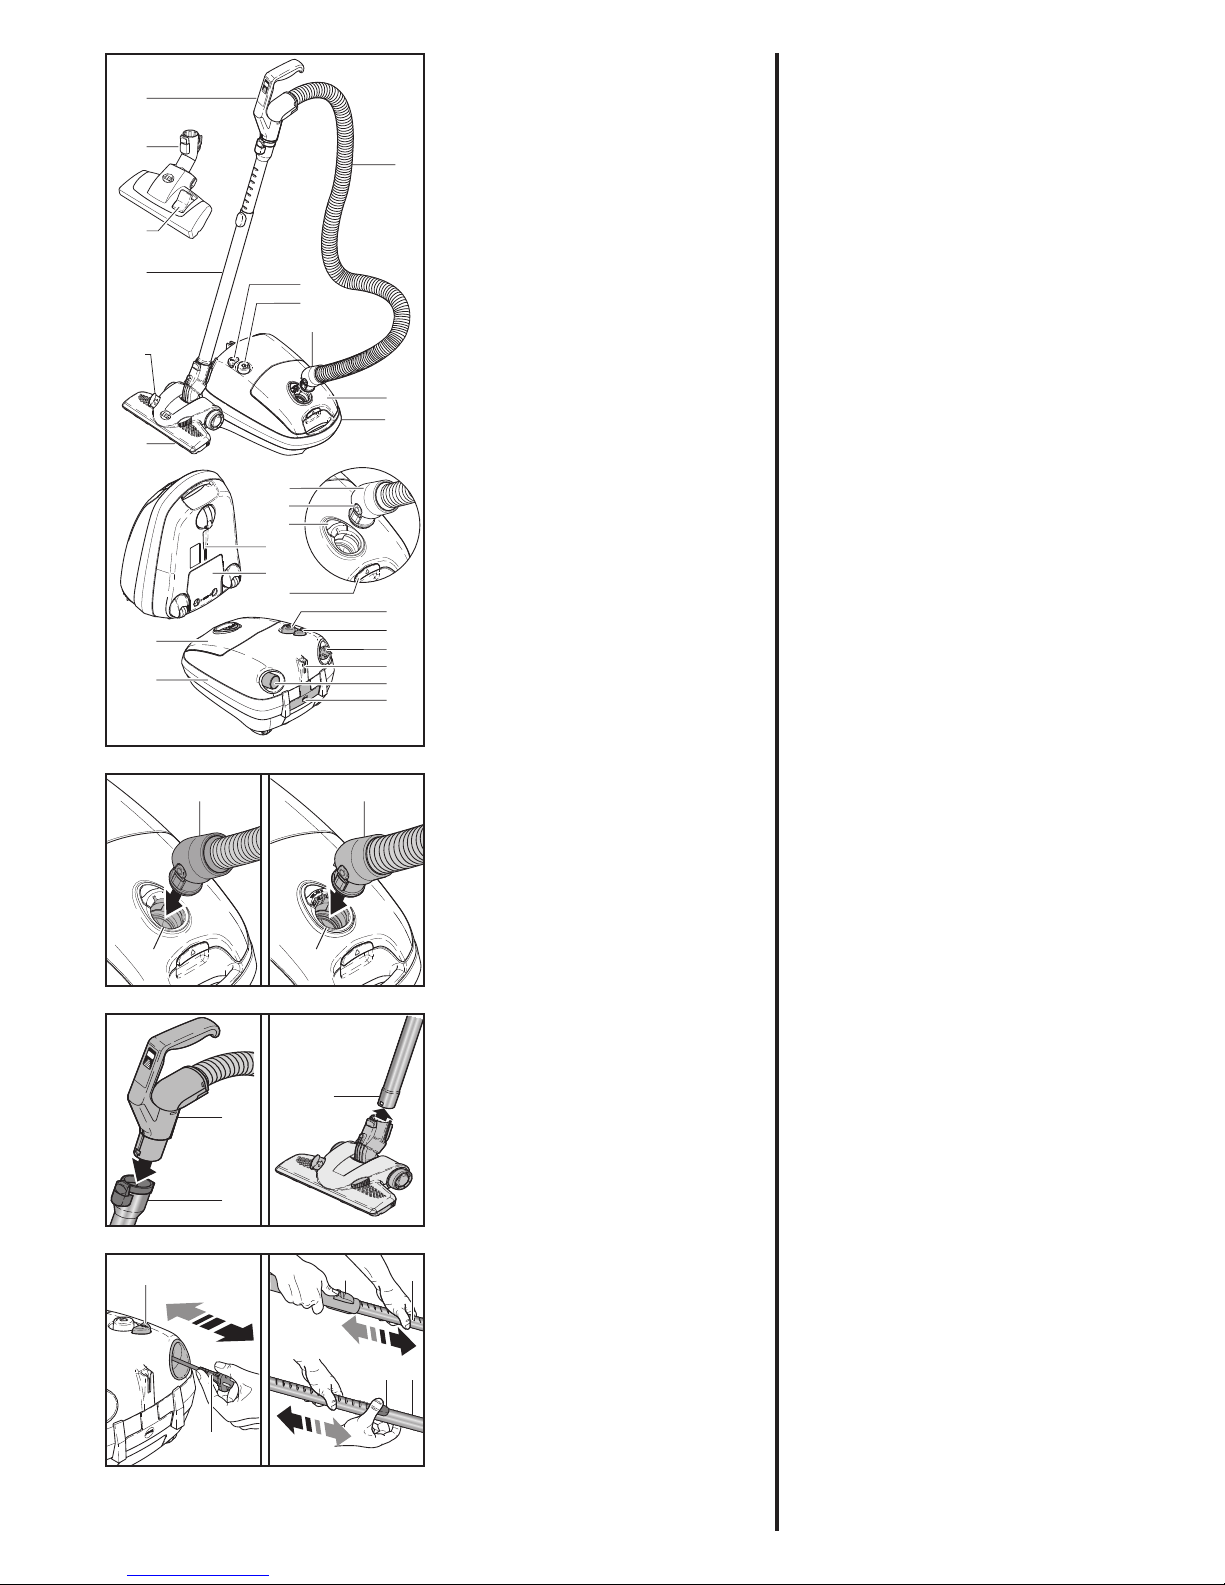
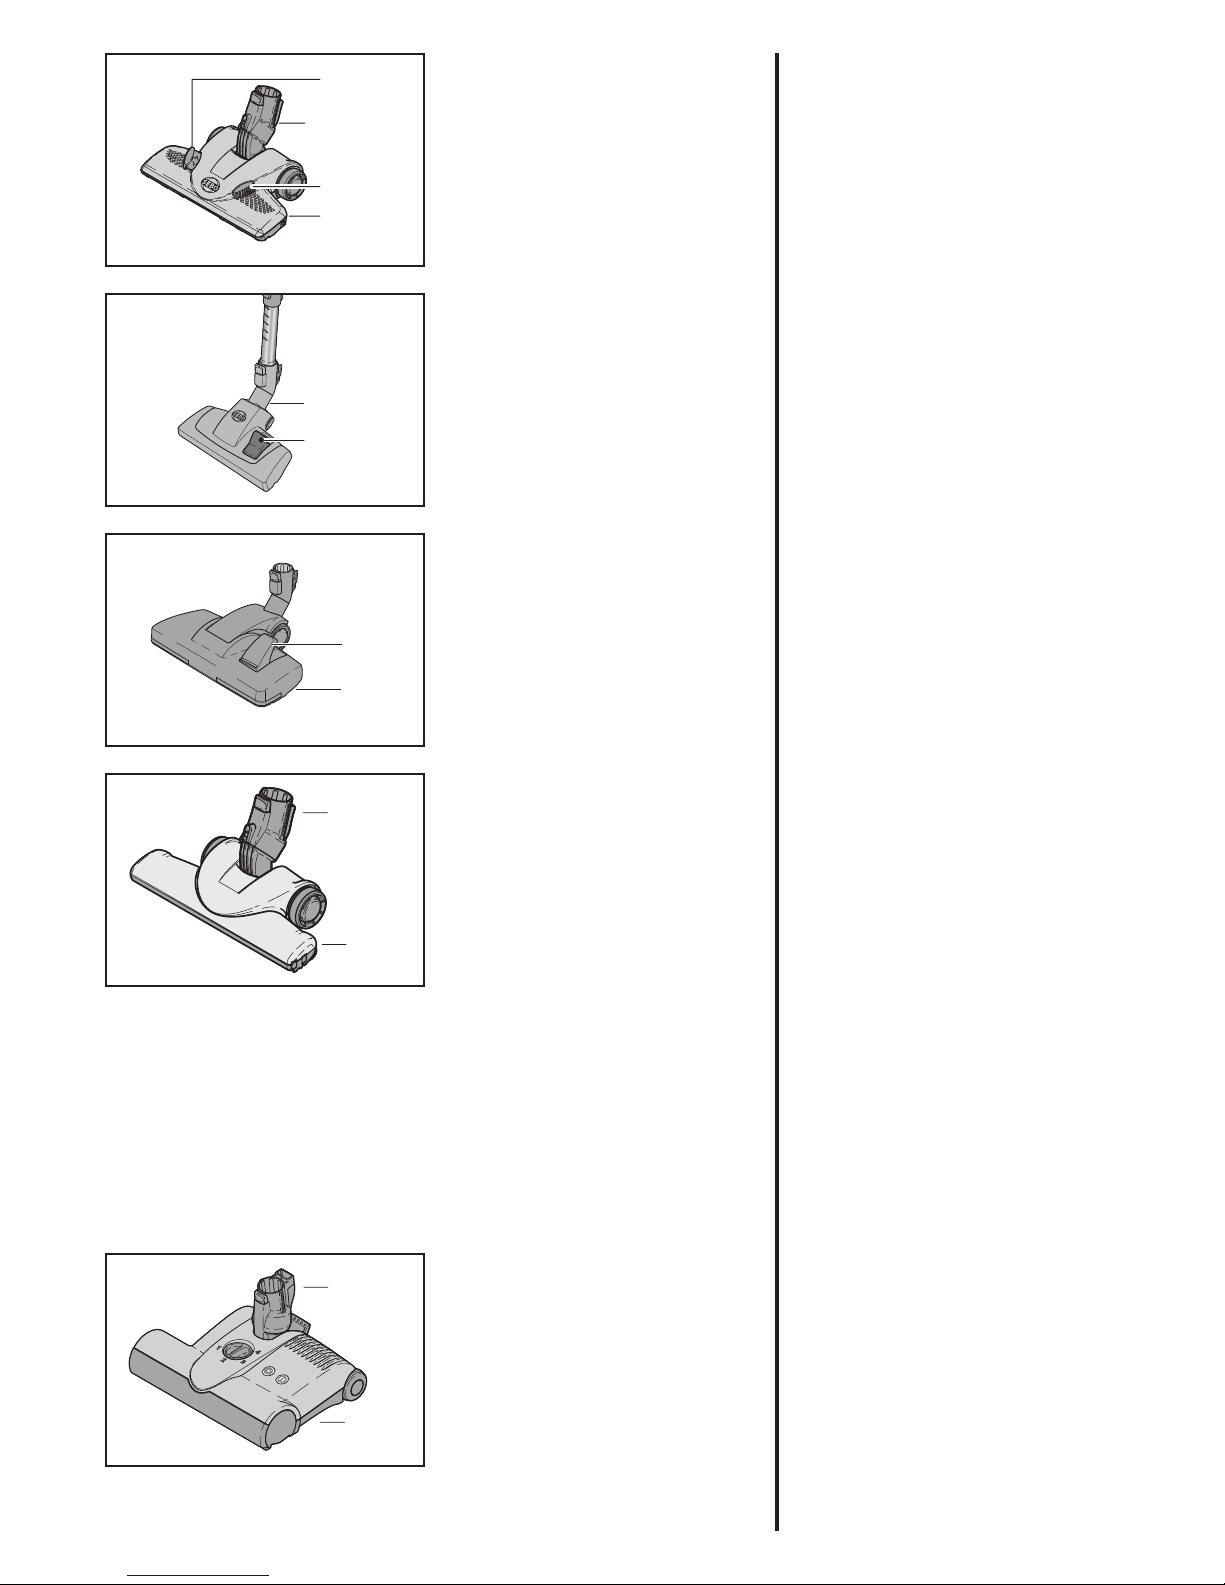
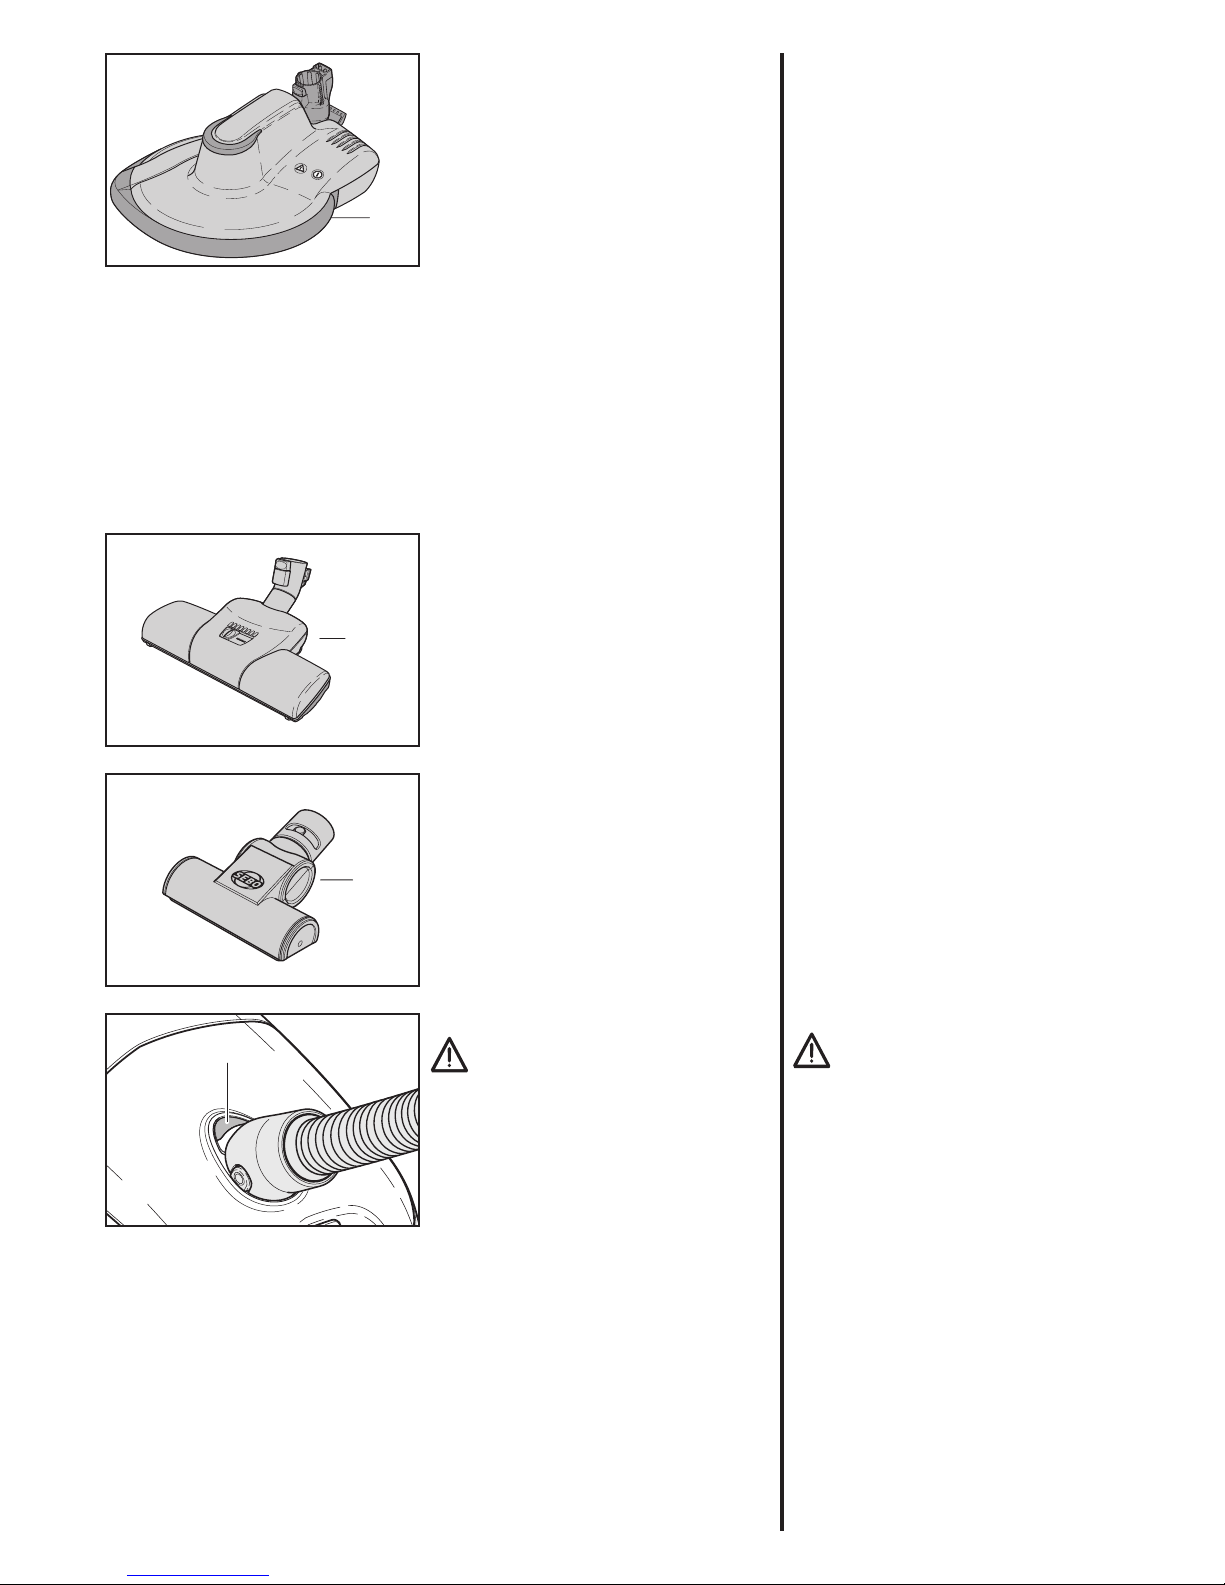
Ihr SEBO AIRBELT E ist mit einer Polster-
(16) und einer Fugendüse (15) ausgestattet.
Das Zubehör ist an der Rückseite des Ge-
rätes eingesteckt und passt sowohl auf das
Teleskoprohr (5) als auch auf den Handgriff
(6). Alle SEBO Zubehördüsen sowie die
SEBO ET (26) (anwendbar nur bei SEBO
AIRBELT E3-Modellen) lassen sich direkt
an den Handgriff (6) stecken, so dass zum
Beispiel Treppenstufen einfach gereinigt
werden können.
Für kurze Saugpausen können Sie das
Saugrohr mit der Bodendüse in der Park-
hilfe (17) am Heck des Staubsaugers oder
nach beendeter Arbeit in die Abstellhilfe
(18) an der Unterseite des Gerätes einste-
cken.
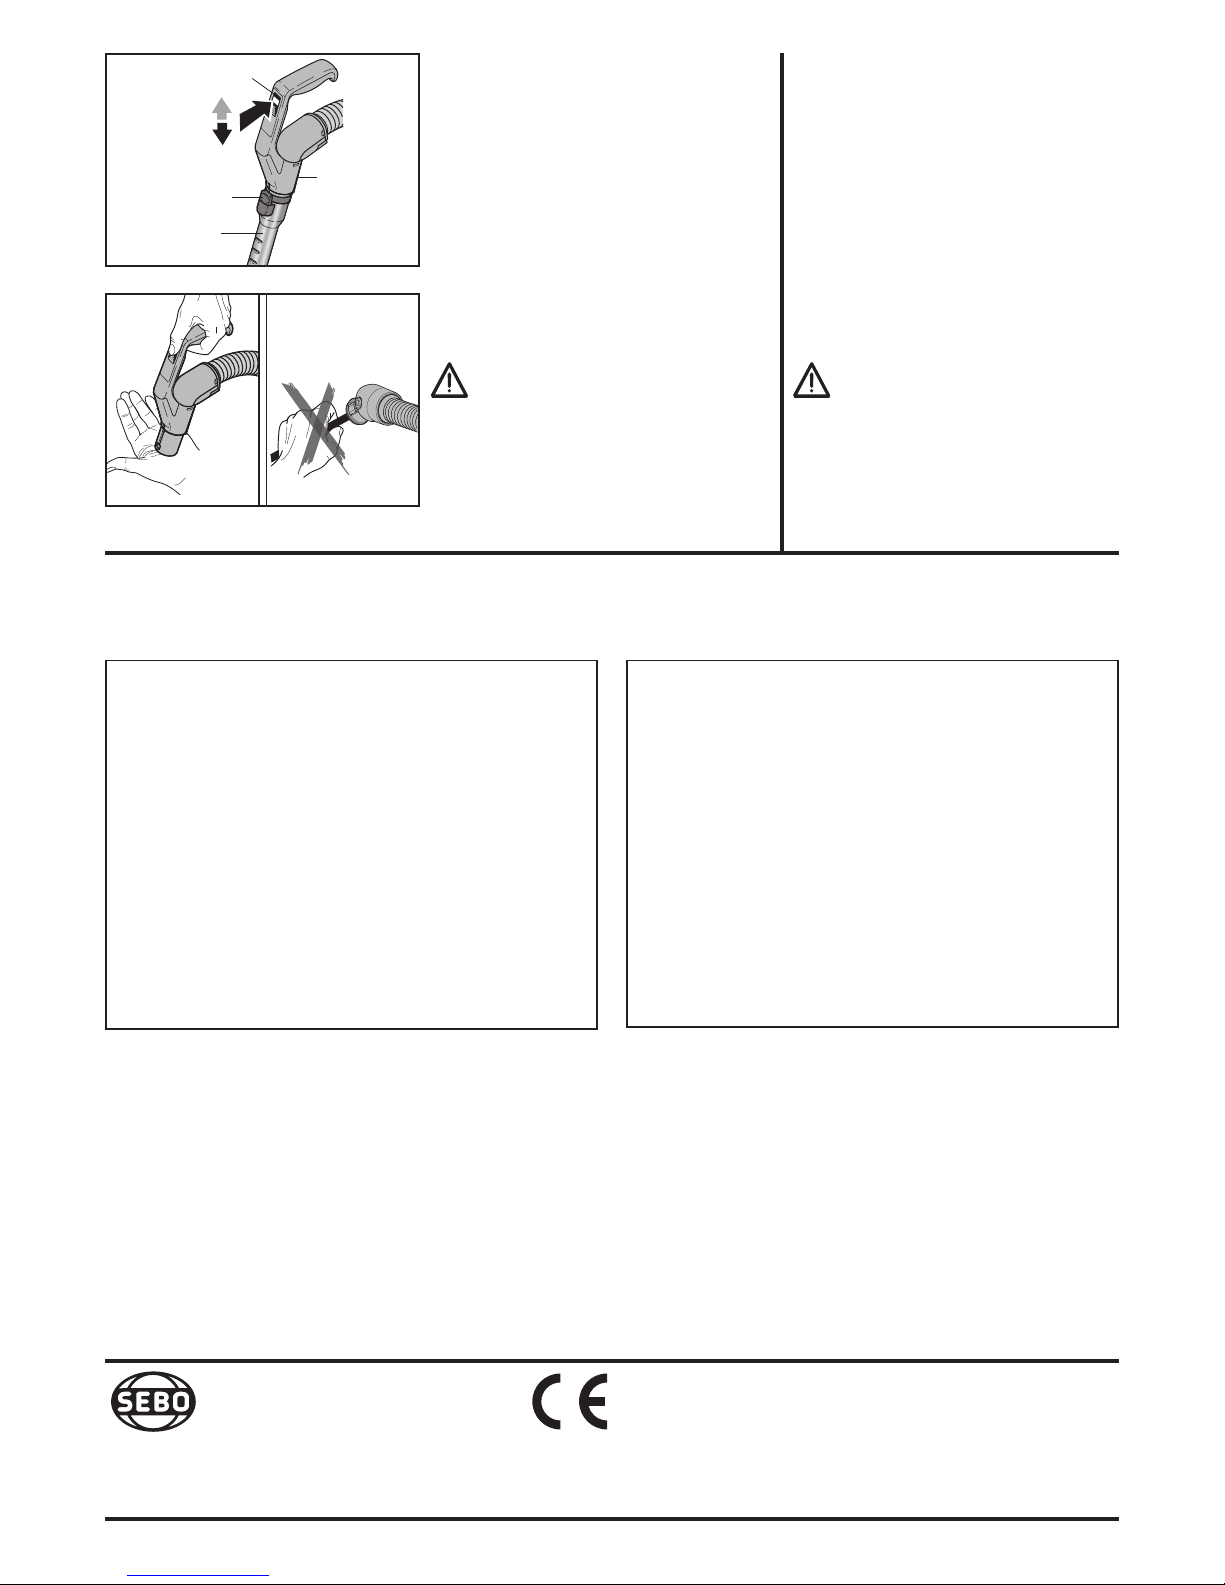
Nach Ende des Gebrauchs, das Gerät
durch Drücken des Schaltknopfes (12) aus-
schalten. Ziehen Sie dann den Netzstecker
aus der Steckdose. Die Anschlussleitung
rollt sich sanft auf, wenn Sie die Kabelein-
zugstaste (13) betätigen. Der praktische
Tragegriff (30) ermöglicht Ihnen ein kom-
fortables Tragen des Gerätes.
* Je nach Modell
Turn on the machine by pressing the
on/off knob (12). When the machine is
switched on, the on/off button (12) emits
blue light. This indicates the normal
operation mode. To adjust the suction
power, rotate the on/ off power control
knob (12) or slide the power control (24)
in the handle (6) from 0 (Stand by-Mode)
to max.*
All SEBO AIRBELT E-models are
equipped with automatic temperature
control. If the machine is too hot, the
colour of the on/off button (12) light will
change from blue to red.
If the on/ off button light (12) is continu-
ously red:
Power is automatically reduced because
the temperature of the motor is too high.
Possible causes could be a blockage or
the filter bag is full ( see removing block-
age or Changing Filter Bag)
If the on/ off button light (12) flashes
red:
The machine has shut down automati-
cally, because of excessive overheating.
Possible causes could be a blockage (see
removing bockage).
Switch off the machine.
Please do not switch on the machine until
the cause is rectified, otherwise it could
result in damage.
To protect against unintentional switch-
ing on, please don’t use external power
control devices such as a time switch as
a power supply, or connect the machine
to a electrical circuit which is regularly
switched on and off by a control system.
The crevice (15) and upholstery nozzles
(16) are located in the rear of the ma-
chine, and fit on to the hose handle (6) as
well as on to the telescopic tube (5).
All of the SEBO attachments and the
SEBO ET power head (E3 models only)
can be attached directly to the handle (6)
of the hose, for easy cleaning of stairs,
etc.
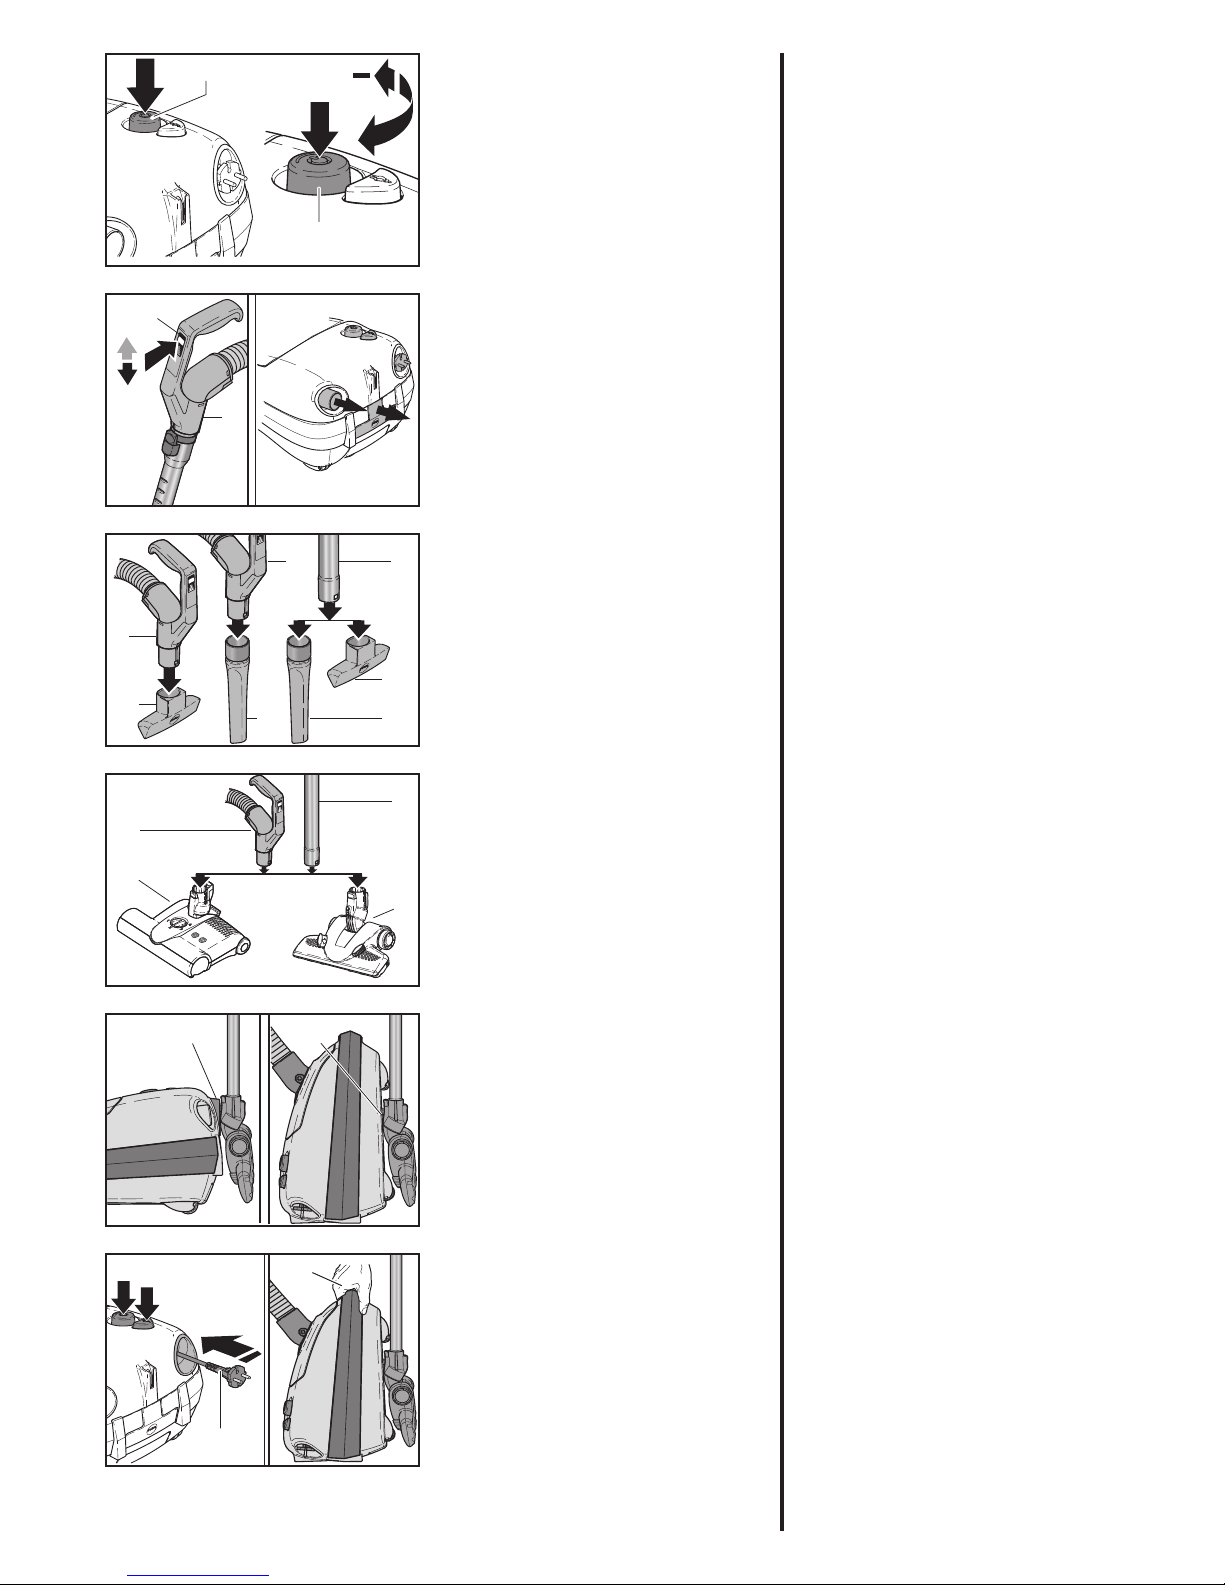
When the vacuum cleaner is not in use,
the telescopic tube (5) with floor at-
tachment can be parked in the parking
groove (17) on the rear of the machine.
For carrying the machine, the telescopic
tube with floor attachment can be fitted
into the carrying groove (18) on the un-
derside. Press the on / off knob (12) to
switch off the machine after use. Remove
the plug from the socket. To retract the
cable press the cable rewind button (13).
The practical carrying handle (30) allows
comfortable carrying of the machine.
* Depending on model
7
12
+
12
14
1213 30
24
max.
0
6

4
27
4
1
6. Bodendüsen und Elektro-
teppichbürsten
SEBO KOMBI*(1) / Komfort Pro Boden-
düse* (2) / Standard-Kombibodendüse*(3)
Die spezielle SEBO KOMBI Bodendüse*
(1) bietet mit ihrem einzigartigen Dreh-
Kipp-Gelenk (27) und vier Laufrollen
größten Saugkomfort. Sie verfügt über
einen wechselbaren, federnd gelager-
ten Naturborstenstreifen. Sie ist zusätz-
lich mit eingelassenen Verschleißbügeln
und einem Bodenblech aus Edelstahl
für hohe Beanspruchung ausgestattet.
Die Standard-Kombibodendüse (3)
nimmt mit einer hochwertigen Me-
tallgleitsohle und zwei optimierten
Fadenhebern mühelos Staub und Ver-
unreinigungen vom Boden auf. Die
Komfort Pro Bodendüse (2) ist mit ei-
nem verbesserten Gelenk und einer
optimierten Staubaufnahme ausge-
stattet. Durch die komfortable Dämp-
fung der Räder lässt sie sich optimal
über Teppich- und Hartboden schieben.
Alle Kombidüsen sind mit Fußrasten
(4) nach Bedarf auf Hartboden (Borsten
raus) und Teppichboden (Borsten rein)
umstellbar.
SEBO PARQUET* (25):
Diese Düse ist speziell für Parkettböden
und andere empfindliche, glatte Hart-
böden entwickelt worden. Ausgestat-
tet mit dem gleichen wendigen Dreh-
Kipp-Gelenk (27) wie die SEBO KOMBI
und vier Laufrollen lässt sich die SEBO
PARQUET ganz leicht führen. Sie ver-
fügt zudem über zwei federnd gelagerte
Naturborstenstreifen, die ausgetauscht
werden können.
Zum Wechseln der Naturborstenstrei-
fen der SEBO KOMBI und der SEBO
PARQUET die gelbe Abdeckung mit ei-
nem Schraubendreher entfernen und
den Borstenstreifen herausziehen.
Nach dem Wechsel die Abdeckung wie-
der einrasten.
Elektroteppichbürste SEBO ET* (26)
Für die optimale Reinigung Ihrer Tep-
pichböden empfehlen wir die Elektro-
teppichbürste SEBO ET (26). Zuverläs-
sig befreit sie Ihren Teppich selbst von
lästigen Tierhaaren und Fusseln. Durch
Ihr Dreh-Kipp-Gelenk (27) ist die SEBO
ET in alle Richtungen beweglich. Zu-
sätzlich ist die SEBO ET mit 4-fach ma-
nueller Höheneinstellung ausgestattet.
Die Elektroteppichbürste arbeitet bis
zum Rand. Detaillierte Informationen
finden Sie in der separaten Gebrauchs-
anweisung.
* Serie oder Sonderzubehör, je nach Modell.
6. Floor Cleaning Heads
SEBO Kombi*(1)/ Comfort Pro Kombi*(2) /
Vario Kombi*(3)
The SEBO Kombi (1) is equipped with a
unique double-jointed “flex” neck (27)
and offers a full range of manoeuvra-
bility. It has natural bristles that can be
easily replaced if worn out. Furthermore
this head is equipped with heavy duty
embedded stainless steel clamps and
bottom plate for durability.
The Vario Kombi (3) easily removes dust
and fibre from carpets because of its
high quality smooth metal sole plate
and two optimised lint strips.
The Comfort Pro Kombi (2) features an
upgraded swivel neck and optimised
dust pick up. It moves easily over car-
pets and hard floors because of its large
diameter wheels. The SEBO Kombi(1),
the Comfort Pro Kombi (2) and the Vario
Kombi (3) can be adjusted for hard floors
(bristles out) or carpet (bristles in) with
the foot switch (4).
SEBO PARQUET* (25):
SEBO has developed this effective and
durable parquet brush for cleaning
hard floors. The “flex” neck (27) de-
sign provides superb manoeuvrability.
Natural bristles and soft wheels make
the SEBO Parquet ideal for delicate or
uneven hard flooring. The brushes ad-
just to surface undulations to achieve
ultimate performance. The brushes are
removable for easy replacement. Please
remove fluff and fibre caught in the
bristles by vacuuming them out with the
crevice nozzle.
To change the natural bristle brush strips
of the SEBO KOMBI and SEBO PARQUET,
remove the yellow cap with a screw driver
and pull out the bristle brush strip. After
changing the bristle brush strip, the cap
has to click into place again.
Power Head SEBO ET* (26)
The use of a power head is recommend-
ed for the optimum cleaning of carpets.
The rotating design of the swivel neck
(27) allows the SEBO ET-1 power head
(26) to move in any direction easily. The
SEBO ET-1 is powered by a 175 Watt
motor. It features brush height adjust-
ment, to-the-edge cleaning action, a
cassette-type removable brush roller
and has a low profile for reaching under
furniture for effective all round cleaning.
Please remove fluff and fibre caught in
the bristles by vacuuming them out with
the crevice nozzle. This power head has
a separate instruction manual which
gives detailed information on its use.
* Depending on model
4
2
8
27
26
L
R
27
25
3
4

SEBO DISCO* (46)
Der innovative Ultra-High-Speed (UHS)
Saugbohner SEBO DISCO arbeitet mit
mehrfach patentierter Technik. Diese
garantiert, dass sich das Pad auf unter-
schiedlichen Böden ohne Zeitverzöge-
rung immer auf die richtige Arbeitshö-
he einstellt. Mit 2.000 U/min und Pads
mit Spezialbeschichtung für alle Böden
erzielt der SEBO DISCO einen einzigar-
tigen Glanzeffekt. Der angeschlossene
Staubsauger beseitigt feinen Polierstaub
sofort. Das Ergebnis ist eine saubere und
glänzende Oberfläche. Das ist optimale
Bodenpflege von SEBO – mühelos und
ohne den Einsatz zusätzlicher chemi-
scher Pflegemittel. Detaillierte Informa-
tionen finden Sie in der separaten Ge-
brauchsanleitung.
Turbobürste SEBO TT-C* (28):
Die Bürstenwalze der Turbobürste SEBO
TT-C wird durch den Luftstrom des
Staubsaugers angetrieben. Sie befreit
Teppiche und Teppichböden von Fusseln
und Fäden. Detaillierte Informationen
können Sie der separten Gebrauchsan-
weisung entnehmen.
Polsterturbodüse SEBO PT-C* (29):
Die SEBO PT-C wird vom Saugstrom des
Staubsaugers angetrieben und ist ideal
für die Reinigung von strapazierfähigen
Polstermöbeln, Matratzen u.ä.
7. Wartung und Pflege
Zur Gewährleistung der Sicherheit
und richtigen Funktion nur original
SEBO Ersatzfilter verwenden. Alle
Filtermedien dürfen auf keinen
Fall gewaschen und wieder ver-
wendet werden.
Filteranzeige
Die orange Filteranzeige (10) zeigt ei-
nen reduzierten Luftstrom an. Entweder
muss die Filtertüte gewechselt werden
oder es liegt eine Verstopfung vor (sie-
he Abschnitt Verstopfung beseitigen). Je
nach Art des Füllgutes kann ein Wechsel
erforderlich sein, ohne dass die Filtertüte
bis oben gefüllt ist. Die Filteranzeige er-
scheint nicht bei niedriger Saugkraftein-
stellung. Sie sollte regelmäßig bei hoher
Saugkraft überprüft werden.
* Serie oder Sonderzubehör, je nach Modell.
SEBO DISCO* (46)
For smooth hard floors, the innovative
Ultra High Speed SEBO DISCO Floor Pol-
isher uses patented technology to create
a brilliant gloss shine. The attached SEBO
vacuum cleaner removes fine dust during
polishing. The result is a spotlessly clean
floor. You will find detailed information in
a separate instruction manual. For further
information visit www.sebo.uk.
Floor Turbo Brush SEBO TT-C* (28):
The Floor Turbo Brush is powered by the
air stream of the vacuum cleaner. It pro-
vides very effective removal of pet hairs
and fibres from carpets and rugs and is
designed to be suitable for use on hard
floors. Please regularly check the brush
roller for fluff and fibre caught in the bris-
tles and remove by vacuuming them out
with the crevice nozzle. For more informa-
tion please see the separate SEBO TT-C
instruction manual. Detailed maintenance
instruction videos can be found at www.sebo.
co.uk.
Stair & Upholstery Turbo Brush
SEBO PT-C* (29):
Powered by the air stream, the Stair
& Upholstery Turbo Brush is ideal for
cleaning small or inaccessible areas of
carpet. It lifts the pile and gives superior
fibre/hair pick up. Please regularly check
the brush roller for fluff and fibre caught
in the bristles and remove by vacuuming
them out with the crevice nozzle. For
more information please see the separate
SEBO PT-C instruction manual. Detailed
maintenance instruction videos can be found
at www.sebo.co.uk
7. Maintenance and Servicing
Use only genuine SEBO replacement
bags and filters to ensure perform-
ance, longevity and safety. Do not
wash filters. Do not re-use bags.
Bag full and Power indicator
When the orange bag full indicator (10) is
showing, airflow is reduced. This could be
because the filter bag is full, the filters are
clogged, or there may be a blockage (see
removing blockages).
Vacuuming fine dust may require an ear-
lier filter bag change even though the filter
bag is not full. Fluff may overfill the filter
bag without the light coming on. The bag
full indicator only works correctly at full
power. At lower levels, the indicator might
not indicate correctly. Therefore please
check the status regularly at full power.
* Depending on model 9
10
46
27
29

37 21
36 31
1119
32
CLOSE
33
35
31
34
33
36
38
39
39
Wechsel der Ultra-Bag™ Filter-
tüte
Zum Wechsel der Filtertüte (31) den Fil-
terdeckel (19) durch Anheben der Entrie-
gelungstaste (11) öffnen. Die Filtertüte
(31) mit dem Hygienedeckel (32) ver-
schließen und unter Kippen des Filter-
halters (34) aus der Filtertütenhalterung
(33) entnehmen. Schieben Sie den Filter-
halter (34) von oben senkrecht in die Fil-
tertütenhalterung (33) und kippen Sie die
Filtertüte (31) wieder ab. Bitte achten Sie
hierbei auf die richtige Positionierung.
Der grüne Filterhalter (34) muss dabei
auf den Rastbügel (35) der Filtertüten-
halterung (33) geschoben werden. Der
Filterdeckel (19) schließt nur mit korrekt
eingesetzter Filtertüte (31).
Wechsel der Filter (Motorschutz-
filter und Hospital-Grade-Filter
E)
Der SEBO AIRBELT E ist serienmäßig mit
einem dreistufigen S-Klasse-Filtersy-
stem ausgestattet, das die besonderen
Ansprüche von Asthmatikern und All-
ergikern erfüllt. Die Luft strömt hierbei
durch drei Filterstufen mit zwei hoch-
wirksamen Microfiltern: die Ultra-BagTM
Filtertüte (31), den Motorschutzfilter
(36) und den Hospital-Grade-Filter (37).
Wechseln Sie den Hospital-Grade- und
den Motorschutzfilter spätestens nach
16 Filtertüten aus, oder wenn sie stark
verschmutzt sind auch schon eher.
Zum Wechsel des Motorschutzfilters (36)
öffnen Sie den Filterdeckel (19) und ent-
fernen Sie die Filtertüte (31). Der Motor-
schutzfilter (36) kann nun durch Anheben
an der Lasche unten (38) nach oben ge-
schwenkt und in waagerechter Position
aus der Halterung (39) einfach entnom-
men werden. Ein neuer Motorschutzfilter
(36) wird wieder in waagerechter Posi-
tion in die Halterung (39) eingelegt und
die Lasche (38) unten im Filtergehäuse
eingerastet.
Changing the Filter Bag
To change the filter bag (31) open the
filter bag cover (19) by lifting the catch
(11). Seal the filter bag (31) with the
sealing cap (32). Lift the filter bag (31)
out of the filter bag holder (33) by tilt-
ing the collar (34) up. Insert the collar
(34) of a new filter bag (31) down into
the filter bag holder (33). Please ensure
that the collar (34) is inserted properly
over the U-shaped metal spring (35) of
the filter bag holder (33) and tilt the col-
lar (34) down. The cover (19) can only be
closed with a correctly fitted filter bag
(31).
Changing the Filters
(Motor filter and Hospital-
Grade-Filter E)
The SEBO AIRBELT E comes with a
triple S-Class filtration system, which
makes it the perfect choice for custom-
ers with allergies or asthma. This sys-
tem uses three high efficiency filters:
the Ultra Bag™ (31), the motor filter
(36) and the Hospital-Grade-Filter (37)
to remove even microscopic particles.
We recommend changing the Hospital-
Grade and motor filter regularly, either
if they have become very dirty, or once
16 filter bags have been used.
To remove the motor filter (36), open
the filter bag cover (19) and remove the
filter bag (31). Swing the motor filter
upwards by lifting the tab (38) at the
lower end of the motor filter (36). When
in horizontal position the motor filter
can easily be removed from the motor
filter holder (39). Insert the new motor
filter (36) in the horizontal position and
swing it downwards until the tab (38)
locks down at the bottom of the hous-
ing.
10

37
20 40
37
41 41
16
42
17
4547
Den Hospital-Grade-Filter E (37) errei-
chen Sie auf der Unterseite des Gerätes.
Dazu die Rasten (40) der Filterabdeckung
(20) zusammen drücken und diese her-
ausziehen. Der Hospital-Grade-Filter E
(37) ist wie eine Filtertüte geformt und ist
flach auf der Geräteunterseite verstaut.
Zum Wechseln muss dieser aus dem Ge-
rät herausgezogen werden. Die Dichtung
des Filters kann nun mit Hilfe der Filter-
rasten (41) von der Ausblasöffnung ge-
zogen werden. Hier werden diese gleich-
zeitig nach innen gedrückt und der Filter
kann herausgezogen werden. Beim Ein-
legen des neuen Hospital-Grade-Filters
E (37) wird zunächst die Dichtung auf die
Ausblasöffnung geschoben (Auf Codie-
rung achten!) und die Filterrasten links
und rechts mit einem Klick eingerastet.
Der Filter wird anschließend wieder auf
der Unterseite des Gerätes verstaut und
die Filterabdeckung wieder eingesetzt.
Airbelt Stoßschutz
Ihr neuer SEBO Bodenstaubsauger ist
mit dem einzigartigen, patentierten Air-
beltTM Stoßschutz (21) ausgestattet, der
Ihr Mobiliar vor Beschädigungen schützt.
Er sorgt auch dafür, dass die gefilterte
Luft rundum besonders leise und sanft
wieder ausgeblasen wird.
Zum Wechseln des AirbeltTM (21) die
Polsterdüse (16) aus der Aufnahme (42)
nehmen und diese mit einem Schlitz-
Schraubendreher heraushebeln. An-
schließend den AirbeltTM (21) mit dem
Schraubendreher aus der Verrastung
seitlich weg hebeln und nach vorn schie-
ben. Die alte Stoffabdeckung entfernen.
Beim Aufziehen der neuen Stoffabde-
ckung darauf achten, dass die Verstär-
kungsstreifen unterschiedliche Längen
haben. Der obere Verstärkungsstreifen
ist mit einer Codierung (47) versehen und
muss auf der Seite „TOP“ (45) in die Nut
eingeführt werden. Anschließend den
AirbeltTM wieder auf das Gerät schieben
und einrasten. Dann die Düsenaufnahme
auf der Rückseite einschieben und an der
unteren Seite einrasten. Zum Schluss
kann die Polsterdüse wieder in die Auf-
nahme geklickt werden.
To change the Hospital-Grade-Filter
(37), first remove the exhaust filter cov-
er (20) from the bottom of the machine
by pressing together both the release
buttons (40) in the cover (20). Next, pull
the fleece material part of the filter out
of the machine. Finally press the latch-
es (41) on either side of the filter inward
and pull out the filter. To insert the new
Hospital-Grade-Filter (37) put the seal
of the filter opening over the exhaust
opening of the housing (please note the
alignment tab goes at the bottom). The
latches (41) on the right and left side
should click shut to hold the filter in
place. Push in the fleece material and
shut the filter cover.
Airbelt Bumper System
Your new vacuum cleaner is fitted with
the patented AirbeltTM (21) shock ab-
sorber system, which protects your
walls and furniture and eliminates ex-
haust air blast.
The outer cloth of the AirbeltTM can be
changed, if necessary. Remove the up-
holstery nozzle (16). To lever out the
upholstery nozzle holder (42) please
use a slotted screw driver. The cloth
covered AirbeltTM assembly can be
levered out of the recess with a screw
driver and removed by carefully sliding
the assembly forwards.
To fit the Airbelt-cloth cover over the
AirbeltTM insert the side rails into the
grooves on the AirbeltTM. Please note
that the upper side rail comes with a
marking code (47). Please insert this
upper side rail into the groove which is
marked “TOP” (45).
Start from one end and continue around
the AirbeltTM. The new cloth covered
AirbeltTM assembly is fitted from the
front of the machine. Press on and en-
gage.
Now refit the upholstery nozzle holder
under the parking groove (17) and lock
it on the lower side. Finally insert the
upholstery nozzle.
21
11

24
max.
0
6
43
5
Verstopfungen beseitigen
Bei Verstopfungen im Schlauch (7) schal-
ten Sie das Gerät ein und regulieren Sie
die Saugkraft auf volle Saugstärke. Lö-
sen Sie anschließend das Teleskoprohr
(5) durch Drücken der Taste (43) vom
Handgriff (6). Der Schlauch sollte beim
Aussaugen an der verstopften Stelle ge-
dehnt werden und mit der flachen Hand
auf die Öffnung des Schlauches geklopft
werden.
Reinigen Sie den Saugschlauch
niemals mit einem Stab und tau-
chen Sie ihn niemals in Wasser
(elektrische Bauteile)!
8. Technical Details *
Removing Blockages
To remove a blockage in the hose (7),
first release the telescopic tube (5)
from the hose handle (6) by pressing
the catch (43). Turn the machine on at
full power and straighten the hose, es-
pecially in the spot where the blockage
is, and close the free end of the hose
repeatedly with your hand.
Never attempt to clear the hose
by using a sharp object and do
not immerse in water for clean-
ing.
For Service please contact your supplier or the UK address below:
Vacuum motor ................................. 700W
Ultra-BagTM Filter Bag ..................... 3.5l, 3-layer, Electrostatic fleece
Weight .................................... 5.2kg
Protection .................................... double insulated
Cleaning range ................................ 10.8m*
Vacuum motor ................................. 1200W
Ultra-BagTM Filter Bag 3.5l, 3-layer, Electrostatic fleece
Weight .................................... 5.3kg
Protection .................................... double insulated
Cleaning range ................................ 10.8m*
* Depending on model
SEBO (UK) Ltd - The Merlin Centre
Cressex Business Park, High Wycombe, Bucks HP12 3QL.
Phone: 0 14 94 - 46 55 33 , Fax: 0 14 94 - 46 10 44, www.sebo.co.uk
©2013 SEBO Stein&Co. GmbH ®Registered Trademark. Subject to change.
SEBO Stein&Co. GmbH, Wülfrather Straße 47-49, 42553 Velbert, Germany
Telefon +49 (0) 20 53 / 89 81, Telefax +49 (0) 20 53 / 89 85, www.sebo.de
©2013 SEBO Stein&Co. GmbH ®Eingetragenes Warenzeichen. Technische Änderungen vorbehalten.
MADE IN GERMANY
Für technischen Service wenden Sie sich bitte an Ihren SEBO
Fachhändler oder direkt an die SEBO Stein & Co. GmbH
12
06328 - 12/2015
8. Technische Daten *
Gebläsemotor ................................................700 Watt
Ultra-BagTM Filtertüte .....................................3,5 l, 3-lagig
Gewicht ................................................5,2kg
Isolationsklasse .............................................. II, doppelt isoliert
Aktionsradius ................................................10,8 m
Gebläsemotor ................................................1200 Watt
Ultra-BagTM Filtertüte .....................................3,5 l, 3-lagig
Gewicht ................................................5,3kg
Isolationsklasse .............................................. II, doppelt isoliert
Aktionsradius ................................................10,8 m
* Je nach Modell
Other manuals for Airbelt E
3
Table of contents
Other Sebo Vacuum Cleaner manuals

Sebo
Sebo ET-1 User manual

Sebo
Sebo Automatic X5 User manual

Sebo
Sebo 370 comfort User manual

Sebo
Sebo Automoatic XP1 User manual

Sebo
Sebo SEBO AUTOMATIC XP 10 User manual

Sebo
Sebo SOFTCASE BP60 User manual

Sebo
Sebo Automatic X4 User manual

Sebo
Sebo K2 User manual

Sebo
Sebo BS 360 User manual

Sebo
Sebo AIRBELT K User manual

Sebo
Sebo Professional G2 User manual

Sebo
Sebo AIRBELT K User manual

Sebo
Sebo 300 EVOLUTION User manual

Sebo
Sebo AIRBELT K User manual

Sebo
Sebo duo User manual

Sebo
Sebo Automatic X1 User manual

Sebo
Sebo AUTOMATIC X7 User manual

Sebo
Sebo BS 36 Comfort User manual

Sebo
Sebo duo User manual

Sebo
Sebo ESSENTIAL G User manual