2 Quick Start
Custom designed for enabling speed and efficiency during disasters, the Reveal
FirePRO has a unique interface all its own. Here is a list of steps to get you started:
2.1 Charging your Battery
1 For the best results, charge your Reveal FirePRO using the included USB cable.
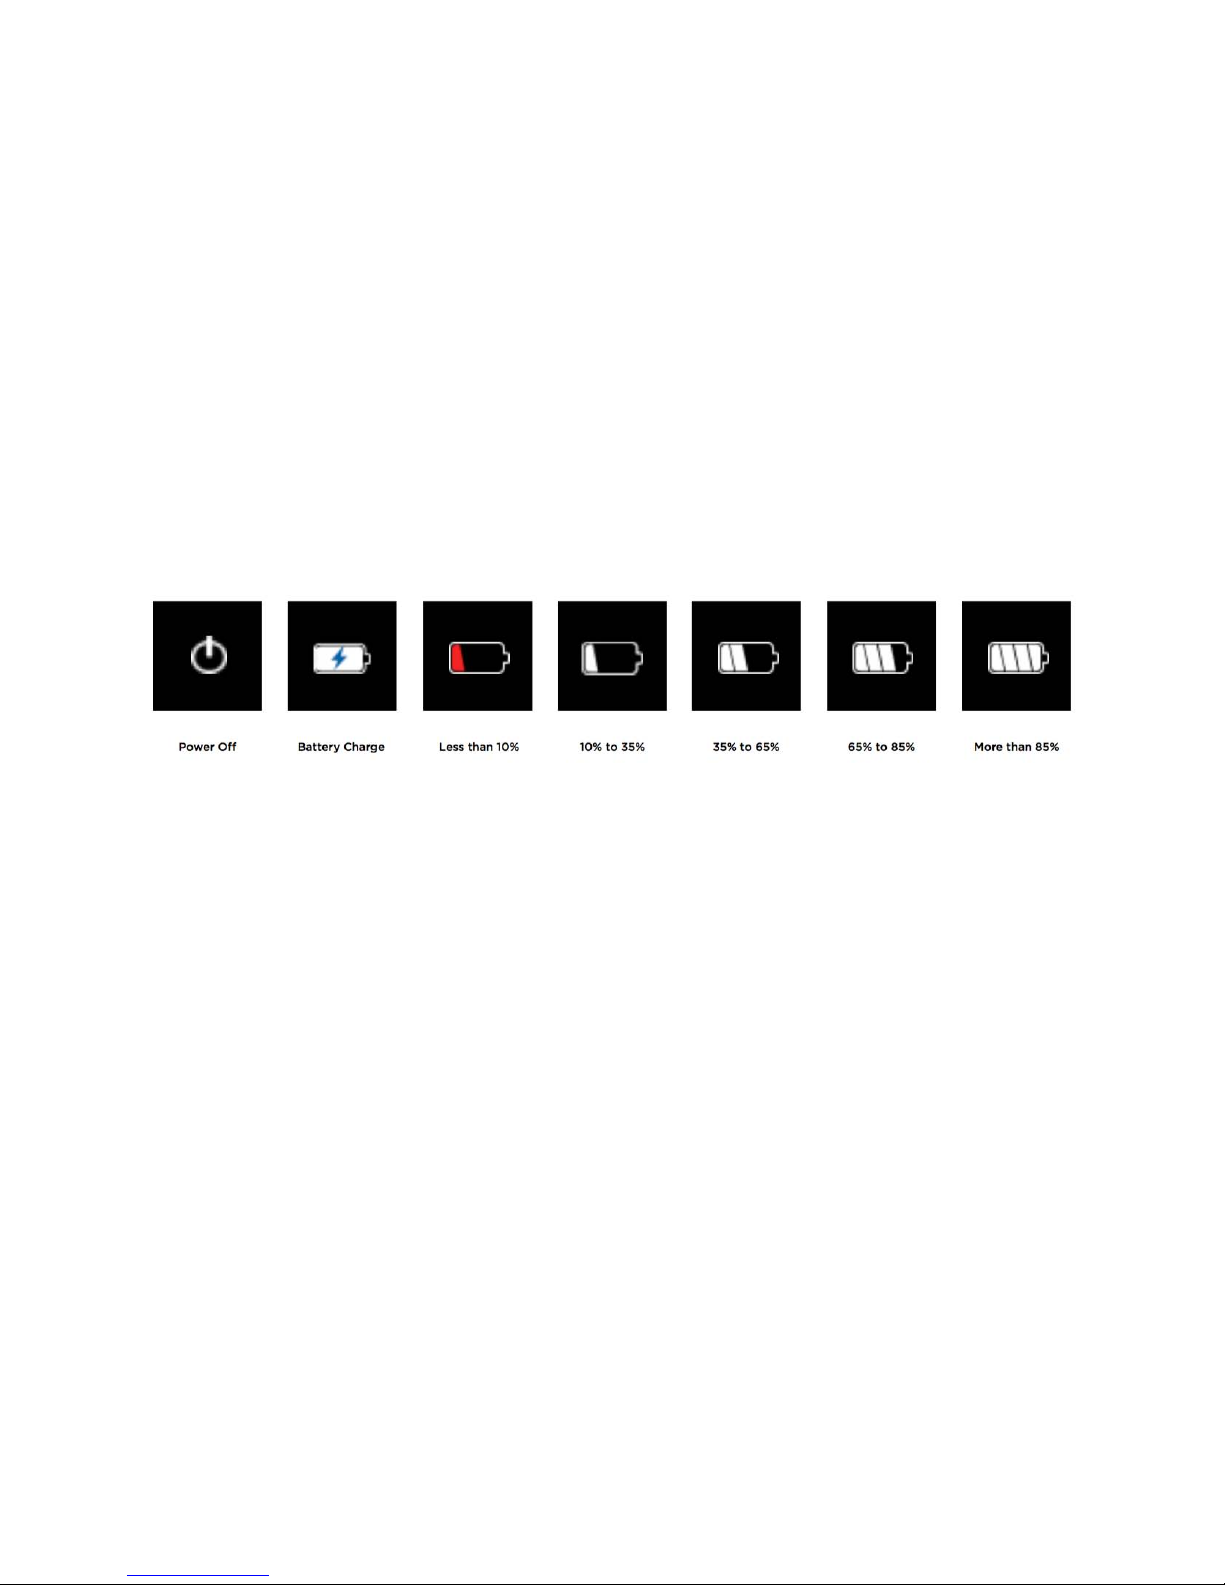
When the thermal camera is ‘off’, the Battery Charging screen will appear. The battery
charge level will only appear when plugged in and the LEFT or RIGHT buttons are
pressed.
NOTE: Reveal FirePRO will provide up to 4 hours of scanning time with a full charge.
2.2 Setting up your Device
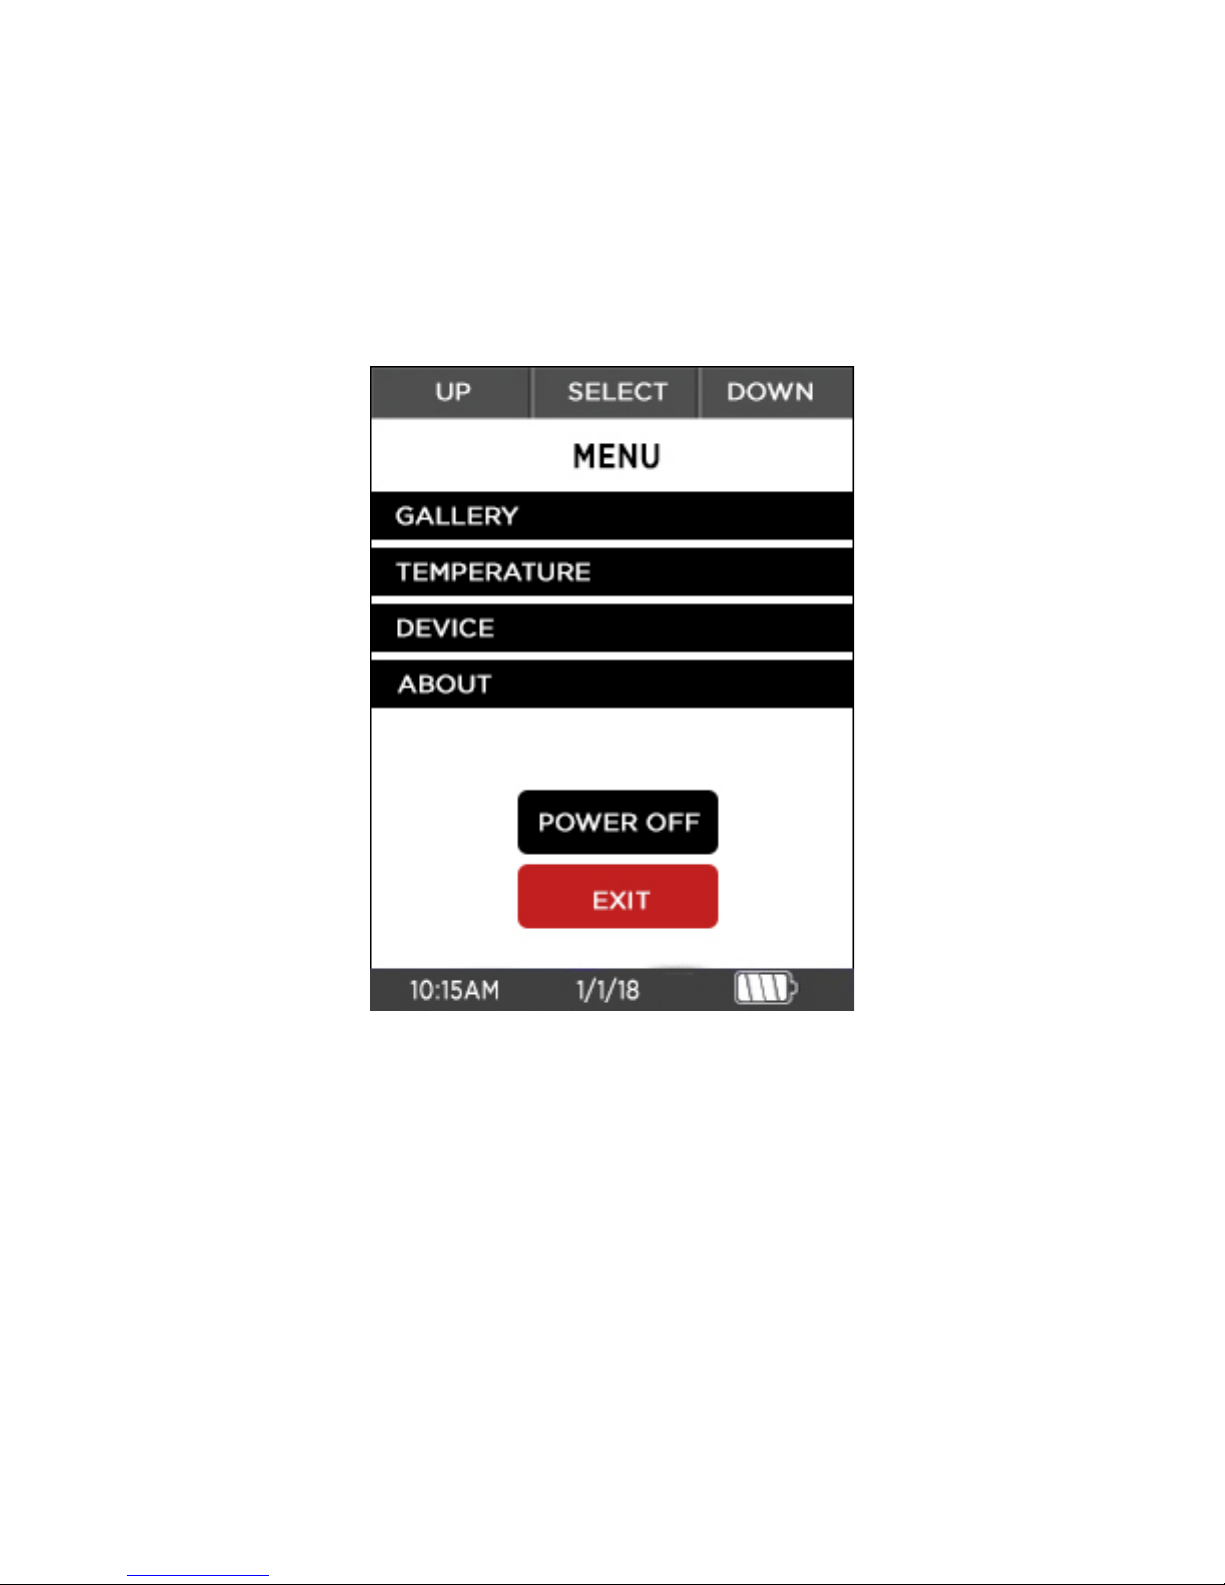
1 To turn on your device, press the CENTER button and hold until the screen lights up.
The button-function ribbon at the top of the screen defines the meaning of the three
buttons above it. For each of the setup screens, use the LEFT and RIGHT buttons to
navigate, and the CENTER button as the selector. For numerical fields, the LEFT button
subtracts from the displayed value, while the RIGHT button adds to it, as the button-
function ribbon indicates. To switch the device off, press and hold down the CENTER
button for 2 seconds until screen goes dark.
2 You will be directed to a screen that asks you to set up some basic information,
including language, and date & time formats. Using the RIGHT and LEFT buttons, scroll
down and select the appropriate fields, using the CENTER button to select and
continue, concluding with the ‘setup complete’ screen.
NOTE: If you need to change any of the information input in the initial setup, or settings
afterwards, you can always restore your device back to its factory settings by selecting
“Restore” in the ‘about’ tab of your menu options. This option will reboot your device and
ask you to input the same information as when it’s first turned on. To conduct a hard