English
13
English
12
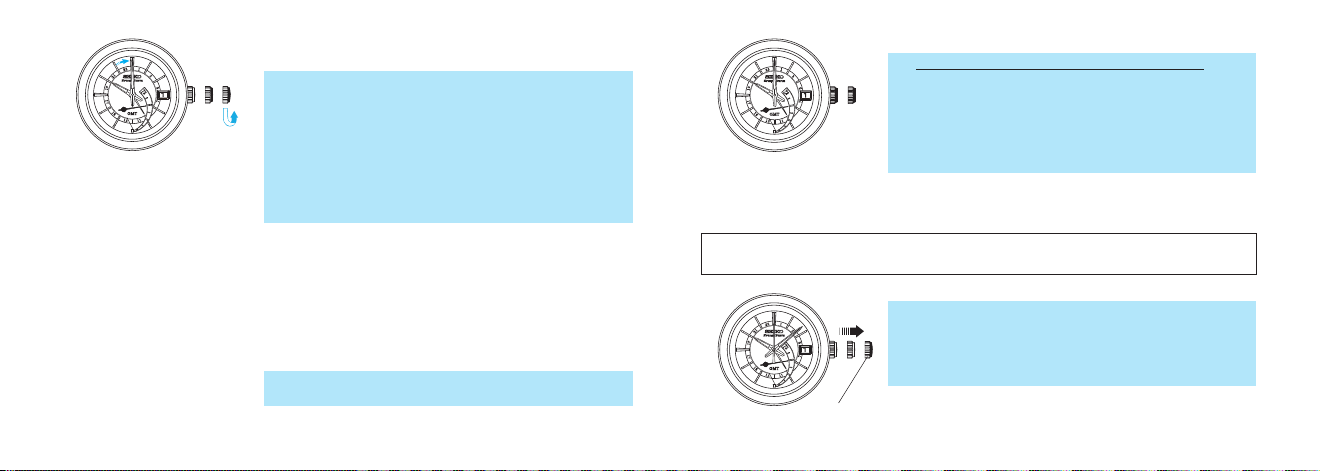
2. Turn the crown counterclockwise to set the 24-hour and
minute hands to the time in the “different time zone
area” you wish to set.
* Only the 24-hour and minute hands are to be set at this
stage. The hour hand is to be set later so it is not
necessary to adjust the hour hand yet, even if it is
indicating the wrong time.
* The date may be altered depending on the position of
the hour hand, however it should not cause any con-
cern since it can also be adjusted later.
* Set the minute hand behind the time and then slowly
advance it to the desired time.
4. Pull out the crown to the first click.
6. Push the crown back in upon completion of time set-
ting.
<Example>
To set the 24-hour hand to the time
in New York while setting the hour/
minute hands to indicate the time in
London.
When the time in London is 10:00
A.M., it is 5:00 A.M. in New York.
Set the 24-hour hand to indicate “5”
on the 24-hour scale (the 2.5 o’clock
position), while the minute hand is
pointing at the “0” minute position.
*The time difference adjustment
function serves only for a time in
a “different time zone area”
where the time difference from
the time in London is represented
in one-hour increments.
Tips for more accurate time setting
• Keep in mind the following points in order to set the time more accurately.
1. Before setting the time, wind the mainspring sufficiently until the power reserve
indicator shows the fully-wound state.
2. When starting to use a watch after it stops, wind the mainspring sufficiently and
wait approximately 30 seconds after the second hand starts to move, then pull the
crown out to the second click.
3. Do not stop the second hand movement for 30 minutes or longer while the crown
is at the second click position. If the stoppage of the second hand movement
exceeds 30 minutes, push the crown back in to restart the second hand, wait at
least 30 seconds, and then carry out the time setting once again.
*Also, adjust the date at this point if necessary.
* The moment the date changes is midnight. When
setting the hour hand, be sure that AM/PM is set
correctly.
* Turn the crown slowly, checking that the hour hand
moves in one-hour increments.
* When adjusting the hour hand, the other hands may
move slightly. However, this is not a malfunction.
3. Push the crown back in simultaneously with the time
signal.
* The setting of the 24-hour, minute and second hands
to the time in the “different time zone area” is now
completed.
5. Turn the crown to set the hour hand to the current hour.
(In this example, the current hour in London.)