manuals.online logo
Brands
  1. Home
  2. •
  3. Brands
  4. •
  5. Seiko
  6. •
  7. Watch
  8. •
  9. Seiko Astron 7X52 Instruction manual

Seiko Astron 7X52 Instruction manual

 Check the charging status
 Features
 In-ight mode ( ) (When boarding)
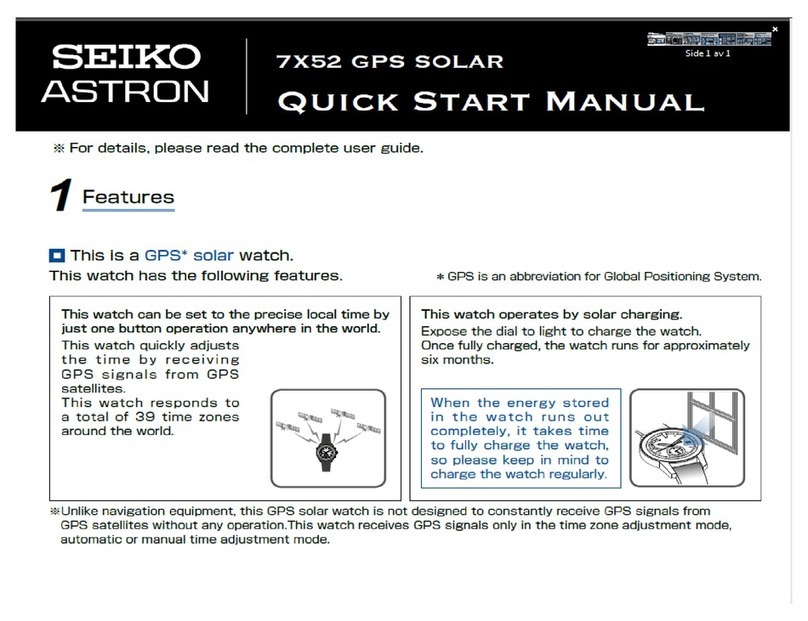
This is a GPS* solar watch.
This watch has the following features. 
This watch can be set to the precise local time by
just one button operation anywhere in the world.
This watch operates by solar charging.

 

 
  
  

  
   




Reception
is allowed
Reception
is not
allowed


 
 











  





 


 

 







 


 
 
 





  
  
  
 






 

 
 
 

 
 
 

2
1
3
The indicator hand position shows whether this watch is able or unable to receive GPS signals.
In addition, for the low charging state, the movement of the second hand shows the energy
depletion state in further detail.


Set to the in-flight mode ( )
Reset the in-flight mode( )
󰴤󰴦 
󰴥 
   
 

           󰴤      
        󰴤
  


  
     

 
Set to the in-ight mode
( )where the reception
may inuence operation of
other electronics devices
in an airplane, etc.
In the in-ight mode( )
the GPS signal reception
(time zone adjustment,
manual time adjustment,
and automatic time
adjustment) does not
work.

In-flight mode ( )
In-ight mode setting
automatically ends
after 5 sec
3
  


  

  
 
When the in-flight mode
()is brought about, the
indicator hand points to
even after the watch
has returned to the time
display mode.
  
   
  
   
   

Press Button B and
then release it.
1
 
 
  
 


Press
and
Release
Continue to press Button C
(3 sec) within approximately
5 sec after operation of ① .
2
  

 
   
  
 
Press
for
3sec
Press
 
Manual time zone setting (To set the watch to the local time of the destination in an airplane, etc.)
 
Time Zone Adjustment (When the region or time zone where the watch is used is changed)
 Set Daylight Saving Time (DST)
456
Continue to press Button C
(3 sec), and when the second
hand has stopped, release it.
1Press Button B or Button C to adjust the second
hand to the time zone of the destination
When the hour and
minute hands stop
moving, press Button A
2 3



   
   



  


 
    
   
   
   
   
󰴦

        
clock
wise
counter
clock
wise
How to manually set the time zone

  


  


     
  
 
    
  
 
Manual time zone setting
In places where the time zone cannot be adjusted, the time zone can be set manually.
     
  

Precautions on time zone adjustment
If the time zone is adjusted near a time zone boundary, the time of the adjacent time zone may be displayed.
In some areas the boundaries observed by the watch may not exactly correlate to the actual time zone markers on
the land. This does not indicate a malfunction. In this case, set the time zone in the manual time zone setting mode.
                    
         
        
How to adjust the time zone
Continue to press Button B (6 sec),
and then release it when the second
hand moves to the 30-sec position.
1
  
  
 
 

2 3
When the second hand
points to “Y” or “N,”
reception is completed.
Direct the watch face
upward and wait 4
Press
for
6sec

 
  
  
  
 
 
   


   
  
  

  














B
PC
JJY
B
PC
JJY
  
  



 
   
    
  

 
  


     
   
It takes a maximum of 2
min to complete reception.




   




BPC
JJY
Mayreceive
E
a
s
y

t
o

r
e
c
e
i
v
e
C
a
n
n
o
t

r
e
c
e
i
v
e
3units
4units
5units
6units
・
・
・
・
・
・
2units
0units

      
     


     
󱐰  
 

 

 
Depending on the area, Daylight Saving Time (DST) is individually set.
Daylight Saving Time means summer time, which is a system to lengthen
daylight time by advancing 1 hour when daylight time is long in summer. Daylight saving time has been
adopted in about 80 countries, mainly in Europe and North America. The adoption and duration of daylight
saving time vary depending on the country.
      
Daylight Saving Time (DST)
Continue to press Button C
(3 sec)within 5 sec after
operation of ①
2
Press Button A
When the hour and minute hands stop moving,
the DST setting mode is automatically
completed after approximately 5 sec.
1 3
Carry out operation of ① to ③ in the state where Daylight Saving Time (DST)
setting is ON.
In operation of ②, adjust the indicator hand to the “OFF” position as shown in the
gure at the right. The hour and minute hands return by one hour.

    

 
  
  

  


              
         󱐯  
Turn ON Daylight Saving Time (DST)
Turn OFF Daylight Saving Time (DST)


     
    
  
  

    
    
    
Press
for
3sec
Press
Press
for
3sec
Press
Press
7X52 GPS SOLAR
Quick Start Manual
※ For details, please read the complete user guide.
 Manual time adjustment (To set only the time)
7
The watch can be set to the precise current time of the currently set time zone.
(The time zone is not changed.)
Manual time adjustment
How to manually adjust the time
Continue to press Button B (3 sec),
and then release it when the second
hand moves to the 0-sec position.
1 2
When the second hand
points to “Y” or “N,”
reception is completed.
Direct the watch face
upward and wait 4









  
  


  
  
  

   
 

   

  

  
  



    


  
   


   
 

   
 


     
   
 


 

BPC
J
J
Y
BPC
JJY
 










B
PC
JJY
B
PC
JJY






It takes up to 1 min to
complete reception.
  

Press
for
3sec
Press
3
 How to set the sub-dial
8
・The sub-dial displays
the time in a 24-hour
system.
・Even when the time
zone of the dial is
changed, the time
of the sub-dial is not
changed.
 
 

Unlock the crown
Pull out the crown to
the rst click
Push the crown back in
Press Button B or Button C
to set the time
1
2 43










  
  



 

Pullout
tothefirst
click
0 1 2   
 


  
 
  

Push
backin
012
How to set the sub-dial

Press
onceto
setback
1minute
Press
onceto
advance
1minute



      
    
   
    

    

 How to manually set the time
9
Unlock the crown
Pull out the crown to
the second click
Push the crown back (in
simultaneously with a
time signal)
Continue to press Button A (3
seconds)and then release it when the
hand moves to the 0-second position
Press Button B or
Button C to set the time
1
2
53 4

  


 

  

 
  

  

・
When using the watch again under a condition in which the watch is able to receive GPS signals, receive GPS signals to set the time.
・When adjusting the time, the date will be accordingly adjusted.
How to manually set the time

            
       
0 1 2
Pullout
thecrownto
thesecond
click
Pressfor
3seconds
0 1 2
Push
backin

  
 


    
   

  
    
  
Press
onceto
advance
1minute
Press
onceto
setback
1minute
  

  

 
 

  
            
 
    
 
    
   
   
    
  
 How to manually set the date
10
How to manually set the date
Precautions on the setting the date manually
Please refrain from doing this operation except where GPS signals cannot be received because this
watch can be set to the precise current time and calendar by automatically receiving GPS signals. It
may cause the preliminary position of this watch misaligned.

       
     
    
  



  
    


   
When the date is not auto-
matically changed under a
condition in which the watch is
unable to receive GPS signals
(when changing from months with
30 days or less to months with
31 days), set the date manually.
・
The date can be set independently
regardless of the time.
・
When using the watch again under
a condition in which the watch
is able to receive GPS signals,
receive GPS signals to set the
time and date.
 
→ 5 How to adjust the time zone.
Unlock the crown
1


Push the crown back in
Pull out the crown to
the second click
Press Button B or Button C
to set the date
42 3
 

  


Push
backin
012
0 1 2
Pullout
tothe
second
click
Pressonce
toadvance
thedate
1day.
Pressonce
toreturn
thedate
1day.
 

  
 
 

 

   
   

    
  
 
    
 

    

  
 


 
Instructions for Receiving Leap Second Data on Seiko Astron GPS Solar Watch
11
Thank you fo r purchasing a S eiko Astron Wa tch.
This watch enters the “ leap second data” receiving mod e af ter the rst GPS signal is received on or
after De cember 1st and June 1st.
It is conducted eve ry si x mon ths whether the leap second data is p ut in to e 󱐯ect or no t. T his process
occurs automatically so no s pecial operation is required from the user. T he process of receiv ing t he
leap second data takes longer than the regular time adjustment. Be sure to complete receiving the leap
second dat a in an environ ment where a G PS signal ca n be received , such as outd oors.

        
    
       
For details, please read the Basic Manual (P.18).
About Leap Second
The leap second is to comp ensate for deviations fr om the “Universal Time”(UT ) which is astronomically
determine d and the “Int ernation al Atomic Time”( TAI). 1 se cond m ay be added (del eted) once a year or
every few year s at the end of J une or Dece mber.
The watch will repeatedly enter the “leap second data” receiving mode until the process is successfully
completed. During this time, no time adjustment will take place. In the event that the attempt to receive
leap second data is unsuccessful, indicated by position N (not successful), it is recommended you move to
a place where a GPS signal can be easily received, such as outdoors, and complete the process of receiving
time data and then leap second data through a GPS signal by pressing and holding button B for 3 seconds.
The second hand begins moving counter-clockwise and
displaysthe countdown inminutes until leapsecond data is
received.
Thismayrequireupto18minutes.
Whenthe secondhand has reachedthe 12 o'clockposition,
receptionof theleap seconddata beging.When receptionis
good,thesecondhandmovestothe1o'clockpositionandthe
watchacquiresthedata(withinapproximately,oneminute).
Ifthereceptionwassuccessful,thesecondhandpointstothe
Ypositionindicatingsuccessfuldatatransfer.
ButtonB
Theindicatorhandpoints
to the right side of the
4+position.
The process of receiving leap second data
Althoug h this movement is d i󱐯erent f rom the nor mal time displa y, it is not an indicatio n that the wat ch is defect ive.

Other manuals for Astron 7X52

1

This manual suits for next models

1

Other Seiko Watch manuals

Seiko Prospex SSC813P User manual

Seiko

Seiko Prospex SSC813P User manual

Seiko 6A32 User manual

Seiko

Seiko 6A32 User manual

Seiko H249 User manual

Seiko

Seiko H249 User manual

Seiko 5Y85 User manual

Seiko

Seiko 5Y85 User manual

Seiko 4F56 User manual

Seiko

Seiko 4F56 User manual

Seiko V657 Installer manual

Seiko

Seiko V657 Installer manual

Seiko Astron 7X52 Installation guide

Seiko

Seiko Astron 7X52 Installation guide

Seiko Conceptual SUR517P User manual

Seiko

Seiko Conceptual SUR517P User manual

Seiko SSC854J1 User manual

Seiko

Seiko SSC854J1 User manual

Seiko A156A Quick start guide

Seiko

Seiko A156A Quick start guide

Seiko V172A Quick start guide

Seiko

Seiko V172A Quick start guide

Seiko ASTRON 8X82 GPS SOLAR User manual

Seiko

Seiko ASTRON 8X82 GPS SOLAR User manual

Seiko 6R51 User manual

Seiko

Seiko 6R51 User manual

Seiko 5D22 User manual

Seiko

Seiko 5D22 User manual

Seiko 4R36 User manual

Seiko

Seiko 4R36 User manual

Seiko Prospex SJE085J User manual

Seiko

Seiko Prospex SJE085J User manual

Seiko V14J User manual

Seiko

Seiko V14J User manual

Seiko 5R66 User manual

Seiko

Seiko 5R66 User manual

Seiko VELATURA 7T62 User manual

Seiko

Seiko VELATURA 7T62 User manual

Seiko 0439A Quick start guide

Seiko

Seiko 0439A Quick start guide

Seiko Analog Quartz 7T32 User manual

Seiko

Seiko Analog Quartz 7T32 User manual

Seiko 7R68 User manual

Seiko

Seiko 7R68 User manual

Seiko N855 User manual

Seiko

Seiko N855 User manual

Seiko 7C46 User manual

Seiko

Seiko 7C46 User manual

Popular Watch manuals by other brands

Accurist 6P20 instructions

Accurist

Accurist 6P20 instructions

Denver SW-164 user guide

Denver

Denver SW-164 user guide

OHSEN 1610 instructions

OHSEN

OHSEN 1610 instructions

WEEPLUG GPS SMARTFIT manual

WEEPLUG

WEEPLUG GPS SMARTFIT manual

Suunto SPARTAN SPORT WRIST HR BARO 2.5 user guide

Suunto

Suunto SPARTAN SPORT WRIST HR BARO 2.5 user guide

Momentum VS-1 instructions

Momentum

Momentum VS-1 instructions

Casio 4752 Operation guide

Casio

Casio 4752 Operation guide

Fitbit Zip Versa Lite quick start guide

Fitbit Zip

Fitbit Zip Versa Lite quick start guide

Erhard Junghans J830.5 manual

Erhard Junghans

Erhard Junghans J830.5 manual

Casio QW-914 manual

Casio

Casio QW-914 manual

CanMore TW-356 user guide

CanMore

CanMore TW-356 user guide

UNION GLASHÜTTE/SA UNG-14.01 user manual

UNION GLASHÜTTE/SA

UNION GLASHÜTTE/SA UNG-14.01 user manual

Jaquet Droz THE LOVING BUTTERFLY AUTOMATON manual

Jaquet Droz

Jaquet Droz THE LOVING BUTTERFLY AUTOMATON manual

SMAWAFIT Q9 operating instructions

SMAWAFIT

SMAWAFIT Q9 operating instructions

Zippo 45002 manual

Zippo

Zippo 45002 manual

Citizen Aqualand JV0010-08E Product information

Citizen

Citizen Aqualand JV0010-08E Product information

Chr. Ward C5 MALVERN AUTOMATIC MKII Owner's handbook

Chr. Ward

Chr. Ward C5 MALVERN AUTOMATIC MKII Owner's handbook

Chronos Manufactures Chrono Diamond Theseus 12100 instruction manual

Chronos Manufactures

Chronos Manufactures Chrono Diamond Theseus 12100 instruction manual

manuals.online logo
manuals.online logoBrands
  • About & Mission
  • Contact us
  • Privacy Policy
  • Terms and Conditions

Copyright 2025 Manuals.Online. All Rights Reserved.