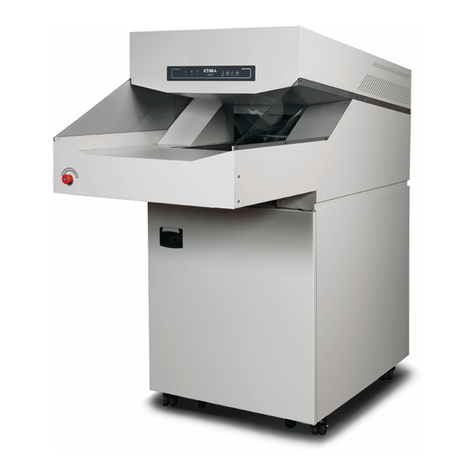
SEM 7050P Quick start guide

Security Engineered Machinery Co., Inc
OPERATIONAL & MAINTENANCE MANUAL
Model 7050P Old Style with Dual Troll Bin
POP-0027 Rev. 1
ECN: 00518
Revised: 03/25/2020
Security Engineered Machinery Co., Inc
Phone Toll Free 1(800)225-9293
Email: [email protected]
Fax: (508)366-6814
Website: WWW.SEMSHRED.com


1
TABLE OF CONTENTS
READ CAREFULLY BEFORE USE
This paper shredder is designed for the in-office destruction of paper documents to an unidentified waste.
Proper care and use of our shredder will insure many years of trouble free operation.
Index 1
Safety Instructions & Application 2
Installation 3
Transportation / Pre-Assembly 4
Operating 5-7
Troubleshooting 8
Accessories/Technical Data 9
Recommended/Using and Ordering Spare Parts 10
Parts Breakdown 11-26
Wire Diagram 27-29

2
SAFETY INSTRUCTIONS
This instruction manual helps you learn the safe and comfortable operation of this machine. Before working
with the machine please read these instructions carefully and consider the safety regulations.
Danger! Non-compliance with the instructions may endanger persons.
Warning! Non-compliance with the instructions may cause damage to the machine. The operating instructions
must always be available for the operator
APPLICATION
The machine is capable of shredding loose and crumbled paper as well as cartons with staples. Due to material
separation we recommend to avoid shredding plastic foils at the same time.
Danger!
−
Only qualified persons are allowed to operate the machine
−
Children should not operate the shredder
−
Do not shred any strapping materials or fluids which can loop, splinter, chemically react or explode.
Warning!
−
Feeding large steel components, rigid material, screws or nails will damage the shredding mechanism.

3
INSTALLATION
The machine is mounted on castors and easy to move. The machine must be installed on a firm, level dry floor.
Danger!
−
The machine must not be used outside
−
Do not use in the vicinity of flammable liquids or gasses
−
Do not use in wet environments
−
Protect the power cable from extreme heat, oil and sharp edges
Warning!
−
Do not cover ventilation slits
−
Follow the space assignment plan carefully (Below)
−
Consider the floor loading, weight approximately 2630 lb (1200kg)
For NATIONWIDE SERVICE Call 1(800)225-9293

4
TRANSPORTATION
Attention!
−
Do not raise the machine higher than necessary to avoid tipping
−
Transport is only possible from the back and with built-in transport safety device (4) and (5).
−
Make sure the lifting truck is centered under the machine.
PRE-ASSEMBLY
¬
Open the door
¬ Remove the transport safety device (4) and (5)
and keep for later transport use
¬
Mount the supporting screws(6)
¬ Screw down the supporting screws until
the rear rolls are relieved
Mount the waste bin
•
Mount the shackle (9)
•
Change both plastic bag
As described under changing
the waste bag)
•
Push the waste bin into the machine
•
Close the door
Power Supply
The name plate is located at the rear of the machine
•
Data stated on the rating plate must correspond to the values of the power supply unit.
•
Voltage “V” • Frequency “Hz” • Power Consumption “A”
•
Earth Wire must be available •Connect the machine with the mains
For NATIONWIDE SERVICE Call 1(800)225-9293

For NATIONWIDE SERVICE Call 1(800)225-9293
5
PRE-ASSEMBLY Cont…
Checking Rotating Direction
Operate the machine for a short time as described under “Operation”
•
The material is transported into the machine by the conveyor belt.
When the machine works in the opposite direction
As the machine is wired according to the IEC standardized rotary
field, when changing the rotary direction we recommend that this
is performed by an experienced specialist. The rotary direction may
be changed by exchanging the “L1” and “L2” connections in the plug.
Danger! Incorrect exchange of the connections may endanger the operator.
In doubt, this work should be performed by an electrical specialist.
OPERATING
The machine will only run when door is closed!
Danger! The machine may only be operated by persons who have read and understand the operating
instructions!
Keep hands away from running shredding mechanism!
The shredding mechanism may cause serious injury!
Operating Elements
1. Start
2. Stop and pilot light for door open
3. Reverse and the lamp waste bin full
4. Key switch
5. Standby
6. Main switch (can also be used as emergency off button)
7. Plot light temperature indicator
8. Emergency off

6
OPERATING Cont…..
Starting the Machine
Do not shred any material which may loop or splinter. Material, which
does not go through the cutting head can only be pushed in with the
pusher (9). In case of danger, press emergency off button (8).
•
Turn main switch (6) into position “I”
•
Emergency button (8) must be unlocked (turn to the right)
•
Turn on the key switch (4) turn to the right then the standby (5) illuminates
•
Press and release the black button (1) conveyor belt is running
•
Feed the paper over the total width of the conveyor belt
In case the quantity of material inserted is increased, the machine automatically changes to a more powerful and
slower function. If this performance is still not sufficient the machine starts to reverse shortly and afterwards
runs again forward. The machine switches between both speed levels until all material inserted is fully
destroyed.
Attention! If possible let the machine work at its normal speed.
Shred continuous paper only in stacks
Stopping the machine
•
Press the red key (2) or press the emergency “OFF” button (8)
Keep hands away from the running shredding mechanism!
•
Yellow pilot light (7) appears, temperature of motor is to high
(Decrease the material on the conveyor belt to make the machine work in normal speed)
•
Yellow pilot light (7) lights up, temperature is too high(wait approximately 10 to 20 minutes until motor
cools down)
Stopping the Machine
For short breaks
•
Press and release the red button (2) conveyor belt stops
For longer breaks
•
Turn the main switch (6) to position ”O” the entire machine shuts down
•
Turn the key switch (4) and remove the key-now the machine is secured
from unauthorized use
Changing the Waste Bag
If the lamp waste bag full lights up you should empty the waste bag.
•
Open the door (9)
•
Pull out the waste bin from the machine
For NATIONWIDE SERVICE Call 1(800)225-9293
6

For NATIONWIDE SERVICE Call 1(800)225-9293
7
OPERATING Cont…
Changing the Waste Bag Cont…
If one of both bags is full
•
Turn the handle (10) to empty waste bag
•
Turn the waste bin and push it into the machine
with full plastic bag in front
•
Close the door (9)
If both bags are full
•
Remove the metal cover (11)
•
Remove the round belt from the waste bag frame (12)
•
Remove waste bags for storage on pallet.
•
Tie the bags (for sealing parts and binding wires see accessories)
•
Place a new bag into the bag frame and fold it down approximately
12” to 15” to the outside. Tighten the bag with the plastic band
•
Fasten the bag with the round belt
•
Attach the metal cover (11)
•
Close the door
•
Check the function of the door switch. Start the machine.
If the door is open the machine has to stop immediately
Note: Waste collection bags SEM part number for single bin - 6425B190 25/box
Waste collection bags SEM part number for dual troll bin -639B140A 50/box
Oiling the Shredding Mechanism
If the sheet capacity reduces or after bag is full we recommend
that you oil the shredding mechanism:
•
Move the lever (13) of the oil pump once
•
After this lubrication please let the machine run several times
Backwards and forwards alternately
•
If the tank (14) is empty refill oil.
Type of oil: SEM Shred Oil #647OILHV (4 Gallon case)

8
TROUBLESHOOTING
Danger! Disconnect from the mains before starting any service work or before removing the cover.
Malfunction: Standby (5) is not lighting up
Cause: The door is open
Main switch is OFF
The emergency button is pressed
Key switch is not plugged in
On-site fuse
Machine is overloaded the motor protection switch is re-activated after 10 minutes
Malfunction: Motor makes a buzzing noise and the machine shows no performance
Cause: One phase is missing
Remedy: Check if all three phases are supplied with electric power (voltage) by an electrician
Malfunction: Machine door is difficult to open
Cause: Guiding bar of the lower cutting head cover is dirty
Remedy: Clean and grease the guiding bar
Malfunction: Machine switches off during normal operation
Cause: Bag full control light will light – Shred bag is full
Remedy: Change waste bag
Or
Cause: Yellow pilot light (7) lights up, temperature of the motor is too high
Remedy: Wait approximately 10 to 20 until machine cools down
For NATIONWIDE SERVICE Call 1(800)225-9293

10
ACCESSORIES
Pusher 9000 593
For closing the plastic bags: Locking device 9000 591
Binding wire (1000 pieces) 9000 597
Important: Only use manufacturer recommended accessories
TECHNICAL DATA
Shred Capacity: Up to 500 sheets
Shred Size: 5/16” x 3-1/8”
Speed: 45 FPM
Horsepower: 12-3/4HP (Dual drive 2 speed)
Dimensions: 67-1/2” H x 40-3/4” W x 85-1/2” D
Weight: 2500 lbs.
Power: 208V/230V 3 Phase
RECOMMENDED SPARE PARTS
Replacement Plastic Waste Bags #190 for single bin Part Number 642B190 25/Box
Replacement Plastic Waste Bags #140 for dual troll bin Part Number 639B140A 50/Box
Shredder Lubricating Oil 4 Gallon Case Part Number 647OILHV

9
Other manuals for 7050P
1
Table of contents
Other SEM Paper Shredder manuals
