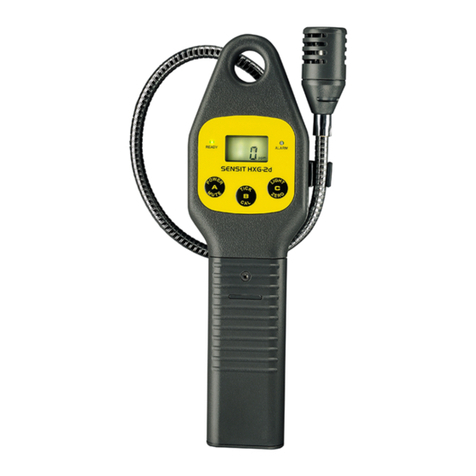
Sensit HXG-3 User manual

SENSIT® HXG-3
Combustible Gas Detector
INSTRUCTIONMANUAL
7-11 UL V4
Approved UL913, For Class 1,
Division 1, Groups C & D
hazardous locations when used
with alkaline batteries.
7WA6
C
L
A
S
S
I
F
I
E
D
Read and understand
instructions before use.
SENSITHXG-3
®
A
P
O
W
E
R
C
S
A
V
E
B
M
E
N
U
Warning:
To prevent ignition
of flammable or
combustible
atmospheres,
disconnect power
before servicing.
Sensit® is a registered trademark of J And N
Ex-Ox-Tox Gasdetectie
Westerdreef 5V
2152 CS Nieuw-Vennep
Telefoon: 0252 620885
E-mail: [email protected]l
Website: www.exoxtox.nl

CONTENTS
Page # 1. Accessories and Parts
2. General Description
2. Specifications
3. Product Features
5. Sensor Type
5. Battery Installation
6. Adjustable Features - Factory Only
7. Operation and Use
10. Calibration Check
11. Menu
16. Calibration
18. Warranty and Repair Policy
ACCESSORIESANDPARTS
1
Standard Accessories (included)
Carrying Case 872-00001 Wrist Strap 360-00040
Filter Cap 365-00045
Instruction Manual 750-00023 Alkaline Batteries 310-00004
Optional Accessories and Parts
Extension Adapter 870-00012
Printer 870-00004
PC Interface with Software 870-00008
Calibration Kit – Methane 881-00015
Calibration Kit – Pentane 881-00077
LEL Sensor 375-2611-01
This safety symbol is used to indicate a potentially hazardous situation
which, if not avoided, may result in minor or moderate injury.
CAUTION NOTICE
2
TheSensit®HXG-3isdesignedtodetectcombustiblegases.All
Sensit®HXG-3instrumentsincorporateanadvancedlowpower
semiconductorsensortomeasurecombustiblegasesinLEL(Lower
ExplosiveLimit) range.Allmeasurements arein 0.1%LELincre-
ments. The ppm display is simultaneously shown in 1 or 10ppm
increments (resolution). An automatically backlit display shows
allgasconcentrationsbeingmeasured.LEDslocatedonthefront
oftheinstrumentindicatepresetvisualwarningsof increasedgas
concentration.
Audibleandvisualalarmswarn theoperatorofhazardouscondi-
tionsbeingsensed.Thepresetalarmsareindicatedbyaredflashing
LED, display indicator and alarm sound. The combustible gas
alarmispresetfrom50%LEL(2.5%methaneor0.75%pentane).
TheSensit® HXG-3 instrumentis approved byUnderwritersLabo-
ratories to UL913, for Class 1, Division 1, Groups C & D hazardous
locations when used with Duracell™ MN1400BK or equivalent al-
kaline batteries.
GENERALDESCRIPTION
SPECIFICATIONS
SENSORSPECIFICATIONS
TYPE RESOLUTION RANGE ACCURACY
Leak 1ppm or 10ppm 0-50,000ppm ±10%
LEL 0.1% 0-100% ±10%
PRODUCTSPECIFICATIONS
Size: 11.5” x 3” x 2.32” (292 x 76 x 69 mm)
Weight: 1.2 lbs.
Operational Temp: 0 to 120° F
Storage Temp: -20° to 132° F
Battery Life-Alkaline: approximately 25 hrs. continuous

PRODUCT FEATURES continued from page 3
The tick can be easily heard with the speaker located in the
back of the instrument.
TheInfraredCommunication windowislocated ontheright side
to allow the Sensit® HXG-3 instrument to download: Calibra-
tiondata;CommunicatewithSmart-Cal CalibrationStation;PCi-
2s Computer Interface; Readings the operator has elected to
saveto theinstrument’s on-boardmemory.
A flexible gooseneck is used to assist in locating the source of
gas leaks and remote sampling.
Atwo linedisplaycontinuously updatesthe operatorofall avail-
able gas concentrations and alarms simultaneously as well as
indicates battery power. Below the display is a series of LEDs
thatare preset toindicate combustiblegasconcentrations. Dur-
ing an alarm condition the red LED on the right side will flash
andan audiblewarning willsound.
There are 3 operational button pads on the front of all Sensit®
HXG-3instruments.
•POWER/MUTEBUTTON(A):OperatethePOWERandMUTE
feature and exit menu items.
• MENU BUTTON (B): Use to enter, change and select menu
items.
•SAVE/ZEROBUTTON(C): Usesave data feature,zero
sensor, scroll and change menu items.
4
SENSITHXG-3
®
A
P
O
W
E
R
C
S
A
V
E
B
M
E
N
U
3
Sensit® HXG-3 instruments are constructed of durable ABS
plastic to withstand the rigors of field use.
Incorporated in the hand grip area is the battery compartment.
AllSensit® HXG-3 instruments require 3“C” typealkaline bat-
teries. Duracell MN 1400 batteries provide approximately 25
hours of continuous use. A thumbwheel is located on the right
side of the instrument to activate the audible tick sound that
helpsin locatingthe sourceof agas leak.This tickis generated
by using specialized circuitry in combination with the LEL sen-
sor located at the end of the gooseneck assembly.
PRODUCTFEATURES
BACKLIT
2 LINE DISPLAY
SPEAKER
(ON BACK) WARNING LED’S
16”FLEXIBLE
GOOSENECK
IR COMMUNICATION
(DOWNLOADING)
SOLIDSTATE
SENSOR
PUSHPAD
BUTTONS
BATTERY
COMPARTMENT
(Continued on page 4)
THUMBWHEEL FOR
TICK ADJUSTMENT

ADJUSTABLEFEATURES (FACTORYONLY)
6
SessionSaves 1-100 6
Alarm-LEL 0-100% 50%
PPM Display Option 1ppmor10ppm 10ppm
CalDueInterval 30, 45, 60,
90, 180,360 30 days
ShowSession Log* 1-100 6
Warm-upTime 10-30sec. 30 sec.
PurgeTime 1-60 sec. 0 sec.
* Can be disabled
MENU ITEMS RANGE DEFAULT
If you do not use your right hand to hold the bottom of the bat-
tery compartment the batteries can come out. Observe the po-
larity markings on the inside of the battery holder. Improper in-
stallation will cause the instrument not to operate. Replace the
battery sleeve and allow the locking tab to snap into position.
NOTE: Improper battery installation will disable the instru-
ment.
Checkto besurethe handleissecure tothe instrumentbodyby
gently pulling the handle away. The handle will remain firmly in
place if a proper connection is made.
BATTERYINSTALLATION/REPLACEMENTContinuedfrom pg5
5
Combustible Gas Sensor
All Sensit® HXG-3 instruments incorporate a highly sensitive
semiconductor type sensor. The function and accuracy of the
sensoraremonitored andcontrolledbyspecialized circuitryand
amicroprocessor.Thissensor iscapableofmeasuring concen-
trationsof 10ppm ofmethane (natural)gas up to100% LEL.
SENSORTYPE
BATTERYINSTALLATION/REPLACEMENT
CAUTION: Always change batteries in an environment
free of combustible gases.
Batteryreplacement is necessarywhen the displayreads BAT
LOW,anaudiblealarmsoundsandthegreenreadyLEDflashes.
When the instrument remains in BAT LOW, a countdown will
appear starting at 300 seconds (5 minutes) which is the maxi-
mumtime remaining to shutdown.
Removethe batterysleeve coverby depressingthe lockingtab
onthefront ofthehandle withacoin orflatobject andpullingthe
handle away from the top or display area of the instrument.
Place 3 approved batteries into the battery holder. For best re-
sults hold the battery compartment so that it lays in your right
hand.With your lefthand installthebattery thatgoestoward the
front first, the battery that is in contact with the rear spring sec-
ondandfinally insertthethird batteryinthe centerbyforcing the
secondbattery suchthat thespring compressesandallows the
batteries to go into place.
(Continued on page 6)

7(Continued on page 8)
CAUTION: Always start any Sensit® HXG-3 in a gas
free environment to insure a proper zero.
1. Push and hold the power button (A) until the display illumi-
nates.
2. If the display fails to illuminate or BAT LOW is shown on the
displayreplace thebatteries.There isroom inthecarrying case
to keep an extra set of alkaline batteries.
3. During successful start-up the instrument will display:
a.Productname andmodelversion
b.System check
c.Dateand time
d.GasType
e.CAL PAST DUE when calibrationis overdue
f. Warm-upcountdown
g.AUTOZERO indicatingthe zeroingofthe sensor
h.Workingdisplay
NOTE:Ifasensor iscompletelyinoperableorimproperly zeroed
atstartup, thedisplay willshow ERROR LEL followedbyFAIL.
OPERATIONANDUSE
8
(continued on page 9)
OPERATION AND USE continued from page 7
4. Model 3.30 displays LEL% only. Model 3.35 displays LEL%
and ppm. All LEL readings have a resolution of 0.1% LEL or
50ppmmethane. Allppm readingshavearesolution of1ppmor
10ppm and are displayed simultaneously with the LELdisplay.
5. It may be necessary to manually zero the instrument based
oncompany practicesand environmentalconditions.
CAUTION: Zeroing should be done in a gas free envi-
ronment only.
6. When testing high areas or overhead lines the use of the
optionalextensionadapter willallowa broomhandle or painters
stick to extend the instrument to the area where sensing must
beaccomplished.This slidesontothe batterysleeveand isheld
in place by the locking nut assembly.
7. Whena gasis sensedthe displaywillupdate. Additionally, a
seriesofLEDs onthefront oftheinstrument willilluminatewhen
the preset concentrations of the calibration gas are reached. If
an alarm condition exists, based on a preset alarm point, the
red (HAZ 3) LED will flash and the alarm will sound.
Thepreset levels of the LED warninglights are:
AmberLED/Low 5 - 9.9% LEL methane
RedLED/Haz1 10.0 - 24.9% LEL
RedLED/Haz2 25.0 - 49.9% LEL
RedLED/Haz3 50.0 - 100% LEL

(Continued on page 10)
9
OPERATION AND USE continued from page 8
Caution: These instruments have cross sensitivities to
a variety of gases.
8. During an alarm condition (factory default at 50% LEL) the
displaywill flash,LED HAZ3 willflash andanaudible alarmwill
sound indicating a potentially unsafe environment. To disable
the audible alarm press and release the mute button (A). To
enablethe alarm pressand release itagain.
9. To assist in locating the source of small combustible gas
leaks or surveying areas outdoors or indoors, rotate the
thumbwheel located on the right side of the instrument until a
steady ticking sound is heard. Note: There is no warm-up for
this feature as it uses the LEL sensor that is already operating.
Movethe sensor towardthe area suspectedof leakage.As the
sensormovescloserto aleaksourcethetick willincrease.When
the tick becomes a steady tone rotate the thumbwheel in a
clockwise direction while keeping the sensor in the same posi-
tion.This willslow downthe tickand allowthe operatorto finda
higherconcentration usingthe same procedure.Ifthe tickgoes
away you have moved away from the leak or there is no more
gaspresent. Forbest resultsalways usethe leak detectorprior
to using any liquid leak detection fluids as these sensors will
detecttheir presence.
10.At any time the operator may save the readings on the dis-
play by pressing the SAVE/ZERO button (C). This will save all
readingsfor downloadat a latertime.
10
OPERATION AND USE continued from page 9
The memory is factory set to store 6 events. This can be ad-
justed from 1-15 at the factory. The most recent save is first
duringdownload.
11. FollowingFederal, State,Municipaland/orCompany proce-
dures move to the areas where gas readings are suspected or
must be tested. During sampling the respective readings may
change.Audibleand visualalarms willactivatewhen thepreset
limitsare reached.
12. When being used in dark areas an automatic backlight will
illuminate the display.
13. To turn instrument off, push and hold the power button (A)
for 5-6 seconds until POWER DOWN appears on the display.
To verify the accuracy of any Sensit® HXG-3, it must be ex-
posed to a known concentration of test gas. Any sensor that
does not meet the specifications listed in this manual may re-
quire calibration or replacement. A calibration check does not
update the calibration due date. Full calibration is required to
update these times.
Acalibration past duemessage willilluminateduring warm-upif
calibrationhas notbeenperformed peryour companyspecified
interval.Anytimeitis suspectedtheSensit® HXG-3 isnotwork-
ingproperly, checkcalibration.
CALIBRATIONCHECK

12
(continued on page 13)
MENU continued from page 11
(C) to scroll to another PRINT MENU function. Pressing the
POWER/MUTE button (A) will reenter the USER MENU. Use
the SAVE/ZERO button (C) at this time to scroll to another
menufunction. Pressing the POWER/MUTE button (A) willre-
turn the instrument to the working display.
CALIBRATION (see page 16 for complete instructions)
From the working display access the user menu by pressing
andholding theMENU button(B)until thetop lineof thedisplay
reads USER MENU. Press and release the SAVE/ZERO but-
ton (C) until the bottom line displays CALIBRATION.
POWER OFF
Fromtheworkingdisplayaccessthemenubypressingand hold-
ing the MENU button (B) until the top line of the display reads
USERMENU.PressandreleasetheSAVE/ZERObutton(C)until
the bottom line displays POWER OFF. Press the MENU button
(B). Use the SAVE/ZERO button (C) to increase the number of
minutes of run time and the MENU button (B) to reduce them.
Settingthetimerto0willcausetheunittoalwaysremainon.After
adjustingthenumber,pressandreleasetheleftbutton(A)tosave
the adjustment. Use the SAVE/ZERO button (C) at this time to
scrolltoanothermenufunction.PressingthePOWER/MUTEbut-
ton (A) will return the instrument to the working display.
SETCLOCK
From the working display access the user menu by pressing
andholding theMENU button(B)until thetop lineof thedisplay
readsUSER MENU.Press andreleasethe SAVE/ZERObutton
(C)untilthe bottomlinedisplays SET CLOCK.Press theMENU
button (B). The day will flash upon entering the SET CLOCK
MENU
11 (Continued on page 12)
TheSensit® HXG-3 has severalfeatures inthe user menu.
Theseinclude:
PRINT MENU: SESSIONLOG - print data thatwas saved.
CAL LOG - print last 4 successful calibrations.
SMARTCAL- access to Smart-Cal Calibration Station.
CALIBRATION: Calibrate LELand accessSmart-Cal
CalibrationStation.
POWER OFF: Set the automatic shut off timer in minutes.
SET CLOCK: Set date and time.
SHOW CAL LOG: Display last calibration.
SHOW SES LOG: Display saved gas reading data with date
and time.
BUMPTEST: Perform automatictest forresponse tominimum
of80% of calibrated gas valuewithin 30seconds.
SMART-CAL: Accessautomatic calibrationstation.
GAS TYPE: Selectnatural/methane orpentane asprimary gas
to be sensed.
PRINTMENU
From the working display access the user menu by pressing
andholding theMENU button(B)until thetop lineof thedisplay
reads USER MENU. The bottom line will read PRINT MENU.
Press the MENU button (B) to access the print menu options.
UsetheSAVE/ZERObutton (C)toselect theCAL LOG orSES-
SIONLOG.
At this time prepare the printer.Aim the IR window on the right
sideof the instrumentto theIR receptoron the printer. Position
theinstrument 6-12” fromthe IRreceptor and pressthe MENU
button (B). Downloading will begin immediately. When the dis-
play no longer reads PRINTING... use the SAVE/ZERO button

13 (Continued on page 14)
MENU continued from page 12
option. The SAVE/ZERO button (C) advances to the next item
are based on US time and date settings using a 24 hour clock.
After adjusting all numbers press and release the POWER/
MUTEbutton (A)to savethe adjustment.Use theSAVE/ZERO
button (C) at this time to scroll to another menu function in the
USER MENU. Pressing the POWER/MUTE button (A) will re-
turn the instrument to the working display.
SHOW CAL LOG
From the working display access the user menu by pressing
andholding theMENU button(B)until thetop lineof thedisplay
readsUSER MENU.Press andreleasethe SAVE/ZERObutton
(C) until the bottom line displays SHOW CAL LOG. Press the
MENU button (B) and the display will show the last gas cali-
bratedand calibration date.Pressing any buttonwill return the
display to the user menu. Pressing the POWER/MUTE button
(A) will return the instrument to the working display.
SHOW SES LOG
From the working display access the user menu by pressing
andholding theMENU button(B)until thetop lineof thedisplay
readsUSER MENU.Press andreleasethe SAVE/ZERObutton
(C) until the bottom line displays SHOW SES LOG. Press the
MENU button (B). Use the SAVE/ZERO button (C) to scroll to
the saved session you wish to review. SESSION 1 is the most
recent data saved. Pressing the MENU button (B) will display
the date and time of that session. Pressing the MENU button
(B)againwill displaythegas reading.PressthePOWER/MUTE
14
(Continued on page 15)
MENU continued from page 13
(B)againwill displaythe gasreading.Press thePOWER/MUTE
button (A) to return to SESSION(#) and pressing the SAVE/
ZERO button (C) will allow you to scroll all previously saved
SESSIONS. Pressing the POWER/MUTE button (A) 2 times
willreturnyouto theUSERMENU.PressingthePOWER/MUTE
button (A) once more returns you to the working display. The
number of stored session log saves is factory set at 6. It can
store up to 100 by changing a factory setting (contact SENSIT
TECHNOLOGIESfor instructions).
BUMPTEST
Fromtheworkingdisplayaccessthe menubypressingandhold-
ing the MENU button (B) until the top line of the display reads
USERMENU.PressandreleasetheSAVE/ZERObutton(C)until
thebottomlinedisplaysBUMPTEST.Prepare50%LELmethane
(orpentane)calibrationgasforapplication totheinstrument.
Applycalibration gastothe instrumentsensor. PresstheMENU
button(B).The readingmustread80% ofcalibratedvaluewithin
30 seconds. The reading is on the left side and the timer is on
the right side of the display.
If the instrument passes, the display will read BUMP TEST
PASSES, a beep will sound and the unit display will automati-
cally return to the user menu. If the instrument fails, the display
willreadBUMP TEST FAILED and abeepwillsound. Repeated
bump test failure indicates possible need for instrument repair.
Contact JAnd N for instructions.
At the end of any bump test press the POWER/MUTE button
(A) to return to the working display.

15
MENU continued from page 14
SMART-CAL (methane calibration only)
From the working display access the menu by pressing and
holding the MENU button (B) until the top line of the display
readsUSER MENU.Pressandreleasethe SAVE/ZERObutton
(C) until the bottom line displays SMART CAL. Place the
instrumentinto thecradleprovided onthe leftsideof theSmart-
CalCalibration Station.Attachthetubing fromthe stationto the
instrument sensor. Press the MENU button (B). The display
will show SMART CAL Communicating. Select the test from
the Smart-Call Station to be performed.At the end of the test
the instrument will beep 3 times and display PASS or FAIL.
Retrythe testif necessaryby pressing the proper buttonon the
Smart-CalStationagain. Pressandrelease the POWER/MUTE
button(A) toreturn theworking display. Removethetubing and
return instrument to service or send instrument to the proper
placefor repair percompany procedures.
SHORTCUT TOACCESS SMART-CAL: Place the instrument
intothe cradle providedon theleftside oftheSmart-Cal calibra-
tion Station. Attach the tubing from the station to the instru-
ment sensor. While in the working display press the POWER/
MUTEbutton (A) for 2-3seconds and release.The display will
show SMART CAL Communicating. Perform all tests as de-
scribed in the SMART CAL section.
GASTYPE
From the working display access the user menu by pressing
andholding theMENU button(B)until thetop lineof thedisplay
(Continued on page 16)
GAS TYPE continued from page 15
16
(continued on page 17)
reads USER MENU. Press and release the SAVE/ZERO
BUTTON(C)until thebottomlinedisplays GASTYPE.Pressthe
MENU BUTTON (B). Press Button (B) or Button (C) to change
betweenPEN(Pentane) orNAT(Natural orMethane) asprimary
gas to be sensed. Press Button (A) to confirm selection is made.
CALIBRATION
Calibration is the process of setting the readings of the instru-
mentto equalthe value ofcertified calibrationgases.
NOTE: Using calibration kits other than recommended by
SENSIT TECHNOLOGIES may cause inaccurate readings.
Repairs are required if any sensor fails to calibrate. Con-
sult SENSIT TECHNOLOGIES for details.
NOTE: When calibrating, the numbers shown on the dis-
play represent the numbers seen by the microprocessor
and should not be confused with actual gas readings.
Combustible Gas Calibration Procedure (50%LEL Methane
or 50%LEL Pentane)
The calibration gas used for this procedure should match the
Gas Type selected for your instrument. Refer to Gas Type in
the Menu section of this manual. Instruments set to methane
will calibrate with 50% LEL methane/air while those set to
pentanewill calibratewith 50% LELpentane/air.
Priorto calibrationallow theinstrument tooperate for5 minutes
in a gas free environment. Manually zero the instrument by

17
CALIBRATION continued from page 16
press and holding the (C) button until the display shows
AUTOZERO. Preparethecorrespondingcalibrationgas(methane
orpentane),regulatorandadapter.
From the working display access the USER MENU by pressing
and holding the (B) button until the top line of the display reads
USER MENU. Press and release the (C) button and the bottom
lineshouldreadCALIBRATION. Pressandreleasethe(B)button,
the top line will read CALIBRATION and the bottom line will read
LEL 50%.
Applythe appropriate calibration gas foryour instrumentsset-up
andpressthe(B)buttontostarttheautomatedcalibrationprocess.
If calibration is successful, the display will flash DATA SAVED
before automatically returning to the calibration menu. Pressing
the(A)buttonrepeatedlywill returntheinstrumenttotheworking
display. Remember to disconnect and shut off the gas supply.
Ifcalibrationisunsuccessful,thedisplaywillflashBADCALbefore
returning to the calibration menu. In the event of a BAD CAL,
remove the instrument from service and contact SENSIT
Technologiesforassistance.
NOTE:Calibrationwill be basedonthe last successfulcalibration.
The calibration due date will not be updated until successful
calibrationhas occurred.Anyinstrumentthatdoes notcalibrate
requiresservice.ContactSENSITTECHNOLOGIESfordetails.
WARRANTYANDREPAIRPOLICY
Your Sensit® HXG-3 is warranted to be free from defects in
materials and workmanship for a period of two years after pur-
chase(excluding sensor,calibration andbatteries). Ifwithin the
warrantyperiod,yourinstrumentshouldbecomeinoperativefrom
suchdefects, the unitwill berepaired orreplaced at ouroption.
This warranty covers normal use and does not cover damage
whichoccursin shipmentorfailure whichresultsfromalteration,
tampering,accident, misuse,abuse, neglector impropermain-
tenance.Proof ofpurchase may berequired beforewarranty is
rendered. Units out of warranty will be repaired for a service
charge.Internal repairor maintenancemust becompleted bya
SENSITTECHNOLOGIES authorizedtechnician. Violationwill
void warranty. Units must be returned postpaid, insured and to
the attentionof theService Dept. forwarranty orrepair.
This warranty gives you specific legal rights and you may have
other rights which vary from state to state.
18
Ex-Ox-Tox Gasdetectie
Westerdreef 5V
2152 CS Nieuw-Vennep
Telefoon: 0252 620885
E-mail: [email protected]l
Website: www.exoxtox.nl
Other manuals for HXG-3
1
Table of contents
Other Sensit Security Sensor manuals
Sensit
Sensit HXG-2d User manual
Sensit
Sensit TKX User manual

Sensit
Sensit HXG-2d User manual
Sensit
Sensit CO Programming manual

Sensit
Sensit VMD Operating instructions
Sensit
Sensit HXG-3P User manual
Sensit
Sensit HXG-2d User manual

Sensit
Sensit TKX User manual
Sensit
Sensit RLD-2 User manual
Sensit
Sensit PMD2 User manual
Popular Security Sensor manuals by other brands

Tractel
Tractel Blocfor B10 AES Operating and maintenance instructions
ESYLUX
ESYLUX MD 180i/16 BASIC CH operating instructions

DELTA DORE
DELTA DORE DMB TYXAL+ installation guide
Lattice Semiconductor
Lattice Semiconductor iCE40 UltraLite quick start guide
AGFA
AGFA DX-D 40C user manual
Polimaster
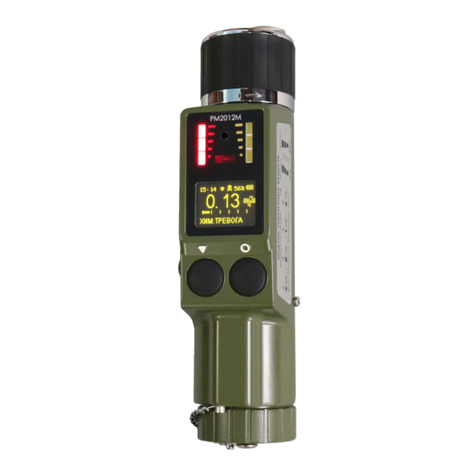
Polimaster PM 2012M Operation manual
