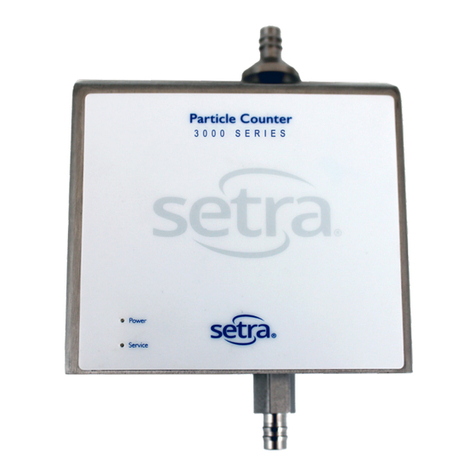
Setra Systems 8000 User manual

Warning
™
the AirCheck Lab
the AirCheck
Lab
15768 Hamilton Pool Rd. Austin, TX 78738 • (p) 512-263-0000 • (f) 512-263-0002 • www.AirCheckLab.com
©2019 Trace Analytics, LLC. All rights reserved. Page 1 of 9
SETRA 8000:
Operating Instructions
The Setra 8000 is a sensitive laboratory analytical instrument.
Do not connect to any compressed air or gas source that has not received an approved baseline test
from Trace Analytics. Failure to follow this procedure may damage the instrument, invalidate any tests, and
incur penalties, up to and including replacement of the instrument.
If you have questions, STOP and call Trace Analytics at 800-247-1024 ext 3.
This SETRA 8000 LPC and accessories are the Property of Trace Analytics, LLC
Version 1 - 05/08/2019
•
TRACEAnalyticsLLC

Please carefully check the inventory list below.
If any items are missing, STOP and call Trace Analytics at 800-247-1024 before proceeding.
Inventory List
Icon Key
Start Test Stop Test On/Off - press to turn on, press and hold to turn off
View previous location data Change data format Export data to USB
If any items are missing,
If any items are missing,
SETRA 8000 Laser Particle Counter
High Pressure Diffuser
Pressure Gauge
(2) Silver Background Tubing Filter
USB Flash Drive
©2019 Trace Analytics, LLC. All rights reserved. Page 2 of 9
1/4” Bev-a-line
Particle Free Tubing
with (4) 1/4“ Female NPT to 1/4” Tube fittings
Power Cable and Adaptor
Green LPC Purge Filter
1/4” inlet barbed fitting
Clear Particle Free Tubing

©2019 Trace Analytics, LLC. All rights reserved.
To Begin: LPC Purge Filter Test
Page 3 of 9
Power button
Start/Stop Icons
To Begin: LPC Purge Filter Test
Start/Stop Icons
Power button
Start/Stop Icons
*This step ensures the SETRA 8000 is functioning properly and starts at zero particles
1. Connect the SETRA 8000 to power adaptor and appropriate power source
2. Plug in the USB Thumb Drive to the SETRA 8000
3. Turn on the SETRA 8000 by pressing the black power button for 2 seconds
4. Unscrew the silver isokenetic probe from the top of the LPC and attach silver
inlet barbed fitting to top of the LPC in its place
5. Screw the green LPC purge filter to the inlet barbed fitting on top of the LPC.
6. Press the green ‘running man’ icon on the screen to begin the test. The test will run for 1 minute.
7. Repeat tests as needed until all channels read 0.
8. Indicate on Log Sheet that the LPC purge filter test was performed.
9. Remove green LPC purge filter from top of LPC and return to case.
Quick Notes:
1. Do not press the Settings button. Settings have been pre-set. Adjusting settings may damage
the instrument, invalidate any tests, and incur penalties, up to and including replacement
of the instrument.
2. To change data format view:
a. Press the Chart icon to change data format views
b. There are three views: home data view, channel view, and graph view
3. To change and/or create locations:
a. Toggle the + and - icons to switch between locations
b. To add, remove, or edit locations, press the location drop down. Locations can be added, changed, or
removed in this view.
4. To view data from previous sample locations:
a. Press the previous records icon. Scroll to view different sample locations.
5. Repeat entire procedure (LPC Purge Test, Tubing Test, and Sampling) at each point-of-use to ensure
accurate results.

©2019 Trace Analytics, LLC. All rights reserved.
Tubing Background Test:
Page 4 of 9
Silver Background Filter
High Pressure Diffuser
SETRA 8000 LPC
*This test ensures there are no particles present in the provided tubes. Should the readings indicate there are particles
present, swap out tubes with second set provided.
1. Attach provided pressure gauge to point-of-use. Set air flow for
between 25-100 psi.
2. Once this is set, close sampling point, and remove pressure gauge.
3. Remove the black and silver caps from the silver background filter. Attach the provided silver background
test filter to the quick connect on your sampling point. Ensure the arrow points away from the sampling
point in the direction of air flow.
4. Unscrew silver caps from both ends of the black Bev-a-line tubing. Attach one end of the black tubing to the
silver background test filter.
5. Remove the silver cap on the High Pressure Diffuser and attach the other end of the black Bev-a-line tubing.
6. Remove the black cap from the opposite end of the High Pressure Diffuser. DO NOT LOSE CAP
7. Attach an end of the clear hose to the High Pressure Diffuser.
8. Attach the other end of the clear hose to the inlet barbed fitting atop the LPC .
9. Open the compressed air valve (DO NOT EXCEED 100PSI)
10. To begin testing, press the green running man on the LPC screen. Wait for 30 second delay.
12. Test will run for 1 minute. If you do not see 0 particles on all channels run test again. If you continue
to see particles, replace tubing and repeat procedure. Follow tubing decontamination procedures as
needed.
13. Once the testing consistently reads 0 particles, end test, and record on Log Sheet
14. Depressurize the line. Remove silver tubing background filter from point-of-use, replace black and silver
cap and return to case.
Tubing Background Test:
*This test ensures there are no particles present in the provided tubes. Should the readings indicate there are particles
2. Once this is set, close sampling point, and remove pressure gauge.
3. Remove the black and silver caps from the silver background filter. Attach the provided silver background
test filter to the quick connect on your sampling point. Ensure the arrow points away from the sampling
3. Remove the black and silver caps from the silver background filter. Attach the provided silver background
test filter to the quick connect on your sampling point. Ensure the arrow points away from the sampling
3. Remove the black and silver caps from the silver background filter. Attach the provided silver background
4. Unscrew silver caps from both ends of the black Bev-a-line tubing. Attach one end of the black tubing to the

The CSV data files received from this instrument and the Log Sheet are your record of testing results. Indicate
on the Log Sheet which time stamps you would like to include on your report. If no time stamps are indicated,
Trace will report the data from the last (5th) time stamp given. Review recorded data for exact Setra time
stamps. Hours, minutes, and seconds must be included for proper reproting.
Included in your accessories is a Trace Analytics USB. Plug the USB into the left side of the USB. To export
data from LPC, press the records button When the new screen opens up, press the export button on
the right hand side. Then select “All Records”, and press “Export”. Do not remove the USB until the screen
reads 100%. Plug the USB into your PC computer to view results.
Viewing Real-Time Sample Data
1.
2.
Top Reporting Banner displaying location, date, run-time status, and
current time.
Sampling Data Table displaying the particle size channels and related
particle counts.
µ = particle size in µm
∆ = number of particles detected of the specified size
∑ = cumulative number of all particles detected of the
specified size and larger
*See page 5 for instructions on interpreting data per ISO 8573-1.
©2019 Trace Analytics, LLC. All rights reserved. Page 5 of 9
Location Sampling
Data Reporting
1. Once tubing background filter is removed, attach black Bev-a-line tubing to the sampling point.
2. Enter sample information (date, time stamp, location) on Log Sheet.
3. Open sampling point valve to begin air flow
(DO NOT EXCEED 100PSI).
4. Press green running man icon to begin sampling.
5. Consecutive one-minute samples can be taken until sampling is complete. Review the results of the samples.
Once results are consistent (usually after 5 consecutive samples), stop the test.
6. Turn off air flow and depressurize line. Complete Log Sheet and indicate which record number is to be reported.
*If sampling more than 1 point-of-use, repeat the Purge Filter Test, Tubing Background Test, and Location sampling at each location.
Included in your accessories is a Trace Analytics USB. Plug the USB into the left side of the USB. To export
data from LPC, press the records button When the new screen opens up, press the export button on

Disassembly
1. To turn off LPC, press and hold black power button for 5 seconds until machine turns off.
Pressing and immediately releasing the button will begin a new sample. This could harm the
machine if done after silver isokenetic probe is reattached.
2. Detach clear hose from top of LPC. Replace silver isokenetic probe onto top of LPC.
3. Unplug charging cord and USB Thumb Drive from LPC and return pieces to case.
4. Detach the clear tubing from the High Pressure Diffuser. Return black cap to High Pressure Diffuser.
5. Detach black tubing from High Pressure Diffuser. Screw on silver cap.
6. Remove black tubing from air sampling point. Place tubes back into box for return.
7. Place High Pressure Diffuser into case for return shipment.
©2019 Trace Analytics, LLC. All rights reserved. Page 6 of 9
Shipping
1. For return shipment, ensure all caps are replaced. Place all items back into respective bags and slots.
2. Once all pieces have been returned to the black case, fill out inventory checklist.
3. Put case in cardboard box for return shipment.
4. Include bubble wrap as needed and use the return shipping label to send back to Trace Analytics.

ISO 8573-1:2010 Classes 1-5 specify Purity Classes for maximum number of particles, identified by particle
size, maximum number of particles per m3.
Particle size ranges identified by ISO 8573-1:2010 are specified in micrometer (µm):
0.1 – ≤ 0.5 µm - not included on reports*
0.5 – ≤1.0 µm
1.0 – ≤5.0 µm
≥5.0 µm
The Sampling Data Table displays the particle size channels and related particle counts.
µm = particle size in micrometer
∆ = number of particles detected of the specified size
∑ = sum of all particles detected of the specified size and larger
To evaluate data according to ISO 8573-1:2010 specification, always use the Delta (∆) column.
0.5 – ≤1.0 µm = ∆ column, 0.5 channel
1.0 – ≤5.0 µm = ∆ column, 1.0 channel and 2.5 channel
≥5.0 µm = ∆ column, 5.0 channel and 10 channel
Note: ISO 8573-1 states “where it is determined that there are particles with a size greater than 5µm, then the classification of 1 to 5 cannot be applied.”
1.
2.
3.
4.
Interpreting Data per ISO 8573-1:2010
©2019 Trace Analytics, LLC. All rights reserved. Page 7 of 9
Cleaning the Black Bev-a-Line™ Particle-Free Tubing
This includes both the ¼” OD black tubing used to connect to the air outlet and the clear particle free tubing
connected between the diffuser and the LPC.
1. Remove the stainless steel plugs from both ends.
2. Direct a stream of isopropanol inside the tubing.
3. Hand-tighten the plugs onto the end fittings.
4. Move the tubing so that the internal surfaces are thoroughly rinsed.
5. Remove the plugs and expel the isopropanol into a suitable container.
6. Repeat the rinsing procedure twice for a total of three.
7. With the two outlets facing downwards, allow the isopropanol to evaporate for about 30 seconds.
8. Hand-tighten the plugs onto the tubing.
Isopropanol clear out before sampling
1. Assemble the sampling components EXCEPT do not attach the outlet end of the ½” OD black tubing to the LPC.
2. Connect the ¼” OD black tubing to the compressed air supply.
3. Adjust the outlet pressure to 40-100 psig and allow the air flow to evaporate the isopropanol. This is accom-
plished when no liquid isopropanol is visible at the outlet of the ½” OD black tubing.
HPD III High Pressure Diffuser
After sampling a gas source with a high concentration of particles, it may be necessary to purge the diffuser with
filtered gas to help remove contaminants in the system.
1. Remove the clear tubing from the LPC Supply Inlet.
2. With a length of clean ¼” Bev-a-line black tubing to the Matheson filter on the gas source, purge at up to
100 psig for as long as 10 minutes.
Setra 8000 Laser Particle Counter (LPC)
NEVER ATTEMPT TO CLEAN THE LPC! Introduction of any liquid into the LPC will cause it to be
inoperable and may cause irreparable damage to the sensing cell.
Avoiding contamination from the environment
1. Keep the fittings (tubing plugs and device caps) in place when not sampling.
2. Keep the plugs and caps in a closed zip bag during sampling. Do not allow ambient particulate to accumu-
late on the fittings.
3. Keep sample path components in provided zip bags when not sampling.
Determine if contamination exists
1. Run the LPC Background test (see page 3); the results should be near zero for all particle ranges.
2. Run the Tubing Background test (see page 4); the results should be below those displayed below:
3. If the Background Limits are exceeded, contamination may be a significant portion of the sample readings.
Cleaning air flow path components
Items needed for cleaning:
• Wash bottle, pre-cleaned
• Isopropanol, semiconductor grade; must be purchased by you. e.g., Honeywell 17604, Sigma-Aldrich 40301
• Safe collection and disposal of isopropanol used in cleaning. While isopropanol is the primary component of
rubbing alcohol, is should not be used without the appropriate safeguards. Consult the MSDS for the
purchased isopropanol for safe handling.
• Fill the wash bottle with isopropanol to no higher than the maximum fill level indicated on the side of the bottle.
• A moderate squeeze of the wash bottle, about ½” on each side, lasting about 5 seconds will deliver approxi-
mately 20 mL of isopropanol.
Note Regarding the Matheson (Silver background tubing) Filter:
The only portion of the Matheson filter that will be contaminated is the point at which the ¼” OD black tubing is
attached. Clean by rinsing the external threads and throat with isopropanol from the wash bottle. Hand-tighten
the provided nut onto the threaded fitting.
ISO 8573-1:2010 Purity Classes
Compressed Air Particle Contaminant Maximum Limits
Purity Class
0.1<d≤0.5 µm* 0.5<d≤1.0 µm 1.0<d≤5.0 µm
>
5.0 µm
1
<20,000
<400 <10 0
2 <400,000 <6,000 <100 0
3 - <90,000 <1,000 0
4 - - <10,000 0
5 - - <100,000 0
Error Conditions
The Setra 8000 will indicate if it detects an operating condition that may prevent it from giving an accurate analysis.
If at any time during sampling, or testing this red warning sign appears. Stop testing immediately and contact Trace Analytics
for assistance before proceding. The service team can be reached at: 512-263-0000 ext 3
Continuing to use the SETRA after the warning appears could result in invalid test results, or could damage the machine and
require replacement.

Cleaning the Black Bev-a-Line™ Particle-Free Tubing
This includes both the ¼” OD black tubing used to connect to the air outlet and the clear particle free tubing
connected between the diffuser and the LPC.
1. Remove the stainless steel plugs from both ends.
2. Direct a stream of isopropanol inside the tubing.
3. Hand-tighten the plugs onto the end fittings.
4. Move the tubing so that the internal surfaces are thoroughly rinsed.
5. Remove the plugs and expel the isopropanol into a suitable container.
6. Repeat the rinsing procedure twice for a total of three.
7. With the two outlets facing downwards, allow the isopropanol to evaporate for about 30 seconds.
8. Hand-tighten the plugs onto the tubing.
Isopropanol clear out before sampling
1. Assemble the sampling components EXCEPT do not attach the outlet end of the ½” OD black tubing to the LPC.
2. Connect the ¼” OD black tubing to the compressed air supply.
3. Adjust the outlet pressure to 40-100 psig and allow the air flow to evaporate the isopropanol. This is accom-
plished when no liquid isopropanol is visible at the outlet of the ½” OD black tubing.
HPD III High Pressure Diffuser
After sampling a gas source with a high concentration of particles, it may be necessary to purge the diffuser with
filtered gas to help remove contaminants in the system.
1. Remove the clear tubing from the LPC Supply Inlet.
2. With a length of clean ¼” Bev-a-line black tubing to the Matheson filter on the gas source, purge at up to
100 psig for as long as 10 minutes.
Setra 8000 Laser Particle Counter (LPC)
NEVER ATTEMPT TO CLEAN THE LPC! Introduction of any liquid into the LPC will cause it to be
inoperable and may cause irreparable damage to the sensing cell.
Detecting and Correcting Sampling Equipment Contamination
Avoiding contamination from the environment
1. Keep the fittings (tubing plugs and device caps) in place when not sampling.
2. Keep the plugs and caps in a closed zip bag during sampling. Do not allow ambient particulate to accumu-
late on the fittings.
3. Keep sample path components in provided zip bags when not sampling.
Determine if contamination exists
1. Run the LPC Background test (see page 3); the results should be near zero for all particle ranges.
2. Run the Tubing Background test (see page 4); the results should be below those displayed below:
3. If the Background Limits are exceeded, contamination may be a significant portion of the sample readings.
Cleaning air flow path components
Items needed for cleaning:
• Wash bottle, pre-cleaned
• Isopropanol, semiconductor grade; must be purchased by you. e.g., Honeywell 17604, Sigma-Aldrich 40301
• Safe collection and disposal of isopropanol used in cleaning. While isopropanol is the primary component of
rubbing alcohol, is should not be used without the appropriate safeguards. Consult the MSDS for the
purchased isopropanol for safe handling.
• Fill the wash bottle with isopropanol to no higher than the maximum fill level indicated on the side of the bottle.
• A moderate squeeze of the wash bottle, about ½” on each side, lasting about 5 seconds will deliver approxi-
mately 20 mL of isopropanol.
Note Regarding the Matheson (Silver background tubing) Filter:
The only portion of the Matheson filter that will be contaminated is the point at which the ¼” OD black tubing is
attached. Clean by rinsing the external threads and throat with isopropanol from the wash bottle. Hand-tighten
the provided nut onto the threaded fitting.
©2019 Trace Analytics, LLC. All rights reserved. Page 8 of 9
2. Run the Tubing Background test (see
page 4
); the results should be below those displayed below:
ISO 8573 Limit Background Limit
0.1 – ≤0.5 20,000 2,000
0.5 – ≤1.0 400 40
1.0 – ≤5.0 10 1
0.1 – ≤0.5 400,000 40,000
0.5 – ≤1.0 6,000 600
1.0 – ≤5.0 100 10
1
2
Particle Size Range, µm
ISO 8573 Particle
Class
No. of Particles/m3

Cleaning the Black Bev-a-Line™ Particle-Free Tubing
This includes both the ¼” OD black tubing used to connect to the air outlet and the clear particle free tubing
connected between the diffuser and the LPC.
1. Remove the stainless steel plugs from both ends.
2. Direct a stream of isopropanol inside the tubing.
3. Hand-tighten the plugs onto the end fittings.
4. Move the tubing so that the internal surfaces are thoroughly rinsed.
5. Remove the plugs and expel the isopropanol into a suitable container.
6. Repeat the rinsing procedure twice for a total of three.
7. With the two outlets facing downwards, allow the isopropanol to evaporate for about 30 seconds.
8. Hand-tighten the plugs onto the tubing.
Isopropanol clear out before sampling
1. Assemble the sampling components EXCEPT do not attach the outlet end of the ½” OD black tubing to the LPC.
2. Connect the ¼” OD black tubing to the compressed air supply.
3. Adjust the outlet pressure to 40-100 psig and allow the air flow to evaporate the isopropanol. This is accom-
plished when no liquid isopropanol is visible at the outlet of the ½” OD black tubing.
HPD III High Pressure Diffuser
After sampling a gas source with a high concentration of particles, it may be necessary to purge the diffuser with
filtered gas to help remove contaminants in the system.
1. Remove the clear tubing from the LPC Supply Inlet.
2. With a length of clean ¼” Bev-a-line black tubing to the Matheson filter on the gas source, purge at up to
100 psig for as long as 10 minutes.
Setra 8000 Laser Particle Counter (LPC)
NEVER ATTEMPT TO CLEAN THE LPC! Introduction of any liquid into the LPC will cause it to be
inoperable and may cause irreparable damage to the sensing cell.
©2019 Trace Analytics, LLC. All rights reserved. Page 9 of 9
Avoiding contamination from the environment
1. Keep the fittings (tubing plugs and device caps) in place when not sampling.
2. Keep the plugs and caps in a closed zip bag during sampling. Do not allow ambient particulate to accumu-
late on the fittings.
3. Keep sample path components in provided zip bags when not sampling.
Determine if contamination exists
1. Run the LPC Background test (see page 3); the results should be near zero for all particle ranges.
2. Run the Tubing Background test (see page 4); the results should be below those displayed below:
3. If the Background Limits are exceeded, contamination may be a significant portion of the sample readings.
Cleaning air flow path components
Items needed for cleaning:
• Wash bottle, pre-cleaned
• Isopropanol, semiconductor grade; must be purchased by you. e.g., Honeywell 17604, Sigma-Aldrich 40301
• Safe collection and disposal of isopropanol used in cleaning. While isopropanol is the primary component of
rubbing alcohol, is should not be used without the appropriate safeguards. Consult the MSDS for the
purchased isopropanol for safe handling.
• Fill the wash bottle with isopropanol to no higher than the maximum fill level indicated on the side of the bottle.
• A moderate squeeze of the wash bottle, about ½” on each side, lasting about 5 seconds will deliver approxi-
mately 20 mL of isopropanol.
Note Regarding the Matheson (Silver background tubing) Filter:
The only portion of the Matheson filter that will be contaminated is the point at which the ¼” OD black tubing is
attached. Clean by rinsing the external threads and throat with isopropanol from the wash bottle. Hand-tighten
the provided nut onto the threaded fitting.
Table of contents
Other Setra Systems Cash Counter manuals
Popular Cash Counter manuals by other brands

Royal Sovereign
Royal Sovereign RBC-1003 owner's manual
Royal Sovereign
Royal Sovereign RBC-1000 Series Specifications
Nautilus Hyosung
Nautilus Hyosung MONiMAX8200QTN Operator's manual
HANYOUNG NUX
HANYOUNG NUX LC Series user manual

CashTester
CashTester BC 231 SD user manual

TrueTime
TrueTime 800 Series General information
