ENGLISH
FRANÇAIS
NEDERLANDS
DEUTSCH
FEATURES
ION SHOWER
New ION SHOWER Operation Mode releases
the concentrated Plasmacluster Ions, and
effectivelyremovesthe pollenandmold,and also
controls the activity of airborne virus, mold, and
allergen.
Plasmacluster Ion Control
Your new air purifier will control the ratio of
negativeions andpositive ionsdependingon the
condition of the room.
•Clean Mode
Approximatelythe samenumbersof positiveand
negative ions are discharged.
•AUTO Plasmacluster Ion Mode
The unit detects the dust, mold or airborne
microbes using its sensors, and controls the
generating amount of positive and negative ions
automatically.
When room air is impure, approximately same
numbers of positive and negative ions will be
released.
When room air is clean, negative ions will be
released in an increased rate and controls the
ion balance.
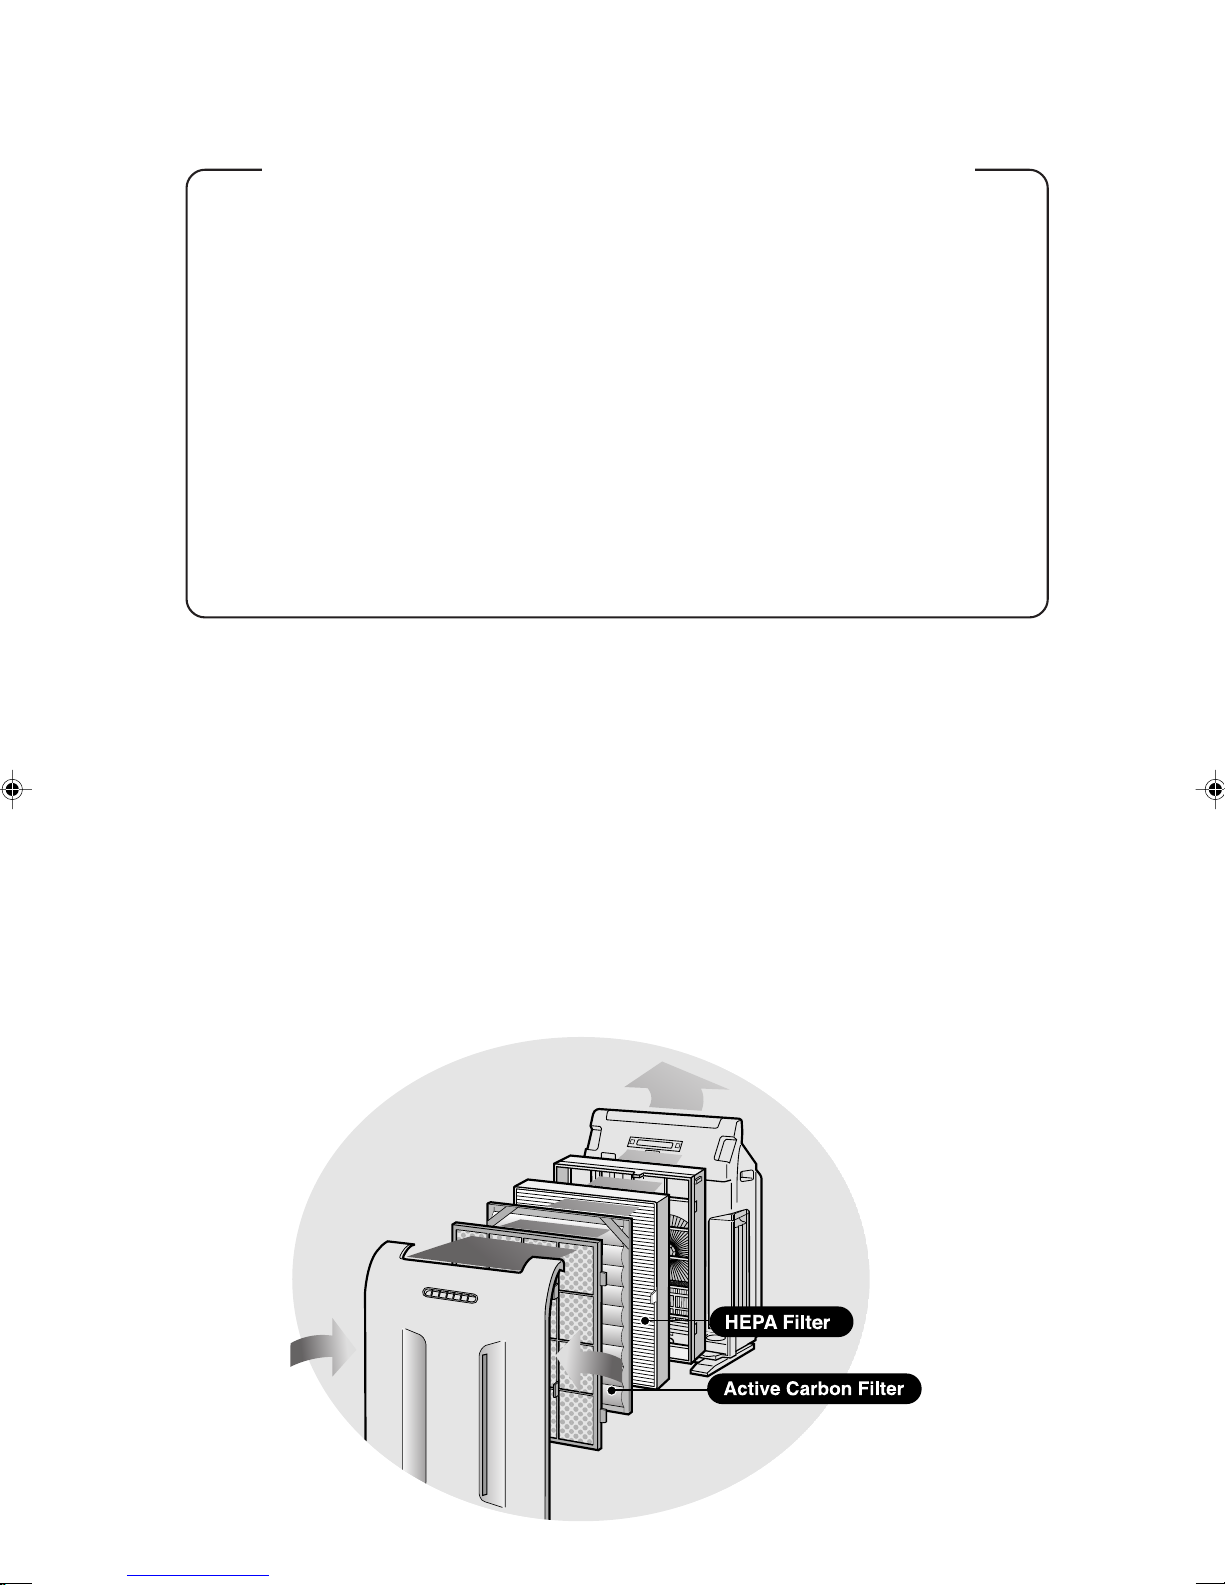
•Filters
1) Washable Active Carbon Filter
Absorbs odour elements.
Washable to maintain optimum deodoriza-
tion performance.
2) HEPA (High Efficiency Particulate
Air) Filter with Microbial control.
High-efficiency particle collection including
pollen and dust.
•Mist Operation Mode
New Ion Mist coats each ion with a water mist
that helps to further reduce odours both in the
air and tactile surfaces.
E-1
ENGLISH
CONTENTS
IMPORTANT SAFETY INSTRUCTIONS ....
E-2
•WARNING............................................. E-2
•
CAUTIONS CONCERNING OPERATION....
E-3
•REMOTE CONTROL LIMITATIONS ..... E-3
•INSTALLATION GUIDELINES .............. E-3
•FILTER GUIDELINES ........................... E-3
PART NAMES.................................... E-4
•MAIN UNIT DISPLAY............................ E-4
• INCLUDED............................................ E-4
• BACK .................................................... E-5
PREPARATION.................................. E-6
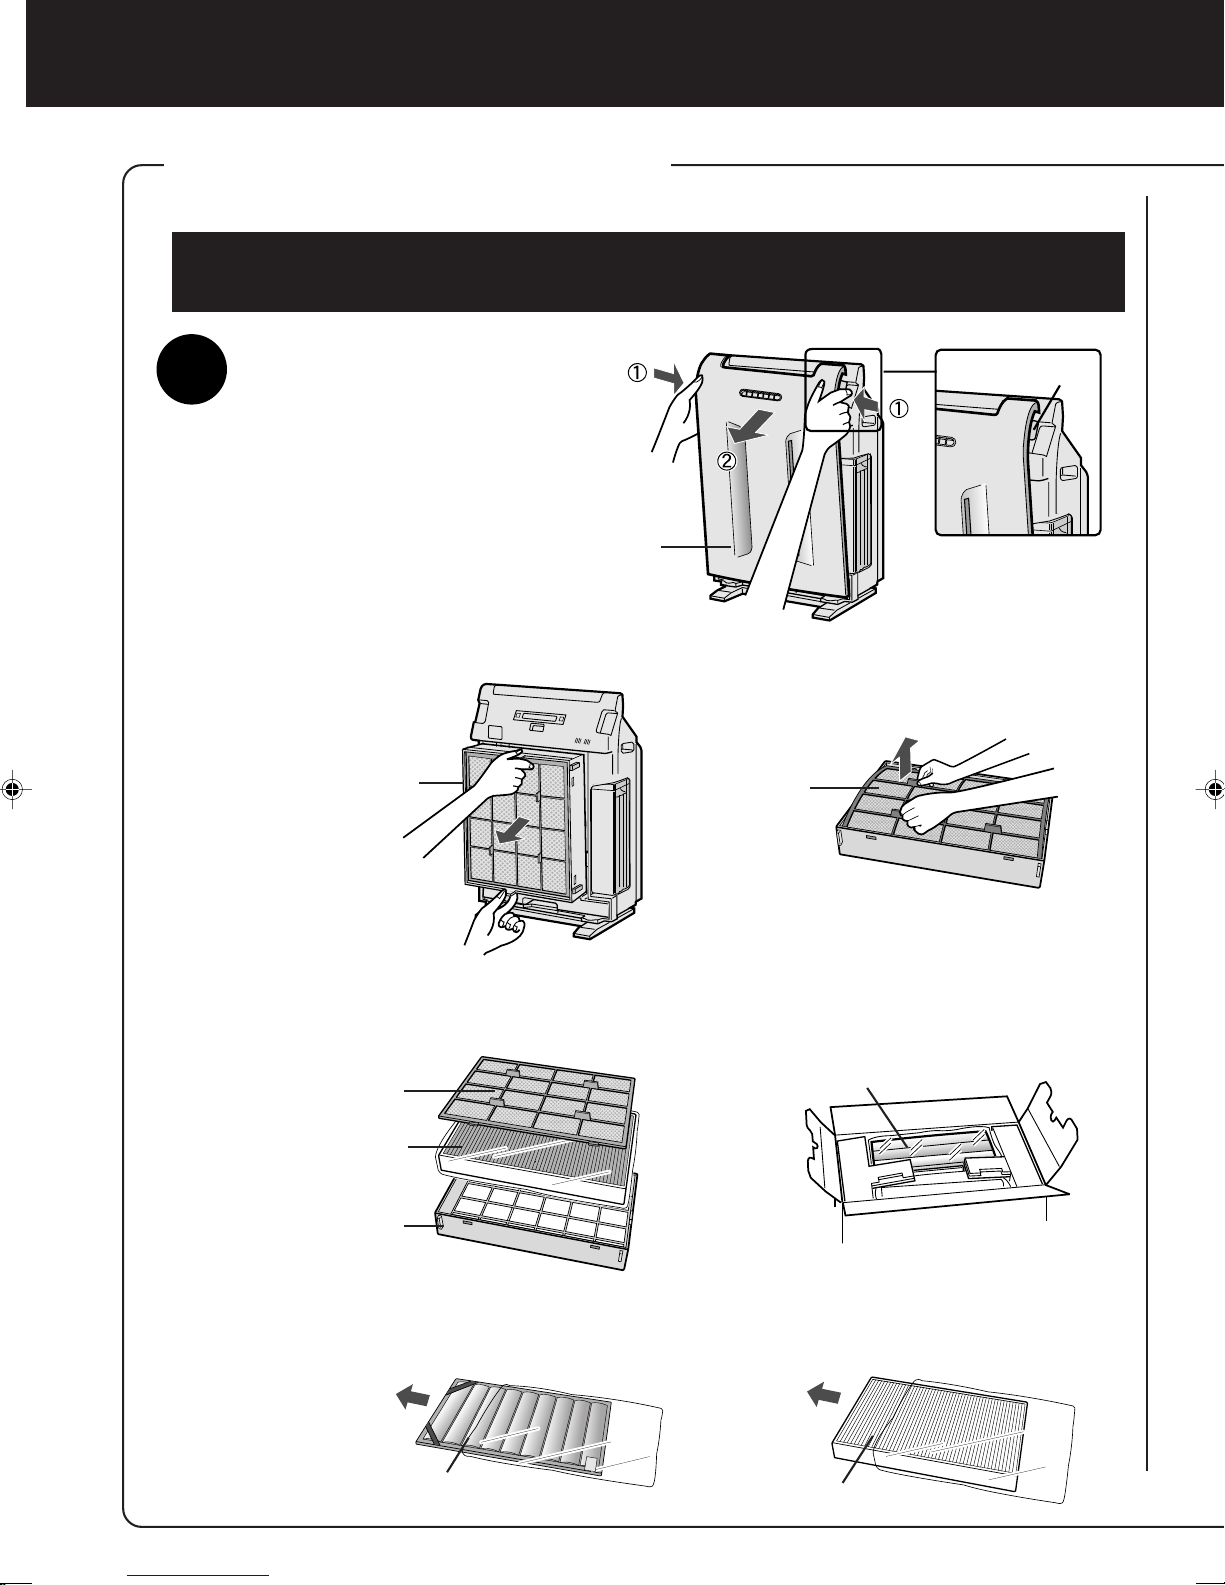
•FILTER INSTALLATION ........................ E-6
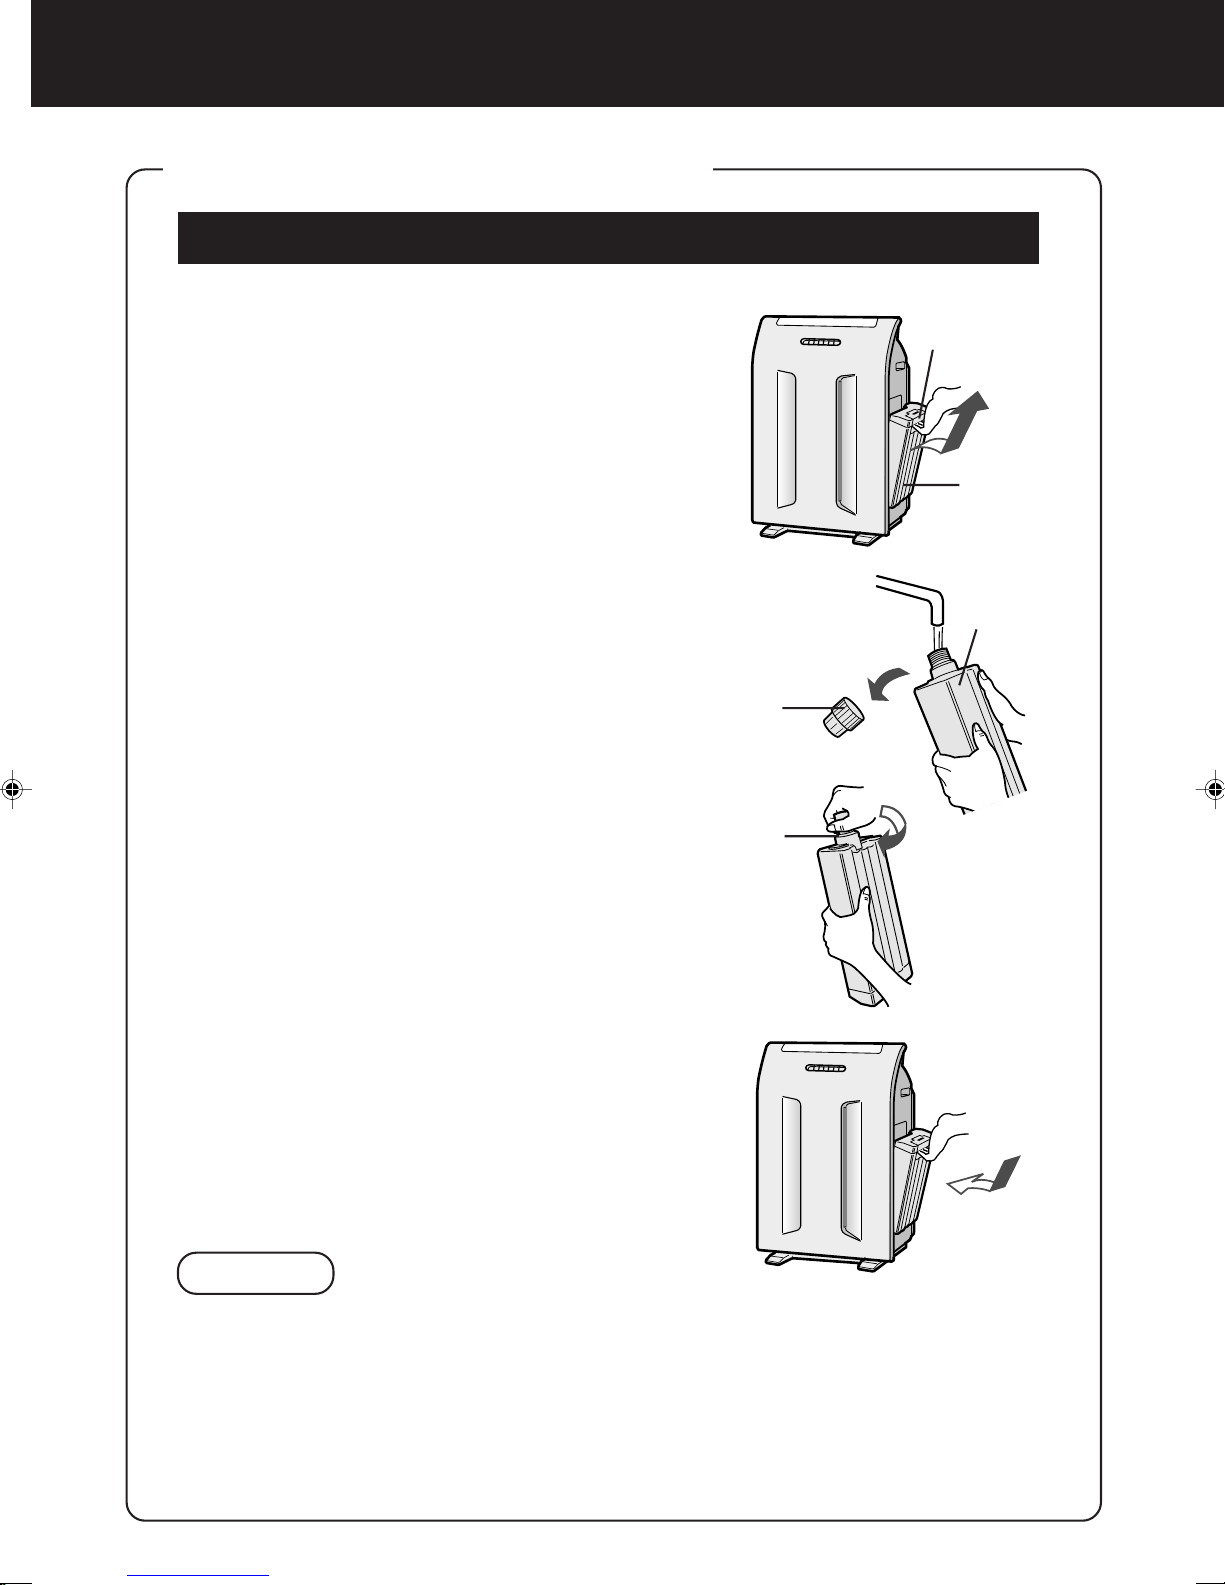
•POUR WATER INTO THE TANK .......... E-8
•INSERTING BATTERIES
IN THE REMOTE CONTROL ............... E-9
•REMOTE CONTROL USE.................... E-9
OPERATION .................................... E-10
•MAIN UNIT OPERATION.................... E-10
•REMOTE CONTROL OPERATION .....E-11
•MAIN UNIT INDICATOR ..................... E-12
CARE AND MAINTENANCE........... E-14
•MIST UNIT .......................................... E-14
•TANK................................................... E-16
•
WASHABLE ACTIVE CARBON FILTER CARE .
E-16
•MAIN UNIT.......................................... E-17
• PRE-FILTER ....................................... E-17
• SENSORS .......................................... E-17
•FILTER REPLACEMENT
GUIDELINES ...................................... E-18
TROUBLE SHOOTING.................... E-19
SPECIFICATIONS ........................... E-20
INFORMATION ON PROPER DISPOSAL .....
E-21
ThankyouforpurchasingtheSHARPAir Pu-
rifier.Pleasereadthismanualcarefullyforthe
correct usage information. Before using this
product, be sure to read the section: “Impor-
tant Safety Instructions.”
After reading this manual, retain it in a con-
venient location for future reference.